Table of Contents
Advertisement
Quick Links
Advertisement
Table of Contents

Related Manuals for H-KING AXN Floater Jet


Summary of Contents for H-KING AXN Floater Jet
- Page 1 H-KING FLOATER JET ELECTRIC GLIDER MADE OF STRONG EPO FOAM INSTRUCTION MANUAL...
-
Page 2: Specifications
H-KING Features and Specifications. The H-King Floater Jet is a model everyone should have, it is great fun to fly with a fantastic performance. Very quick and easy to assemble, you will have it built and flying in no time. When it comes... - Page 3 H-KING Contents. 1 x Main Wing. 1 x Horizontal Stabilizer. 1 x Vertical Stabilizer. 1 x Carbon Wing Joining Rod. 1 x 5 x 5 Propeller. 1 x Y Lead. 1 x Fuselage.
- Page 4 H-KING Assembly Sequence. 1. Pass the Z link of the elevator pushrod through the top hole of the elevator control horn. 2. Apply slow setting CA glue to the rear of the fuselage where the horizontal stabilizer sits.
- Page 5 H-KING 3. Position the horizontal stabilizer onto the fuselage and ensure it remains square and true to the fuselage while the glue sets. 4. Pass the rudder pushrod Z link through the rudder control horn. Apply slow setting CA glue into the slot in the rear of...
- Page 6 H-KING 5. Feed the vertical stabilizer assembly into the slot in the rear of the fuselage and ensure it remains true and square while the glue sets. 6. Slide the carbon wing joining rod into the lefthand wing as shown.
- Page 7 H-KING 7. Slide the rod into the wing until you feel it hit the end stop. 8. Feed the righthand wing aileron servo lead through the slot in the fuselage so that it exits into the radio/battery compartment. Slot the righthand wing spigots into the fuselage.
- Page 8 H-KING 9. Now slide the carbon wing joiner that is in the lefthand wing through the fuselage and into the righthand wing. 10. When the lefthand wing is a few centimetres from the fuselage feed the lefthand aileron servo cable through into the radio/battery compartment.
- Page 9 H-KING 11. Identify the propeller parts and select the correct hub center. 12. Fit the propeller as shown and tighten the spinner with a suitable tommy bar. Ensure you fit the prop the correct way round, remember this is a pusher configuration and the front...
- Page 10 H-KING 13. Fit the Y lead to the 2 aileron connectors in the radio/ battery compartment. 14. Loosen the grub screws on all the servo connectors...
- Page 11 H-KING 15. Connect your chosen receiver to the aileron, elevator, rudder and ESC servo leads. Switch on your transmitter with the throttle closed and then connect the flight battery (usually best to temporarily remove the propeller while you do this). Center all...
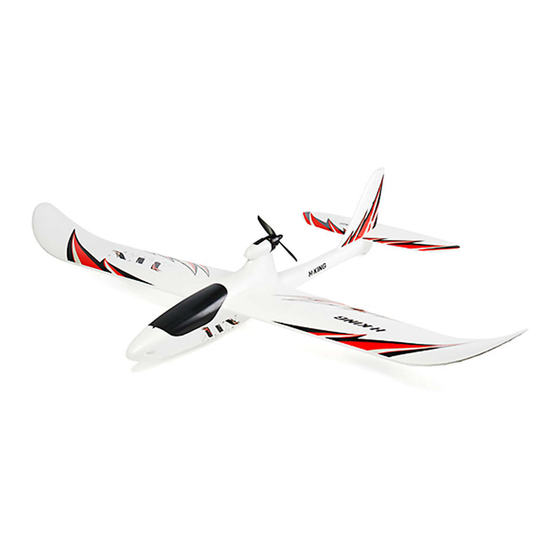
- Page 12 H-KING The finished H-King Floater Jet. Before you fly please check the center of gravity, it should balance anywhere between 50-60mm from the leading edge of the wing next to the fuselage. For initial flights keep it closer to the 50mm mark as this will make it more docile.
- Page 13 H-KING Flying the H-King Floater Jet First thing is to double check that the center of gravity is correct and also check that the controls are working in the correct direction. When you move your aileron control stick to the right the right aileron should go up and the left one down.
- Page 14 H-KING Flying the H-King Floater Jet Now you are at a safe height, well upwind and nicely trimmed you can practice some gentle turns. Using just the ailerons try turning left or right, move the stick a small amount and watch the model...
-
Page 15: Recommended Accessories
There are plenty of model flying clubs and societies around with members who are always willing to help with newcomers so please search you area before going it alone. Have fun and enjoy flying your H-King Floater Jet. Recommended Accessories OrangeRx Tx6i Full Range 2.4GHz DSMX... - Page 16 H-KING Recommended Accessories Turnigy Nano-Tech 2200mAh 3S Turnigy 1800mAh 3S 20C Turnigy 2200mAh 3S 25C 25C Lipo Pack w/XT60 Lipo Pack Lipo Pack SKU: 9210000271-0 SKU: T1800.3S.20 SKU: T2200.3S.25 Turnigy 2200mAh 3S 30C ZIPPY Compact 2200mAh 3S Turnigy Nano-Tech 1800mAh...
- Page 17 H-KING Recommended Accessories Turnigy 12v 2-3S Basic Balance Turnigy Accucell-6 50W 6A Balancer/ Charger Charger LiHV Capable SKU: Turnigy-3S SKU: 9052000069-0 Turnigy Accucell S60 AC Charger Turnigy Accucell C150 AC/DC 10A 150W Smart Balance Charger SKU: 9052000138-1 (EU Plug) SKU: 9052000138-2 (UK Plug)
- Page 18 H-KING � CE :a l, durafly.com facebook.com/durafly MADE IN CHINA • .,...
Need help?
Do you have a question about the AXN Floater Jet and is the answer not in the manual?
Questions and answers