
Subscribe to Our Youtube Channel
Related Manuals for Boly ScoutGuard MG984G-30M


Summary of Contents for Boly ScoutGuard MG984G-30M
- Page 1 QUICK START GUIDE MG984G-30M CAMERA TRAPS cc +27(0)83 560 0555 | +27(0)82 422 0356 info@cameratraps.co.za www.cameratraps.co.za SOUTH AFRICA...
-
Page 2: Table Of Contents
MG984G-30M Table of Contents 1. Get to know your camera..................1 2. Camera Startup......................2 2.1 Batteries / Power Supply..................2 2.2 SD Card Information....................2 2.3 Network SIM Card Information................2 2.4 Camera Modes.....................3 3. Sending via MMS / GPRS / Molnus..............4 3.1 SETUP using the Camera Setup Software............5 3.2 Setting up your camera for Molnus (Cloud Service)........7 3.3 Remote Communication..................9... -
Page 3: Get To Know Your Camera
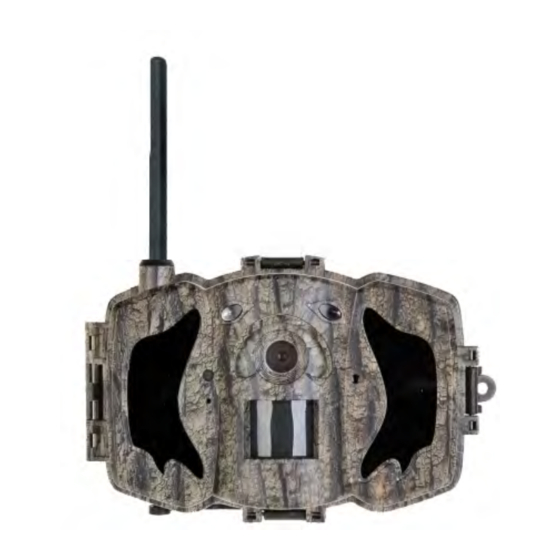
MG984G-30M 1. Get to know your camera... This camera, a digital scouting camera with communication function, is a digital, black flash (no red glow from the flash emitters when activated at night) surveillance camera that can be triggered by any human or animal movement and is monitored by a highly sensitive Passive Infrared (PIR) motion sensor. -
Page 4: Camera Startup
MG984G-30M 2. Camera Startup 2.1 Batteries / Power Supply This camera is powered by eight x AA size batteries. High-density, high-performance Alkaline or Lithium batteries are recommended. You can also use high capacity (min 2600 mAh) rechargeable Nickel Metal Hydride (NiMH) batteries. When the camera’s battery levels are low, the indication LED light will blink twice then the camera will automatically shut down (Each battery should be above 1.5V). -
Page 5: Camera Modes
MG984G-30M 2.4 Camera Modes The different modes are accessed by sliding the power switch to the different positions marked on the camera. The power switch is located inside the camera on the bottom right of the LCD screen. The different camera modes are as follows: •... -
Page 6: Sending Via Mms / Gprs / Molnus
MG984G-30M 3. Sending via MMS / GPRS / Molnus Images sent / transmiited instantly you based on your preferred Send Mode settings. The Sending / transmitting options are; 1. Molnus (default setting) - (Videos will be sent that are less than 10MP) 2. -
Page 7: Setup Using The Camera Setup Software
MG984G-30M 3.1 SETUP using the Camera Setup Software All the relevant cell network / MMS / e-mail parameters AND camera settings can also be set up on your PC and then uploaded to the camera using the setup application program BMC CONFIG.exe This program... - Page 8 MG984G-30M Step 1 Step 3 Step 2 Step 4 Step 5...
-
Page 9: Setting Up Your Camera For Molnus (Cloud Service)
MG984G-30M STEP 3: Choose between default or manual settings. For first time use, we suggest using the default settings. STEP Input phone number phone to receive images “administrator number” field email address in “Receive Email 1” field (This is NOT the phone number of the inserted SIM card that resides in the camera). The administrator number is also the one that can send the remote SMS commands - see later for more information on Remote Communication STEP 5: Select the location to save the relevant settings then click 'Save' and a 'GSM' folder will... - Page 10 MG984G-30M • Register your Molnus account with a valid e-mail address and activate it with the relevant Activation Code that will be automatically e-mailed to you. https://molnus-asia.azurewebsites.net/#/register • Login to your Molnus account and go to the 'My Cameras page' (in Molnus). •...
-
Page 11: Remote Communication
MG984G-30M Vodacom Cell C = internet = internet internet Username (leave blank) Username = (leave blank) Username = (leave blank) Password = (leave blank) Password = (leave blank) Password (leave blank) Telkom Virgin Mobile afrihost internet vdata afrihost Username (leave blank) Username (leave blank) Username... -
Page 12: Bg Tools App - Usage Instructions
MG984G-30M 3.4 BG Tools App - Usage Instructions The BG Tools APP makes it easy to communicate with the camera so you don’t need to edit the command SMS's. STEP 1: Open the BG Tools app and click on the icon to add a new device. - Page 13 MG984G-30M STEP 5: In the Email Service: you can decide on having Boly Email or Other Email service to fill in the relevant SEND MAIL parameters. STEP 6: Select “Setting / Control” to remotely set / change camera / user custom settings (Work parameter).
- Page 14 MG984G-30M Set password: If you forget your super user password, you can get a new one. Super User information: Change your super user and password in the advanced settings section. Add or Delete a device: Android Select“My Device” you can add a device, Long Click on device can choose delete operations.
-
Page 15: Camera Setup Options
MG984G-30M 3.5 Camera Setup Options To view the camera settings menu, slide the power switch to TEST/SETUP mode and press MENU button on the remote. Use the ► or keys to toggle between the sub-menus. Use the ▲ or ▼ keys to select the different options. Press “OK” to save the settings. After changing EACH setting in the Setup menu, you must press OK or the camera will retain the previous setting. - Page 16 MG984G-30M ► or second delay. Press the keys to decrease or increase the video length. Default: 10 seconds Clock Settings Set the cameras date and time. The date format is month/day/year. The time format is hour: minute: Set Clock second.
- Page 17 MG984G-30M LEFT or RIGHT to decrease or increase the desired PIR Interval time. Default: 5 seconds Choose the days of the week you want the camera to work. Work Day This setting is only available in Hunting Mode. Default: All This setting allows the camera to be active only during the set period of time per day.
- Page 18 MG984G-30M with these settings. “Email1-Email4” stands for the receiving Email address. When you program the receiving emails you can add up to 4 emails. The camera sends image to your email address via GPRS network with SMTP protocol. Required GPRS settings: APN, Account Password, Server, Port, Ssl.
- Page 19 MG984G-30M ● OFF: Disable all communication functions. Please Note: Some cellular carriers limit the size of files being sent. Some image and video files may be too large to send. Default: Instant Control enables mobile communication functionality. When SMS Control to ON, the camera SMS Control can receive and respond to your SMS commands.
- Page 20 MG984G-30M All information on the SD card will be deleted. Format SD Make sure that you have made a backup of important data already on the SD card. Default Settings Restore all settings back to the default values. Shows firmware and IMEI/Control Code Version information of the camera.
- Page 21 Version 1.3 CAMERA TRAPS cc +27(0)83 560 0555 | +27(0)82 422 0356 info@cameratraps.co.za www.cameratraps.co.za SOUTH AFRICA http://www.bolymedia.com/index/Support...
Need help?
Do you have a question about the ScoutGuard MG984G-30M and is the answer not in the manual?
Questions and answers