Table of Contents
Advertisement
Available languages
Available languages
Quick Links
Instructions for Installing
Dead Level
For Pre-Sloped Trench Drains
WARNING
!
Read this Manual BEFORE using this equipment.
Failure to read and follow all safety and use information
can result in death, serious personal injury, property
damage, or damage to the equipment.
Keep this Manual for future reference.
Installation Guidelines
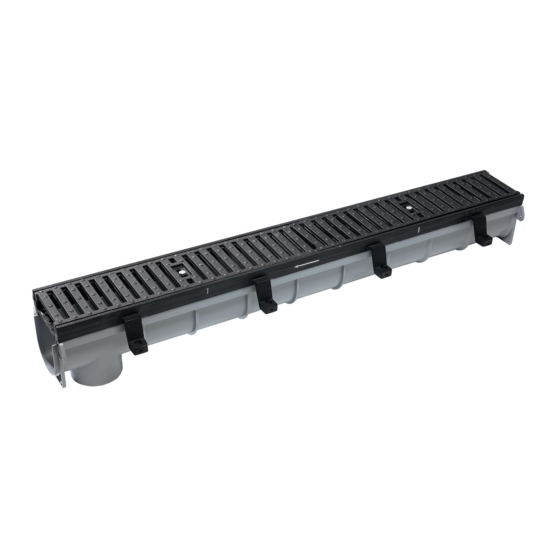
General Note: Please DO NOT separate channels from frames.
Channel and frame sections arrive to the jobsite preassembled in a specific
sequence to meet your project design requirements. They are not interchangeable
between sections and separating and reassembling them may cause installation
errors. If they accidentally become separated, please contact your Watts representative for technical
support with any questions.
1. Installation Diagram
1.1 Locate and save the installation diagram from the hardware box.
If you cannot find your installation diagram contact your Watts
representative for another copy.
2. Excavation
2.1 Excavate to allow a minimum 4" concrete pour below, and on both sides of
the trench drain and below a catch basin, if used.
Trench Drains
®
IS-WD-DL-Installation-CAN_Fr-CA
Advertisement
Table of Contents

Related Manuals for Watts Dead Level Trench Drains


Summary of Contents for Watts Dead Level Trench Drains
-
Page 1: Installation Guidelines
They are not interchangeable between sections and separating and reassembling them may cause installation errors. If they accidentally become separated, please contact your Watts representative for technical support with any questions. 1. Installation Diagram 1.1 Locate and save the installation diagram from the hardware box. - Page 2 3. Catch Basins & Piping Connections 3.1 Catch basins, if used, should be set first. If no catch basin is used skip to step 3.6. 3.2 Using a reciprocating or hole saw, remove the circular pipe connection cutout(s) where the basin will connect to discharge piping. 3.3 Invert the catch basin on a flat surface, and butt the section(s) shown on the installation drawing against the pattern on the basin.
- Page 3 5.3 Drive a minimum of 4 pieces 1/2" #4 rebar through the frame ears to support each frame section. The rebar should reach a depth sufficient to provide stability for the system, and prevent floating during the concrete pour. Threaded steel rod may be substituted for rebar at the installers discretion.
- Page 4 6A Connecting Center Sections 6A.1 Layout sections as shown below. 6A.2 Cut the CA-M adapter to fit the bottom depth of the channel section. 6A.3 Cut the top section of the CA-M to fit the depth of the top of the channels. *Note: The CA-M is equipped with distinct grooves for ease in cutting to the correct size.
- Page 5 The CA-M will allow the two male sections to fit together securely. 6A.4 Fit the two male channel sections together using the CA-M. 6A.5 Use 4-6 #10-24 bolts and nuts to hold the two channel sections securely in place. Use 4-6 #10-24 bolts and nuts to fit the two channel sections together securely Dead Level Channel Male End View...
- Page 6 6B. Spacers 6B.1 Dead Level systems are shipped with a CA-F 3/4" spacer. These spacers are provided for filling in on long runs when heat can cause shrinkage in the channel connections. They will fit both male and female ends. 6B.2 The CA-F is equipped with indentations for cutting to fit the top of the channel.
- Page 7 7. Corners/Tees 7.1 If the system layout requires Corner/Tee Sections, follow the general installation guidelines. 7.2 Invert the Corner/Tee section on a flat surface, and use a reciprocating saw to remove the appropriate cutout(s) on the section. (Be sure to note whether the connecting channel(s) have a tongue or groove connection prior to cutting the Corner/Tee, and remove a cutout with an opposite connection type than the connecting channel).
- Page 8 7.4 Secure the channels and frames with the appropriate hardware (see 6. Connection Sections) Note: Dead Level corners or tees can also be formed with a Catch Basin (See "Catch Basins & Piping Connections"), or underground piping. To pipe under- ground terminate the trench drains a short distance from the corner joint.
- Page 9 8.2 Install grates along the length of the trench, and secure with hex head or countersunk lock bolts provided (Fig. F). Lockdown Grates FIG. F 8.3 Position Construction Covers over the grates, with the flange between the grate and frame (Fig. G). Construction Cover FIG.
- Page 10 9. Concrete Pour 9.1 Check the entire trench system for proper anchoring, alignment, and leveling, and connections prior to pouring concrete. (Although the Dead Level frame- anchored design dramatically reduces the risk of floating, a poorly anchored system can shift during the pour). 9.2 Check the excavation to be sure a minimum of 4"...
- Page 11 Notes:...
- Page 12 For more information: Watts.com/prop65 Limited Warranty: Watts Regulator Co. (the “Company”) warrants each product to be free from defects in material and workmanship under normal usage for a period of one year from the date of original shipment. In the event of such defects within the warranty period, the Company will, at its option, replace or recondition the product without charge.
- Page 13 Les sections ne sont pas interchangeables; les séparer et les réassembler peut entraîner des erreurs d’installation. Si, par accident, elles étaient séparées, veuillez communiquer avec votre représentant Watts pour obtenir du soutien technique et répondre à vos questions.
- Page 14 3. Raccordements au bassin collecteur et à la tuyauterie 3.1 Les bassins collecteurs, le cas échéant, doivent d’abord être posés. Si aucun bassin collecteur n’est utilisé, passez à l’étape 3.6. 3.2 À l’aide d’une scie alternative ou cylindrique, retirez la ou les découpes de raccordement de tuyau circulaire à...
- Page 15 5.3 Enfoncez au moins 4 morceaux de 1/2 po (1,27 cm) de la barre d'armature nº 4 à travers les oreilles du cadre afin de soutenir chaque section du cadre. La barre d'armature devrait atteindre une profondeur suffisante pour offrir de la stabilité au système et l’empêcher de flotter lorsque le béton est coulé.
- Page 16 6A Raccordement des sections de centre 6A.1 Disposez les sections comme illustré ci-dessous. 6A.2 Coupez l’adaptateur CA-M afin qu’il s’adapte à la profondeur du bas de la section du canal. 6A.3 Coupez la section supérieure du CA-M pour qu’elle s’adapte à la profondeur du haut des canaux.
- Page 17 Le CA-M permettra aux deux sections mâles de s’adapter fermement ensemble. 6A.4 Adapter les deux sections mâles du canal ensemble en utilisant le CA-M. 6A.5 Utiliser 4 à 6 boulons et écrous nº 10-24 pour tenir fermement les deux sections de canal en place.
- Page 18 6B. Espaceurs 6B.1 Les systèmes Dead Level sont expédiés avec un espaceur CA-F de 3/4 po (2 cm). Ces espaceurs sont fournis pour combler les espaces sur les longues pistes où la chaleur peut provoquer un rétrécissement des raccords des canaux. Ils conviennent aux extrémités mâles et femelles.
- Page 19 7. Coins et tés 7.1 Si la disposition du système nécessite des sections de coins et des tés, suivez les lignes directrices d’installation. 7.2 Inversez la section coin et té sur une surface plane et servez-vous d’une scie alternative pour supprimer la ou les découpes correspondantes sur la section. (Avant de couper le coin et le té, veillez à...
- Page 20 7.4 Fixez les canaux et les cadres avec la quincaillerie appropriée (vous reporter à 6, Sections des raccordements) Remarque : les coins ou tés Dead Level peuvent aussi être formés avec un bassin collecteur (vous reporter à « Raccordements au bassin collecteur et à la tuyauterie ») ou une tuyauterie souterraine.
- Page 21 8.2 Installez les grilles sur le long de la tranchée et fixez avec des boulons à tête hexagonale ou à tête fraisée fournis (Fig. F). Verrouillage Grilles FIG. F 8.3 Placez les couvercles de construction sur les grilles, avec la bride entre la grille et le cadre (Fig.
- Page 22 9. Couler le béton 9.1 Vérifiez l’ancrage, l’alignement, le nivellement ainsi que les raccordements de l’ensemble du système de tranchée avant de couler le béton. (Bien que la conception de cadre Dead Level ancré réduit de manière radicale les risques de flottement, un système mal ancré...
- Page 23 Remarques:...
- Page 24 Watts.com/prop65 Garantie limitée : Watts Regulator Co. (la « Société ») garantit que chacun de ses produits est exempt de vice de matériau et de fabrication dans des conditions normales d’utilisation pour une période d’un an à compter de la date d’expédition d’origine. Dans l’éventualité où de tels vices se manifesteraient pendant la période de garantie, la Société, à sa discrétion, remplacera ou reconditionnera le produit sans frais.
Need help?
Do you have a question about the Dead Level Trench Drains and is the answer not in the manual?
Questions and answers