Table of Contents
Advertisement
Advertisement
Table of Contents

Related Manuals for Levoit LV550HH


Summary of Contents for Levoit LV550HH
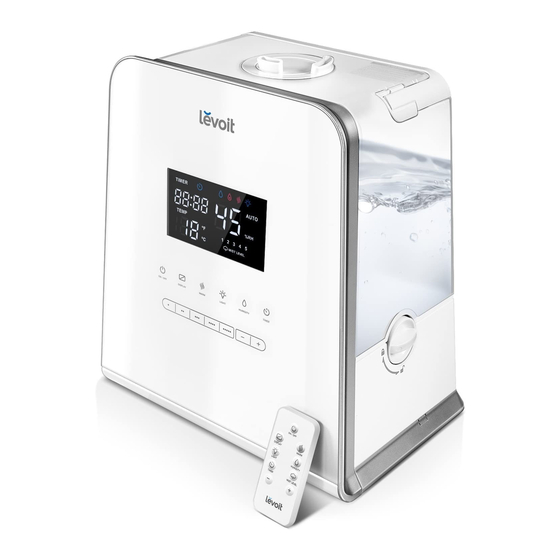
- Page 1 Model No.: LV550HH Hybrid Ultrasonic Humidifier Questions or Concerns? Questions or Concerns? Please contact us Mon-Fri 9:00AM-5:00PM PST Please contact us Monday - Friday 9:00 am - 5:00 pm PST at (888) 726-8520 or email support@levoit.com at support@levoit.com or at (888) 726-8520.
- Page 2 B Y L E V O I T ! Should you have any questions or concerns regarding your new product, feel free to reach out to us at support@levoit.com. We hope you enjoy your new product! G E T S T Y L E I N S P I R AT I O N Find @LevoitLifestyle on social media for wellness + style inspiration.
-
Page 3: Table Of Contents
TABLE OF CONTENTS PACKAGE CONTENTS Package Contents 1 x LV550HH Hybrid Ultrasonic Humidifier Specifications 1 x Cleaning Brush Safety Information 3 x Aroma Pads (1 Pre-installed) Getting to Know Your Humidifier 1 x Remote · LCD Display 1 x 3V CR2025 Battery (Pre-installed) ·... -
Page 4: Safety Information
S A F E T Y I N F O R M AT I O N IMPORTANT: Please read, understand, and comply with all of the instructions provided in this manual before using the device. Failure to comply with the instructions given in this manual and/or using the device in ways other than the ones mentioned in this manual may result in serious injury and/or damage to the product. - Page 5 • DO NOT fill the water tank through the nozzle or • DO NOT clean the unit while it is connected mist tube. Doing so may damage the humidifier. to a power source or while it is on. • DO NOT add essential oils or medicated •...
-
Page 6: Getting To Know Your Humidifier
G E T T I N G T O K N O W Y O U R H U M I D I F I E R Handle 2. Nozzle 3. Water Tank 4. LCD Display 5. Control Panel 6. Safety Lock Base 8. - Page 7 12. Water Tank Cap 13. Mist Tube 14. Water Level Sensor 15. Heating Element 16. Inner Chamber 17. Cleaning Brush 18. Night Light 19. Cleaning Brush Storage 20. Air Vent 21. Transducer 22. Power Cord...
-
Page 8: Lcd Display
LCD Display Timer 2. Humidity Icon 3. No Water Indicator 4. Warm Mist Icon 5. Night Light Icon 6. Auto Mode Indicator Relative Humidity Level (RH) 8. Mist Level Indicator 9. Temperature Unit 10. Ambient Temperature Control Panel Power Button 2. -
Page 9: Getting Started
G E T T I N G S TA R T E D 3. Lift up the handle, then pull up on the Turn the safety lock to the “ ” position. handle to remove the water tank from [Figure 1.1] the base. - Page 10 G E T T I N G S TA R T E D ( c o n t . ) 5. Fill the tank with cold or room 6. Replace the cap once you have filled temperature water. Use distilled water the tank to your desired level.
- Page 11 Carefully place the water tank back on 8. Turn the safety lock to the “ ” position. the base, making sure to align the water [Figure 1.10] tank cap with its respective opening. 9. Replace the nozzle. [Figure 1.11] [Figure 1.9] Figure 1.10 Figure 1.11 Figure 1.9...
-
Page 12: Operation
O P E R AT I O N General Operation Place the humidifier on a flat, elevated 4. Press ‘ ’ once to turn on the surface. [Figure 2.1] humidifier. The humidifier will start 2. Properly fill the water tank as mentioned producing mist. -
Page 13: Button Controls
Button Controls NOTE: • For added convenience, the same button controls can be found on the included remote control. • The LED display will automatically dim after 10 seconds of inactivity while the humidifier is operating. Power Button Press once to turn on or turn off the humidifier. Display Button Press once to turn on or turn off the display on the humidifier. - Page 14 Button Controls (cont.) Humidity Button The humidity button has 3 functions for this humidifier: i. Auto Mode: Press ‘ ’ once to activate the automatic (Auto) mode for the humidifier. The Auto Mode will produce mist as needed to maintain the relative humidity (RH) at a comfortable level based on the ambient temperature [Chart A].
- Page 15 ii. Customizable Humidity Hold ‘ ’ for two seconds to access the humidity level selection. You will see a flashing number, indicating that you can now select a humidity level. 2. Use ‘+’ or ‘-’ to select a humidity level anywhere from 30–80% RH. Please note that the adjustable levels increase and decrease in increments of five.
- Page 16 Button Controls (cont.) Timer Button The humidifier is equipped with a built-in 12-hour timer. The humidifier will automatically turn off when the programmed timer finishes counting down. Press ‘ ’ to activate the function. 2. Use the ‘+’ or ‘-’ buttons to select a time anywhere from 1–12 hours. [Figure 4.1] 3.
-
Page 17: Humidity Sensor
Mist Level Controls Press the mist level controls at the bottom of the control panel to select a mist level for the humidifier. There are 5 mist levels to choose from. Each level has its own button. You can also use the ‘+’ or ‘-’ buttons to select a mist level. Humidity Sensor The humidity sensor on the power cord is a vital component to this appliance. -
Page 18: Automatic Shut Off
Automatic Shut Off The humidifier will automatically turn off when all of the water in the tank has been diffused, or when a programmed timer has finished counting down. When the water level is low the display will continue showing “ ”... -
Page 19: Using The Aroma Box
U S I N G T H E A R O M A B O X Your new humidifier can also be used as an aroma diffuser to provide added comfort in your home. Turn off and unplug the humidifier from 3. - Page 20 U S I N G T H E A R O M A B O X ( c o n t . ) 4. Add 2-3 drops of essential oil on the 5. Carefully replace the aroma box. Fill the aroma pad.
-
Page 21: Preventing Water Leaks
P R E V E N T I N G W AT E R L E A K S When not sealed properly, the water tank on your new humidifier may leak. The following tips will ensure that your humidifier will operate smoothly. Make sure the silicone ring around the 3. - Page 22 P R E V E N T I N G W AT E R L E A K S ( c o n t . ) NOTE: DO NOT move the entire humidifier using the handle on the water tank. [Figure 8.5] (To properly remove the water tank, see the Getting Started section on page 9.) Figure 8.5...
- Page 23 4. It is recommended to empty the inner chamber before replacing the water tank back onto the base. If there is too much water in the inner chamber, water may leak from the seam between the base and the water tank. [Figures 8.6 & 8.7] Figure 8.6 Figure 8.7 5.
- Page 24 P R E V E N T I N G W AT E R L E A K S ( c o n t . ) 6. Make sure the safety lock is turned to the “ ” position when the water tank is on the base.
-
Page 25: Keeping Things Clean
K E E P I N G T H I N G S C L E A N General Cleaning CAUTION: Make sure the humidifier is disconnected from any power source before cleaning. It is recommended to clean the humidifier on a weekly basis if used continuously, or at least once a month. - Page 26 General Cleaning (cont.) 4. Pour 3 cups of distilled white vinegar 8. Pour out the excess vinegar and rinse along with 3 cups of water into the water the inner chamber thoroughly with warm tank. Replace the cap and gently shake water.
-
Page 27: Cleaning The Aroma Pad
• You can purchase new aroma pads by parts thoroughly under clean, running scanning the QR code below or search for water. “Levoit LV550HH Replacement Aroma Pads” 6. Allow the water tank and base to on Amazon. completely air dry before reassembling the humidifier. -
Page 28: Replacing The Remote Control Battery
Replacing the Remote Control Battery Press the locking tab toward the pulling slot to remove the battery compartment. [Figure 10.1] 2. Properly dispose of the old battery. 3. Place a new 3V CR2025 battery into the battery compartment with the positive side facing up. -
Page 29: Troubleshooting
T R O U B L E S H O O T I N G Problem Cause Solution No mist is coming out Unit is not plugged in. Plug the humidifier into a powered of the nozzle. electrical outlet. Unit is not turned on. Tap the power button to turn on the unit. - Page 30 T R O U B L E S H O O T I N G ( c o n t . ) Problem Cause Solution White dust appears Water being used has a high mineral Use distilled water with the humidifier. around the humidifier content.
- Page 31 Problem Cause Solution The mist being The humidifier is heating up to Please wait for 15 minutes. Use caution produced is not produce warm mist. It will take about when using the warm mist function. The warm after pressing 15 minutes after pressing ‘ ’...
- Page 32 T R O U B L E S H O O T I N G ( c o n t . ) Problem Cause Solution Remote control does Remote control is out of range from Use the remote control within 16 feet not work.
-
Page 33: Warranty Information
TERMS & POLICY this exclusion or limitation of incidental or consequential losses so the foregoing disclaimer Levoit warrants all products to be of the highest may not apply to you. This warranty gives you quality in material, craftsmanship, and service. -
Page 34: Customer Support
Defective Products & Returns Should your product prove defective within the specified warranty period, please contact Customer Support via support@levoit.com with your order number. Once our Customer Support team has approved your request, please return the unit with a copy of the invoice and your order number. - Page 35 Connect with us @LevoitLifestyle...
- Page 36 Levoit.com AL0418BFV1.5...
Need help?
Do you have a question about the LV550HH and is the answer not in the manual?
Questions and answers
The remote for the 1000S doesn’t work. I cannot remove the battery from the remote to see if it needs to be replaced. Even when I push the release tab I cannot remove the battery compartment.
Press the locking tab toward the pulling slot to release the battery compartment. If it is stuck, ensure you are applying firm but gentle pressure on the tab while pulling the compartment out. If needed, try using a small tool to assist in pressing the tab.
This answer is automatically generated