Table of Contents
Advertisement
Advertisement
Table of Contents

Summary of Contents for ElDorado Advantage
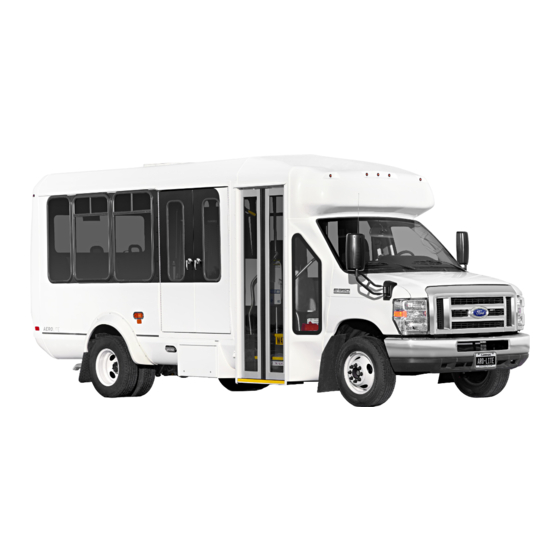
- Page 1 OPERATOR’S MANUAL...
-
Page 2: Table Of Contents
CONTENTS 01 INTRODUCTION Cargo Storage Welcome Driving on Snow & Ice Drunk Driving Rocking the Vehicle Distracted Driving 04 DOORS & WINDOWS Preventive Maintenance Doors Warranty Statement Key Locks Vehicle Certification Labels Chassis Cab Door Vehicle Emissions Passenger Entry Door California Proposition 65 Hinges Serial Number... - Page 3 CONTENTS Rubber Flooring Floor Maintenance 10 CHASSIS Chassis 07 INTERIOR FIXTURES Lubrication Walls & Ceiling Filters Stanchions Brake Retarder Stanchions Maintenance Fuels Modesty Panels Fuel Filling Panel Maintenance Cab Area Trim 11 WHEELS & TIRES Trim Maintenance Tires & Wheels Rails &...
-
Page 4: 01 Introduction
WELCOME SYMBOLS Thank you for purchasing an ElDorado CAUTION WARNING IMPORTANT Advantage bus. ElDorado`s goal is to provide its customers with vehicles NOTABLE INFORMATION that reflect the highest standards of quality, safety and value available in the small and mid-sized bus industry. -
Page 5: Drunk Driving
Maintenance schedules are Contact Advantage or your local dealership for provided in your Operator`s Manual. options available for your vehicle. ElDorado recommends following these... -
Page 6: Vehicle Certification Labels
01 INTRODUCTION VEHICLE SAFETY VEHICLE EMISSIONS STANDARD CERTIFICATION INFORMATION LABELS Emissions information appears on the VECI decal which is located on or The Vehicle Certification Labels are near the engine. This decal identifies attached to either the hinge pillar, engine displacement and also provides end of driver door or the door latch certain tune-up specifications. -
Page 7: California Proposition
01 INTRODUCTION CALIFORNIA PROPOSITION 65 Some constituents of engine exhaust, certain vehicle components, certain products of component wear contain or emit chemicals known to cause cancer and birth defects or other reproductive harm. Battery posts, terminals and related accessories contain lead and lead compunds, chemicals known to the State of California to cause cancer and reproductive harm. -
Page 8: Serial Number
Please call your local dealer for parts and service information or to purchase parts. Please provide the last five (5) digits of the Advantage serial number, (located on a decal on the driver’s door frame), when calling for parts and service information. This number... -
Page 9: Vehicle Identification Number
01 INTRODUCTION VEHICLE IDENTIFICATION Digits five, six, and seven identify the model or line, series chassis, and cab NUMBER (VIN) or body type. The eighth digit points A seventeen digit combination of out the particular engine found in the numbers and letters form the Vehicle vehicle. - Page 10 01 INTRODUCTION POSITION 1 The first letter or number of the VIN denotes world region where the vehicle was manufactured. POSITION 2 The second letter or number, in combination with the first letter or number in the VIN, tells you in what country the car or truck was manufactured. POSITION 3 The third number or letter is used by the vehicle manufacturer to identify what kind of vehicle it is: car, (truck, bus etc).
-
Page 11: 02 Interior
02 INTERIOR FLOOR PLANS equipment not covered here. Please refer to the various information The Advantage offers a variety of packets which were delivered with the interior floor plans and options. This bus. You can also contact customer manual includes most of the general... -
Page 12: Emergency Equipment
Your bus may or may not include the -Body Fluid Clean-Up Kit. following pieces of safety equipment: Fire Extinguisher - Emergency Image: Sample Of Safety Equipment Commonly Equipped On Advantage Buses ADDITIONAL INFORMATION CPR and First Aid Kit Visit: certifiedsafetymfg.com Fire Extinguisher 5LB (Standard). -
Page 13: 03 Driver's Area
03 DRIVER’S AREA CAB AREA DRIVER’S MIRROR The driver operates the bus from the If equipped, the driver’s mirror is Cab Area where the driver can control typically installed near the drivers sun many systems: passenger lighting - visor. sound system - environmental controls MODE VOL/SEL ST-4000... -
Page 14: Visor Mount
03 DRIVER’S AREA VISOR MOUNT FAST IDLE If equipped, the rear-observation Fast Idle, (InPower shown), when monitor could be mounted to the InPower’s Green Charge is activated, Sun-Visor. the engine idle is raised to 900 RPM. It then gradually raises the engine speed from 900 RPM to the minimum speed necessary to charge the batteries. -
Page 15: Ramp Interlock
03 DRIVER’S AREA INTERLOCK (Intermotive) GAUGES Powered operation of your lift is If equipped, the control panel regulated by safety interlocks. These may include gauges to inform the interlocks mandate the following driver of the many system which conditions be met for the lift to require monitoring. -
Page 16: Reverse Alarm
Illustration: Driver’s Fan FAREBOX VAULT The Advantage offers several different models of fare boxes and donation boxes based on how your bus was equipped. The major difference between the styles is the type of currency accepted. -
Page 17: Destination Sign
03 DRIVER’S AREA DESTINATION SIGNS If equipped, A Stop-Request sign, located in the drivers bulkhead, will If equipped, Your bus may have front notify the driver and passengers to a facing and/or side facing destination passenger stop-request via the Pull- signs. -
Page 18: Emergency Reflector Kit
03 DRIVER’S AREA EMERGENCY REFLECTIVE HILLS, CURVES, AND TRIANGLE WARNING KIT OBSTRUCTIONS If a commercial motor vehicle is To assemble Triangle: stopped within 500 feet of a curve, 1. Raise two (2) arms of triangle and crest of a hill, or other obstruction snap pin into slot. -
Page 19: Setup Reflector Kit
03 DRIVER’S AREA SETTING UP WARNING KIT ON A DIVIDED HIGHWAY: 1. Place one (1) Reflective Triangle on ON TWO (2) LANE HIGHWAY: traffic side of road 4 paces (10 feet), 1. Place one (1) Reflective Triangle on from the stopped commercial motor traffic side of road 4 paces (10 feet), vehicle in the direction of approaching from the stopped commercial motor... -
Page 20: Jumper Cables
03 DRIVER’S AREA JUMPER CABLE battery location, then disconnect other end of (-) negative cable from booster INSTRUCTIONS battery. 1. Apply vehicle’s parking brake and 8. Disconnect (+) positive jumper cable turn “OFF” any exterior or interior end from vehicle’s newly charged lights that may be “ON”... -
Page 21: Towing Procedures
03 DRIVER’S AREA 3. Turn “ON” the emergency flashers. On vehicles equipped with dual rear wheels, re-tighten the wheel lug 4. Place warning devices, (pg 18-19). nuts to the specified torque at 100 5. Remove spare tire, jack, handle, and miles (160 kilometers), and again at lug wrench from storage, if equipped. - Page 22 03 DRIVER’S AREA Your chassis manufacturer produces 3. Attach to towing device, (Do not tow a towing manual for all authorized with a slingbelt). tow truck operators. Have your tow 4. Lift the bus and secure the safety truck operator refer to this manual for towing chains.
-
Page 23: Vehicle Systems Safety Checks
03 DRIVER’S AREA VEHICLE SYSTEMS and the direction of air flow across the windshield. SAFETY CHECKS LIGHTS & BUZZERS This bus conforms to all Federal Motor Check all instrument panel warning Vehicle Safety Standards applicable lamps, and all interior and exterior at the time of manufacture, and in lights for proper illumination. - Page 24 03 DRIVER’S AREA EXHAUST SYSTEM CAUTION Be alert to any changes in the sound AS WITH ANY MACHINE, CARE of the exhaust system or the smell of SHOULD BE TAKEN WHEN exhaust fumes. This could indicate an PERFORMING ANY INSPECTION, exhaust leak requiring repair at the MAINTENANCE, OR REPAIR SO AS first available opportunity.
-
Page 25: Cargo Storage
03 DRIVER’S AREA REAR CARGO STORAGE OVERHEAD STORAGE If equipped, rear cargo compartments, If equipped, overhead compartment offer spacious storage for all shapes storage, provides convenient storage and sizes of luggage and leisure-type for smaller personal items. They are gear. Optional racks and shelving can often used on transit, tour, and airport be tailored to your requirements. -
Page 26: Driving On Snow & Ice
03 DRIVER’S AREA DRIVING ON SNOW OR ICE or directional shift changes when the engine RPM is above idle. When operating the vehicle on snow To avoid injury or property damage or ice, reduce speed gradually. Select caused by sudden bus movement, do a gear range that will not exceed not shift from “Neutral”... -
Page 27: Doors & Windows Doors
04 DOORS & WINDOWS DOORS PASSENGER ENTRY DOOR The ElDorado Advantage installs bus The passenger entry door is located doors, except for the driver’s door, on the curb side of the bus and is according to the options specific to operated electrically. -
Page 28: Door Actuator Cover
04 DOORS & WINDOWS DOOR ACTUATOR COVER DOOR SEALS The door actuator cover is located Inspect door seals every week for above the passenger entry door. This material quality and tight door closure. cover protects the door linkage, actua- Repair or replace damaged seals, as tor, and door motor, (on electric doors necessary. -
Page 29: Door Leaf Adjustment
04 DOORS & WINDOWS DOOR LEAF ADJUSTMENT jam nuts for the switch tab. Make sure the tab actuates the switch at full axial Using a carpenters framing square, rotation each way of the push-pull measure the door “OPEN” angle. assembly. Adjust the length of the push-pull rod Cycle the door “CLOSED”... -
Page 30: Gas Shocks
04 DOORS & WINDOWS GAS SHOCKS Gas shocks are commonly used on paratransit doors, storage compartments and rear exit doors. Gas shocks assist in keeping the door in the open position. When opening the door, the operator must keep control of the door until completely open to ensure the wind does not force the door in either direction. -
Page 31: Paratransit Doors
04 DOORS & WINDOWS PARATRANSIT DOORS The Bi-Fold paratransit door consists of two panels fastened to the bus with upper and lower pivots. Each door panel has its own handle that rotates locking rods, away from the door jamb allowing the door to open “outward”. -
Page 32: Lift Terminology
04 DOORS & WINDOWS LIFT TERMINOLOGY FLOOR LEVEL: Floor level is the position (height) the platform assembly DEPLOY (A-C) reaches in order for the wheelchair A. UNFOLD (Out) - Platform Unfolds: passenger to enter and exit the Unfold is the action of the platform vehicle (fully raised). -
Page 33: Mobility Lift
LIFT ATTENDANTS MUST ENSURE THAT LIFT OCCUPANTS KEEP HANDS, ARMS AND If equipped, the most common ALL OTHER BODY PARTS WITHIN THE LIFT lift option for the Advantage is a OCCUPANT AREA AND CLEAR OF MOVING gravity-down lift. Please refer to the PARTS. -
Page 34: Pendant Control
04 DOORS & WINDOWS HAND-HELD PENDANT CONTROL The hand-held attendant’s pendant control is equipped with two rocker switches: UP DOWN FOLD UNFOLD The momentary switches activate the automatic lift functions. Image: Lift Toggle LIFT POWER ON/OFF SWITCH This switch must be in the ON position in order to activate the lift. -
Page 35: Loading Ramp Passengers
04 DOORS & WINDOWS LOADING PASSENGERS WITH THE PARATRANSIT LIFT Certain precautionary steps specified below must be followed when using the paratransit lift: 1. Stop the bus in a safe place. Ensure there is enough room to deploy the lift onto a level surface, free of obstructions and people. -
Page 36: Windows
If leaks occur, apply Sikaflex® sealant around window frames and/or glass. For best results, clean surfaces thoroughly Image: Opening Sliding Window before application. Replacement glass and other window parts may be obtained through your Advantage Dealer. -
Page 37: Egress Windows
04 DOORS & WINDOWS EGRESS WINDOWS The Advantage buses are equipped with egress windows, (emergency exit), in the passenger area. Egress windows are easily identified by window decals and red release handles either along the sides or at ... -
Page 38: Plug Windows
04 DOORS & WINDOWS PLUG WINDOWS The plug windows are located in front of the entry door on the curb side of the bus. Plug windows allow the driver, while seated, to see the curb and passengers who may be standing in front of the entry door. -
Page 39: Emergency Hatch
04 DOORS & WINDOWS EMERGENCY HATCH The emergency hatch is a common option available on this bus. In an emergency the hatch can be used as an exit. To open hatch, turn the RED KNOB 90º clockwise TO EXIT, then press Image: Emergency Hatch Knob In Closed Position firmly on the RED KNOB. -
Page 40: Venting The Hatch
04 DOORS & WINDOWS VENTING THE HATCH Press the lid straight up. The hatch will To vent the hatch, reach up and grip lift as the spring-loaded hatch levers your hands in the grooved indents on snap up and into position. both sides of the hatch ... -
Page 41: 05 Seating
05 SEATING SEAT OPTIONS PASSENGER SEATING The Advantage offers a wide variety Passenger seating is available in bench, of high-quality standard and custom bucket, reclining bucket, folding, and seating options, however, due to perimeter styles. Most passenger the number of seating alternatives,... -
Page 42: Removing Passenger Seats
� Center at 800-955-9086. and wall track, and tighten to the Advantage recommends that both the floor proper lb-ft torque value. bolts and wall bolts are secured in the tracks for Ensure all hardware that had been seat security and passenger safety. - Page 43 05 SEATING Illustration: Floor & Wall Track Seat Mounting Illustration: Fold-Away Seat Mounting Illustration: Fold-Away Seat Mounting...
- Page 44 05 SEATING Illustration: Flip Seat Mounting Illustration: Perimeter Seat Mounting With Gusset...
-
Page 45: Seat Restraints
05 SEATING Image: Seat Belt Connectors SECUREMENT SYSTEM CAUTION DAILY INSPECTION DO NOT MODIFY THE STRUCTURE OF CHECKLIST ANY SEAT. MODIFYING SEATS MAY VOID MANUFACTURERS WARRANTIES, Vehicle is equipped with a belt RAISE LIABILITY ISSUES, AND cutter. ENDANGER PASSENGERS. Check the retractors by pulling out the webbing to ensure they are locking SEAT RESTRAINTS properly. -
Page 46: Wheelchair Tie-Down & Occupant Restraint System
05 SEATING WHEELCHAIR TIE-DOWN EACH WHEELCHAIR & OCCUPANT RESTRAINT STATION REQUIRES: SYSTEM (WTORS) 1. Four retractors with proper floor anchorage fittings The transport of wheelchair dependent passengers requires special 2. One lap belt assembly precautions to ensure passenger safety. 3. One shoulder belt assembly, may be The driver is required to review the in combination with the lap belt manufacturer`s materials which... -
Page 47: Flooring
06 FLOORING FLOORING a neutral detergent. The detergent dilution should be in accordance with The Advantage floors are constructed the manufacturer’s instructions. Tough of 5/8” exterior type plywood sup- stains may require gentle scraping or ported by steel cross-members. This use of a scrub brush. - Page 48 06 FLOORING CAUTION DO NOT USE AN ELECTRIC SCRUBBER WITH A SCRUBBING BRUSH WHICH HAS A SPEED GREATER THAN 450 TR/ MIN. DO NOT USE A HIGH PRESSURE WATER JET. DO NOT USE INDUSTRIAL STAIN REMOVERS WITHOUT FIRST TESTING THEM ON A SMALL CONCEALED AREA TO PREVENT ANY POSSIBLE DAMAGE.
-
Page 49: 07 Interior Fixtures
07 INTERIOR FIXTURES WALLS & CEILING STANCHION MAINTENANCE Interior wall panels and fiberglass Stanchions are used by passen- headliner should be cleaned every gers repeatedly to get on and off the week with a mild soap and water solu- bus, they should be checked daily for tion. -
Page 50: Panel Maintenance
07 INTERIOR FIXTURES PANEL MAINTENANCE Stains may be removed using a soap and water solution or a commercial stain remover Check modesty panels daily for that is safe for fabrics. secure attachment. Clean modesty panels on a weekly RAILS & SAFETY HANDLES basis with a mild soap and water Rails and safety handles are installed solution. -
Page 51: Electrical
WIRING REPAIRS SHOULD ONLY BE and lighting that are unique to the DONE BY QUALIFIED TECHNICIANS. Advantage bus. All bus circuits are CONSULT YOUR LOCAL ADVANTAGE connected to the chassis 12-Volt DEALER BEFORE PERFORMING ANY Negative Ground Electrical System. -
Page 52: Power Distribution Center
08 ELECTRICAL POWER DISTRIBUTION CENTER The power distribution center provides power to the many electrical systems within the bus. The circuit board is located in the headliner above the driver’s seat. This board can be removed with 4 screws which allows access behind it to the wiring harness or for easy board replacement. -
Page 53: Wiring Harness
08 ELECTRICAL REAR CAP REMOVED Connector End Points Connector End Points Connector End Points Wire Harness Wire Harness Connector End Points Illustration: Electrical Access Points WIRING HARNESSES Use fuses of the specified type and amperage rating only. Using other Wiring harnesses are located behind fuses may cause damage to electrical interior trim pieces throughout the components and increase the risk of... -
Page 54: Blunt-Cut Wires
08 ELECTRICAL BLUNT-CUT WIRES Ford supplies blunt-cut wires for customer access located under the hood. We connect a pass-thru wire which penetrates the fire wall to the connection point 9C24-14A411-G located below the steering column. I/P DRIVER SIDE FRONT OF VEHICLE 9C24-14A411-G GREY CONNECTOR &... -
Page 55: Ground To Frame
08 ELECTRICAL GROUND TO FRAME EXTERIOR LIGHTING The frame-rail ground is fastened to Exterior lighting is designed to assure the frame on the driver side rear. the visibility of the bus to other drivers and pedestrians. Exterior lighting FRAME-RAIL GROUND (Drivers side rear on outside of frame) consists of: front and rear clearance and identification lights, rear brake... -
Page 56: Rear Clearance Lights
08 ELECTRICAL REAR CLEARANCE & SIDE MARKER LIGHTS IDENTIFICATION LIGHTS The purpose of the side marker lamps is to enable a driver to see another One red clearance light is located on vehicle that is approaching at an angle either side of the top rear corners of at night and to avoid a collision. -
Page 57: Interior Lighting
08 ELECTRICAL INTERIOR LIGHTING Interior lighting should be checked daily for proper operation. Standard interior lighting consists of: Clean fixtures often to ensure Driver map light, (only works with visibility. driver door and OEM switch). Entry door step light, (only works when passenger entry door is open). -
Page 58: Replacing Courtesy Lights
08 ELECTRICAL REPLACING COURTESY REPLACING SPEAKERS LIGHTS 1. Remove the screws from the section of trim the speaker is attached to. 1. Remove the two screws from the lens 2. Gently pull the trim out of its and remove the lens fixture. channeling. -
Page 59: 09 Exterior
09 EXTERIOR The Advantage offers two exterior Wash the underside of the bus sidewall options for your convenience - often by spraying with warm, soapy a composite side wall panel; and water to remove dirt and debris which an aluminum side wall panel. -
Page 60: Exterior Sealant
Repair the seal using Sikaflex®-505 UV brand sealant, ( 505 DATA SHEET Image: Detail Of Sealant Failure Always follow the manufacturer`s Advantage also uses 3M 4412 sealant instructions. tape, ( ), to seal the 4412 DATA SHEET ... -
Page 61: Composite Exterior
09 EXTERIOR hatch. Any areas not sealed properly DISCOLORATION REMOVAL will require the tape to be replaced or If regular washing and waxing has 3M 4000 sealant added to any voids. been neglected, discoloration of the Prior to adding or replacing tape, you gel coated fiberglass surface may must preform a thorough cleaning occur. -
Page 62: Standard Formulations
245.5g authorized body shop. Complete body panels U455 Bright Yellow including front and rear caps are available for 0.1g purchase through your local Advantage Dealer. U160 Black 0.4g When repairs are complete, it is U99 Reducer necessary to refinish the repaired area 55.6g... -
Page 63: Aluminum Exterior
If regular washing and waxing has been than with the repair of alternate body neglected, discoloration or oxidation panel construction. Advantage recom- on the aluminum painted surface may mends contacting a qualifed body shop occur. Oxidation, left untreated, can to complete necessary repairs. -
Page 64: Chassis
10 CHASSIS Image: E350 Ford Chassis CHASSIS FILTERS Advantage buses are built on the Ford Filters should be changed regularly, E-Series chassis. according to the manufacturer’s All persons responsible for the specifications, using only approved operation and maintenance of the filters. -
Page 65: Fuels
Use only high quality gas or diesel fuel For customer support call 800-955-9086. that meets the minimum specifications Please have your Advantage serial number ready of the engine manufacturer. Failure to when calling, (see pg 8 for serial number location do so may result in damage to engine information). -
Page 66: 11 Wheels & Tires
11 WHEELS & TIRES TIRES & WHEELS Always use an accurate gauge when testing tire pressure. Your bus is equipped with high quality tires that meet the vehicle usage Tires should be rotated on a regular specifications. Tires are warranted by basis using a recommended rotation pattern. -
Page 67: Mud Flaps
11 WHEELS & TIRES MUD FLAPS Lug nuts should always be installed clean and dry. Never lubricate lug nuts. Inspect mud flaps regularly to ensure Hubs should be clean, dry, and free of firm attachment. Make sure they are rust and excess paint. Firm metal-to- clean and free from mud and debris. -
Page 68: 12 Hvac
The air conditioning units installed for the cabin area of your bus have their own user’s The ElDorado Advantage uses the 70 manuals and service schedules. Please refer to KBTU Inwall HVAC unit, designed to those documents for instructions on your HVAC create a comfortable climate for the system. -
Page 69: Heater Shut-Off
12 HVAC HEATER SHUT-OFF HVAC DRAIN HOSES The valve to shut off fluids to the ; u Check that the drain hoses, located heater is located on the drivers side in the rear chassis under the bumper, just behind the driver’s door and under are clean and free from debris monthly the skirt area. -
Page 70: 13 Maintenance Checklists
Power train (engine, transmission) It is the bus owner’s responsibility to Suspension review the materials assembled in the Advantage Manuals for information on Doors keeping your bus in top condition. Windows Persons responsible for chassis... -
Page 71: Pre-Trip Inspection
13 MAINTENANCE CHECKLISTS PRE-TRIP INSPECTION solution with clean water. If the battery posts or cable terminals are corroded, The following pre-trip inspection disconnect the terminals from the checklist helps to ensure that the vehi- posts. Clean them with a soda solution cle components are in good working and a wire brush. - Page 72 13 MAINTENANCE CHECKLISTS A. If the coolant is low, check the C. Be sure the hose support brackets amount of antifreeze protection. If the are securely fastened. Make sure the protection is adequate, add a 50/50 hoses are not located near sources of mixture of water and antifreeze.
- Page 73 13 MAINTENANCE CHECKLISTS Refer to the Engine Manufacturer’s the level to the top of the “HOT” band. Operation and Maintenance Manual Refer to the OEM Operator’s Manuals for recommended lubricants and for approved transmission fluids and capacities. transmission fluid capacities. CAUTION CAUTION MAINTAIN THE CORRECT ENGINE...
- Page 74 13 MAINTENANCE CHECKLISTS As soon as possible, check the fluid CAUTION using “hot check” procedure. ON DIESEL FUELED VEHICLES, USE 11. INSPECT FUEL TANKS AND ONLY ULTRA-LOW SULFUR DIESEL COMPONENTS. (ULSD) WITH A SULFUR CONTENT OF A. Inspect the fuel tank(s) and fuel line 15PPM MAXIMUM.
- Page 75 13 MAINTENANCE CHECKLISTS that remove the need to prime the 14. INSPECT FRONT AND REAR system manually. Before restarting SUSPENSION. an engine that has run out of fuel, A. Check for broken spring leaves, turn the key to “ON” for at least 30 loose U-bolts, cracks in the suspension seconds before starting the engine.
- Page 76 13 MAINTENANCE CHECKLISTS 15. CHECK STEERING WHEEL FOR 21. INSPECT INTERIOR LIGHTING. EXCESSIVE PLAY. If any of the instrument panel gauge A. With the front tires straight ahead, bulbs, the dome lights, step-well turn the steering wheel until motion is light, reading lights, rear luggage observed at the front wheels.
- Page 77 13 MAINTENANCE CHECKLISTS If a tire has been run under-inflated, check Refer to the OEM Operator’s Manuals for the wheel for damage to wheel, rim or tire before checking tire inflation pressure, front axle adding air. rotation, dual axle rotation and wheel nut tightening sequence drawings.
- Page 78 13 MAINTENANCE CHECKLISTS 26. CYCLE THE MOBILITY LIFT. CAUTION Open and inspect paratransit door. INSUFFICIENT WHEEL NUT (RIM NUT) Ensure there is enough clearance to TORQUE CAN CAUSE WHEEL SHIMMY, deploy the wheelchair lift. Cycle the RESULTING IN WHEEL DAMAGE, STUD lift, fully deploying and stowing it BREAKAGE, AND EXTREME TIRE each time to its full-stop positions.
- Page 79 13 MAINTENANCE CHECKLISTS vehicle, and make sure the ajar/locked buzzer and light works, if equipped. Inspect all seals, looking for tears, accumulation of debris, and proper contact with sealing surfaces. Check that the prop operates smoothly and holds the door in its full open position. Inspect the entry door, checking that it moves smoothly through its full range of motion.
- Page 80 13 MAINTENANCE CHECKLISTS DAILY MAINTENANCE CHECKLIST ITEM MAINTENANCE AREA OF BUS Driver’s Compartment Clean and inspect Driver’s Area Driver’s Seat Check operation of adjusting mechanism Driver’s Area Driver’s Seat Belt Inspect for damage Driver’s Area Driver’s Window (chassis) Check operation Driver’s Area Driver’s Door Check alignment, latch...
- Page 81 13 MAINTENANCE CHECKLISTS DAILY MAINTENANCE CHECKLIST ITEM MAINTENANCE AREA OF BUS Door Seals Inspect for damage Doors Rear Emergency Exit Door Check operation - Be sure instructions are Doors clearly visible Door Flop (Panel) Alignment Check and adjust daily or as needed Doors Passenger Seats Clean - Inspect for damage and loose...
- Page 82 13 MAINTENANCE CHECKLISTS DAILY MAINTENANCE CHECKLIST ITEM MAINTENANCE AREA OF BUS Tires Inspect for damaged valve stems - Chassis, Suspen- Replace missing valve caps sion, Wheels & Tires Wheels Inspect rims and wheels for damage Chassis, Suspen- sion, Wheels & Tires Air Conditioning Control Check the operation by placing the A/C...
-
Page 83: Weekly
13 MAINTENANCE CHECKLISTS WEEKLY MAINTENANCE CHECKLIST ITEM MAINTENANCE AREA OF BUS Compressor Tank (Air Door Bleed to remove water Doors only) - If equipped Side Windows Clean and inspect for damage Windows Ventilating (Slider) Windows Check latches operation - Lubricate Windows slides with silicone, if needed Emergency Exit Windows... -
Page 84: Semi-Annual
13 MAINTENANCE CHECKLISTS SEMI-ANNUAL MAINTENANCE CHECKLIST EVERY 6 MONTHS ITEM MAINTENANCE AREA OF BUS All Door Seals Apply a light coat of silicone to keep Doors rubber supple All Window Seals Check for water intrusion, cracks and Windows sealing Door Motor &... - Page 85 13 MAINTENANCE CHECKLISTS CYCLICAL MAINTENANCE CHECKLIST ITEM MAINTENANCE AREA OF BUS Evaporator Fins Clean coil and straighten bent fins Every 600 Major operating hours Options Refrigerant Valves Inspect valve cap seals for damage Every 600 Major and valve caps for proper operating hours Options tightness...
- Page 86 13 MAINTENANCE CHECKLISTS CYCLICAL MAINTENANCE CHECKLIST ITEM MAINTENANCE AREA OF BUS Under body Check welds at frame and Every 12,000 Exterior outriggers, bulkheads and body miles frame Battery Clean and inspect for damage Every 12,000 Electrical & miles Lighting Tires Rotate tires Every 12,000...
-
Page 87: 14 Trailer Towing
14 TRAILER TOWING WEIGHTS AND LOADING IMPORTANT This vehicle is designed to provide YOUR VEHICLE IS NOT CAPABLE satisfactory service throughout OF TOWING A TRAILER. TOWING A its lifetime if it is not loaded in TRAILER MAY DAMAGE THE VEHICLE excess of either the Gross Vehicle AND AFFECT HANDLING AND BRAK- Weight Rating (GVWR) or the... -
Page 88: Control Console Switch Symbols
CONTROL CONSOLE SWITCH SYMBOLS... -
Page 89: Reporting Safety Defects
To contact NHTSA, you may call the Vehicle Safety Hotline at 1-888-327-4236 (TTY: 1-800-424- 9153), or visit online at: www.safercar.gov Write the National Highway Traffic Safety Administration: Administrator, NHTSA 1200 New Jersey Ave. SE Washington DC, 20590 0039696| REV | ELDORADO | ADVANTAGE OM |... - Page 93 1655 WALL STREET SALINA, KANSAS 67401 785-827-1033...
Need help?
Do you have a question about the Advantage and is the answer not in the manual?
Questions and answers