Ugolini Quick-GEL Operator's Manual
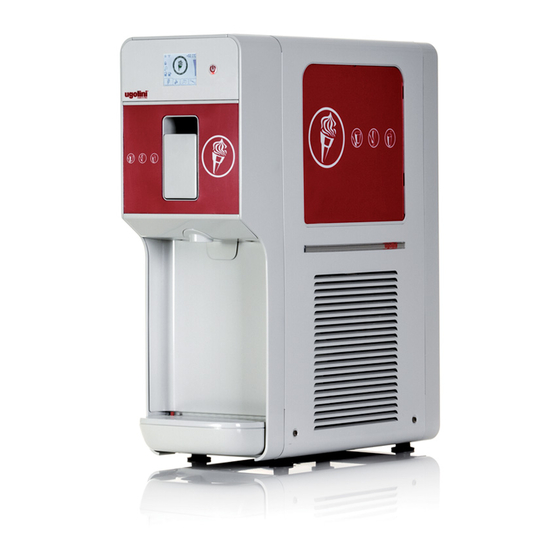
Cold drink dispenser
Hide thumbs
Also See for Quick-GEL:
- Operator's manual (61 pages) ,
- Quick manual (2 pages) ,
- Operator's manual (44 pages)
Advertisement
Quick Links
Download this manual
See also:
Operator's Manual
Advertisement

Related Manuals for Ugolini Quick-GEL


Summary of Contents for Ugolini Quick-GEL
- Page 1 MANUALE D’ISTRUZIONE O P E R A T O R ’ S M A N U A L CARNET D’INSTRUCTIONS GEBRAUCHSANWEISUNG MANUAL DE INSTRUCCIONES...
- Page 2 EC DECLARATION OF CONFORMITY We Ugolini spa, via dei Pioppi, 33 20090 Opera Milano ITALY declare, under our responsibility, that the apparatus COLD DRINK DISPENSER - Trademark: UGOLINI S.p.A. - Manufacturer: UGOLINI S.p.A. - Model: Quick-GEL - 230V 50Hz are in conformity with the following Standards: EN60335-1 (2012)+A11(2014) EN 55014 -1 (2006) + A1 (2009) + A2 (2011);...
- Page 3 Ugolini s.p.a., un esborso superiore 2. Per garanzia si intende la sostituzione o riparazione gratuita delle parti compo- al prezzo versato dall'acquirente per l'acquisto del prodotto.
- Page 4 1 ELECTRICAL SAFETY INSTRUCTIONS 3 TECHNICAL CHARACTERISTICS 1 Before connecting the dispenser to the mains, check that the voltage shown on the rating plate matches your electricity Bowl capacity, approx supply. Connect the dispenser to a single-phase supply Evaporator capacity, approx through an earthed socket as required by current regulations.
- Page 5 the ice-cream preparation base refrigerated and a lower cylinder these. for the production of the ice cream. Every time a portion of ice cream is dispensed, the same quantity of ice cream mixture drops down by the force of gravity from the upper tank into the lower cylinder.
- Page 6 3 Insert the upper part of the mixing pipe into the lower one. IMPORTANT (see figure 5) Use the dispenser with foodstuff only. 8 Dispense the ice cream using the faucet handle. 9 In case the density setting range wouldn’t be enough to obtain the required result, the mix can be modified as follows: Ice cream too soft : increase the quantity of liquid (water or milk) from 5 % to 10 % of the total volume.
- Page 7 TOUCH DISPLAY figure 9) figure 9 When the ice cream is ready, the mixing system slows down, the cooling system stops and the appliance switches to awaiting to figure 8 dispense mode. At default intervals (factory set to every 10 minutes), the mixing system increases the speed and the The following icons appear on the display: cooling system is started to restore the proper ice cream...
-
Page 8: Figure
it. The display indicates the conservation icon. (see figure 12) - type user password (0000) - press on hourglass icon - press RESET button - type user password (0000) - press exit button 7. 2 OPERATION HELPFUL HINTS The appliance parameters are factory set to guarantee optimum figure 12 operation. - Page 9 7. 4. 1 DISASSEMBLY and (see figure 19). ATTENTION Before disassembling any component, always unplug the appliance from the mains. 1 Remove the upper cover. (see figure 16) If the cover is fitted with a safety lock, turn the key anti- clockwise and remove it.
-
Page 10: Figure
10 Remove the drip tray from its seat. (see figure 25) figure 21) figure 25 figure 21 7. 4. 2 WASHING 7 Remove the tap assembly and disassemble it, following the sequence specified. (see figure 22) IMPORTANT If the power supply cable is damaged, it must be replaced by the manufacturer or by its service centre, or in any case by similar qualified professionals, in order to avoid all risk. -
Page 11: Figure
2 In a basin, prepare approximately two gallons of hot water grooves in the upper basin.(see figure 27) (45-60°C) and 2 ozs of sanitiser equipped (stera sheen green label). 3 Soak all the parts to be sanitised into the solution for the amount of time specified by the product manufacturer or for at list 5 minutes. -
Page 12: Figure
manufacturer. (see figure 29) figure 29 3 Once weekly: check for the presence of any leakage by removing the purpose-designed tray (see figure 30). In case they are present, make sure the scraper coupling seal is properly installed and not worn. If it is, replace with an original spare part from the manufacturer (see figure 29).
Need help?
Do you have a question about the Quick-GEL and is the answer not in the manual?
Questions and answers