
Related Manuals for 1&1 Homeserver+

Summary of Contents for 1&1 Homeserver+
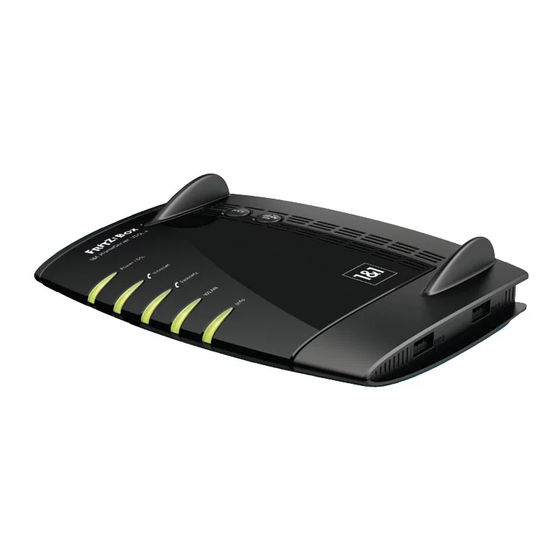
- Page 1 QUICK-START GUIDE 1&1 HOMESERVER + AVM FRITZ!Box 7490 Connect HomeServer Enter 1&1 Start-Code Help and contact information Connect device Connect telephone...
- Page 2 Internet, telephone and more: YOUR 1&1 DSL Welcome to our 1&1 customer world! I am glad that you have found the internet package you were looking for from us. I am convinced that you have made the right choice! Here at 1&1 you can choose a connection to suit your needs, either with or without a minimum contract period.
-
Page 3: Table Of Contents
Contents Before you get started ..........4 Troubleshooting ............20 Safety information No internet connection Pre-requisites for a smooth-running service Device doesn’t work correctly Manufacturer’s information Telephone calls are not working properly Check the package contents No incoming calls Technical requirements Slow Wi-Fi connection LED indicator lights Wi-Fi interference... -
Page 4: Before You Get Started
Before you get started Safety information „ The 1&1 HomeServer does not have an on/off switch. As such, „ If moisture or liquid reaches the 1&1 HomeServer, it could it must be possible to unplug the 1&1 HomeServer at all times. lead to electric shocks or short circuits. -
Page 5: Pre-Requisites For A Smooth-Running Service
Pre-requisites for a smooth-running service Manufacturer’s information Location – easily accessible and central The 1&1 HomeServer is a FRITZ!Box 7490, manufactured by AVM. „ Position the 1&1 HomeServer so there are no obstacles, such as As such, the designation of the manufacturer AVM FRITZ!Box 7490 cupboards or other electronic devices, between your 1&1 Home- is found in the user interface and in the network name (SSID). -
Page 6: Check The Package Contents
Check the package contents Technical requirements In order to ensure a smooth installation of the device, it is im- „ 1&1 Internet connection in Germany portant that all accessories are to hand. As such, first check the Up-to-date web browser with HTML5 support „... -
Page 7: Led Indicator Lights
LED indicator lights Light Status Meaning Permanently Power provided and DSL connection operational. 1&1 HomeServer+ illuminated Power / DSL Power provided, DSL connection being established Flashing or has been interrupted. Permanently Internet is connecting. Power / DSL illuminated Internet Internet is now connecting or has been deactivated. Flashing Permanently Internet... - Page 8 Device overview Buttons Type plate (underneath the device) FRITZ!Box 7490 Einfache Einrichtung mit http://fritz.box WLAN-Netzwerkschlüssel (WPA2) 1234 5678 9012 3456 7890 Serien-Nummer: Artikel-Nummer: CWMP-Account: N/A Nur mit Netzteil 311P0W091 Ports Power DSL/TEL FON 1 FON 2 FON S LAN 1 LAN 2 LAN 3 LAN 4...
- Page 9 Buttons Type plate (underneath the device) DECT button: Register DECT telephone Wireless network key: Password for the connection with your Wi-Fi network WLAN / WPS button: Turn Wi-Fi on/off / start WPS (factory set) Ports 2x Analogue telephone port (TAE) DSL- / VDSL port 2 x Analogue telephone port (RJ11) ISDN port...
-
Page 10: Initial Set-Up
Initial set-up Turn on your 1&1 HomeServer on the day that your 1&1 DSL is being connected (connection date). Connect 1&1 HomeServer Connect device Connect the 1&1 HomeServer to the DSL Connect your 1&1 HomeServer with a connection before 8am. computer, tablet or smartphone. -
Page 11: Connect 1&1 Homeserver
1. Connect 1&1 HomeServer Step 1 Note: Only use the original po- Plug in the 1&1 HomeServer to a power wer supply delivered with socket using the power supply cable. this 1&1 HomeServer! FO N FO N The “Power / DSL” light will start to flash F O N F O N after a few seconds. -
Page 12: Connect Device
2. Connect device Connection either via a network cable ( LAN) or wireless ( Wi-Fi). LAN connection (wired) Use the network cable to connect the 1&1 HomeServer to the network port on your computer. F O N F O N F O N F O N Set-up wireless connection at the... -
Page 13: Alternative Connection - Wi-Fi Connection
Alternative connection - Wi-Fi connection ( wireless): Ensure that the WLAN LED is illuminated on the 1&1 HomeServer. If so, press the “WLAN/WPS” button. Connect computer via Wi-Fi Instructions by operating system (computer) 1. Turn on Wi-Fi on your computer. Follow Start >... -
Page 14: Enter 1&1 Start-Code
3. Enter 1&1 Start-Code Step 1 Open your web browser (e.g. Chrome, Firefox, Safari, Internet Explorer, Edge). The configuration page will be displayed. If the configuration page does not open automatically, enter http://fritz.box http://192.168.178.1 into the address line of your browser. Step 2 Press a button (DECT or WLAN / WPS) on the 1&1 HomeServer. - Page 15 Sehr geehrter Herr Muster, heute erhalten Sie die Zugangsdaten für Ihren 1&1 Anschluss. Bitte beachten Sie hierzu die Hinweise auf der Rückseite und bewahren Sie diese Zugangsdaten in Ihren Unterlagen auf. Mit dem 1&1 Start-Code und der Schnell-Start-Anleitung richten Sie Ihre Internetverbindung und Telefonie bequem ein.
- Page 16 Step 7 Once you have successfully set up your connection, you will see an overview of your telephone numbers. Activate “Mit der Einrichtung Ihrer Telefoniegeräte und WLAN Einstellun- gen fortfahren” (Continue to set-up your telephone devices and Wi-Fi settings) and click on Weiter (Continue)
- Page 17 Step 10 You have the option of entering your email address, so that you can receive information, such as updates, from your 1&1 HomeServer. Click on Weiter (Continue) Step 11 Assistenten fertigstellen Click on (Close set-up assistant) You have now set up your device and your DSL connection. You can now surf the web and, once you have connected a telephone to the FON connection, or via DECT, you can also make phone calls.
-
Page 18: Connect Telephone
4. Connect telephone The telephone number, that you gave to or received from 1&1 when placing your order, will be set up for 1&1 telephone calls once you have entered the 1&1 Start-Code. Analogue telephone Plug the telephone cable (TAE) into the P o w e r port labelled “FON”... -
Page 19: Cordless Telephones (Dect
Cordless telephones (DECT Read and follow the instructions provided with your DECT telephone to manually set 1&1 HomeServer+ up a base station. As soon as you are requested to press the Power / DSL registration/paging button on the base DECT station, press and hold the button Internet... -
Page 20: Troubleshooting
Troubleshooting Problem Possible cause Solution The connection date has not yet Wait for your connection to be set-up. You can find your passed connection date in your documentation. The connection will be available by 6pm at the latest on this day. Incorrect cabling Check the cables connecting your router and the telephone No internet connection or... -
Page 21: Device Doesn't Work Correctly
Problem Possible cause Solution No connection to the 1&1 Home- Reconnect your device via Wi-Fi or LAN. Server > page 12 No Wi-Fi connection Turn on Wi-Fi on your 1&1 HomeServer and on your device. > page 13 Wi-Fi activated but cannot log in Check the network key. -
Page 22: No Internet Connection
Additional support No internet connection Incorrect cabling Most faults are due to issues with the cables. Ensure that the DSL cable is plugged into the DSL port on the 1&1 HomeServer F O N F O N that the other end of the cable is plugged F O N F O N into the port labelled “F”... - Page 23 No connection This will take you to the overview page for between the 1&1 the 1&1 HomeServer. If there is a green light HomeServer and the in front of “Internet”, the 1&1 HomeServer is device connected to the internet. Check the manufacturer’s If the 1&1 HomeServer is not connected to instruction manual for your device (e.g.
- Page 24 Out-of-date firmware Out-of-date firmware (operating system on the 1&1 HomeServer) can cause problems. To update the firmware, use the auto-update tool on your FRITZ!Box, available under Assistenten > Update (Tools > Update) Or download the firmware from the manufacturer’s website http://www.avm.de Hardware model under...
-
Page 25: Device Doesn't Work Correctly
Device doesn’t work correctly sec. Step 1 Unplug the 1&1 HomeServer from the mains and from the telephone socket. Wait for 20 seconds. Step 2 Plug the 1&1 HomeServer back into the plug socket and wait until the WLAN LED is permanently illuminated. -
Page 26: Slow Wi-Fi Connection
Slow Wi-Fi connection Step 1 Measure speed with the 1&1 Control- Open your browser, go to http://fritz.box, Center app enter your FRITZ!Box password and press Under WLAN-Verbin- ENTER. dung (Wi-Fi connection) in the 1&1 Control-Center app, you can find tools to help you measure and Step 2 improve the quality of... -
Page 27: Wi-Fi Interference
Wi-Fi interference Place your 1&1 HomeServer away from obstacles and in a central position - this is a key requirement for ensuring you receive the best possible Wi-Fi signal. Remove objects that may interfere with the signal. „ Walls and floors (depending on the material, loss of signal from walls can be extremely high) „... -
Page 28: Accessories To Improve Range
Accessories to improve range Wi-Fi repeater (smaller distances) Wi-Fi repeaters receive the Wi-Fi signal emit- ted by the 1&1 HomeServer, amplify it and then transmit it to devices either via Wi-Fi or (depending on the repeater) via LAN. The Wi-Fi repeater must be positioned, so that it can effectively receive the Wi-Fi signal emitted by the 1&1 HomeServer (identified by at least three LEDs illuminating on the... -
Page 29: Reset 1&1 Homeserver To Factory Settings
Reset 1&1 HomeServer to factory settings Step 1 Save settings By restoring factory set- Click on System > Sicherung (System > tings, all settings, telepho- Security) in the 1&1 HomeServer menu. ne books, dial options etc. will be deleted. As such, it Step 2 is important to save your settings and telephone... -
Page 30: Recycling And Disposal
Recycling and disposal Returning old devices European directives and the German Electrical and When purchasing a new device from 1&1, you can hand in an old Electronic Equipment Act (ElektroG) state that you cannot device of the same kind to our disposal partner Interseroh. Simply dispose of your old device or any of the electronic parts take along the disposal ticket included with the delivery of your included in the delivery in your household waste. -
Page 31: Help And Contact Information
Help and contact information Do you have questions regarding set-up? No problem! You can find lots of support here: FAQs Free email support You can find answers to lots of questions, plus lots of interesting Our technical support and customer service team provide free tips and tricks, in our 1&1 Hilfe-Center at: 1&1 ... - Page 32 YOUR 1&1 USER GUIDE www.1und1.de/handbuch-dsl You can find detailed information about services and troubleshooting here: Telephone, home network Wi-Fi, cloud, security, email Manage your contract, 1&1 Control-Center Questions and answers MacOS X, Windows 10, iOS, Android The up-to-date, detailed 1&1 DSL user guide is always available online. It can also be downloaded as a PDF.
Need help?
Do you have a question about the Homeserver+ and is the answer not in the manual?
Questions and answers