
Related Manuals for Narvon 378SM261


Summary of Contents for Narvon 378SM261
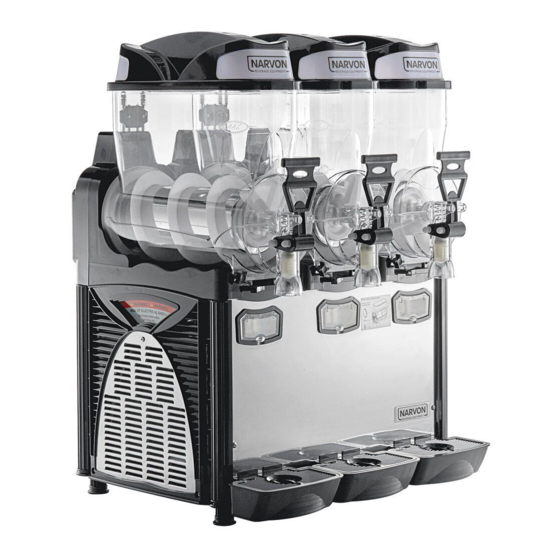
- Page 1 USER MANUAL 2.6 GALLON BOWL FROZEN BEVERAGE DISPENSERS #378SM261 #378SM262 #378SM263 SINGLE BOWL DOUBLE BOWL TRIPLE BOWL READ THOROUGHLY BEFORE OPERATION • UPDATED 2/2019 NARVON...
- Page 2 NARVON...
-
Page 3: Table Of Contents
- DO NOT allow children to play with the appliance . - DO NOT allow the machine to be used by children or untrained persons . - DO NOT leave the machine outdoors . - DO NOT pull on the electrical cord to unplug the machine . NARVON... -
Page 4: Components, Features & Controls
SERIAL PLATE The technical features of the machine are reported on the serial plate attached on the frame. A - Beverage Type Control Switch 0: Cooling OFF ITEM #: 378SM261 MADE IN ITALY I: Slush/Frozen Cream Mode II: Cold Drink Mode MFR MODEL #: OASIS 1-10 B - Spiral Blade Switch SPECS: 1 x 2.6 GAL •... -
Page 5: Installation
Fig. 1 • DO NOT leave the machine outside . • DO NOT pull the cable to disconnect the machine from the electric supply . • DO NOT place the machine near flammable or explosive materials. • DO NOT place the machine nearby any heat source or heating element. NARVON... -
Page 6: Operation
It is recommended to maintain a product level above the cylinder evaporators for consistent cooling. (Fig. 4) Fig. 4 1 . Position the Beverage Type Control Switch to II (Cold Drink Mode). 2 . Position the Spiral Blade Switch to 0 (OFF). 3 . The optimal drink temperature has been set by the factory. Use the Thermostat Control to adjust the temperature of the drink. 4 . To set temperature, open the transparent screen on the front panel below the bowl and turn the Thermostat Screw . 5 . Dispense the beverage by pulling the tap lever. (Fig. 5) Fig. 5 NARVON... -
Page 7: Cleaning
Fig. 9 Fig. 11 Fig. 10 Fig. 12 Fig. 8 Drip Tray (Fig. 13) 1 . Lift upward and then away from the machine to unseat the hooks. 2 . Wash with warm water and dry . 3 . Re-insert the hooks into their holes and push down . Fig. 13 NARVON... -
Page 8: Washing & Sanitizing
SM262 & SM263 (Fig. 14) (Fig. 15) • Remove the back panel by unscrewing the 4 screws . • Remove the left side stainless steel panel by • Use a soft and dry brush to remove the dust from the unscrewing the Fixing Knob (A) as shown. condenser fins. • Use a soft and dry brush to remove the dust from the • When cleaning is complete, replace the back panel condenser fins. with the 4 screws . • When cleaning is complete, replace the side panel with the Fixing Knob (A). Fig. 14 Fig. 15 NARVON... -
Page 9: Reassembly
6 . After all bowl components are properly positioned and lubricated, slide the Bowl into position. (Fig. 19) 7 . Secure the bowl by screwing the Bowl Fixing Knobs clockwise. (Fig. 20) Lid (Fig. 21) Fig. 17 Fig. 18 1 . Place the lid over the bowl, verifying the correct insertion of the electric contacts. Fig. 19 Fig. 20 Fig. 21 Dispensing Tap (Fig. 22) 1 . Place the Lever (E) in place so Pin (B) lines up correctly. Insert Pin (B) and secure. 2 . Lubricate the Tap Valve (C). 3 . Insert the Spring (D) into the product supply hole, followed by the lubricated Tap Valve (C) and secure Fig. 22 with Pin (A). NARVON... -
Page 10: Rinsing
- Sugar percentage in the product - Thickness/Temperature settings In order to reduce startup time, it is strongly recommended that you not fill the bowl with warm or room temperature products . It is recommended to chill the product beforehand . When refilling or topping off a product, it is highly recommended that you chill the added product beforehand . If the product is a mixture of water and concentrate, it needs to be mixed before adding to the bowl . DISPOSAL When the machine is no longer of use, dispose of it properly. Or if still operational, sell off through an authorized organization or company. NARVON... -
Page 11: Troubleshooting
Spiral Blade Switch is defective Replace the Spiral Blade Switch The Spiral Blade Insufficient lubrication Lubricate all areas correctly (see Fig. 16-18) makes noise Dispensing Tap Valve (C) is defective Replace the Tap Valve (C) Dispensing Tap is leaking Insufficient lubrication Lubricate Tap Valve (C) correctly (see Fig. 22) Dispensing Tap does Ice accumulation in bowl Switch the Main Switch OFF and wait for ice to melt not dispense product NARVON... -
Page 12: Warranty
• Overloading or improper loading of the unit in a manner that prevents proper airflow. Additionally, no claims can be made against this warranty for spoilage of products, loss of sales or profits, or any other consequential damages. Normal wear type parts, such as light bulbs and gaskets, are not included in warranty coverage. This warranty is only valid on equipment purchased from an authorized dealer . Failure to contact Narvon Beverage Equipment prior to obtaining equipment service may void your warranty. This states the exclusive remedy against Narvon relating to the product(s) whether in contract or in tort or under any other legal theory, and whether arising out of warranties, representations, instruction, installation, or defects from any cause. Narvon shall not be held liable whether in contract or in tort or under any other legal theory, for loss of revenue or profit, or for any substitute use or performance, or for incidental, indirect, special or consequential damages, or for any other loss or cost of similar type, including without limitation, losses or damages arising from food or product spoilage . -
Page 13: Electrical Diagrams
Lighting Scheme SM263 Main power switch SD 1,2,3 Thickness micro-switch SGB 1,2,3 Slush/drink switch G 1,2,3 Motor-gearbox EV 1,2,3 Electrovalve Timer Fan motor Transformer Fuse Compressor L 1,2,3 Light Light Switch T 1,2,3 Drink thermostat SM 1,2,3 Spiral blade switch NARVON... - Page 14 NARVON...
-
Page 15: Parts Diagrams
Timer 115V (4min) 2133,01 Bowl Kream line 6 Lt 2166 Transformer 220-240V - 50Hz 2107,02 Kream line lid 2167 Transformer 115V - 60Hz 2157 Thickness control spring Light switch Main switch 2108 Back support cover 2131 Motor-gearbox support 2121 Motor-gearbox 220/115V-50/60hz NARVON... - Page 16 NARVON...
- Page 17 2183 Coil 115V - 50/60 Hz 2167 Transformer 115V - 60Hz 2133,01 Bowl Kream line 6 Lt 2157 Thickness control spring 2107,02 Kream line lid Light switch Main switch 2108 Back support cover 2131 Motor-gearbox support 2121 Motor-gearbox 220/115V-50/60hz NARVON...
- Page 18 NARVON...
- Page 19 2183 Coil 115V - 50/60 Hz 2167 Transformer 115V - 60Hz 2133,01 Bowl Kream line 6 Lt 2157 Thickness control spring 2107,02 Kream line lid Light switch Main switch 2108 Back support cover 2131 Motor-gearbox support 2121 Motor-gearbox 220/115V-50/60hz NARVON...
Need help?
Do you have a question about the 378SM261 and is the answer not in the manual?
Questions and answers