
Related Manuals for Erbauer ERB690CSW


Summary of Contents for Erbauer ERB690CSW
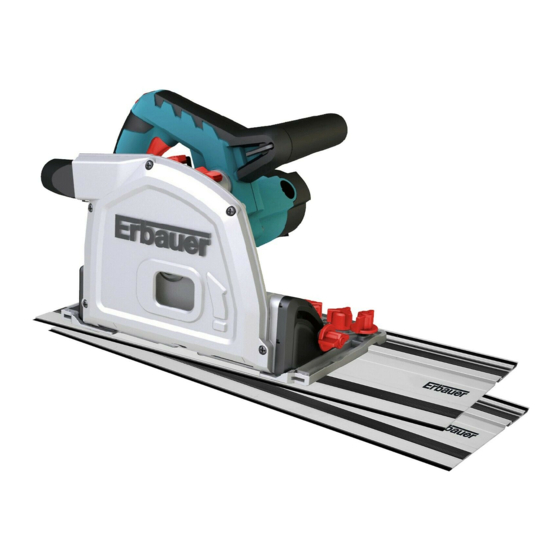
- Page 1 EAN: 3663602628255(B&Q) 5052931644452(SFD) ERB690CSW ORIGINAL INSTRUCTIONS V01-180630...
- Page 2 Product description Safety instructions Assembly Care & maintenance Guarantee Declaration of Conformity...
- Page 3 WARNING ! Please read all safety warnings carefully and be sure that they are fully understood before handling the tool.
- Page 4 Product description Fig. 1 Fig. 2...
- Page 6 Hex screw Hex key Hex key Hex screw...
- Page 7 Min.16mm...
- Page 11 Output spindle Saw blade Inner flange Outer flange Screw...
-
Page 12: General Power Tool Safety Warnings
Safety instructions GENERAL POWER TOOL SAFETY WARNINGS WARNING ! Read all safety warnings, instructions, illustrations and specifications provided with this power tool. Failure to follow all instructions listed below may result in electric shock, fire and/or serious injury. Save all warnings and instructions for future reference. -
Page 13: Personal Safety
PERSONAL SAFETY a) Stay alert,watch what you are doing and use common sense when operating a power tool. Do not use a power tool while you are tired or under the influence of drugs, alcohol or medication. A moment of inattention while operating power tools may result in serious personalinjury. -
Page 14: Cutting Procedures
e) Maintain power tools. Check for misalignment or binding of moving parts,breakage of parts and any other condition that may affect the power tools operation. If damaged, have the power tool repaired before use. Many accidents are caused by poorly maintained power tools. f) Keep cutting tools sharp and clean. -
Page 15: Kickback Causes And Related Warnings
e) When ripping, always use a rip fence or straight edge guide. This improves the accuracy of cut and reduces the chance of blade binding. f) Always use blades with correct size and shape (diamond versus round) of arbour holes. Blades that do not match the mounting hardware of the saw will run off-centre, causing loss of control. -
Page 16: Guard Function
f) Blade depth and bevel adjusting locking levers must be tight and secure before making the cut. If blade adjustment shifts while cutting, it may cause binding and kickback. g) Use extra caution when sawing into existing walls or other blind areas. The protruding blade may cut objects that can cause kickback. - Page 17 Lung cancer Silicosis Chronic Obstructive Pulmonary Disorder (Chronic obstructive pulmonary disease (COPD) And breathing in fine particles of wood dust can lead to the development of Asthma The risk of lung disease is linked to people who regularly breathe construction dust over a period of time, not on the odd occasion.
- Page 18 VIBRATION The European Physical Agents (Vibration) Directive has been brought in to help reduce hand arm vibration syndrome injuries to power tool users. The directive requires power tool manufacturers and suppliers to provide indicative vibration test results to enable users to make informed decisions as to the period of time a power tool can be used safely on a daily basis and the choice of tool.
- Page 19 WARNING ! Identify safety measures to protect the operator that are based on an estimation of exposure in the actual conditions of use (taking account of all parts of the operating cycle such as the times when the tool is switched off and when it is running idle in addition to the trigger time).
-
Page 20: Technical Specifications
Product description 22. Cutting width 1. Plunge lock button 12. Front bevel lock indicators 2. ON/OFF switch knob 23. Saw blade 3. Main handle 13. Bevel scale 24. Dust extraction 4. Rear bevel lock knob 14. Depth adjustment outlet 5. Rear parallel guide knob 25. - Page 21 Proper measures include among others regular maintenance and care of the product and accessories, keeping hands warm, periodical breaks and proper planning of work processes. RATING LABEL EXPLANATION ERB690CSW ERB = Erbauer 690 = Model Number CSW = Plunge Saw...
- Page 22 Assembly SYMBOLS Wear hearing protection. Read the instruction manual. Wear a dust mask. Wear eye protection Wear protective, slip resistant Wear protective gloves. footwear. Do not touch and keep the hand For cutting wood away from the movable parts such as saw blade.
-
Page 23: Assembling The Machine
Plunge Saw 1 pc 5 mm hex key 1 pc 3 mm hex key 1 pc 700 mm track 2 pc Connector adapter 1 pc Carbon brush 2 pc Parallel guide 1 pc Dust collection bag 1 pc Work clamps 2 pc Track bag 1 pc... -
Page 24: Set Cutting Angle
Note : Maximum cutting depth for working without track can reach 67mm in special case if the track compensation lever is set in “down” position. The real cutting depth is then 5mm more than the indicated value on the scale. This setting shall only be applied if the ordinary maximum cutting depth for working without track (62mm) is insufficient. -
Page 25: Switch On/Off
CONNECTING RODS FOR TRACK(D2-D5) Using the track connectors supplied in the track pack, you can connect lengths of track for long cuts. Each track connector (d) comprises a spacer (a) and an expansion bar (b) with four hex screws (c). Assemble each connector by fitting the spacer (a) to the side of the expansion bar (b) opposite the heads of the hex screws. -
Page 26: Determine Cutting Line
DETERMINE CUTTING LINE Two cutting lines are marked on the base plate (6) of the Plunge Saw. 1. Align position A (0 mark on base plate) at the front of the base plate with your marked cutting line when using the saw without track for straight cuts. For 45°... -
Page 27: Intended Use
INTENDED USE The Plunge Saw is intended to cut wood and similar materials, gypsum and cement-bonded fibre materials and plastics. With compatible special saw blades (not provided) the Plunge Saw can also be used to cut aluminium. The Punge Saw is only to be used with a specifically designed track. Installation in a different or homemade track or workbench can cause serious accidents. -
Page 28: Marked Cutting
Note : Check the adapter connects firmly before using the vacuum cleaner. MARKED CUTTING (K ) "Mode selection" section) 2. Press the plunge lock button (1) and push the motor down. The casing stops in 2.5 mm cutting depth position. Note : The markingline shouldbe alignedwith cutting line A 0 mark. - Page 29 4. To switch on the saw press the plunge lock button (1) and the ON/OFF switch (2) and push the motor down. Guide the saw forward to cut. 5. After completing the cut, release the ON/OFF switch and allow the blade to come to a complete stop before removing the saw from the work piece.
-
Page 30: Making Plunge Cuts
CUTTING WARNING ! Check that the workpiece and track are properly supported and secured so that movement cannot occur whilst the saw is in operation. • Always hold the machine with both hands using the main handle (3) and auxiliary handle (17). •... - Page 31 ANTI-KICKBACK The anti-kickback knob (8) is designed to prevent operator injuries due to kickback. The anti-kickback knob (8) counteracts the movement if you try to guide the Plunge Saw on the guide rail back or if the saw kicks back, e.g. due to the saw blade jamming.
- Page 32 WITH THE TRACK (0-48˚) (S) Note : When making bevel cuts it is essential to lock the saw in the track. For a bevel cut, lock the saw to the track by rotating the track lock (9) to the ‘I’ position and set the anti-kickback knob (8) to the ‘I’...
-
Page 33: Dust Collection Bag
USING OTHER OPTIONAL ACCESSORIES WORK CLAMPS Work clamps are ideal for clamping track quickly and securely to the workpiece for fast, accurate cutting. 1. Place the track on the workpiece and align it along the cutting line. 2. Thread the thin top arm of one clamp into the lower clamp channel (running along the underside of the track). -
Page 34: General Cleaning
Note : For those optional accessories, you can consult or purchase through an authorized customer service centre or store. Care & maintenance THE GOLDEN RULES FOR CLEANING WARNING ! Always switch the product off, disconnect the product from the power supply and let the product cool down before performing inspection, maintenance and cleaning work! •... -
Page 35: Blade Maintenance
BLADE MAINTENANCE • Regularly check that the blade is free from a build up of gum resins or sawdust. If necessary clean with an appropriate cleaning agent or multi-use lubricant spray. • Regularly check the saw blade for flatness. Use of the saw with a buckled blade places excessive load on the motor and gearbox assembly, and may affect your warranty rights. -
Page 36: Power Cord
Note : The rotation direction arrows of saw blade and saw must be aligned. 8. Replace the outer flange in such a way that the slaving pins sit in the recesses of the inner flange. 9. Press and hold the shaft lock and tighten the screw. Press the plunge lock button(1) for the casing to swivel up again. -
Page 37: Plug Replacement
PLUG REPLACEMENT If you need to replace the fitted plug, then follow the instructions below. IMPORTANT: The wires in the mains lead are coloured in accordance with the following code: Blue - Neutral Brown - Live As the colours of the wires in the mains lead of this product may not correspond with the coloured markings identifying the terminals in your plug, proceed as follows. - Page 38 STORAGE 1. Clean the product as described above. 2. Store the product and its accessories in a dry, frost-free place. 3. Always store the product in a place that is inaccessible to children. The ideal storage temperature is between 10°C and 30°C. 4.
- Page 39 This guarantee is limited to parts recognised as defective. It does not, in any case, cover ancillary costs (movement, labour) and direct and indirect damage. If the Erbauer power tool is defective during the guarantee period, then we reserve the right, at our discretion, to replace the item with a product of equivalent quality and functionality or to provide a refund.
- Page 40 Kingfisher International Products Limited 3 Sheldon Square London W2 6PX United Kingdom Declare that the product 1400W Plunge Saw, ERB690CSW Serial number: from 000001 to 999999 Complies with the essential health and safety requirements of the following Directives: EC Machinery Directive 2006/42/EC...
- Page 41 Manufacturer • Fabricant • Producent • Hersteller • Producător • Fabricante: Kingfisher International Products Limited, 3 Sheldon Square, London, W2 6PX, United Kingdom www.kingfisher.com/products Distributor: B&Q plc, Chandlers Ford, Hants, SO53 3LE United Kingdom www.diy.com Screwfix Direct Limited, Trade House, Mead Avenue, Yeovil, BA22 8RT, United Kingdom www.screwfix.com...
Need help?
Do you have a question about the ERB690CSW and is the answer not in the manual?
Questions and answers