
Related Manuals for Pfeiffer Vacuum IKR 270


Summary of Contents for Pfeiffer Vacuum IKR 270
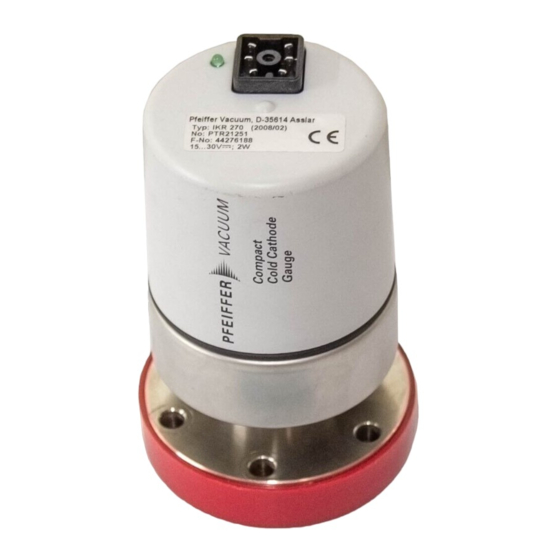
- Page 1 A P A S S I O N F O R P E R F E C T I O N IKR 270 Compact Cold Cathode Gauge, All-metal Operating Instructions...
-
Page 2: Product Identification
Over the whole measurement range, the measuring signal is output as logarithm of the pressure. The Compact Cold Cathode Gauge IKR 270 functions with a cold cathode ioni- zation measurement circuit (according to the inverted magnetron principle). BG 5008 BEN... -
Page 3: Table Of Contents
2 Technical Data 3 Installation 3.1 Vacuum Connection 3.1.1 Removing the Magnet Unit 3.2 Power Connection 3.2.1 Use With a Pfeiffer Vacuum Measurement Unit 3.2.2 Use With Another Evaluation Unit 4 Operation 5 Maintenance 5.1 Cleaning the Gauge / Changing Parts 5.1.1 Disassembling the Gauge... -
Page 4: Safety
Maintain a safety distance of ≥10 cm between the magnet and the heart pacemaker or prevent the influence of strong magnetic fields by antimagnetic shielding. Pass on the safety information to other users. BG 5008 BEN (2011-01) IKR 270... -
Page 5: Liability And Warranty
Pfeiffer Vacuum assumes no liability and the warranty becomes null and void if the 1.4 Liability and Warranty custodian or third parties • disregard the information in this document • use the product in a non-conforming manner • make any kind of changes (modifications, alterations etc.) to the product •... -
Page 6: Technical Data
500 m (1.0 mm² conductor) Operating voltage ≤ 3.3 kV (in the measuring chamber) Operating current ≤ 100 µA (in the measuring chamber) Pfeiffer Vacuum measurement and control units for Compact Gauges fulfill these requirements. BG 5008 BEN (2011-01) IKR 270... - Page 7 ≈ 20 cm³ Dimensions 105.5 24.1 VACUUM Compact ColdCathode Gauge VACUUM 216.5 103.5 VACUUM Compact ColdCathode Gauge VACUUM Ausheizbereich Weight 950 g (DN 40 CF-F short type) 1100 g (DN 40 CF-F long type) BG 5008 BEN (2011-01) IKR 270...
-
Page 8: Installation
If clamps are opened unintentionally injury can be caused by catapulted parts. Use the type of clamps which can only be opened and closed by means of a tool (e.g. hose clip clamping ring). BG 5008 BEN (2011-01) IKR 270... -
Page 9: Removing The Magnet Unit
Remount the magnet unit and lock it with the hexagon head screw (3). Carefully mount the electronics unit (2). Push the electronics unit up to the mechanical stop and lock it with the hexagon socket set screw (1). BG 5008 BEN (2011-01) IKR 270... -
Page 10: Power Connection
3.2 Power Connection 3.2.1 Use With a Pfeiffer If the gauge is used with a Pfeiffer Vacuum measurement Vacuum Measurement unit for Compact Gauges, a Unit corresponding connection cable is required (→ 22). • Secure the connection socket on the gauge with the screw. - Page 11 Incorrect connection, incorrect polarity, or inadmissible supply voltages can damage the gauge. Reassemble the connection socket. Plug in the connection socket. Secure the connection socket on the gauge with the screw. BG 5008 BEN (2011-01) IKR 270...
-
Page 12: Operation
, and CO. They can be mathematically converted for other gases (→ Appendix B). If you are using a Pfeiffer Vacuum measurement unit for Pfeiffer Vacuum Compact Gauges, you can enter a calibration factor to correct the measurement value displayed (→... -
Page 13: Maintenance
(2) (→ Figure 2). Remove the electronics unit. Caution The cover of the electronics unit cannot be removed. Unfasten the hexagon head screw (3) on the magnet unit (4) and remove the magnet unit. BG 5008 BEN (2011-01) IKR 270... - Page 14 Procedure for long type Remove the gauge from the vacuum system (→ 21). Unfasten the hexagon socket set screw (1) on the side of the electronics unit (2) (→ Figure 3). Remove the electronics unit. BG 5008 BEN (2011-01) IKR 270...
- Page 15 Carefully remove the following items in this order: pressure piece (9), washer (9a), complete anode (10), metal seal (11) incl. centering ring (12). The parts can now be cleaned or replaced. Figure 3a BG 5008 BEN (2011-01) IKR 270...
-
Page 16: Cleaning The Gauge
Allow both to dry. Cleaning or replacing the anode: Remove the old ignition aid (10a), for example with tweezers (→ Figure 2). Using a polishing cloth rub the anode pin to a bright finish. BG 5008 BEN (2011-01) IKR 270... -
Page 17: Assembling The Gauge
Place the circlip (5) snugly fitting on the polarity insert. Caution Visually check that the anode pin is centered over the middle hole of the polarity insert (max. eccentricity = 0.5 mm). If possible perform a leak test (leak rate <10 mbar l/s). BG 5008 BEN (2011-01) IKR 270... - Page 18 WARNING WARNING: electric arcing Helium may cause electric arcing with detrimental effects on the electronics of the product. Before performing any tightness tests put the product out of operation and remove the electronics unit. BG 5008 BEN (2011-01) IKR 270...
- Page 19 Mount the electronics unit (2) and secure it with the hexagon socket set screw (1). DANGER Due to missing ground connection in conjunction with missing or not correctly tightened hexagon socket set screw (1) danger- ous contact voltage will occur. Figure 4 BG 5008 BEN (2011-01) IKR 270...
-
Page 20: What To Do In Case Of Problems
< 5×10 mbar. 0.5 ... 1.96 V Gas discharge has not Wait until the gas dis- (underrange). ignited. charge ignites (≈ 20 minutes at a pres- sure of 10 mbar). BG 5008 BEN (2011-01) IKR 270... -
Page 21: Removing The Gauge From The System
Dirt and damages impair the function of the vacuum component. When handling vacuum components, take appropriate measures to ensure cleanliness and prevent damages. Procedure Deactivate the gauge. Unplug the connection socket. Detach the gauge from the vacuum apparatus. Place the protective cap. BG 5008 BEN (2011-01) IKR 270... -
Page 22: Returning The Product
7 Returning the Product WARNING WARNING: forwarding contaminated products Products returned to Pfeiffer Vacuum for service or repair should, if possible, be free of harmful substances (e.g. radioactive, toxic, caustic or microbiological). Otherwise, the type of contamination must be de- clared. -
Page 23: Spare Parts
DN 40 CF-F flange, long type 10 Disposal WARNING WARNING: substances detrimental to the environment Products, operating materials etc. may have to be specially disposed For environmentally compatible disposal, please contact your nearest Pfeiffer Vacuum Service Center. BG 5008 BEN (2011-01) IKR 270... -
Page 24: Appendix
1×10 mbar < p < 1×10 mbar pressure range: 7.5×10 Torr < p < 7.5×10 Torr c, d constants (dependent on pressure unit) 1×10 Pa < p < 1 Pa BG 5008 BEN (2011-01) IKR 270... -
Page 25: B: Gas Type Dependence
Gas Type Dependence Indicated pressure (Gauge calibrated for air) p (mbar) Luft / Air Xe Kr (mbar) Indication range below In the range below 10 mbar the pressure indication is linear. For gases other than mbar air the pressure can be determined by means of a simple conversion formula: = K ×... - Page 26 Notes BG 5008 BEN (2011-01) IKR 270...
- Page 27 Notes BG 5008 BEN (2011-01) IKR270.oi...
- Page 28 A P A S S I O N F O R P E R F E C T I O N Pfeiffer Vacuum stands for innovative and custom Leading. Dependable. vacuum solutions worldwide. For German engineering art, Customer Friendly. competent advice and reliable services.
Need help?
Do you have a question about the IKR 270 and is the answer not in the manual?
Questions and answers