
Related Manuals for New World NW-55THLG


Summary of Contents for New World NW-55THLG
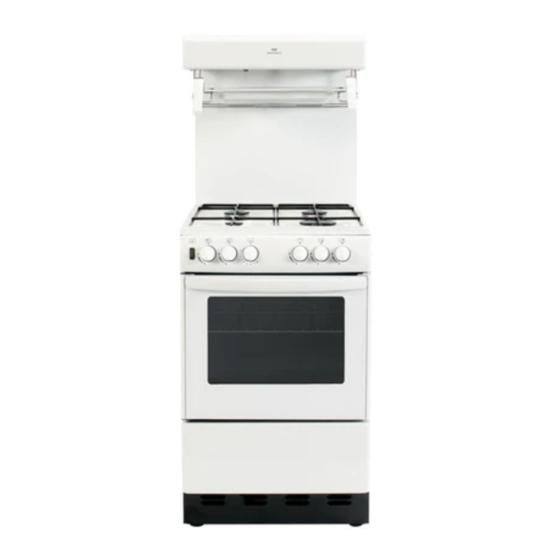
- Page 1 Users Guide & Installation Handbook New World High Level Gas UK Part No 083139807 Date 08/11/2017...
- Page 2 CONTENTS & INTRODUCTION CONTENTS WARRANTY Your new appliance comes with our 12 • SAFETY month guarantee, protecting you against electrical and mechanical breakdown. To • USING THE PRODUCT register, please complete the registra- • CLEANING tion form included, register online or by phone.
- Page 3 CONTENTS & INTRODUCTION Our policy is one of constant development and improvement, therefore we cannot guarantee the strict accuracy of all of our illustrations and specifications - changes may have been made subsequent to publishing. GAS WARNING If you smell gas: Do not try to light any appliance. Do not touch any electrical switch.
- Page 4 SAFETY WARNING • During use the appliance becomes hot. Care should be taken to avoid touching heating elements. • Children less than 8 years of age shall be kept away unless continuously supervised. This appliance can be used by children aged from 8 years and above and persons with reduced physical sensory or mental capabilities or lack of experience and knowledge if they have been given supervision or instruction concerning the use of the appliance in a safe way and understand the hazards involved. Children shall not play with the appliance. Cleaning and user maintenance shall not be made by children without supervision. • Do not use harsh abrasive cleaners or sharp metal scrapers to clean the oven door glass since they can scratch the surface, which may result in shattering of the glass. • Do not use a steam cleaner on any cooking range, hob or oven appliance. • If your appliance is fitted with a lid, any spillage should be removed from the lid before opening. The hob surface should be allowed to cool before closing the lid. • Ensure that the appliance is switched off before replacing the lamp to avoid electric shock. • The appliance is not intended to be operated by means of an external timer or separate control system. • Unattended cooking on a hob with fat or oil can be dangerous and may result in fire. • NEVER try to extinguish a fire with water, but switch off the appliance and then cover the flame with a lid or damp cloth. • Danger of fire: Do not store items on the cooking surfaces. • Only use hob guards designed by the manufacturer of the cooking appliance or indicated by the manufacturer of the appliance in the instructions for use as suitable or hob guards incorporated in...
- Page 5 should be kept away. • If the cooker is placed on a base, measures have to be taken to prevent the appliance slipping from the base. CAUTION • This appliance must not be installed behind a decorative door in order to avoid overheating. • The cooking process has to be supervised. A short term cooking process has to be supervised continuously. • The use of a gas cooking appliance results in the production of heat, moisture and products of combustion in the room in which it is installed. Ensure that the kitchen is well ventilated especially when the appliance is in use: keep natural ventilation holes open or install a mechanical ventilation device (mechanical extractor hood). Prolonged intensive use of the appliance may call for additional ventilation, for example opening of a window, or more effective ventilation, for example increasing the level of mechanical ventilation where present. • This appliance is for cooking purposes only. It must not be used for other purposes, for example room heating. • (Gas through glass models only) In case of hotplate glass breakage, immediately shut off all burners and any electrical heating element and isolate the appliance from the power supply, do not touch the appliance surface, do not use the appliance. • Fire Safety Advice If you do have a fire in the kitchen, don’t take any risks - get everyone out of your home and call the Fire Brigade. If you have an electrical fire in the kitchen and you consider it safe to do so: • Pull the plug out, or switch off the power at the fuse box - this may be enough to stop the fire imme- diately • Smother the fire with a fire blanket, or use a dry powder or carbon dioxide extinguisher • Remember: never use water on an electrical or cooking oil fire. • Other Safety Advice • Servicing should be carried out only by authorised personnel.
- Page 6 gas operated parts not working efficiently. The cooling fan (if fitted) is designed to run on after the control knob has been switched off. • GAS WARNING! - If you smell gas: Do not try to light any appliance, Do not touch any electrical switch. Contact your local gas supplier immediately.
- Page 7 USING THE HOB - GAS • If your hob is supplied with left and • To simmer, turn the control knob right handed pan supports, ensure to the small flame symbol. This will that they are located over the align- ensure that the flame is just large ment pins and are sitting flat on the enough to gently heat the contents of hob.
- Page 8 USING THE HOB - GAS WOK RING (IF SUPPLIED) The wok ring should only be used with a wok. No other style of pan is suitable for use with this accessory. If desired, the wok ring should be located on top of the pan supports around the centre burner.
- Page 9 USING THE GRILL - GAS Caution: Accessible parts may be hot with use of the different grilling positions when the grill is used. Young chil- (see section on grilling). Only use the grill dren should be kept away. burner between the large and small flame symbol. Make sure that the grill pan is first pushed back to the rear stop position and engage To turn off, push in the control knob and...
- Page 10 USING THE MAIN OVEN - GAS USING THE MAIN OVEN The temperature at the oven base is suit- able for cooking baked vegetables, baked Ignition fruit, milk pudding etc, and for warming bread rolls, soup, coffee, or ovenproof Push in and turn the main oven control plates and dishes.
- Page 11 USING THE MAIN OVEN - GAS For roasting joints of meat or poultry, and for pot roasts preheat the oven to gas mark 6 and cook for 30 minutes, then adjust the oven control to the “S” slow setting for the remainder of the cooking time. Slow cooking times will be about three times as long as conventional cooking times.
-
Page 12: Traditional Fruit Cakes
USING THE MAIN OVEN - GAS Traditional fruit cakes Roast turkey It should be remembered that ovens can Roasting turkey involves cooking two vary over time, therefore cooking times different types of meat - the delicate light can vary, making it difficult to be precise breast meat, which must not be allowed when baking fruit cakes. - Page 13 USING THE MAIN OVEN - GAS Roasting guide Notes: The times given in the roasting guide • When cooking stuffed meat or poultry are only approximate, because the size calculate the cooking time from the and age of the bird will influence cooking total weight of the meat plus the times as will the shape of a joint and the stuffing.
- Page 14 CLEANING General Enamel surfaces & parts • If larger splashes of fat do not readily • It is important to clean the product disappear, you can use a mild cream regularly as a build up of fat can af- cleaner to remove them. fect its performance or damage it and may invalidate your guarantee.
- Page 15 CLEANING REMOVING OVEN PARTS FOR Shelf Runners CLEANING • Shelf runners can be removed to Inner Door Glass (glass doors only) enable you to clean them thoroughly. Make sure they are cool to touch and • Some models have a removable, in- then grasp the runners and slide out ner door glass.
- Page 16 CLEANING GAS HOB Cast iron griddle or pan supports (if fitted) Burner caps and heads • Ensure the griddle has fully cooled • The slots in the burner head where and scrape off any stubborn marks the flames burn should be cleared of and bits of food with a plastic or deposits.
-
Page 17: Ventilation Requirements
INSTALLATION INSTRUCTIONS - GAS Before you start: Please read the in- Ventilation requirements structions. Planning your installation The use of a gas cooking appliance re- will save you time and effort. sults in the production of heat and mois- Prior to installation, ensure that the local ture in the room in which it is installed. - Page 18 INSTALLATION INSTRUCTIONS - GAS LP GAS ONLY If this is not possible, Do not install this appliance in a room a kit (part number 0125552 00) may be below ground level. This does not pre- ordered clude installation into rooms which are from Customer Care which will basements with respect to one side of the protect the units.
- Page 19 INSTALLATION INSTRUCTIONS - GAS ASSEMBLE GRILL Fit the grill shelf Fitting the grill canopy Note: For ease of assembly, slacken the 4 Fixing screws and washers that are not screws holding the canopy to the splash loosely assembled in position are in plate, before offering up the grill shelf.
- Page 20 INSTALLATION INSTRUCTIONS - GAS LEVELLING YOUR COOKER STABILITY BRACKET Place a spirit level on a baking sheet onto If the cooker is fitted with a flexible con- an oven shelf. nection, a stability bracket should be fit- ted to engage in the back of the cooker. A The cooker is fitted with LEVELLING stability bracket can be bought from your FEET.
- Page 21 INSTALLATION INSTRUCTIONS - GAS CONNECT TO THE ELECTRICITY SUP- electrician who will replace it with a lead of the same size and temperature rating. (mains ignition models only) Important: - ensure that you route all Warning: This appliance must be earthed. mains and electrical cables and flexible The flexible mains lead is supplied con- tubing well clear of any adjacent heat...
- Page 22 INSTALLATION INSTRUCTIONS - GAS Hob burner CONNECT TO THE GAS SUPPLY Turn the control knob to the FULL ON The inlet to the cooker is ½” BSP internal position, wait a second before pressing situated at the rear right corner. Fit the the ignition switch or holding a lighted bayonet connection.
-
Page 23: Technical Data
TECHNICAL DATA Data badge - lower part of front frame. Gas category, Natural gas I2H, LP gas I3+ Type of gas: This cooker must only be used with either Countries of destination - GB, IE Natural gas and LP gas only as specified Grill on the appliance data badge Grill burner is surface combustion type. - Page 24 CUSTOMER CARE FAQs duce condensation when the oven is cooling down with food inside. What parts of the appliance can be Should the cooling fan continue to washed in a dishwasher? run once the appliance has been • Any enamelled parts such as the grill switched off? pan can be cleaned in a dishwasher, •...
- Page 25 CUSTOMER CARE CUSTOMER CARE WEB SHOP range of Bake ware and Cookware essen- tials including Roasting Pans, Cake Tins Having purchased a superior cooker, hob and Non-Stick Cooking Liners. or hood from us, you’ll naturally want to keep it looking great. And who better to For all enquires, please visit our Web Shop at www.gdhaonline.co.uk or help you care for it than the manufac-...
- Page 26 CUSTOMER CARE CUSTOMER CARE CHANGING LIGHT BULBS (where fitted) Warning: There is a risk of electric shock, so always make sure you have turned off and unplugged your appliance before starting. Always allow the product to cool down before you change a bulb. Not all appliances have the same number and type of bulbs.
- Page 27 Please keep this handbook for future reference, or for anyone else who may use the appliance.
- Page 28 CUSTOMER CARE To contact New World about your appliance, please call Warranty Registration 0800 952 1065 to register your appliance Customer Care Helpline 0344 815 3747 in case of difficulty within the UK Spares Sales Team 0344 815 3745 Alternatively general, spares and service information is available from our website at www.newworld.co.uk...
Need help?
Do you have a question about the NW-55THLG and is the answer not in the manual?
Questions and answers
Oven knob will not fully turn oven off, it will turn up higher but not turn off. What could the problem be? Does a part need to be replaced?
The manual does not provide specific troubleshooting steps for an oven knob that will not fully turn off. However, possible causes could include a faulty control knob, a stuck gas valve, or an internal mechanical issue. It may be necessary to inspect the control mechanism or replace the knob or valve if damaged. If the issue persists, contacting customer care for further assistance is recommended.
This answer is automatically generated