Table of Contents
Advertisement
Available languages
Available languages
Advertisement
Chapters
Table of Contents

Summary of Contents for Apeman ID73
- Page 1 User Manual IP Camera ID73...
- Page 3 Menu English 1-22 Deutsch 23-44 Français 45-66 Italiano 67-88 Español 89-110 日本語 111-132 Home Camera...
-
Page 5: Table Of Contents
Contents Warm prompt Product information Instructions for use of software User registration/login Add camera Details of software function Specifications Warranty... -
Page 6: Warm Prompt
Warm prompt · Use this unit only for its intended use as described in this manual. · To avoid the risk of electric shock, do not disassemble or attempt to repair the unit. · Never dispose of the product in fire or water, which may result in explosion and/or injury. -
Page 7: Product Information
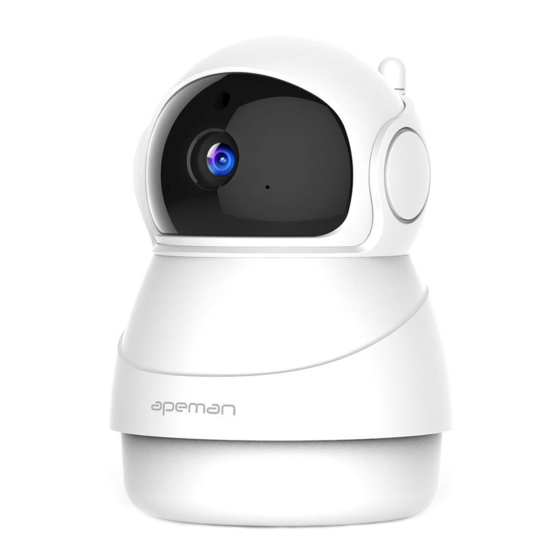
Product introduction 1. Photoresistor 5. Power indicator 2. Lens 6. Reset button 3. Microphone 7. SD card slot 4. Infrared lamp... -
Page 8: Instructions For Use Of Software
Instructions for use of software User registration/login IPC360 is an application software for the camera on mobile devices. It supports both iOS and Android system. You can receive streaming videos and remotely control the camera by using this software. Download APP Scan the QR code below or search for “IPC360”... - Page 9 Register, login and retrieve password sign in sign up Forgot password? Experience 1.Registration Once the APP is downloaded, you can register an account by using your email. · Click “sign up” . Select the country or region your are in. ·...
- Page 10 2.What if you forgot password If you forget the password or the password is stolen, please modify the password in time in “Forget Password” . · Click Forget Password and select your country or region. · Enter your register email address. Click to get verification code, obtain the verification code from your register email box and enter the code; ...
- Page 11 Warm tips: · Password format: 6 to 18 characters or numbers, case-sensitive. · You can click “ ” in the password bar and select on/ off password in visual state. · The email address / mobile phone number must be valid.
-
Page 12: Add Camera
Add camera My camera No camera,add by + Camera power startup · Supply the camera with power. · The power indicator (on the left side of the camera)turns red. · Camera makes horizontal and vertical rotation. Wait for around 15 to 20 seconds and camera will announce “camera’... - Page 13 Wired connection Using a network cable to make connection. · Select the “Wired mode” . Connect the camera and router with a network cable. The LAN indicator will flash in orange. Make sure that your phone and the camera is using the Wi-Fi came from a same router.
- Page 14 Wireless connection Pair the camera with 2.4G Wi-Fi. ( Camera does not support 5G band Wi-Fi. ) · Click “Smart wireless mode” after making sure that you use Wi-Fi on your phone and both the camera and your phone are in good network condition.
- Page 15 Warm tips: · Camera currently supports 2.4GHz Wi-Fi network only. If no 2.4GHz Wi-Fi network available, please try wired connection. · Camera supports class 10 SD cards from 8G to 64G. Please format SD card before use. Plugin or unplug a SD card only before turning the camera on.
-
Page 16: Details Of Software Function
Details of software function My camera My camera 360° Access to panoramic navigation interface, and click “Try now” . The camera will make a panorama shot of taking 15 photos which create a long navigation picture. Each photo bookmarks a position. - Page 17 Camera setting Rename Shared camera Shooting angle Indicator LED Alert mode Volume Language&timezone Encryption setting Recording timing Change router Camera information Memory card information Firmware upgrade Restart camera Refresh setting information delete camera Rename the camera (special symbol is invalid); Share this camera with other users by entering their IPC360 accounts.
- Page 18 Select to turn on or off LED indicator. Enable/ Disenable detection and alert notification. Turn on/off sound of “video on/off ” , “camera online” . Adjust intercom, camera and microphone volume. Select the broadcast language and time zone of the camera. Choose custom encryption to set your streaming video password.
- Page 19 Enter the camera--click the camera you want to select Vertical screen 2018-01-23 RealTime 00:00 10:00 11:00 12:00 The shooting angle of camera can be adjusted by sliding the middle screen up and down and side to side. Show date and time. You can playback video footage if a SD card is inserted.
- Page 20 Horizontal screen Camera position correction function: the machine can rotate 360 ° for positioning and alignment. Quick positioning-quickly adjust the camera angle by clicking anywhere on the screen as the center point. Shoot current screens, and view them in the Album. Adjust the camera angle by sliding the screen up and down and side to side (the horizontal and vertical directions can be also adjusted by sliding the screen slantwise).
- Page 21 Album Album Select 2018-01-16 total 1 item 1.You can view and download previous photos and videos according to time. 2.The "Select" function button in the upper right corner can be used for selection in batches for deletion. Message Message Select 2018-01-23 Total 20 Alert Information...
- Page 22 1. Alarm settings Alarm can be turned on/ off. After enabling the reset, the alarm time can be set to daytime (08: 00-18: 00), night (18: 00-08: 00), all-day (00: 00-24: 00), a self-defined time; Set the sensitivity 0-5 (the larger the numerical value, the higher the sensitivity), depending on the change degree of screen in a certain time interval.
- Page 23 My APP setting Message setting Help About Modify password Sign out Turn on/ off alarm tone. Some common use guidelines and suggestions that can help you use this camera in a better way. The current version, you can contact us to check for the latest version. ...
-
Page 24: Specifications
Specifications Antenna 2.4Ghz-2.5Ghz Sensor SC2235 Focal length: 3.6mm Lens Pixel: 2Mp Infrared LED 850nm 9PCS Protocols: HTTP/DHCP/IP/TCP WIFI Frequency band: 2.4G Channel: 1TX/1RX Format: H.264 Video Resolution: 1920X1080 Max. frame rate: 1080P/25FPS 8-64G Class 10 Card SD card Recorded format: AVI Power DC 5V/2.0A... -
Page 25: Faq
Any WiFi connection tips? C a m e r a c a n o n l y s u p p o r t 2 . 4 G f r e q u e n c y s i g n a l , a n d 802.11b/g/n WiFi network. -
Page 26: Warranty
Warranty This product carries a one-year warranty from purchase date. Please feel free to let us know what we can do to assist you when you have any product problem. Apeman customer service email addresses: America: support.us@apemans.com Europe: support.eu@apemans.com Japan: support.jp@apemans.com... - Page 27 Verzeichnis Hinweise Produktbeschreibung Verwendungsbeschreibung Benutzer registrieren/einloggen Kamera hinzufügen Detaillierte Softwarefunktionen Spezifikationen Garantie...
-
Page 28: Hinweise
Hinweise · Verwenden Sie dieses Gerät nur für den in diesem Handbuch beschrie- benen Verwendungszweck. · Um die Gefahr eines Stromschlags zu vermeiden, darf das Gerät nicht zerlegt oder repariert werden. · Entsorgen Sie das Produkt niemals in Feuer oder Wasser, da dies zu Explosionen und / oder Verletzungen führen kann. -
Page 29: Produktbeschreibung
Produktbeschreibung 1. Fotowiderstand 5. Leistungsanzeige 2. Aufnahme 6. Reset-Taste 3. Mikrofon 7. SD Kartensteckplatz 4. Infrarotlicht... -
Page 30: Verwendungsbeschreibung
Verwendungsbeschreibung Benutzer registrieren/einloggen Der IPC360 ist eine kameraseitige Anwendung auf dem mobilen Gerät, die sowohl Apple- als auch Android-Telefone unterstützt. Mit dieser Software können Sie Videos auf dem mobilen Gerät fern- steuern und abrufen. APP herunterladen Scannen Sie den QR-Code unten oder suchen Sie nach „IPC360 “ im App Store und Google Play für die neueste APP zu verwenden. - Page 31 Registrieren Anmelden und Passwort abrufen sign in sign up Forgot password? Experience 1.Registrieren Nach dem Herunterladen von APP können Sie sich registrieren. Derzeit wird nur die E-Mail-Registrierung unterstützt . · Klicken Sie Registrieren und wählen Sie das Land und den Standort. ·...
- Page 32 2.Wenn Passwort vergessen wird Wenn Sie das Passwort vergessen haben oder der Passwortdiebstahl passiert hat, ändern Sie bitte umgehend das Passwort von der Funk- tion „Passwort vergessen “. · Klicken Sie auf Passwort vergessen und wählen Sie Ihr Land oder Ihre Region.
- Page 33 Tipps: · Das Passwort kann nur eine alphanumerische Kombina- tion von 6 bis 18 sein, wobei die Groß- und Kleinschrei- bung zu beachten ist. · Sie können auf die Taste „ “ klicken und wählen Sie den visuellen Status Ein- / Aus-Passwort ·...
-
Page 34: Kamera Hinzufügen
Kamera hinzufügen My camera No camera,add by + Die Kamera starten · Verwenden Sie USB Netzkabel in Verbindung mit dem Netzteil. · Nachdem die Kamera an das Stromnetz angeschlossen ist, startet sie.(rotes oder grünes Licht blinkt) Blinkt das rote Licht nicht, drück- en Sie die RESET-Taste für ca. - Page 35 Kabel hinzufügen Verbinden Sie die Kamera über ein Netzwerkkabel und einen Router mit dem Netzwerk. · Wählen Sie den Kabel hinzufügen. Wählen Sie entsprechend der APP fordert das Ende des Netzwerkkabels in die Maschine Ether- net-Schnittstelle, das andere Ende mit dem Router verbunden ist, zur gleichen Zeit muss das Telefon an den gleichen Router von der WIFI-Netzwerk ausgestellt werden.
- Page 36 Drahtlose Verbindung Verbinden Sie die Kamera mit WIFI (5G-Band-Netzwerkkopplung ist Vorübergehend nicht unterstützt). · Nach der Bestätigung der Verbindung mit einem stabilen WIFI, wählen Sie Drahtlos hinzufügen.Wenn das Gerät erfolgreich gestartet ist, klicken Sie auf Weiter. Wenn nicht erfolgreich, bitte wiederholen Sie die obigen Schritte zum Einschalten;...
- Page 37 Tipps: · Kamera unterstützt derzeit nur 2,4 GHz Wi-Fi-Netzwerk. Wenn kein 2,4-GHz-Wi-Fi-Netzwerk verfügbar ist, versuchen Sie es bitte mit einer kabelgebundenen Verbindung. · Camera unterstützt SD-Karten der Klasse 10 von 8G bis 64G. Bitte formatieren Sie die SD-Karte vor der Verwendung.
-
Page 38: Detaillierte Softwarefunktionen
Detaillierte Softwarefunktionen Meine Kamera My camera 360° Sie können die Produktion von Panorama-Navigationskarte Schnittstelle eingeben, und klicken Sie auf „Versuchen Sie es “ zu 360 ° Panoramaaufnahmen, insgesamt fünfzehn Bilder. Dann können Sie den Aufnahmebildschirm am Telefon sehen. Klicken Sie Einschalten/Ausschalten der mobilen Überwachung und Empfehlung der Alarmfunktion. - Page 39 Camera setting Rename Shared camera Shooting angle Indicator LED Alert mode Volume Language&timezone Encryption setting Recording timing Change router Camera information Memory card information Firmware upgrade Restart camera Refresh setting information delete camera Benennen Sie die Kamera um (Spezielle Zeichen werden nicht unterstützt).
- Page 40 Bitte wählen Sie aus,ob das Anzeigelicht angemacht wird. Aktivieren / deaktivieren Sie die mobile Überwachung. Wählen Sie aus, ob die Sprachsendung bei aktiviertem Internetzu- griff und die Sprachsendung beim Ein- / Ausschalten des Videos aktiviert werden soll und passen Sie die Lautstärke der Gegen- sprechanlage, die Lautstärke der Rundsendung und die Mikrofon- lautstärke.
- Page 41 Die Kamera eingehen –Klicken Sie Ihre gewünschte Kamera Vertikaler Bildschirm 2018-01-23 RealTime 00:00 10:00 11:00 12:00 Sie können den Kamerawinkel einstellen, indem Sie den mittleren Bildschirm nach oben, unten, links und rechts verschieben (Sie können auch diagonal kippen, während Sie die horizontale und vertikale Richtung einstellen).
- Page 42 Wählen Sie Schärfe - Wählen Sie zwischen Clear (720P), High Definition (1080P) und Adaptive Mode (wählt automatisch die Schärfe basierend auf der Geschwindigkeit des Netzwerks). Horizontaler Bildschirm Die Funktion der Korrektur der Kameraposition, die Maschine wird sich 360° zur Positionierung drehen, um Kalibrierung zu machen. Schnell positionieren, klicken Sie den Kamera um schnell anzupas- sen.
- Page 43 Fotoalbum Album Select 2018-01-16 total 1 item 1.Nach der Reihenfolge der Zeit schauen Sie die historischen Fotos und heruntergeladenen Videos. 2.Die Funktionstaste „Auswählen “ in der oberen rechten Ecke kann in Stapeln zum Löschen ausgewählt werden. Benachrichtigung Message Select 2018-01-23 Total 20 Alert Information...
- Page 44 1. Alarmeinstellung Aktivieren / deaktivieren Sie den Alarmton. Geben Sie den Reset ein,nachher können Sie die Alarmzeit auf: Tag (08: 00-18: 00), Nacht (18: 00-08: 00), den ganzen Tag (00: 00-24: 00), benutzerdefinierte Zeit einstellen. Stellen Sie die Empfindlichkeit von 0-5 (Je größer der Wert ist ,desto empfindlicher), das Prinzip für ein bestimmtes Zeitinter- vall ändert sich die Größe des Bildschirms.
- Page 45 Mein APP setting Message setting Help About Modify password Sign out Aktivieren / deaktivieren Sie den Alarmton. Einige allgemeine Anwendungsrichtlinien und Vorschläge, die Ihnenbei besserer Nutzung dieser Kamera helfen. Die aktuelle Version, kontaktieren Sie uns bitte für das Korrek- turlesen ,ob sie die neueste Version ist. Geben Sie das alte Passwort ein, geben Sie das neue Passwort ein und geben Sie das neue Passwort wiederholt ein, um das Login Passwort zu ändern (Passwort kann nur 6-18 alphanumerische...
-
Page 46: Spezifikationen
Spezifikationen Antenna 2.4Ghz-2.5Ghz Sensor SC2235 Focal length: 3.6mm Lens Pixel: 2Mp Infrared LED 850nm 9PCS Protocols: HTTP/DHCP/IP/TCP WIFI Frequency band: 2.4G Channel: 1TX/1RX Format: H.264 Video Resolution: 1920X1080 Max. frame rate: 1080P/25FPS 8-64G Class 10 Card SD card Recorded format: AVI Power DC 5V/2.0A... -
Page 47: Faq
Gibt es Tipps der WiFi-Verbindung? D i e K a m e r a u n t e r s t ü t z t n u r d i e 2 , 4 G F r e q u e n z u n d d a s 802,11b/g/n WiFi Netzwerkprotokoll. -
Page 48: Garantie
Garantie Dieses Produkt hat eine einjährige Garantie ab Kaufdatum. Bitte zögern Sie nicht, uns mitzuteilen, was wir tun können, um Ihnen bei Produktproblemen behilflich zu sein. Apeman Kundenservice-E-Mail-Adressen: America: support.us@apemans.com Europe: support.eu@apemans.com Japan: support.jp@apemans.com... - Page 49 Table des Matières Conseils Présentation du produit Description de l'utilisation du logiciel Enregistrement / connexion de l'utilisateur Ajout de caméra Détails des fonctions des logiciels Spécifications Garantie...
-
Page 50: Conseils
Conseils · Utilisez cet appareil uniquement pour son usage prévu, tel que décrit dans ce manuel. · Pour éviter tout risque d'électrocution, ne pas démonter ou tenter de réparer l'unité. · Ne jetez jamais le produit dans le feu ou dans l'eau, car cela pourrait provoquer une explosion et / ou des blessures. -
Page 51: Présentation Du Produit
Présentation du produit 1. Photorésistance 5. Témoin de source d'alimentation 2. Objectif 6. Bouton de reconfiguration 3. Microphone 7. Goulotte de serrage SD 4. Lampe infrarouge ... -
Page 52: Description De L'utilisation Du Logiciel
Description de l'utilisation du logiciel Enregistrement / connexion de l'utilisateur IPC360 est le logiciel d'application du terminal de l'équipement mobile pour la caméra, qui supporte le IOS et Android en même temps. Vous pouvez adopter ce logiciel pour réaliser la manipulation à... - Page 53 Enregistrement, connexion et récupération du mot de passe sign in sign up Forgot password? Experience 1.Enregistrement Après avoir téléchargé l’ APP, il est possible d'enregistrer. Présente- ment, il supporte uniquement l'enregistrement par la boîte mail. · Cliquez sur l'enregistrement, sélectionnez votre pays ou région. ·...
- Page 54 2.Comment faire si vous avez oublié le mot de passe ? En cas d'oubli du mot de passe ou du vol, veuillez modifier le mot de passe dans la fonction «Mot de passe oublié»s'il vous plaît. · Cliquez sur le mot de passe oublié, sélectionnez votre pays ou région.
- Page 55 Remarque: · Le mot de passe ne peut être qu'une combinaison alphanumérique 6-18 et sensible à la casse. · Il est possible de cliquer à la fin de la colonne du mot de passe pour sélectionner d'activer ou de désacti- ver la visibilité...
-
Page 56: Ajout De Caméra
Ajout de caméra My camera No camera,add by + Démarrage de l'alimentation de la caméra · Connectez la caméra et l'adaptateur d'alimentation à l'aide du câble de recharge USB . · Le démarrage est effectué après la connexion (l’ indicateur peut entrer en état de lampe rouge clignotante ou de lampe verte). - Page 57 Ajout filaire A l'aide du câble de réseau et du routeur pour connecter la caméra dans le réseau. · La sélection de l'ajout filaire. Lors de la sélection, selon le rappel dans APP, insérez une extrémité du câble de réseau dans l'interface Ethernet de la machine, une autre extrémité...
- Page 58 Connexion sans fil Le jumelage entre la caméra et WIFI (pour le moment, le jumelage du réseau de bande de fréquence 5G n'est pas supporté). · Après avoir déterminé la connexion du téléphone à WIFI stable, choisissez l'ajout sans fil. Déterminez que la caméra a démarré avec succès, cliquez sur l'étape suivante après la confirmation.
- Page 59 Remarque: · Caméra prend actuellement en charge le réseau Wi-Fi 2,4 GHz seulement. Si aucun réseau Wi-Fi 2,4 GHz n'est disponible, veuillez essayer une connexion filaire. · Caméra prend en charge les cartes SD de classe 10 de 8G à 64G. Veuillez formater la carte SD avant utilisation. Branchez ou débranchez une carte SD uniquement avant d'allumer l'appareil photo.
-
Page 60: Détails Des Fonctions Des Logiciels
Détails des fonctions du logiciel Ma caméra My camera 360° Il est possible d'entrer dans la production de l'interface de carte de navigation panoramique, cliquez ''Essai'' pour réaliser la prise de vue panoramique 360° , il peut prendre quinze images au total. Ensuite, vous pouvez les voir sur le téléphone mobile . - Page 61 Camera setting Rename Shared camera Shooting angle Indicator LED Alert mode Volume Language&timezone Encryption setting Recording timing Change router Camera information Memory card information Firmware upgrade Restart camera Refresh setting information delete camera Renommez la caméra (l'utilisation des symboles spéciaux n'est pas supportée).
- Page 62 Sélectionnez si vous souhaitez allumer le voyant d'alimentation. Activer / désactiver la surveillance mobile. Sélectionnez si vous souhaitez activer la diffusion vocale lors de l'accès de l'Internet et lors de l'ouverture / fermeture de la vidéo ;Réglez le volume d'intercommunication, le volume de diffu- sion et le volume de microphone.
- Page 63 Entrée dans la caméra -- Cliquez sur la caméra que vous voulez sélectionner Écran vertical 2018-01-23 RealTime 00:00 10:00 11:00 12:00 Vous pouvez ajuster l'angle de la caméra en faisant glisser l'écran central vers le haut, le bas, la gauche et la droite (il est aussi possible de glisser en diagonale pour ajuster les directions hori- zontales et verticales en même temps).
- Page 64 Sélection de la résolution -- Il est possible de sélectionner la résolution générale (720P), la haute définition (1080P) et le mode auto-adaptatif (sélectionner automatique la résolution selon la vitesse du réseau). Écran horizontal La fonction de correction de position de caméra. La machine va réaliser le positionnement de rotation 360°...
- Page 65 Album Album Select 2018-01-16 total 1 item 1.Voyez et téléchargez des photos et des vidéos historiques en fonction du temps. 2.Le bouton «Sélectionner» au coin supérieur à droite pour supprim- er par lots. Message Message Select 2018-01-23 Total 20 Alert Information...
- Page 66 1. Paramètres d'alarme Il est possible de réaliser Activer / Désactiver l'alarme. Après l'entre dans la réglage, définissez l’ heure d'alarme : la journée (08: 00 - 18: 00), la nuit (18: 00 - 08: 00), tout temps (00: 00 - 24: 00), temps personnalisé. Réglez la sensibilité...
- Page 67 Mien APP setting Message setting Help About Modify password Sign out Activer / Désactiver du son de rappel d'alarme. Certains guides de l'utilisation et aides des questions ordinaires, qui vous aident à utiliser plus parfaitement cette caméra. La version actuelle. Il est possible de nous contacter pour rectifier si c'est la dernière version.
-
Page 68: Spécifications
Spécifications Antenna 2.4Ghz-2.5Ghz Sensor SC2235 Focal length: 3.6mm Lens Pixel: 2Mp Infrared LED 850nm 9PCS Protocols: HTTP/DHCP/IP/TCP WIFI Frequency band: 2.4G Channel: 1TX/1RX Format: H.264 Video Resolution: 1920X1080 Max. frame rate: 1080P/25FPS 8-64G Class 10 Card SD card Recorded format: AVI Power DC 5V/2.0A... -
Page 69: Faq
Quelques conseils de connexion WiFi? l'appareil photo ne peut prendre en charge que le signal de fréquence 2.4G et le réseau WiFi 802.11b/g/n. 1.Le mot de passe WiFi connecté doit être inférieur à 16 numéros et ne peut contenir les numéros spéciaux tels que: @ ¥! Ect (sug- gérer de réviser le mot de passe qui ne contient que des lettres et des numéros). -
Page 70: Garantie
Ce produit est couvert par une garantie d'un an à compter de la date d'achat. N'hésitez pas à nous faire savoir ce que nous pouvons faire pour vous aider lorsque vous avez un problème de produit. Adresses e-mail du service clientèle d'Apeman: America: support.us@apemans.com Europe: support.eu@apemans.com Japan: support.jp@apemans.com... - Page 71 Contenuto Attenzione Introduzione dei prodotti Istruzioni d'uso per software Registrazione / accesso di utente Aggiungimento di videocamera Spiegazione dettagliata delle funzioni di software Specificazioni Garanzia...
-
Page 72: Attenzione
Attenzione · Usare questa unità solo per l'uso previsto come descritto in questo manuale. · Per evitare il rischio di scosse elettriche, non smontare o tentare di riparare l'unità. · Non smaltire il prodotto in caso di incendio o acqua, che potrebbe causare esplosioni e / o lesioni. -
Page 73: Introduzione Dei Prodotti
Introduzione dei prodotti 1. Fotoresistenza 5. Indicatore luminoso di alimentazione 2. Obiettivo 6. Pulsante di reset 3. Microfono 7. Slot per schede SD 4. Luce a infrarossi ... -
Page 74: Istruzioni D'uso Per Software
Istruzioni d'uso per software Registrazione / accesso di utente L'IPC360 è un'applicazione di videocamera sul dispositivo mobile, supporta sia telefono cellulare di Apple che quello di Android. Con questo software, è possibile realizzare funzioni come “controllo remoto” , “ottenimento di video” e cosi via sul dispositivo mobile. Download dell'APP Scansionare il seguente codice QR, o cercare"IPC360"... - Page 75 Registrazione, accesso e ricupero di password sign in sign up Forgot password? Experience 1.Registrazione Dopo aver scaricato APP, si può effettuare la registrazione. Attual- mente supporta solo la registrazione con casella di posta elettronica. · Fare clic su “Registra” e selezionare il suo paese o la regione. ·...
- Page 76 2.Come fare quando si dimentica la password Se si dimentica la password o il furto della password si è verificato, si prega di modificare tempestivamente la password nella funzione “Hai dimenticato la password” . · Fare clic su “Hai dimenticato la password” e scegliere il suo paese o regione.
- Page 77 Suggerimenti caldi : · Le password può essere solo la combinazione di 6-18 cifre, si distinguono maiuscole e minuscole. · È possibile fare clic sul pulsante " " nella parte inferi- ore del campo della password per selezionare "Abilita / disabilita lo stato visibile di password".
-
Page 78: Aggiungimento Di Videocamera
Aggiungimento di videocamera My camera No camera,add by + Avvio della videocamera · Collegare la videocamera all'alimentatore con un cavo di ricarica USB. · Quando la videocamera è collegata all'alimentazione, si avvia (l'indi- catore luminoso entra nello stato di lampeggio della luce rossa o verde), se non vedi la luce rossa lampeggia, premere il pulsante RESET per circa 3-4 secondi, la videocamera ruota verso su, verso giù, verso sinistra e verso destra e la luce rossa lampeggia, o senti il... - Page 79 Aggiungimento cablato Collegare la videocamera alla rete tramite un cavo di rete e un router. · Selezionare “Aggiungimento cablato” . Inserire un'estremità del cavo di rete nell'interfaccia Ethernet della macchina in base all'indicazione di APP, e collegare l'altra estremità al router, allo stesso tempo il cellulare deve essere collegato alla rete WIFI emessa dallo stesso router.
- Page 80 Connessione wireless Accoppiare la videocamera con il WIFI (l'accoppiamento delle reti a banda 5G non è supportato ora). · Dopo avere assicurato che il cellulare sia collegato a un WIFI stabile, selezionare “Aggiungimento wireless” . Confermare che la video- camera è avviata correttamente, fare clic su “Avanti” . Se non si avvia correttamente, ripetere i passaggi di avvio sopra riportati: inserire la password di WIFI al quale è...
- Page 81 Suggerimenti caldi: · La fotocamera supporta attualmente solo la rete Wi-Fi a 2,4 GHz. Se non è disponibile una rete Wi-Fi da 2,4 GHz, provare la connessione cablata. · La fotocamera supporta le schede SD classe 10 da 8G a 64G.
-
Page 82: Spiegazione Dettagliata Delle Funzioni Di Software
Spiegazione dettagliata delle funzioni di software La mia videocamera My camera 360° Per entrare nell'interfaccia di navigazione panoramica di produzi- one, fare clic su "Prova" per la registrazione panoramica a 360 ° , ottiene un totale di 15 immagini. Poi è possibile visualizzare le immagini scattate sul cellulare. - Page 83 Camera setting Rename Shared camera Shooting angle Indicator LED Alert mode Volume Language&timezone Encryption setting Recording timing Change router Camera information Memory card information Firmware upgrade Restart camera Refresh setting information delete camera Rinominare la videocamera (i simboli speciali non sono supportati). Condividere con gli altri utenti che hanno registrato l'APP (uguale al precedente passaggio di condivisione).
- Page 84 Scegliere se accendere o non accendere la luce di indicazione di alimentazione. Accendere/ spegnere il monitoraggio di movimento; Selezionare se accendere o non accendere la trasmissione vocale quando l’ Internetè collegato, la trasmissione vocale quando il video viene acceso / spento e regolare il volume di dialogo, il volume di trasmissione e il volume di microfono.
- Page 85 Entrare in videocamera - fare clic sulla videocamera che si desidera selezionare Schermo verticale 2018-01-23 RealTime 00:00 10:00 11:00 12:00 È possibile regolare l'angolazione della videocamera facendo scorrere lo schermo centrale verso l'alto, verso il basso, verso sinistra e verso destra (è inoltre possibile regolare le direzioni orizzontale e verticale facendo scorrere lo schermo inclinata- mente).
- Page 86 Selezionare la definizione - è possibile scegliere tra definizione normale (720P), definizione alta (1080P) e modalità adattiva (seleziona automaticamente la definizione in base alla velocità della rete). Schermo orrizontale Funzione di correzione della posizione della videocamera, la mac- china ruota a 360 ° per il posizionamento e la calibrazione del centro.
- Page 87 Album Album Select 2018-01-16 total 1 item 1. Visualizzare e scaricare foto e video storici in base al tempo. 2. Il pulsante di funzione "Seleziona" nell'angolo in alto a destra serve a selezionare in lotti per la cancellazione. Messaggio Message Select 2018-01-23...
- Page 88 1. Impostazioni di allarme Può accendere / spegnere l'allarme. Dopo essere entrato nella reimpostazione, il tempo di allarme può essere impostato come: giorno (08: 00-18: 00), notte (18: 00-08: 00), tutto il giorno (00: 00-24: 00), tempo personalizzato. Impostare la sensibilità 0-5 (è più sensibile con il valore maggiore), il principio si basa sul grado di cambiamento dell’...
- Page 89 Mio APP setting Message setting Help About Modify password Sign out Abilita / disabilita il suono di allarme. Alcune guide comuni di uso e aiuto di domande per aiutarla a usare meglio la videocamera. la versione attuale, vi preghiamo di contattarci per controllare se è l'ultima versione.
-
Page 90: Specificazioni
Specificazioni Antenna 2.4Ghz-2.5Ghz Sensor SC2235 Focal length: 3.6mm Lens Pixel: 2Mp Infrared LED 850nm 9PCS Protocols: HTTP/DHCP/IP/TCP WIFI Frequency band: 2.4G Channel: 1TX/1RX Format: H.264 Video Resolution: 1920X1080 Max. frame rate: 1080P/25FPS 8-64G Class 10 Card SD card Recorded format: AVI Power DC 5V/2.0A... -
Page 91: Faq
Qualsiasi suggerimento per connettere WiFi? La camera può supportare solo il segnale di frequenza 2.4G e la rete WiFi 802.11b/g/n. 1.La password di WiFi collegata deve essere inferiore a 16 digitali e non può contenere le digitali speciali come: @ ¥! ecc. (suggeri- sci di modificare la password che contiene solo lettere e numero). -
Page 92: Garanzia
Questo prodotto ha una garanzia di un anno dalla data di acquisto. Non esitate a farci sapere cosa possiamo fare per aiutarvi in caso di problemi con il prodotto. Indirizzi email del servizio clienti Apeman: America: support.us@apemans.com Europe: support.eu@apemans.com Japan: support.jp@apemans.com... - Page 93 Contenidos Advertencia Introducción del producto Instrucciones de software Registro/ inicio de sesión del usuario Agregar una cámara Funciones detalladas del software Especificaciones Garantía 1 1 0...
-
Page 94: Advertencia
Advertencia · Utilice esta unidad solo para su uso previsto como se describe en este manual. Para evitar el riesgo de descarga eléctrica, no desarme ni intente · reparar la unidad. · Nunca deseche el producto en el fuego o en el agua, lo que puede provocar una explosión o lesiones. -
Page 95: Introducción Del Producto
Introducción del producto 1. Fotorresistencia 5. Luz indicadora 2. Cámara 6. Botón de reinicio 3. Micrófono 7. Ranura de la tarjeta SD 4. Luz infrarroja ... -
Page 96: Instrucciones De Software
Instrucciones de software Registro/ inicio de sesión del usuario IPC360 es una aplicación informática instalada en el terminal del dispositivo móvil para realizar un control remoto de la cámara y obtener los vídeos en tiempo real, es compatible con los teléfonos de sistema iOS y Android. - Page 97 Registrarse, iniciar sesión y recuperar contraseña sign in sign up Forgot password? Experience 1.Registrarse Después de descargar la APP, puede registrarse. Actualmente se limita sólamente al registro por medio del correo electrónico. · Haga clic en Registrarse, seleccione su país o región. ·...
- Page 98 2.¿Qué hace si olvida la contraseña? Si se olvida de la contraseña o cuando la contraseña ha sido robada, por favor modifique la contraseña inmediatamente desde la función de "Olvidé mi contraseña". · Haga clic en"Olvidé mi contraseña", seleccione su país o región. ·...
- Page 99 Recordatorio: · La contraseña puede ser compuesta por caracteres alfanuméricos entre 6 y 18 dígitos, con una diferencia de mayúsculas y minúsculas. · Puede hacer clic en el botón " " en la parte trasera de la barra de contraseña para activar o desactivar el estado visual de la contraseña.
-
Page 100: Agregar Una Cámara
Agregar una cámara My camera No camera,add by + Encender la cámara · Conecte la cámara al adaptador de la fuente de alimentación utilizando un cable de carga USB; · La cámara estará activada al conectarse a la fuente de alimentación (la luz indicadora parpadeará...
Need help?
Do you have a question about the ID73 and is the answer not in the manual?
Questions and answers