Table of Contents
Advertisement
Quick Links
Advertisement
Table of Contents

Related Manuals for LIMIT 500


Summary of Contents for LIMIT 500
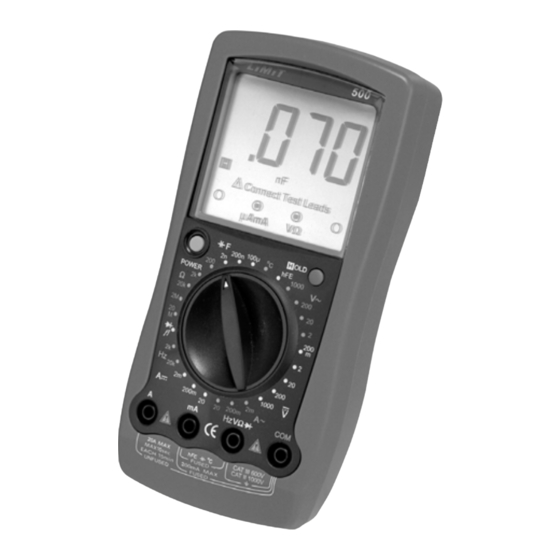
- Page 1 5 0 0 Digital Multimeter Operating manual...
- Page 2 5 0 0 Fig 2. Current measurement AC Fig 1. Voltage measurement DC and AC Fig 3. Diode test Fig 4. Replacing battery Continuity test Resistance Fig 5. Replacing battery...
- Page 3 Illustrations & Tables DC Voltage Range Resolution Accuracy Overload Protection 200mV 0.1mV 250V AC ±(0,5%+1) 10mV 1000V AC 200V 100mV 1000V ±(0,8%+2) AC Voltage Range Resolution Accuracy Overload Protection 10mV ±(0.8%+3) 1000V AC 200V 100V 1000V ±(1.2%+3) DC Current Range Resolution Accuracy Overload...
- Page 4 5 0 0 AC Current Range Resolution Accuracy Overload Protection 1μA ±(1.0%+3) CE Version: Fuse 0.5A, 200mA 0.1mA ±(1.8%+3) 250V, fast type, 5x20mm 20mA 10mA ±(3.0%+5) Resistance Range Resolution Accuracy Overload Protection 200Ω 0.1Ω ±(0.8%+3) + Test Lead 2Ω 1Ω Short Circuit Resistence 250V AC 20kΩ...
- Page 5 Tabels Transistor Test Range Resolution Accuracy ±(a%reading + b digits) 1ß Vce≈3V Ibo≈10μA 1000ßMAX Frequency (UT58C only) Range Resolution Accuracy Overload Protection 2kHz 20Hz 10Hz ± (1.5%+5) 250V AC Remarks • 100mVrms < input amplitude < 30Vrms...
- Page 6 5 0 0 Language Contents Language page English ....... .5-12 Svenska .
-
Page 7: Table Of Contents
English Contents Overview General specification Safety information Voltage DC and AC Current DC and AC Resistance Temperature Diodes test Continuity test Capacitance Transistor test Frequency Battery Fuses... -
Page 8: Overview
Please read the relevant information carefully and observe all the Warnings and Notes strictly. Limit 500 are 3 1/2 digits instrument for professional use. Display have large digits and also shows correct test leads terminals and rotary switch position, makes this instrument easy to handle for the user. - Page 9 English • Before using the Meter inspect the case. Do not use the Meter if it is damaged or the case (or part of the case) is removed. Look for cracks or missing plastics. Pay attention to the insulation around the connectors.
-
Page 10: Voltage Dc And Ac
5 0 0 Voltage measurement DC and AC (see fig 1) 1. Insert the red test lead into the HzVΩ terminal and the black test lead into the COM terminal. 2. Set the rotary switch to an appropriate measurement position in V--range for DC or V~ for AC. - Page 11 English 3. Set the rotary switch to an appropriate measurement position A range for DC or A~ for AC. When the value is unknown always start from the max range 20 A. 4. Break the current path to be tested. Connect the red test lead to the more positive side of the break and the black test lead to the more negative side of the break.
-
Page 12: Diodes Test
5 0 0 The measured value shows on the display. Note • The included point contact temperature probe can only be used up to 230 °C. • The temperature function is type K. For measuring higher tempera- tures other probes of type K can be used. Diode test (see fig 3) Use the diode test to check diodes, transistors, and other semicon-... -
Page 13: Transistor Test
English 1. Insert the multi socket into the mA and HzVΩ terminals. 2. Set the rotary switch to an appropriate measurement position in F range. 3. Connect the capacitor to be tested into the multi socket. The measured value shows on the display. Note •... - Page 14 5 0 0 Replace the fuse (see figure 5) 1. Disconnect the connection between the testing leads and the cir- cuit under test. 2. Turn the Meter to OFF position. 3. Remove the screw and separate the case bottom from the case top. 4.
Need help?
Do you have a question about the 500 and is the answer not in the manual?
Questions and answers