Table of Contents
Advertisement
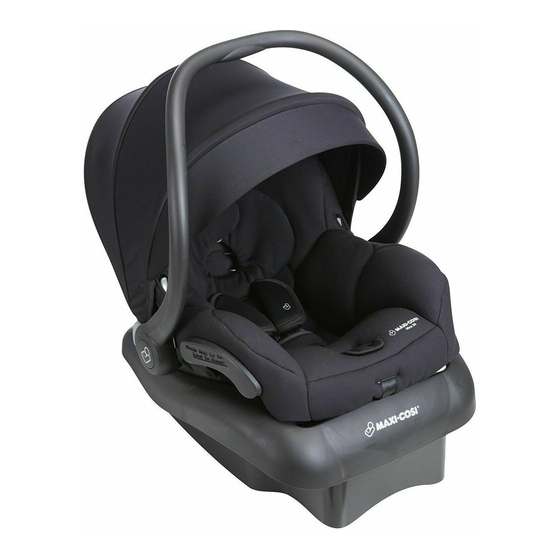
Mico 30
Infant Car Seat
For children 5-30 lb (2.3 -13.6 kg)
and 19-32 in. (48-81.3 cm)
KEEP INSTRUCTIONS FOR FUTURE USE.
Read all instructions before using this child restraint.
© 2016 Dorel Juvenile.
Failure to follow the warnings on the labels
and in the instruction manual can result in
4358-7131
serious injury or death to your child.
Advertisement
Table of Contents

Related Manuals for Maxi-Cosi Mico 30


Summary of Contents for Maxi-Cosi Mico 30
- Page 1 Mico 30 Infant Car Seat For children 5-30 lb (2.3 -13.6 kg) and 19-32 in. (48-81.3 cm) KEEP INSTRUCTIONS FOR FUTURE USE. Read all instructions before using this child restraint. © 2016 Dorel Juvenile. Failure to follow the warnings on the labels...
-
Page 2: Table Of Contents
Table of Contents Getting Started ..........1 Vehicle Information ........37 Parts of the Child Restraint ........2 Choosing Lower Anchor Belt or Vehicle Belts ...37 Knowing Your Vehicle Belts ........39 Prepare Child Restraint to Fit Your Child ....6 Aircraft Information ..........43 How Does Your Child Fit?.........8 Changing Position of Buckle ........9 Rear Facing with Base........ -
Page 3: Parts Of The Child Restraint
Your child’s height, weight, and age determine how your Parts of the Child Restraint child restraint should be placed in the vehicle. Front View Children up to 1 year of age must ride rear facing. The American Academy of Pediatrics recommends that children should remain rear facing until they are at least 2 years old. - Page 4 Back View Bottom View Carry Handle Base Release Adjustment Handle Button Base Adjustment Shell (child restraint) Handle Harness System Detail Infant Head Support Harness Covers Chest Clip Harness Strap Shoulder Harness Harness Buckle Tongue Slots Adjustment Strap Buckle Buckle Cover Harness Strap Buckle’s Metal Buckle Strap...
-
Page 5: Prepare Child Restraint To Fit Your Child
Top of Base Prepare Child Restraint to Fit Your Child Remove Child Restraint From Base From the back of the child restraint, slide the base release handle up and lift the restraint out of the base. Fully Loosen Harness Strap Push down on harness release lever (under flap Base Belt Path... -
Page 6: How Does Your Child Fit
How Does Your Child Fit? Release Chest Clip Press on chest clip release Use the guidelines below to determine if the buckle and button and pull apart. harness strap are in the right place for your child. Place harness strap out of REAR FACING ONLY the way. -
Page 7: Changing Position Of Buckle
Changing Position of Buckle Insert Buckle’s Metal Retainer into Slot Unbuckle Harness Closest to Your Child Press in on the red button. Buckle MUST face out. Pull buckle tongues out. From Bottom of Seat, Turn Seat Over Pull Metal Retainer Completely Through Locate buckle’s metal Pad and Shell... -
Page 8: Changing Position Of Shoulder Harness Strap
Changing Position of Shoulder Harness Strap Attach 1st Harness Strap Fully Loosen Harness Loops to Splitter Plate Strap Sewn ends of the harness Push down on harness strap loops MUST face release lever (under flap towards you. on front of seat pad) while DO NOT twist harness strap pulling out on harness strap or harness adjustment strap. -
Page 9: Harness System Adjustments For Smaller Infants
Fully Loosen Harness Harness System Adjustments for Strap Smaller Infants Push down on harness With Buckle in the release lever (under flap 1st Slot As Shown, Turn on front of seat pad) while the Seat Over pulling out on harness strap as shown. -
Page 10: Securing Child In Child Restraint
Securing Child in Child Restraint Attach 2nd Harness Strap Loops to Splitter Plate As Shown Place Child in Child Sewn ends of the harness Restraint strap loops MUST face The child’s bottom and towards you. back should be flat against DO NOT twist harness strap the child restraint. - Page 11 Attach Harness Tighten Harness Adjustment Strap Pull on harness adjustment Loop to Shell strap to tighten harness snugly. Pull up the pad at the front of the shell. The end of the harness adjustment strap has a loop. Position Chest Clip Slide one side of the loop onto one tab and the other side on the other tab.
-
Page 12: Removing And Installing Child Restraint To Base
Removing and Installing Child Restraint Adjusting the Base to Base To Adjust the Base To Remove Child Restraint from Base The base has multiple positions. From the back of the child restraint, slide the base From the back of the base, pull out on the base release handle up and lift the recline handle and lift or... -
Page 13: Carrier Use
Carrier Use WARNING: Read ALL instructions before using child restraint as a To Adjust Carry Handle carrier. Squeeze both adjustment NEVER use carrier unless child is properly secured. buttons on each side of the carry handle. Rotate up or Use only as a carrier by children weighing 5-30 down to desired location. -
Page 14: Removing Seat Pad For Cleaning
Removing Seat Pad for Cleaning Pull Back Panel of Pad Forward As You do not need to remove the harness system to Shown remove the pad. Pull buckle down through slot in pad. Release Chest Clip and Buckle Push harness strap behind the panel. -
Page 15: Removing Harness System
Removing Harness System Cleaning Pad and Accessories Machine wash separately with cold water on a gentle cycle. Fully Loosen Harness Make sure harness covers are closed so fastening strips are Strap not exposed. Do not use bleach. Tumble dry separately for 10-12 minutes on low heat. -
Page 16: Installing Harness System
Installing Harness System Unthread Buckle Do not unbuckle the buckle. Insert Buckle’s Metal Retainer into Slot Closest to Your Child Pull Harness Strap Out of Hip Harness Slots Pull Metal Retainer Completely Through Pad and Shell Turn Seat Over Locate buckle’s metal retainer on bottom of shell. - Page 17 Lift Up Front of Pad and Thread Harness Strap Weave Harness Strap In into Correct Shoulder and Out of Shell As Harness Slots For Shown Your Child Make sure shoulder harness slots in pad are correctly lined up with same shoulder harness slots in shell.
-
Page 18: Canopy Removal And Installation
Canopy Removal and Installation To Install Canopy The canopy hoop has an angle that will make the Cleaning Canopy canopy lean forward when installed. Make sure the Hand wash using warm sudsy water. Line dry. angle is correct when you thread the canopy hoop Canopy Parts into canopy. -
Page 19: Accessories
Accessories Child Restraint Use Infant Head Support Never take your child out of the child restraint When using the head support, while the vehicle is moving. make sure it does not cover your Never leave child unattended. infant’s face in any way. Placing your child in a hot child restraint may You may remove the insert for result in burns. -
Page 20: Installation In Vehicle
Installation in Vehicle If you are not sure where to place the child restraint in your vehicle, consult your vehicle owner’s manual, con- Check the vehicle belt or lower anchor belt before tact Dorel Juvenile Group Consumer Care Department, each use. Use only if the belt is tightened properly or visit your local Child Passenger Inspection Station. -
Page 21: Choosing Lower Anchor Belt Or Vehicle Belts
Choosing Lower Anchor Belt or Vehicle Belts Your vehicle’s features may be considerably different than those pictured here. Lower Anchor Bars Seat Bight The LATCH System Vehicle Belts The lower anchors of LATCH (Lower Anchors and Tethers for If lower anchors are not an option, you must use the CHildren) is a universal system for installing child restraints vehicle seat belt system to install the child restraint. -
Page 22: Knowing Your Vehicle Belts
Knowing Your Vehicle Belts Check the Retractor Retractors pull seat belts into Not all vehicle belts and seating positions will stored positions and lock the work with child restraints. Please follow the belt to hold passengers in following steps to understand how to lock a child place. - Page 23 If the latch plate does not Automatic Locking Retractor slide up and down the vehicle belt, it is a locking This retractor always locks. latch plate. It will automatically lock after slowly pulling the seat If the latch plate slides up belt out at least halfway and letting the belt go back and down the vehicle belt, into the retractor an inch or two.
-
Page 24: Aircraft Information
Aircraft Information Rear Facing with Base This restraint is certified for aircraft use. 5-30 lb (2.3-13.6 kg) Install the child restraint in a 19-32 in. (48-81.3 cm) window seat to avoid blocking the aisle. If the aircraft lap belt is too short, ask the flight attendant for a belt extender. -
Page 25: Lower Anchor Belt Installation With Base
Lower Anchor Belt Installation Place Base in Vehicle with Base Rear Facing Center the base between WARNINGS: Do not use the lower anchor belt the vehicle anchors in the along with the vehicle lap or lap/shoulder belt. chosen seating position. Check the lower anchor belt before each use. - Page 26 Check Belt Tightness WARNING: Failure to securely attach child restraint to base can result in serious injury or Hold the base at the belt death. path with your weakest hand. Check Level Line Push and pull from side to Repeat steps 3-7 if level side.
-
Page 27: Vehicle Belt Installation With Base
Route Vehicle Lap or Vehicle Belt Installation with Base Lap/Shoulder Belt WARNINGS: Do not use the lower anchor belt Through Base Belt Path along with the vehicle lap or lap/ Buckle vehicle belt. shoulder belt. Secure the lower anchor connectors to storage attachments as shown when installing with vehicle belts. -
Page 28: Rear Facing Without Base
With Child Secured Rear Facing without Base in Child Restraint, Attach Child Restraint to Base 5-30 lb (2.3-13.6 kg) Pull up on front two corners of child restraint by infant’s feet 19-32 in. (48-81.3 cm) to make sure it is locked to the base. -
Page 29: Vehicle Belt Installation Without Base
Vehicle Belt Installation without Tighten Belt Base Lay your forearm across child restraint at the belt path while With Child Secured in Child pulling shoulder belt or free end Restraint, Place Child Restraint of lap belt to tighten. in Vehicle Rear Facing Center the child restraint in the chosen seating position. -
Page 30: Using A Locking Clip
Determine Locking Clip Using a Locking Clip Location You will rarely need to use a locking clip except in some Grasp both vehicle belts older vehicles. together just behind the Built in child restraint locking systems have been required latch plate to mark the in vehicles since 1996, and many vehicles had these fea- position for locking clip. -
Page 31: Dorel Juvenile Group Information
Reinstalling the base or child straint, please contact our Consumer Care Department at: restraint. B. Changing to a different seating location. Recheck Level Line Website: maxi-cosi.com Mailing Address: The level line on shell Phone: 1-800-951-4113 Dorel Juvenile Group, Inc. MUST... -
Page 32: Registration And Safety Notices
Limitation of Damages: The warranty and remedies as set forth are exclusive and in lieu of all others, oral or written, AB123CDE MAXI-COSI CAR SEAT expressed or implied. In no event will DJG or the dealer sell- ing this product be liable to you for any damages, including If you don’t have the card or if your... -
Page 33: Replacement Parts Order Form
Group, Inc. Fill in the area on the next page to charge credit card. (Visa or MasterCard only). We do not accept cash, purchased from an authorized Maxi-Cosi retailer. The origin personal checks, or other credit cards. All outside of U.S. -
Page 34: Troubleshooting
Troubleshooting Replacement Parts List Locate a Child Safety Seat Inspection Station NOTE: If requested color is not available, similar color will for hands on training on how to use your child be substituted. Prices are subject to change. restraint: Part Cost Total Cost Buckle Assembly ...
Need help?
Do you have a question about the Mico 30 and is the answer not in the manual?
Questions and answers