Table of Contents
Advertisement
Quick Links
Advertisement
Table of Contents

Subscribe to Our Youtube Channel
Related Manuals for Niryo One


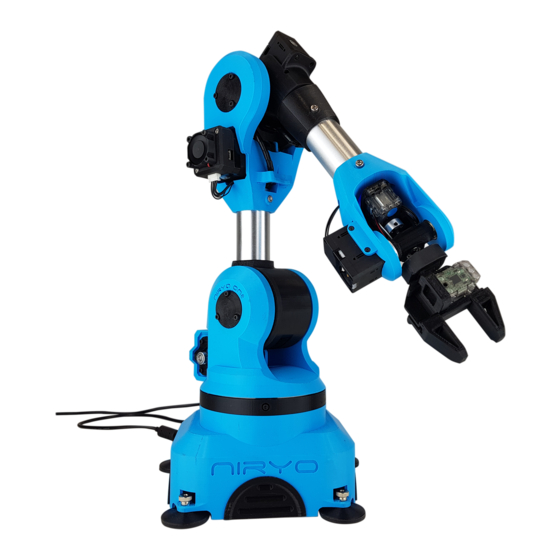
Summary of Contents for Niryo One
- Page 1 Niryo One User Manual 21/02/2019...
-
Page 2: Table Of Contents
Introduction ........................4 Purpose ..............................4 Safety precautions ..........................4 Software versions ........................... 4 How to update Niryo One software ....................4 Niryo One - Physical external interfaces ................. 6 Overview ..............................6 Panel connector ............................7 Get started with Niryo One ....................9 Niryo One Studio ............................ - Page 3 Sequences ............................... 39 4.7.1 Save a sequence .......................... 39 4.7.2 Save a sequence from Niryo Blocks ..................41 Use the top button to trigger a (set of) sequences ..............42 Use a joystick controller to move the robot ................44 4.9.1 Connect and enable the joystick controller ..............
-
Page 4: Introduction
When you receive a Niryo One, the versions of the 3 layers are all compatible between them. ⚠ If you update one of those software layer, you may have to update the other layers (in this case you’ll get a warning on Niryo One Studio when you connect to the robot). - Page 5 Update Niryo One Studio Update Raspberry Pi 3B image Update Niryo Steppers On the download page, you can also find all kinds of resources to download.
-
Page 6: Niryo One - Physical External Interfaces
Niryo One - Physical external interfaces 2.1 Overview There are many physical interfaces at the back of Niryo One. Here is an overview and some warnings about things you should be careful about. The functionalities related to each interface will be covered throughout this manual. -
Page 7: Panel Connector
9. GPIO panel * 2. Total 6 digital pins, actionable through software. You can use GPIO1 and GPIO2 pins as 5V digital pins (mode: input or output, state: high or low). 10. Power switch 11. Power adapter connector ⚠ Ensure your power adapter has a 12V output and is able to provide 6A. Lower output voltage and current may cause the robot to fail to move correctly. - Page 8 The XL-320 (Dxl-Data1) interface should only be used to connect XL-320 motors. The XL-430 (Dxl-Data2) interface should only be used to connect XL-430 motors. Do not make a short circuit between the GND and 12V pins of the switches (SW1 and ...
-
Page 9: Get Started With Niryo One
Niryo One Studio is the desktop application (Windows - MacOS - Linux) for controlling Niryo One. You can use it to setup the robot, change some settings, move the robot, program a sequence, etc. In this manual we’ll cover all the available functionalities. -
Page 10: Power On And Power Off The Robot
The left menu allows you to switch between all the different panels. From top to bottom: Robot command (arm, tool, digital I/Os) Niryo blocks Saved positions Saved sequences (+ sequence autorun) Settings (Wi-Fi, Raspberry Pi, software versions) ... -
Page 11: Power Off The Robot
LED is purple, you can release the button. Now, wait until the LED becomes red. Once the LED turns red, it means that you can safely switch off the robot and unplug the power adapter. 2. On Niryo One Studio -> “settings” panel, “Raspberry Pi settings” section: Click on the “Shutdown Niryo One” button and confirm. -
Page 12: Meaning Of The Led Color
(from top button or from Niryo One Studio), in this case it means that you can power off the robot and pull the power adapter. Blue The LED will be blue when the robot is fully started and in “hotspot mode”. If the robot doesn’t find any previously saved Wi-Fi network on boot, it will create its own Wi-Fi network, and its IP address will be 10.10.10.10 (static IP). -
Page 13: Top Button
Niryo One Studio), and is currently shutting down. Once the Raspberry Pi 3B is completely shut down, the LED will turn red, meaning that you can power off the robot and unplug the power adapter. Blue or green + blinking red... -
Page 14: Wi-Fi Connection
On the right of the toolbar, you can see the current connection state: “Connected to” + IP address, or “Not connected”. Once the robot is powered on, and fully started (LED blue or green), you can connect Niryo One Studio to it. -
Page 15: Connect To The Robot In "Hotspot Mode" (Led Is Blue)
First, connect your computer to this Wi-Fi network (password: “niryoone”). Note that this network doesn’t provide an Internet access. Once connected, you can press the “Connect to Niryo One” button. You should see a success message on the screen, and the toolbar should look like this: To disconnect from the robot, open the connection panel again and click on “disconnect”. - Page 16 Write “169.254.200.200” (static IP) and click on “Choose” to select the IP address. Note that selecting the IP address just means that this IP will be used by Niryo One Studio, it does not mean that you are connected to the robot.
-
Page 17: Connect The Robot To A Wi-Fi Network
3.5.3 Connect the robot to a Wi-Fi network One of the main drawback of the “hotspot mode” is that you can’t be connected to the robot and have Internet access at the same time. Also, if you have multiple robots, it means that you need to connect your computer to a different Wi-Fi network every time you want to switch between robots. -
Page 18: Connect To The Robot In "Connected Mode" (Green Led)
If the robot is successfully connected to the Wi-Fi network, the LED will turn green (connected mode). If the LED stays blue after 30 seconds, it means that the robot failed to connect to the Wi-Fi network (for example: bad ssid/password). The robot is still in “hotspot mode” and you can connect to it again by connecting your computer to the Wi-Fi network created by the robot. -
Page 19: Make The Robot Go Back To "Hotspot Mode
You can now click on the new displayed IP address (or name) to select it. Make sure that the IP address is correctly shown in the deep blue chip. (The IP address you see here is the one used for the entire application) Now, click on “Connect to Niryo One”... -
Page 20: Give A Custom Name To The Robot
After the robot has been successfully launched (LED green or blue), and before you can give a move command to the robot, you will need to calibrate it. Also, if a Niryo Stepper motor was disconnected and reconnected, a calibration will be required. -
Page 21: Auto-Calibration
Once connected, you will easily find out if a calibration is needed. In this case, you’ll see a “Calibration needed” blinking warning on the top right of Niryo One Studio. Click on the warning, or on the calibration icon on the left menu to go on the calibration panel. - Page 22 The offsets to apply will then be saved inside the robot. The manual calibration will use the stored values from the last auto-calibration. Place all the axis (only the axis with Niryo Stepper motors) so the small marks on the mechanical parts are (approximately) in front of each other.
-
Page 23: Require A New Calibration
The calibration will have the exact same precision as the last auto-calibration, so if you save a position inside the robot, the position will be the same every time you reboot the robot. This is much faster : a few seconds instead of about 30 seconds ... -
Page 24: Command The Robot
4.1 State section and learning mode For every panel you open in Niryo One Studio, you’ll always have the same right section. This section will give you some info about the robot and also contains the “learning mode” functionality that you’ll use quite often. -
Page 25: Move The Robot
The 3D view can help you see if a manual or auto calibration was not done correctly. If there is an offset between what you see on the screen and your robot (ex: the axis 1 is clearly not at the same position), then you should probably do the auto-calibration again. 2. - Page 26 You can’t execute a new command while another move command is running. If you want to start a new command, you’ll have to stop the previous one. You can also choose a position that you previously saved with the “Select saved position”...
-
Page 27: Use The Tools
4.3 Use the tools 4.3.1 Overview There are several tools that you can use with Niryo One. With each Niryo One, you get one Gripper 1. You may have also ordered some additional tools: 1. Gripper 1 (already included) -
Page 28: How To Plug The Tools
2. Gripper 2 3. Gripper 3 4. Electromagnet 5. Vacuum Pump 4.3.2 How to plug the tools? For all the tools in the “gripper” category, you just have to plug the tool to the robot “hand” and connect the 3-wires cable of the gripper. Gripper 1 Gripper 2 Gripper 3... - Page 29 ⚠ Make sure you connect the cable with the black wire in front of the black wire, and the red wire in front of the red wire. Electromagnet Plug the electromagnet to the robot “hand”, and connect the end of the cable to the “GPIO1” connector placed at the back of the robot.
-
Page 30: Select A Tool
You can only have one tool selected at the same time. At any time, you can unselect the current selected tool by clicking on the “X” icon near the... -
Page 31: Control A Tool
4.3.4 Control a tool Once the tool is successfully selected, you can send a command. Grippers The commands will be “open” and “close”. You can set a speed parameter. Electromagnet You first need to setup a digital I/O pin. If you are using the electromagnet cable provided with your tool (and connected on the “GPIO1”... - Page 32 In Niryo One Studio → “Digital I/O panel” section, you can control the 2 switches and all 6 digital pins. The switches are already set as OUTPUT mode and cannot be changed. You can activate the 12V output (HIGH) or deactivate it (LOW).
-
Page 33: Saved Positions
Make sure that you have read the warnings about the panel connector, and the safety precautions. 4.5 Saved positions 4.5.1 Overview Go to the “Saved positions” panel. You can see all the saved positions on the robot inside the select box. Now select one saved position. -
Page 34: Save A Position
When you select a position, you can see its properties. 1. Basically a saved position has a name and a list of joints in radian. The position and orientation of the TCP (Tool Center Point) are also saved but not displayed. 2. -
Page 35: Niryo Blocks
You can also reuse a position in the “Niryo Blocks” panel. 4.6 Niryo Blocks Open the “Niryo Blocks” panel. This panel allows you to create complete programs (sequences) for Niryo One, without having to know how to program. - Page 36 The interface is based on Blockly, a Google library, which is also used on the Scratch project made by the MIT. To create a program, use any of the standard and Niryo One specific blocks on the left. Drag them to the workspace and assemble them in the order you want.
- Page 37 Niryo Blocks along with the learning mode is the perfect combination to easily create programs in no time. Activate the learning mode, then for each position you want, add a position block corresponding to the current state, and that’s it. Check out this video tutorial how to use the “learning mode”...
- Page 38 11. The “Niryo One” functions in the block library cover almost all of the possible commands you can execute on the robot: Move commands Tool commands Calibration Digital I/Os (write/read) … The “Niryo Blocks” panel contains everything you need to create complete programs for...
-
Page 39: Sequences
4.7 Sequences 4.7.1 Save a sequence You can create sequences with Niryo Blocks. You can also save them and reuse them later. Go on the “Sequences” panel -> “Sequences” section. - Page 40 This will help you and other people know what the sequence is about. Blockly XML : the XML representation of the sequence (this is what Niryo Blocks is using to show the blocks on the workspace) Python Code: The generated Python code from the XML.
-
Page 41: Save A Sequence From Niryo Blocks
If you plan on using the Python API to control Niryo One, using Niryo Block first can be helpful to get started with no programming language. You can see what Python code is generated from your sequence, and when you feel more confident, you can switch to Python. -
Page 42: Use The Top Button To Trigger A (Set Of) Sequences
The Blockly XML field will be already filled with the current sequence you had on the Niryo Blocks workspace. You need to give a name and (optional) a description, and then click on the “Save” button to save the sequence on the robot. Note that if you don’t give a name, a default name will be given (“sequence_”... - Page 43 One Studio This is very useful when you use Niryo One in an exhibition event or for a demo. You’ll just need to power on the robot, wait for the LED to be blue or green, and then press the button to run a given set of sequences (that you previously programmed).
-
Page 44: Use A Joystick Controller To Move The Robot
(wireless controller won’t work because of a driver compatibility issue). 4.9.1 Connect and enable the joystick controller First, connect the USB cable of the joystick controller to one of the USB cable available at the back of the robot. -
Page 45: Use The Joystick Controller
Once you’re done with the joystick control, uncheck this box to disable it. Direct control and joystick control are not compatible. You can only enable the joystick control if the robot is not moving. Also while the joystick control is enabled, you can’t move the robot with the “Move Joints”... -
Page 46: Settings
Go on “Settings” panel → “Raspberry Pi settings”. 5.1.1 ROS logs (advanced users) The software inside the Raspberry Pi 3B (Niryo One ROS stack) is producing logs, which are useful when developing and debugging. Those logs are also stored. However, after some time they can take a lot of space, and they will indefinitely need more space. -
Page 47: Shutdown The Robot
and stored, unless you are developing or debugging a specific point (in this case you might want to switch the option to “NO” and then turn it back to “YES” when you’re done) ⚠ If you never purge ROS logs (on boot or manually), the micro SD card will eventually become full and might not work as expected. -
Page 48: Hardware Status
2. Niryo Raspberry Pi 3B image: The image that is flashed inside the Raspberry Pi 3B micro SD card. 3. ROS: The current version of the Niryo One ROS stack running on the Niryo Raspberry Pi 3B image. 4. Niryo Steppers: A list of the firmware versions running on each Niryo Stepper attached to Niryo One. -
Page 49: Motor Connection Problem
5.3.2 Motor connection problem If you see a blinking alert saying “Motor connection problem” on the top right of Niryo One Studio, it means that one or multiple motors are not connected/recognized. -
Page 50: Debug And Logs
5.4 Debug and logs 5.4.1 Overview Go on the “Debug” tab. Here you’ll find 3 sections: Niryo One Studio logs: the logs produced by the desktop application. Robot logs (ROS): the logs produced internally by the robot. Motor debug options: allows you to debug motors one by one. -
Page 51: Debug Motors One By One
For example, you noticed that the robot is not able to communicate with Dynamixel motors. What you can do is disable all motors, try to launch the robot, and then enable one motor at a time. Click on “Change config and reboot” to apply the new configuration. The robot will then reboot, don’t power it off. -
Page 52: Going Further
Start as a maker with Niryo One Start as a developer with Niryo One You can also find on the NiryoRobotics github account: Niryo One STL files + BOM + Electronics overview Niryo One ROS Stack Niryo Stepper firmware ...
Need help?
Do you have a question about the One and is the answer not in the manual?
Questions and answers