Table of Contents
Advertisement
Available languages
Available languages
Quick Links
Download this manual
See also:
Service Manual
Advertisement
Table of Contents

Related Manuals for Sony SPP-ID970


Summary of Contents for Sony SPP-ID970
-
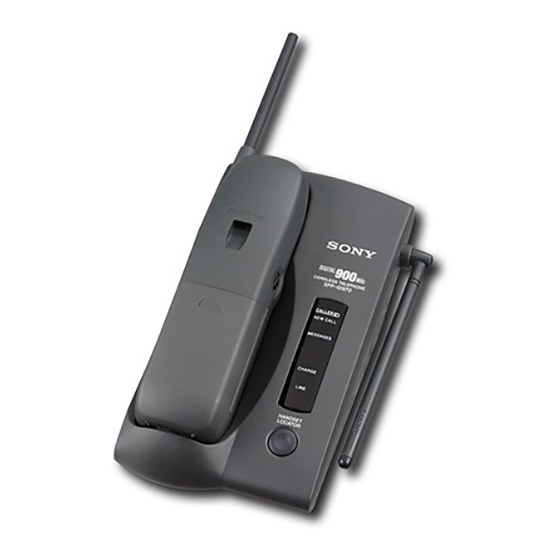
Page 1: Cordless Telephone
Cordless Telephone Operating Instructions Manual de instrucciones SPP-ID970 ©1999 by Sony Corporation 3-867-313-11 (1) - Page 2 The model and the serial numbers are located at the bottom of the unit. Record the serial number in the space provided below. Refer to these numbers whenever you call upon your Sony dealer regarding this product. Model No. SPP-ID970 Serial No. ________________...
-
Page 3: Normal Operation
To reduce the risk of fire or injury to persons by battery, read and follow these instructions. 1. Use only the following type and size battery pack: Sony BP-T23. 2. Do not dispose of the battery pack in a fire. The cell may explode. Check with local codes for possible special disposal instructions. - Page 4 – Consult the dealer or an experienced radio/ TV technician for help. Note on Warranty Be sure to save the receipt and attach it to your warranty card when having your equipment repaired at an authorized Sony service station.
-
Page 5: Table Of Contents
Table of contents Getting Started 6 Read this first 7 Step 1: Checking the package contents 8 Step 2: Setting up the base unit 11 Step 3: Preparing the battery pack 13 Step 4: Entering the area code 16 Identifying the parts Basics 18 Making calls Redialing... -
Page 6: Getting Started
Getting Started Read this first Before you use your phone, you must first set it up. Here’s a quick way to set up your phone: Steps 1, 2, 3 and 4. Step 1 Handset Getting Started (page 7) First, unpack the phone and the supplied accessories. -
Page 7: Step 1: Checking The Package Contents
Step 1 Checking the package contents Make sure you have received the following items in the package. If anything is missing, contact your local Sony dealer. AC power adaptor (AC-T127) Telephone line cords (2) Base unit Wall bracket for base unit... -
Page 8: Step 2: Setting Up The Base Unit
Step 2 Setting up the base unit Do the following steps: • Choose the best location • Connect the base unit • Choose the dialing mode Choose the best location Where you place the base unit affects the reception quality of the handset. - Page 9 Connect the base unit If you want to hang the base unit on the wall, see page 42. Hook the cord. To an AC outlet AC power adaptor (supplied AC-T127) Telephone line cord (supplied) To the telephone outlet To DC IN 9V To LINE Connect the telephone line cord to the LINE jack and to a...
-
Page 10: Choose The Dialing Mode
Step 2: Setting up the base unit (continued) Notes • Use only the supplied AC-T127 AC power adaptor. Do not use any other AC power adaptor. • Connect the AC power adaptor to a continuous power supply. • Place the base unit close to the AC outlet so that you can unplug the AC power adaptor easily. -
Page 11: Step 3: Preparing The Battery Pack
Step 3 Preparing the battery pack Charge the battery pack for more than 12 hours before you start using your phone. CHARGE lamp Slide open the battery compartment lid of the handset. Insert the battery pack (with contacts facing down) into the BP-T23 battery compartment. - Page 12 If the battery lasts only a few minutes even after 12 hours of charging, the usable life of the battery has expired and needs replacement. Contact your local Sony authorized dealer or service center, and ask for a Sony BP-T23 rechargeable battery pack.
-
Page 13: Step 4: Entering The Area Code
Step 4 Entering the area code When you use this phone for the first time, or move to an area that has a different area code, you must enter your home area code. Otherwise, you cannot use some functions of this phone and the Caller ID functions. This is also necessary because the phone must be able to select an area code to properly dial call from the Caller ID list. - Page 14 Step 4: Entering the area code (continued) Notes • If the home area code is already entered, it appears on the display in step 4. To enter a different home area code, see “To change the home area code” below. •...
- Page 15 Press Jog Dial. ”ENTER AREA CODE“ appears on the display. Enter three digits of the local area code using the dialing keys. Press (PGM). You will hear a long confirmation beep. Notes • If the local area code is already entered, it appears on the display in step 5. To enter a different local area code, see “To change the local area code”...
-
Page 16: Identifying The Parts
Identifying the parts Refer to the pages indicated in parentheses for details. Base Unit 1 Antenna (p. 9, 42) 2 NEW CALL lamp (p. 32) Flashes when there is a “NEW” data in the Caller ID list. 3 MESSAGES lamp (p. 40) Flashes when you have messages. - Page 17 Handset 1 Antenna 2 Speaker 3 Jog dial (p. 13, 23, 32) 4 TALK button (p. 18, 21) Lets you make or receive a call. 5 Dialing keys (p. 18) 6 Battery compartment (p. 11) TONE button (p. 18) Allows you to switch temporarily to tone dialing.
-
Page 18: Basics
Basics Making calls (*TONE) (REDIAL) Additional tasks Adjust the handset volume Switch to tone dialing temporarily Basics Pick up the handset from the base unit. Press (TALK) and wait until “TALK” appears on the display. The display also shows the operation duration in hours, minutes and seconds. - Page 19 Notes • When you increase the sound volume, in some cases the back ground noise may be increased as well. You should adjust the volume accordingly. • If your conversation is muted and “CHANNEL SEARCHING” appears on the display, move closer to the base unit; otherwise, the call will be disconnected after one minute.
-
Page 20: Redialing
Making calls (continued) Redialing Press (TALK) and wait until “TALK” appears on the display. The LINE lamp on the base unit lights up. Press (REDIAL) to redial the last number dialed. Note If the number exceeds 32 digits or if it is erased, five short error beeps will alert you that the number cannot be redialed. -
Page 21: Receiving Calls
Receiving calls (CALL WAITING/FLASH) VOL switch Additional tasks Do this Adjust the handset volume Set the VOL switch to H (high), M (middle) or L (low). Press (CALL WAITING/ FLASH). Switch to another call Press (CALL WAITING/ FLASH) again to return to (“call waiting”... - Page 22 Receiving calls (continued) Note If another call comes in by “call waiting” service while conversing with an outside caller, you will hear two short beeps. To inform you of an incoming call, the display shows “** RINGING **” when ringing. If you have subscribed to the Caller ID service;...
-
Page 23: Telephone Features
“space”, turn Jog Dial up to move the cursor to the right. Example: to enter “SONY”, press (7) four times (S), press (6) three times (O), turn Jog Dial up to move the cursor, press (6) twice (N), and press (9) three times (Y). -
Page 24: Two Lines
To store a number to be dialed via Private Branch Exchange (PBX) Before entering a phone number in step 5 above, do as follows: Enter the outside line access digit (e.g., 9). Press (PAUSE). Telephone Features (PGM) in steps 4 and 6. SONY 1234567 1234567890123456... -
Page 25: Changing A Stored Name And/Or Phone Number
When the phone number of 17 digits or more has been entered, “–” is displayed next to 15th digit and then the all digits are displayed in two lines after about two seconds. SONY 1234567 DIAL EDIT ERASE 1234567... -
Page 26: Erasing A Memory Location
Turn Jog Dial up to make “YES” flash, then press Jog Dial. You hear a long confirmation beep and the memory location is erased. Making calls from the Phone Directory Turn Press Telephone Features SONY 1234567 DIAL EDIT ERASE 1234567 ERASE NO YES 1234567 Press Jog Dial. - Page 27 • Alphabetical order: ABC...XYZ y symbols y * y # y 0 - 9 • Initial character: To search for “SONY” for example, press then turn Jog Dial to search through the names starting with P, Q, R, S or 7.
-
Page 28: Setting The Ringer Type
Setting the ringer type You can select a ringer type of the handset from four type. Turn Press Telephone Features Press (PGM). Turn Jog Dial up to make “RINGER” flash. DIRECTORY AREA RINGER Press Jog Dial. The current ringer type appears. RINGER 1 SELECTED Press one of the dialing keys ((1) to... -
Page 29: Turning Off The Ringer Of The Handset
Turning off the ringer of the handset Perform steps 1 to 3 on page 28. Press (0). You will hear a confirmation beep. Press (OFF). When “RINGER” is set to “RINGER OFF” The handset won’t ring. You can still make calls, and also receive calls if another telephone connected to the same line rings to inform you on incoming calls. -
Page 30: Paging
Paging You can page the handset from the base unit. Note that you cannot page if the handset is in use. You can page the handset even when “RINGER” is set to “RINGER OFF”. Telephone Features To Page Press (HANDSET LOCATOR). The handset rings for about one minute. -
Page 31: Caller Id Features
Caller ID Features Understanding the Caller ID service Caller ID allows the caller’s phone number to be shown on the display before the call is answered. In order to use this feature, you must first subscribe to the Caller ID service. The name of this service may vary depending on your telephone company. -
Page 32: Looking At The Caller Id List
Looking at the Caller ID list The phone stores the data of the last 20 calls received including “OUT OF AREA” and “PRIVATE” calls. It keeps track of all calls received; even if they were not answered. Viewing the Caller ID list You can look through the Caller ID list to check the phone number and/or name of the calls received. -
Page 33: Erasing Data From The Caller Id List
About the “*” mark SMITH JOHN 1-201-123-4567 Erasing data from the Caller ID list Old data will be erased automatically when a 21st call comes in, but you can also manually erase unnecessary data one by one or erase the entire list. - Page 34 Looking at the Caller ID list (continued) To erase the entire list at once Display any Caller ID data. Press Jog Dial. Turn Jog Dial up to make “ERASE” flash and press Jog Dial. Turn Jog Dial up to make “ALL” flash, then press Jog Dial.
-
Page 35: Using The Caller Id List
Using the Caller ID list By using the Caller ID list, you can call back a phone number from the Caller ID list easily, or store numbers from the Caller ID list into the Phone Directory. Calling back a number from the Caller ID list Turn Press Notes... -
Page 36: Storing A Number Of The Caller Id List Into The Phone Directory
Using the Caller ID list (continued) Storing a number of the Caller ID list into the Phone Directory Display the name and phone number you want to store from the Caller ID list (see page 32). Confirm the number and press Jog Dial. Turn Jog Dial up to make “PGM”... -
Page 37: To Change The Number Of Digits Of The Phone Number
To change the number of digits of the phone number If the number of digits of the phone number in the Caller ID list is different from the actual phone number, you need to adjust the number of digits of the phone number to call back or store into the Phone Directory. - Page 38 Using the Caller ID list (continued) When the local area code matches SMITH JOHN 201-123-4567 SMITH JOHN 1-201-123-4567 Continue the operation to call or store the phone number with the correct number of digits (pages 35 and 36). Notes • You need to adjust the number of digits each time you call back from the Caller ID list as the changes to the Caller ID data is not stored in memory.
-
Page 39: Using "Caller Id With Call Waiting" Service
Using “Caller ID with call waiting” service This telephone is compatible with the “Caller ID with call waiting” service. Make sure that your telephone company offers this service. Like the basic Caller ID service, you need to subscribe to “Caller ID with call waiting”... -
Page 40: Using Visual Message Waiting Service
Using visual message waiting service If you subscribe to your telephone company’s message service which includes this feature, the display will show that you have messages waiting to be retrieved. Note You cannot use this feature, if you have not subscribed to your telephone company’s message service. - Page 41 If you move or change your telephone company Message waiting signals are sent in one of two ways: FSK signaling or “stutter” signaling (Your telephone company can provide you with more information about your service). The first time this phone receives a voice mail message, it will set itself to the FSK service and will lock out the stutter service if your telephone company is in FSK service.
-
Page 42: Additional Information
Additional Information Mounting the base unit on a wall Hang-up tab AC power adaptor cord Wall bracket To remove the wall bracket, press the lower tabs. Additional Information Raise the hang-up tab. Plug the telephone line cord to the LINE jack and the AC power adaptor to the DC IN 9V jack, and hook the cords. -
Page 43: Notes On Power Sources
• If the charge terminals of the base unit and handset are soiled, wipe them with a soft cloth. If you have any questions or problems concerning your phone, please consult your nearest Sony dealer. For the customers in the USA RECYCLING NICKEL-CADMIUM BATTERIES Nickel-Cadmium batteries are recyclable. -
Page 44: Troubleshooting
Troubleshooting If you’ve experienced any of the following difficulties while using your phone, use this troubleshooting guide to help you remedy the problem. Should any problem persist, consult your nearest Sony dealer. Symptom You hear five short error beeps when you press (TALK). - Page 45 Symptom You hear five short error beeps and cannot store a number in the Phone Directory. Phone Directory dialing is incorrect. The caller’s name and/or phone number does not appear on the display. The caller’s name and/or phone number does not appear on the display during call waiting.
-
Page 46: Specifications
Specifications General Frequency band 902 - 928 MHz Operating channel 30 channels Dial signal Tone, 10 PPS (pulse) selectable Supplied accessories See page 7. Handset Power source Rechargeable battery pack BP-T23 Battery life Standby: Approx. 7 days Talk: Approx. 6 hours Dimensions Approx. -
Page 47: Index
Index Adjusting volume handset volume 18, 21 Area code 13 Battery pack charging 11 duration 12 Call waiting service 21, 39 Caller ID 31 Caller ID list 32 calling back 35 memory match function 31 storing in Phone Directory 36 Caller ID with call waiting 39 Connection 9... - Page 48 Anote el número de serie en el espacio que se proporciona a continuación. Refiérase a estos números cada vez que se comunique con su distribuidor Sony con respecto al producto. Modelo N SPP-ID970 Serie N...
- Page 49 1. Sólo debe utilizar un paquete de pilas del siguiente tipo y tamaño: Sony BP-T23. 2. No deseche el paquete de pilas en una hoguera ya que la pila puede explotar.
- Page 50 7. Si experimenta algún problema con este equipo (SPP-ID970), con respecto a la reparación o a la información sobre la garantía, póngase en contacto con Sony Direct Response Center: Tel 1-800-222-7669 (Inglés solamente). Si el equipo causa problemas en la línea, la compañía telefónica puede solicitarle que desconecte el equipo hasta que se resuelva el problema.
- Page 51 Índice Preparativos Lea esto en primer lugar Paso 1: Comprobación del contenido del paquete Paso 2: Instalación de la unidad base 11 Paso 3: Preparación de la batería 13 Paso 4: Introducción del código de área 16 Identificación de las partes Operaciones básicas 18 Realización de llamadas Repetición de la marcación...
-
Page 52: Lea Esto En Primer Lugar
Preparativos Lea esto en primer lugar Antes de utilizar su teléfono, tendrá que instalarlo. A continuación se indica la forma rápida de hacerlo: Pasos 1, 2, 3, y 4. Paso 1 Unidad base Microteléfono Preparativos (página 7) En primer lugar, desembale el teléfono y los accesorios suministrados. - Page 53 Paso 1 Comprobación del contenido del paquete Compruebe si con el paquete ha recibido los elementos siguientes. Si falta algo, póngase en contacto con su proveedor Sony. Adaptador de alimentación de CA (AC-T127) Cables de línea telefónica (2) Unidad base...
- Page 54 Paso 2 Instalación de la unidad base Realice los pasos siguientes: • Elección del mejor lugar • Conexión de la unidad base • Elección del modo de marcación Elección del mejor lugar La situación de la unidad base afectará la calidad de la recepción del microteléfono.
- Page 55 Conexión de la unidad base Si desea colgar la unidad base de una pared, consulte la página 42. Enganche el cable. A un tomacorriente de CA Adaptador de alimentación de CA (AC-T127 suministrado) Cable de línea telefónica (suministrado) A la toma telefónica A DC IN 9V A LINE...
- Page 56 Paso 2: Instalación de la unidad base (continúa) Notas • Utilice solamente el adaptador de alimentación de CA AC-T127 suministrado. No utilice ningún otro adaptador de alimentación de CA. • Conecte el adaptador de alimentación de CA a un tomacorriente que suministre continuamente alimentación.
- Page 57 Paso 3 Preparación de la batería Antes de utilizar su teléfono, cargue la batería durante más de 12 horas. Lámpara CHARGE Deslice y abra la tapa del compartimiento de la batería del microteléfono. Inserte la batería (con los contactos hacia abajo) en el compartimiento para la misma.
- Page 58 Si la batería dura solamente algunos minutos incluso después de 12 horas de carga, la duración útil de la misma habrá expirado, y habrá que reemplazarla. Póngase en contacto con su proveedor o con un centro de reparaciones autorizado por Sony, y solicite una nueva batería BP-T23 Sony. Nota La duración de la batería puede variar dependiendo de las condiciones de...
- Page 59 Paso 4 Introducción del código de área Antes de utilizar este teléfono por primera vez, o cuando se traslade a un lugar con código de área diferente, tendrá que introducir el código de su área. De lo contrario no podría utilizar ciertas funciones de este teléfono ni las de identificación de demandantes.
- Page 60 Paso 4 Introducción del código de área (continúa) Notas • Si el código de área inicial ya está introducido, aparecerá en el visualizador en el paso 4. Para introducir un código de área diferente, consulte “Para cambiar el código de área inicial” indicado a continuación. •...
- Page 61 Presione el mando de lanzadera. En el visualizador aparecerá “ENTER AREA CODE”. Introduzca los tres dígitos del código de área local utilizando las teclas de marcación. Presione (PGM). Usted oirá un pitido largo de confirmación. Notas • Si el código de parea local ya está introducido, aparecerá en el visualizador en el paso 5.
- Page 62 Identificación de las partes Con respecto a los detalles, consulte las páginas indicadas entre paréntesis. Unidad base 1 Antena (p. 9, 42) 2 Lámpara de nueva llamada (NEW CALL) (p. 32) Parpadeará cuando haya datos “NEW” (nuevos) en la lista de identificación de demandantes.
- Page 63 Microteléfono 1 Antena 2 Altavoz 3 Mando de lanzadera (p. 13, 23, 32) 4 Botón de conversación (TALK) (p. 18, 21) Presiónelo para realizar o recibir una llamada. 5 Teclas de marcación (p. 18) 6 Compartimiento de la batería (p. 11) 7 Botón de tono ( TONE) (p.
- Page 64 Operaciones básicas Realización de llamadas (*TONE) (REDIAL) Tareas adicionales Para Ajustar el volumen del microteléfono Cambiar temporalmente a marcación por tonos Operaciones básicas Tome el microteléfono de la unidad base. Presione (TALK) y espere hasta que en el visualizador aparezca “TALK”.
- Page 65 Notas • Si aumenta el volumen del sonido, en algunos casos es posible que aumente también el ruido de fondo. Ajuste adecuadamente el volumen. • Si la conversación se silencia y en el visualizador aparece “CHANNEL SEARCHING”, acérquese a la unidad base. De lo contrario, la llamada se desconectaría después de 1 minuto.
- Page 66 Realización de llamadas (continúa) Repetición de la marcación Presione (TALK) y espere hasta que en el visualizador aparezca “TALK”. La lámpara LINE de la unidad base se encenderá. Para repetir la marcación del último número marcado, presione (REDIAL). Nota Si el número es mayor de 32 dígitos, o si se ha borrado, cinco pitidos de error le indicarán que el número no puede volver a marcarse.
- Page 67 Recepción de llamadas (CALL WAITING/FLASH) Selector VOL Tareas adicionales Para Ajustar el volumen del microteléfono Cambiar a otra llamada (servicio de “llamada en espera”*) Activar/desactivar el generador de llamada del micorteléfono * Usted tendrá que subscribirse a este servicio poniéndose en contacto con la compañía telefónica.
- Page 68 Recepción de llamadas (continúa) Nota Si entra otra llamada mediante el servicio de “llamada en espera” cuando esté conversando con alguien del exterior, oirá dos pitidos cortos. Sugerencia Para notificarle la entrada de una llamada, el visualizador mostrará “** RINGING **” cuando el teléfono esté sonando. Si se ha abonado al servicio de identificación de demandantes •...
- Page 69 T t U t V t 8 W t X t Y t Z t 9 & t ’ t , t – t . t # Ejemplo: para almacenar “SONY” “123-4567”. Presione (PGM). (Cerciórese de no presionar (TALK).) DIRECTORY AREA RINGER Si no está...
- Page 70 Antes de introducir el número de teléfono en el paso 5 anterior, realice lo siguiente: Introduzca el dígito de acceso a la línea exterior (p. ej., 9). Presione (PAUSE). Funciones del teléfono número, oirá cinco pitidos cortos de error SONY 1234567 1234567890123456...
- Page 71 Sugerencia Si introduce un número de teléfono de 17 o más dígitos, después del 15.º se visualizará “–”, y los demás se visualizarán en dos líneas después de aproximadamente dos segundos. SONY 1234567 DIAL EDIT ERASE 1234567 1234567...
- Page 72 Usted oirá un pitido largo de confirmación, y la ubicación de la memoria se borrará. Realización de llamadas desde el directorio telefónico Gire Presione Funciones del teléfono SONY 1234567 DIAL EDIT ERASE 1234567 ERASE NO YES 1234567 Presione el mando de lanzadera.
- Page 73 • Orden alfabético: ABC...XYZ y símbolos y * y # y 0 - 9 • Carácter inicial: Para buscar “SONY” por ejemplo, presione después gire el mando de lanzadera para buscar a través de los nombres que comiencen por P, Q, R, S, o 7.
- Page 74 Ajuste del tipo de generador de llamada Usted podrá seleccionar entre cuatro tipos de generador de llamada del microteléfono. Gire Presione Funciones del teléfono Presione (PGM). Gire el mando de lanzadera para hacer que parpadee “RINGER”. DIRECTORY AREA RINGER Presione el mando de lanzadera. Aparecerá...
- Page 75 Desactivación del generador de llamada del microteléfono Realice los pasos 1 a 3 de la página 28. Presione (0). Usted oirá un pitido de confirmación. Presione (OFF). Cuando haya ajustado “RINGER” a “RINGER OFF” El microteléfono no sonará. Usted podrá seguir realizando llamadas, y recibirlas si otro teléfono conectado a la misma línea suena para notificarle la entrada de llamadas.
- Page 76 Buscapersonas Usted podrá llamar al microteléfono desde la unidad base. Tenga en cuenta que no podrá llamar si alguien está utilizando el microteléfono. Sugerencia Usted podrá llamar al microteléfono incluso aunque “RINGER” esté ajustado a “RINGER OFF”. Funciones del teléfono Para utilizar el servicio de buscapersonas Presione (HANDSET LOCATOR).
- Page 77 Funciones de identificación de demandantes Acerca del servicio de identificación de demandantes El servicio de identificación de demandantes permitirá que el número de teléfono de quien llame aparezca en el visualizador antes de contestar a la llamada. Para utilizar esta función tendrá que abonarse primero a este servicio.
- Page 78 Comprobación de la lista de identificadores de llamada El teléfono puede almacenar hasta 20 llamadas recibidas, incluyendo las de “OUT OF AREA” y “PRIVATAE”. Almacenará todas las llamadas recibidas, incluso aunque no haya contestado a ellas. Contemplación de la lista de identificación de demandantes Usted podrá...
- Page 79 Acerca de la marca “*” SMITH JOHN 1-201-123-4567 Borrado de datos de la lista de identificación de demandantes Los datos antiguos se borrarán automáticamente cuando entre la 21.ª llamada, pero usted también podrá borrar datos innecesarios, uno tras otro, o toda la lista. Para borrar números de teléfono, uno tras otro Haga que se visualice el número de teléfono que desee borrar de la lista de identificación de...
- Page 80 Comprobación de la lista de identificadores de llamada (continúa) Para borrar todos los datos de la lista a la vez Haga que se visualicen los datos de identificación de demandantes. Presione el mando de lanzadera. Gire el mando de lanzadera hacia arriba para hacer que parpadee “ERASE”, y después presiónelo.
- Page 81 Utilización de la lista de identificación de demandantes Utilizando la lista de identificación de demandantes podrá devolver fácilmente la llamada a un número de teléfono de la lista de identificación de demandantes, o almacenar números de dicha lista en el directorio telefónico. Llamada a un número desde la lista de identificación de demandantes Gire...
- Page 82 Utilización de la lista de identificación de demandantes (continúa) Almacenamiento de un número de la lista de identificación de demandantes en el directorio telefónico Haga que se visualice el nombre y el número de teléfono que desee almacenar de la lista de identificación de demandantes (consulte la página 32).
- Page 83 Para cambiar el número de dígitos del número de teléfono Si el número de dígitos del número de teléfono de la lista de identificación de demandantes es diferente al número de teléfono real, tendrá que ajustar dicho número de dígitos para poder llamar o almacenarlo en el directorio telefónico.
- Page 84 Utilización de la lista de identificación de demandantes (continúa) Cuando el código de área local coincida SMITH JOHN 201-123-4567 SMITH JOHN 1-201-123-4567 Continúe la operación para llamar al número o para almacenarlo con el número correcto de dígitos (páginas 35 y 36).
-
Page 85: Llamada En Espera
Utilización del servicio de “Identificación de demandantes con llamada en espera” Este teléfono es compatible con el servicio de “Identificación de demandantes con llamada en espera”. Compruebe si su compañía telefónica ofrece este servicio. Al igual que el servicio de identificación de demandantes, usted tendrá que abonarse a “Identificación de demandantes con llamada en espera”... - Page 86 Utilización del servicio de espera de mensajes visuales Si usted se abona al servicio de mensajes de su compañía telefónica que incluya esta función, el visualizador le indicará que usted tiene mensajes en espera de que los escuche. Nota Usted no podrá utilizar esta función si no está abonado al servicio de mensajes de su compañía telefónica.
- Page 87 Si se traslada o cambia de compañía telefónica Las señales de mensaje en espera se transmitirán de dos formas: Señalización FSK o señalización de “tartamudeo” (su compañía telefónica podrá proporcionarle más información sobre este servicio). La primera vez que este teléfono reciba un mensaje de correo vocal, se ajustará...
- Page 88 Información adicional Montaje de la unidad base en una pared Lengüeta de colgado Cable del adaptador de alimentación de CA Soporte mural Sugerencia Para retirar el soporte mural, presione las lengüetas inferiores. Información adicional Levante la lengüeta de colgado. Enchufe el cable de la línea telefónica en la toma LINE y el adaptador de alimentación en la toma DC IN 9V, y enganche los...
- Page 89 • Si los terminales de carga de la unidad base y el auricular están sucios, límpielos con un paño suave. En caso de duda o problemas con el teléfono, consulte a su proveedor Sony más próximo. Para clientes en EE.UU. RECICLAJE DE PILAS DE NÍQUEL- CADMIO Las pilas de níquel-cadmio...
- Page 90 Solución de problemas Si experimenta cualquiera de las dificultades siguientes cuando utilice el teléfono, use esta guía para poder solucionar el problema. Si el problema persiste, póngase en contacto con su proveedor Sony. Síntoma Se oyen cinco pitidos cortos de error al presionar (TALK).
- Page 91 Síntoma Se oyen cinco pitidos cortos de error y no es posible almacenar un número en el directorio telefónico. La marcación con el directorio es errónea. El nombre y/o el número de teléfono del demandante no parece en el visualizador. El nombre y/o el número de teléfono del demandante no aparecen en el visualizador...
- Page 92 Especificaciones Generales Banda de frecuencias 902 - 928 MHz Canales de operación 30 canales Señal de marcación Tonos y pulsos (10 pps), seleccionable Accesorios suministrados Consulte la página 7. Microteléfono Fuente de alimentación Batería BP-T23 Duración de la batería Espera: Aprox.
- Page 93 Índice alfabético Ajuste del volumen volumen del microteléfono 18, 21 Almacenamiento de datos en el directorio telefónico Batería carga 11 duración 12 Borrado código de área local 15 directorio telefónico 26 datos de identificación de demandantes 33 último número marcado Buscapersonas 30 Código de área 13 Código de área inicial 13...
- Page 96 Sony Corporation Printed in China...