Advertisement
Quick Links
Advertisement

Related Manuals for Alfano AStrO LVF A-165


Summary of Contents for Alfano AStrO LVF A-165
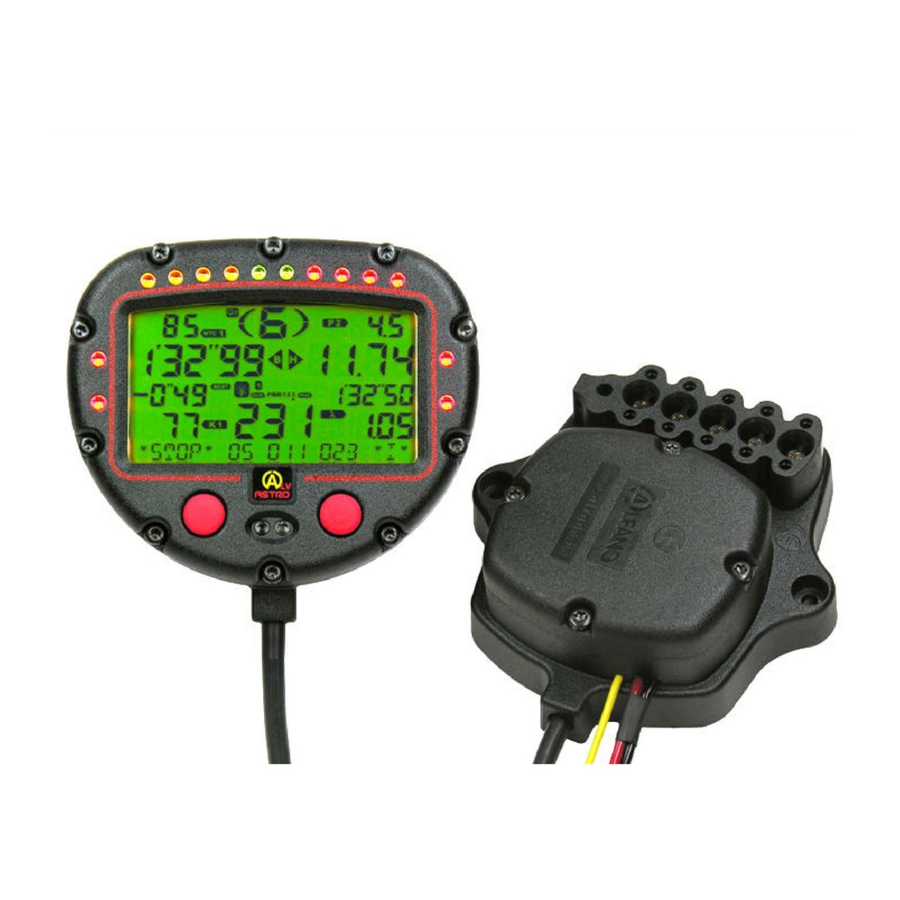
- Page 1 AStrO LVF A-165 User Manual (EN)
- Page 2 AStrO LVF A-165 Copyright 2005 Alfano, S.A. Tous droits réservés.
- Page 3 95% of the memory’s capacity. NOTE: this mode is necessary for an in-depth analysis of the data with the software VISUALDATA. Afterwards, ALFANO automatically proceeds to mode 2. 2) Mode 2 (ENDURANCE) the system halts the registration every 0.1 seconds to leave space for the registration of the times with maximums and minimums (RPM, speed, temperatures, pressures) for every lap and for more than 24 hours.
- Page 4 START mode and access the menu « Config System ». Note: a power cut while the ALFANO is in the START mode risks provoking a deterioration of the registered information.
-
Page 5: Data Menus
After 10 seconds or after having >> Return to STOP. pressed the button (EXIT): This screen will show you that: You have another 69 minutes of registration time in the PRINICIPAL mode. (PRINCIPAL mode, see page 3). Copyright 2005 Alfano, S.A. All rights reserved. - Page 6 NOTE: the 2 counters « 1 and 2 » are reset to zero only during the erasing of the data by the menu « 0.6 RESET ». This screen will show you: (16) Number of exits (013) Number of laps of the last exit (129) Number of laps (total) Copyright 2005 Alfano, S.A. Tous droits réservés.
-
Page 7: System Off
To analyze the lap by 0.1 second with the Press the right button 1 sec. on (VIEW): >> left and right buttons. Press the left button 1 sec. on (EXIT): >> To exit. Copyright 2005 Alfano, S.A. All rights reserved. - Page 8 >> time. Press the left/right button: >> To exit. NOTE: Pressing the left button for 1 second at the start of any menu will make the system return to the STOP mode. Copyright 2005 Alfano, S.A. Tous droits réservés.
-
Page 9: Configuration Menu
NOTE: This menu is only accessible when one single field is configured in menu 10. This configuration is useful: either to ignore one or several split times, or to avoid acquiring other infrared ALFANO emitters placed on the circuit at an untimely moment. This configuration does indeed allow you to program a time upon which the system will not react after having acquired the time per lap. - Page 10 UP arrows: Continue to press or successively press the >> To reduce the RPM of LED 1. right button on the DOWN arrows: Press the left button: >> To regulate LED 7. Copyright 2005 Alfano, S.A. Tous droits réservés.
- Page 11 Menu 16 : ALARM T° Regulating the 4 bright detector lights, LOW temperature and HIGH temperature of: T1 « K » T2 « K » T1 « NTC » T2 « NTC » Copyright 2005 Alfano, S.A. All rights reserved.
- Page 12 Continue to press or successively press >> To increase the level. the right button on the UP arrows: Continue to press or successively press >> To reduce the level. the right button on the DOWN arrows: Copyright 2005 Alfano, S.A. Tous droits réservés.
- Page 13 Configure the transmission ratios. NOTE: the configuration is done while driving normally. Press the right button: >> To enter the menu. The system automatically configures the Drive in 1 gear: >> ratio of box n°1. Copyright 2005 Alfano, S.A. All rights reserved.
- Page 14 NOTICE: When the LAMBDA sensor is activated « ON », this sensor will replace the sensor of temperature T2 « k » or the VALVE sensor, according to the previous configuration. Menu 22 : VALVE ON / OFF Activate « ON/OFF » or not the VALVE sensor: Copyright 2005 Alfano, S.A. Tous droits réservés.
- Page 15 Configure the high value hangover time « RPM » and « speed » during the course: Press the right button: >> To enter the menu. To regulate the hangover time of the Successively press the right button: >> RPM, OFF at 4.4 seconds. Copyright 2005 Alfano, S.A. All rights reserved.
-
Page 16: Display Mask
To select: CELCIUS / FAHRENHEIT. Press the left button: >> To exit. Menu 31 : METRIC / IMPERIAL Configuring the distance measuring unit: Press the right button: >> To enter the menu. Copyright 2005 Alfano, S.A. Tous droits réservés. - Page 17 Menu 34 : DEFAULT Restoring the AStrO LVF with the factory parameters. Press the right button: >> To enter the menu. To confirm the restoration of the AStrO Press the right button: >> LVF. Copyright 2005 Alfano, S.A. All rights reserved.
- Page 18 This menu gives you the possibility of seeing the serial number and the version of the software of your AStrO LVF. NOTE: Pressing the left button for 1 second at the start of any menu will make the system return to the STOP mode. Copyright 2005 Alfano, S.A. Tous droits réservés.
- Page 19 : black wire: on the negative pole (12/24 volt) of the battery. Length: 350 cm : red wire: on the positive pole (12/24 volt) of the battery. Length: 350 cm : yellow wire: connects with the ignition or the calculator box. Length: 350 cm Copyright 2005 Alfano, S.A. All rights reserved.
- Page 20 NOTICE: the connection must be made from the side of the terminal box and not from the side of the coil. The procedure to locate the wire carrying the RPM-signal takes place in the same manner as for the high-tension coil (static double-contact), explained above. Copyright 2005 Alfano, S.A. Tous droits réservés.
- Page 21 These units will divide or multiply the impulses originating from the RPM-module and the result will be displayed in the top right corner of the screen. By knowing your RPM at a slow pace, it suffices finding it on your ASTRO LVF. Copyright 2005 Alfano, S.A. All rights reserved.
- Page 22 ALFANO S.A. Rue de l’ Industrie, 3b – 1400 NIVELLES www.alfano.com Copyright 2005 Alfano, S.A. Tous droits réservés.
Need help?
Do you have a question about the AStrO LVF A-165 and is the answer not in the manual?
Questions and answers