
Related Manuals for Krone Round Pack 1250


Summary of Contents for Krone Round Pack 1250
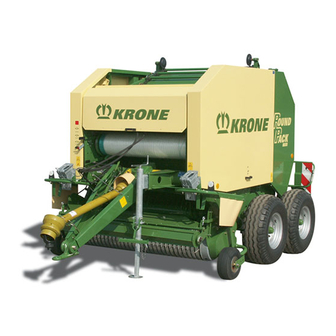
- Page 1 Original operating instructions 150 000 042 00 en Round Baler Round Pack 1250/Round Pack 1250 MultiCut Round Pack 1550/Round Pack 1550 MultiCut (from machine no. 540 680) RBR0933A...
- Page 2 (Managing Director, Design and Development) Year of manufacture: Machine No.: Dear customer, You have now received an operating manual for the KRONE product which you have purchased. This operating manual contains important information for the pro- per use and safe operation of the machine.
-
Page 3: Table Of Contents
Operation in Accordance with Intended Use ............I -2 1.2.7 General Technical Data ................... I -2 1.2.8 Technical Data Round Pack 1250 / Round Pack 1250 MultiCut ......I -3 1.2.9 Technical Data Round Pack 1550 / Round Pack 1550 MultiCut ......I -4 Safety ....................II -1 Identifying Safety Instructions in the Operating Manual ......... - Page 4 Contents Basic Settings and Operation ............V -1 Pick-Up ........................V -1 Baffle Plate ......................V -2 5.2.1 Roll-type crop guard ....................V -2 Cutting System (MultiCut) ..................V -3 5.3.1 Special Safety Instructions ..................V -3 5.3.2 General Information ....................V -3 5.3.3 Adjusting Cutting Length ..................
- Page 5 Contents Control unit Medium (Electro-Hydraulic) ........VII -1 General Information ..................... VII -1 Preparing for Use ....................VII -2 Operation ......................VII -2 7.3.1 Selecting Wrapping Mode ..................VII -2 7.3.2 Baling Pressure Gauge ..................VII -3 7.3.3 Actuating the Wrapping (Manual Operation) ............VII -3 7.3.4 Actuating the Wrapping (Automatic Mode) ............
- Page 6 Contents 9.3.9 Main gearbox ....................... IX -15 9.3.10 Gearbox on the wrapping arm ................IX -16 Drive Chains ......................IX -16 9.4.1 Special Safety Instructions .................. IX -16 9.4.2 General Information .................... IX -16 9.4.3 Setting Drive Chain Tension ................IX -17 Hydraulic System....................
-
Page 7: General Information
Made in 1.2 Technical Data Germany 1.2.1 General Information Type This operating manual is valid for the Round Pack 1250; Round Pack 1250 MultiCut; Round Pack 1550 and Round Pack 1550 MultiCut round balers beginning with Vehicle serial no. 540 680. -
Page 8: Operation In Accordance With Intended Use
General Information 1.2.6 Operation in Accordance with Intended Use The Round Pack 1250 / MultiCut and Round Pack 1550/ MultiCut round balers are designed for standard agri- cultural use only (intended use). Any use of the machine for other purposes is deemed not to be in accordance with intended use. -
Page 9: Technical Data Round Pack 1250 / Round Pack 1250 Multicut
General Information 1.2.8 Technical Data Round Pack 1250 / Round Pack 1250 MultiCut Type Round Pack 1250 Round Pack 1250 MultiCut (without cutting system) (with cutting system) Axle single axle tandem axle single axle tandem axle Pick-up (width) 1600 1950... -
Page 10: Technical Data Round Pack 1550 / Round Pack 1550 Multicut
General Information 1.2.9 Technical Data Round Pack 1550 / Round Pack 1550 MultiCut Type Round Pack 1550 Round Pack 1550 MultiCut (without cutting system) (with cutting system) Axle single axle tandem axle single axle tandem axle Pick-up (width) 1600 1950 1600 1950 1600... -
Page 11: Safety
Safety Safety 2.2 Safety Instructions and Accident Prevent Regulations 2.1 Identifying Safety Instructions 2.2.1 Personnel Qualification and Training in the Operating Manual Persons who use, service or repair the round baler The safety instructions contained in this manual must be trained in its use and instructed as to the which could result in personal injury if not followed risks connected with its operation. -
Page 12: Safety Instructions And Accident Prevention Regulations
Safety Observe the applicable traffic laws when using public 15. Actuating mechanisms (cables, chains, linkages roads (for example, in Germany, the Road Traffic etc.) for remote controlled devices must be Type Approval Law and Road Traffic Law). positioned in such a way that no movements are unintentionally triggered at any transport or 2.2.4 Safety Instructions and Accident working positions. -
Page 13: Trailer Implements
Safety 2.2.5 Trailer Implements 13. Caution! The flywheel will continue to rotate for some time even after the PTO shaft has been 1. Secure implements against rolling. disengaged! Keep clear of the implement during this time. Do not do any work on the implement 2. -
Page 14: Tyres
2.2.8 Tyres technical requirements set by the manufacturer of the implements! 1. When working on the tyres, make sure that the This is ensured by using genuine KRONE implement has safely lowered and secured against replacement parts! rolling (wheel chocks). -
Page 15: Introduction
Safety 2.3 Introduction The KRONE round baler is equipped with all required safety devices (protective equipment). However, it is not possible to eliminate all potential hazards on this machine as this would impair its full functional capability. Corresponding danger notices attached to the machine warn against any dangers. - Page 16 PTO shaft being crushed. is connected. (Only for Round Pack 1250) Order No. 942 196-1 (2x) Order No. 939 407-1 (2x) II - 6...
- Page 17 Safety Do not reach into the danger Do not step under the raised area under the wrapping and tailgate. Before carrying out binding mechanism. any maintenance work close Danger from sharp blades! the shut-off tap on the cylinder. Observe the operating notes! Order No.
-
Page 18: Location Of General Information Labels On The Machine
Safety 2.3.2 Location of General Information Labels on the Machine RBR0933E right side of the machine RBR0826C left side of the machine II - 8... - Page 19 Safety The information labels indicate special features of the machine which must be observed in order to ensure troublefree function. Straßenfahrt nur in Stellung (Vollast) am Bremskraftregler zulässig 942 037-1 278 415-2 (1x) 939 194-1 (2x) 942 037-1 (1x) (2x) 441 071-2 3,0 bar 441 072-2 3,5 bar 942 111-0 (1x)
- Page 20 Safety II - 10...
-
Page 21: Before And After Use
Before and After Use Before and After Use 3.1 Commissioning Before commissioning the round baler needs to be fully assembled and matched to the towing vehicle (refer to Appendix A “Commissioning”). If a different towing vehicle is used later, the following needs to be checked and adjusted if necessary: •... -
Page 22: Hitching
Before and After Use 3.2 Hitching Observe the maximum permissible support and hitching loads for the tractor! Hitch and secure the round baler to the tractor hitch in accordance with specifications. Risk of hands and feet being pinched when the jack stand is actuated! Set the jack stand in the transport position: •... - Page 23 Before and After Use Electrical Supply • Connect the lighting equipment connection cable (2) to the 7-pin tractor electrical system plug-in connector. • Position the cable so that it will not come in contact with the wheels. • Install the control console so that it is easily visible to the driver.
- Page 24 Before and After Use Hydraulic brake (Export) Certain export models are provided with a hydraulic brake. These models require a brake valve on the tractor. The corresponding hydraulic hose (1) is connected to the brake valve on the tractor. The brake is activated by actuating the brake pedal.
-
Page 25: Road Driving
Before and After Use 3.3 Road Driving • Driving on public roads is permitted only if the bale chamber is empty and locked. • If the round balers is not equipped with brakes, the weight of the tractor must be at least equal to the empty weight of the baler. -
Page 26: Parking Brake (Optional)
Before and After Use Parking brake (optional) The parking brake (1) is located on the front right of the drawbar. After the machine has been attached to the tractor, release the parking brake. CP400500 III - 6... - Page 27 Before and After Use 3.4 Unhitching • Always park the round baler on firm, level ground. • If the baler must be parked on soft ground, increase the supporting surface of the jack stand. • Before unhitching, place wheel chocks under the wheels to prevent the round baler from rolling.
- Page 28 Before and After Use • Disconnect the PTO shaft (1) from the tractor. • Place the PTO shaft (1) inside the PTO shaft bracket (2). RBV02240 • Disconnect the hydraulic hoses (1) and electrical connecting cable. • Store these properly in the corresponding receptacle on the twine box.
-
Page 29: Use
Special Safety Instructions In addition to the general safety instructions, other special safety instructions apply for round baler operation. • The following general rules apply to all maintenance, assembly, repair and adjustment work: Bring the machine to a complete standstill. Switch off the engine. -
Page 30: Forward Speed And Pto Speed
Short, crumbly straw: • reduce the number of cutter blades or switchoff the cutting system or remove blades • switch off the PTO when preparing to turn Small, flat windrows: • reduce PTO speed • increase forward speed Straw varies greatly in structure. Even if no cutting system is used, it is not always possible to work at the highest possible pressure. -
Page 31: Wrapping And Depositing Bales
Barrel-shaped round bales can cause damage to the floor conveyor. Distorted and thick round bales are detrimental to proper silage production. The binding process should be started at the latest when the density indicators reach the red range (the buzzer sounds if the comfort control equipment is fitted). -
Page 32: Splashguard
Drive chain for pick-up with shear bolt To protect against overload the pick-up drive and the feed auger drive, which is located behind the guard (3), are secured with a shear bolt at the upper chain wheel. There are 3 replacement screws (2) on the inside of the guard (3). -
Page 33: Rotor Reversing Device
4.6 Rotor reversing device The rotor reversing device is located on the left hand machine side behind the front guard. This device permits the rotor to be reversed hydraulically to clear a blockage. For this proceed as follows: • Switch off the power take-off (Move the PTO speed adjusting lever of the tractor to neutral). - Page 34 IV - 6...
-
Page 35: Basic Settings And Operation
Basic Settings and Operation Basic Settings and Ope- ration 5.1 Pick-Up Special Safety Instructions The following general rules apply to all maintenance, assembly, repair and adjustment work: • Bring the round baler to a complete standstill. • Switch off the motor, remove the ignition key and disconnect the 12 V supply voltage. •... -
Page 36: Baffle Plate
Basic Settings and Operation For extreme ground conditions, regulate the working depth using the low limiter: • Raise the pick-up hydraulically. • Push the feeler wheels (3) upwards. • Slacken the nuts (2). • Slide the depth control (1) forwards. •... -
Page 37: Cutting System (Multicut
Basic Settings and Operation 5.3 Cutting System (MultiCut) 5.3.1 Special Safety Instructions The following general rules apply to all maintenance, assembly, repair and adjustment work: • Bring the round baler to a complete standstill. • Switch off the motor, remove the ignition key and disconnect the 12 V supply voltage. •... - Page 38 Basic Settings and Operation Adjust the setting with the aid of the multi-purpose spanner/wrench (3) or (4). These are located inside a bracket on the right-hand side of the machine. • Remove the spring pin (1). • Detach the multi-purpose spanner/wrench (3) or (4) from the retaining bolt (2).
-
Page 39: Blade Zero Switch
Basic Settings and Operation 5.3.4 Blade Zero Switch "0" To switch off the blades mechanically: • disengage the locking lever (2) • rotate the blade control shaft using the multi-purpose key until the selector disc (1) is set at “0” The “0”... -
Page 40: Setting Blade Control Shaft
Basic Settings and Operation 5.3.6 Setting Blade Control Shaft If the blades are worn out, the blade control shaft (1) can be reset. For this, the bearing housings of the blade control shaft must be loosened; after that, the blade control shaft can be aligned to the rotary shaft. -
Page 41: Clogs In The Cutting System
Basic Settings and Operation Adjusting the Blade Safety Mechanism: • Undo the lock nut (2). • Turn the screw (1) until the desired measurement (a) (see page V - 5) has been attained. • Tighten lock nut (2). If adjustment is not possible using the adjusting screw: •... -
Page 42: Replacing Blades
Basic Settings and Operation 5.3.8 Replacing Blades The cutting system blades are accessible from the bale chamber. • Open the tailgate. Risk of accidents! Secure the open tailgate against unintentional shutting. • Rotate the shut-off tap (1) of the left- hand lifting cylinder from position (b) to position (a). -
Page 43: Adjusting Baling Pressure (Medium
Basic Settings and Operation Replace blades • Pull the blade (1) through the blade shaft slot (2). • Insert blade. • Lock the blade shaft. Relock the blade shaft. KRS-1-015 When working in straw all blades (1) can be disassembled and attached on the bolt (3) with spring pin (2) under the right-hand front guard. -
Page 44: Straw Trap Attachment And Removal
Basic Settings and Operation 5.5 Straw Trap Attachment and Rem- oval • Do installation work only when the machine is at a standstill. • Switch off the motor. Remove the ignition key. • The tailgate must be open in order to work on the straw trap. Make sure that the shut-off tap on the left-hand tailgate cylinder is set in the closed position. -
Page 45: Twine Wrapping / Twine And Net Wrapping
Basic Settings and Operation 5.6 Twine Wrapping / Twine and net wrapping 5.6.1 Special Safety Instructions The following general rules apply to all maintenance, assembly, repair and adjustment work: • Bring the round baler to a complete standstill. • Switch off the motor, remove the ignition key and disconnect the 12 V supply voltage. •... -
Page 46: Components Twine Wrapping
Basic Settings and Operation 5.6.2.2 Components twine wrapping VP-3-009 1 cutter bar 6 twine box 2 twine wrapping mechanism 7 pressure roller tension spring 3 pressure roller 8 stepped roller 4 rubber roller 5.6.3 General Information The twine is threaded from the twine box over the twine eyelet and the twine brake to the stepped roller (8). From thereit is threaded via the twine wrapping mechanism (2) between the rubber-coated roller (4) and the pressure roller (3) and into the area around the cutter bar (1). -
Page 47: Inserting Twine
Basic Settings and Operation 5.6.4 Inserting Twine Attention!- Contamination of tying twine as well as the tying mechanism by oil and grease Effect: Damages to the machine and problems with unrolling of the tying twine • Twine, twine tensioner and eyes must not be contaminated with oil or grease. - Page 48 Basic Settings and Operation • Thread the twine from the eyelets (1) through the twine retainers (2). KR-1-007 • Thread the twine (1) through the twine brake (4) eyelets (3). • Thread the twine through the space between the spring tensioners (2) and the screws (5). CP400001 For twine wrapping, the net stretcher bar (2) - if a net wrap system is installed - is rotated...
- Page 49 Basic Settings and Operation • Shut the cleaning flaps (1). • Rotate the stepped roller in the direction of the arrow until the twine holders (3) move from the outside to the centre starting position. The twine holders (3) must move to the centre when the stepped roller is rotated.
-
Page 50: Setting The Twine Limiter
Basic Settings and Operation 5.6.5 Setting the Twine Limiter The position of the twine limiter determines the spacing between the outermost wrap and the outer edge of the bale. The setting depends on the length and type of baling ma- terial to prevent the thread from slipping off the round bale. - Page 51 Basic Settings and Operation Twine brake release setting Move tensioning arm (2) from lower to central position. In this position: • tension spring (3) must not be under tension, • wire rope (4) must be slightly released. CP400006 Adjusting lever (1) will release the brake at the start of the binding cycle.
-
Page 52: Adjusting The Pressure Roller
Basic Settings and Operation 5.6.7 Adjusting the Pressure Roller If the baler twine does not feed correctly at the start, pressure roller tension can be increased by adjusting the spring (2). Right side: • Detach spring (2). • Detach bolt (3) and screw into one of the upper bore holes. -
Page 53: Net Wrapping
Basic Settings and Operation 5.7 Net Wrapping 5.7.1 Special Safety Instructions The following general rules apply to all maintenance, assembly, repair and adjustment work: • Bring the round baler to a complete standstill. • Switch off the motor, remove the ignition key and disconnect the 12 V supply voltage. •... -
Page 54: Inserting The Netting Roll
Basic Settings and Operation 5.7.4 Inserting the Netting Roll Attention!- Contamination of tying twine as well as the tying mechanism by oil and grease Effect: Damages to the machine and problems with unrolling of the tying twine • Twine, twine tensioner and eyes must not be contaminated with oil or grease. -
Page 55: Setting The Net Brake
Basic Settings and Operation Once installed, the netting roll can be aligned to the right and left in the centre to the machine using the mounting lever (2). To pull the netting, release the brake. To do this press lever (1) downwards. Place the net brake callipers (3) below the netting roll. -
Page 56: Net Stretcher Bar
Basic Settings and Operation The net brake setting depends on the type of netting being used. The net brake should be set so that the net is in the channel approx. 0 - 50 mm above the scraper, after the binding process is complete. -
Page 57: Selecting The Number Of Bale Wraps (Medium
Basic Settings and Operation 5.7.7 Selecting the number of bale wraps (Medium) The adjusting screw (2) for setting the number of bale wraps has a left-handed thread! The number of times the bales are wrapped can be set on the right-hand side of the machine on the adjusting screw (2). -
Page 58: Selecting Wrapping Mode
Basic Settings and Operation 5.7.9 Selecting Wrapping Mode Control unit Medium • Actuate the ON/OFF switch (1). Use switch (6) to select the tying mode. = Net wrapping = Twine wrapping RP600008 Control unit Comfort If net wrapping is selected, the word "Net" must appear in the second line on the display of the comfort control unit. -
Page 59: Central Chain Lubrication Device (Special Equipment
Basic Settings and Operation 5.9 Central Chain Lubrication Device (Special Equipment) The central chain lubrication device is attached to the left side of the machine behind the front guard. Each time the drive shaft makes a rotation, oil is forced out of the tank (1) via the pump (2) and the lubrication strips attached to the left and right of the machine, and onto the brushes on the drive chains. - Page 60 Basic Settings and Operation Oil Flow Rate Setting (Cam Pump) The cam pump is located at the front left on the gearbox drive shaft. Adjust oil flow rate / oil pressure: 128 mm • Undo bolts (2). • Rotate the excenter disk (1). •...
- Page 61 Basic Settings and Operation V - 27...
- Page 62 Basic Settings and Operation V - 28...
-
Page 63: Control Unit Basis (Electric Twine Starter
Control unit Basis Control unit Basis (Electric twine starter) Special Safety Instructions • When doing any assembly work on the round baler, always disconnect the voltage feed to the control unit. • Repair work on the hydraulic system should be carried out by trained specialists only! •... -
Page 64: Preparing For Use
Control unit Basis 6.2 Preparing for Use Attach the control unit on the tractor in a place where it is clearly visible to the driver. Connect the power supply (12V). Check for correct polarity! Switch on the control unit using the ON/OFF switch (2). -
Page 65: Control Unit Medium (Electro-Hydraulic)
Control unit Medium Control unit Medium (Electro-Hydraulic) Special Safety Instructions • When doing any assembly work on the round baler, always disconnect the voltage feed to the control unit. • Repair work on the hydraulic system should be carried out by trained specialists only! •... -
Page 66: Preparing For Use
Control unit Medium 7.2 Preparing for Use Attach the control unit on the tractor in a place where it is clearly visible to the driver. Connect the power supply (12V). Check for correct polarity! Switch on the control unit using the ON/OFF switch (1). -
Page 67: Baling Pressure Gauge
Control unit Medium 7.3.2 Baling Pressure Gauge Adjustment is done on the machine (Chapter 5.4 Adjusting Baling Pressure). The desired baling pressure has been reached: • Is indicated by the indicator on the machine. • Indicator lamps (5) go out and the horn (4) sounds. RP600009 7.3.3 Actuating the Wrapping (Manual Opera- tion) -
Page 68: Sensor Test
Control unit Medium 7.4 Sensor Test The control unit require data acquired via the sensors to ensure trouble-free functioning. The mounting positions and required settings are described in Chapter 9 “Maintenance”. Sensor pressure right Sensor pressure left The baling pressure gauge is located at the front end of the round baler. -
Page 69: Control Unit Comfort
Control unit Comfort Control unit comfort 8.1 General Information The control unit comfort are used to monitor and control the baling process. The twine and net wrapping mechanisms, the bale chamber lock and the electric starter are monitored using sensors. The binding or wrapping process is started automatically by the comfort controls or manually when the preset bale size has been reached. -
Page 70: Mounting
Control unit Comfort 8.2 Mounting Attach the control unit comfort box on the tractor in a place where it is clearly visible to the driver. Connect the control unit comfort to the on-board computer. Plug the control cable (1) into the control unit comfort (3) socket (2). -
Page 71: Control Panel
Control unit Comfort 8.3 Control Panel STOP 19 16 (19) automatic wrapping preselector (0) “start wrapping” key (11) ON/OFF (20) horn (1) “bale size (–)” key (12) main switch (21) control line to baler (2) “bale size (+)” key (13) program key (23) “+”-key (3) “alarm off”... -
Page 72: Ready Status
Control unit Comfort 8.4 Ready Status Switch on control unit comfort at the main switch (12). Press the ON/OFF key (11). ---- K R O N E ----- A brief self-test follows if the power supply is properly Comfort Electronics -- T E R M I N A L -- connected. - Page 73 Control unit Comfort Adjust wrapping mode and number of net wraps 9 23 • Press the function key (8) Net-number:..0.0 The preselected setting appear on the display screen ok?If yes press Quit Net-number:..0.0 (= number of wraps) STOP ok?If yes press Quit If “NET”...
- Page 74 Control unit Comfort Selecting the wrapping start delay - The presetting of the nominal and the set values appear in the display for the wrapping start delay. Verzögerungzahl 6 Ist-Wert :..8 Soll-Wert: ..15 “Wrapping start delay” means the time weiter..ja=quit between “preset density reached”...
-
Page 75: Operation
Control unit Comfort 8.6 Operation During baling material pick-up, the current bale density is shown separately for the right-hand (d) and left-hand (c) bale sides. Prog Quit STOP VP-1-015 If pick-up is uneven arrows (a) appears on the display screen. The arrows (a) points to the side to which the round baler should be steered to ensure that it is filled evenly. - Page 76 Control unit Comfort If the twine or net wrapping process is complete, a continuous audio signal will sound for approximately 3 seconds. The following message appears on the display screen: - Binding process -- ---- finished ! ---- Prog Quit - Binding process -- ---- finished ! ---- STOP...
-
Page 77: Bale Counter
Control unit Comfort 8.7 Bale Counter The control unit comfort bale counter has two displays. This makes it possible to record the number of round bales baled for two different time spans. Bales pie.:..10 Bales tot.:..345 pie.-- erase--- tot. All round bales are recorded according to the following conditions: a) the bale density has reached at least the number 0 STOP... -
Page 78: Stop Key
Control unit Comfort 8.8 STOP Key Interrupt program sequence: ----- Program ------ • press the STOP key (16) ---- stopped ! ----- Prog Quit The following appears in the display screen: ----- Program ------ STOP ---- stopped ! ----- Restart program sequence: VP-1-023 •... -
Page 79: Alarm Messages
Control unit Comfort The error message: - Wrapping process - ---- not cut ! ---- - Wrapping process - ---- not cut ! ---- Prog Quit appears on the display screen: • when the binding or net wrapping process has been completed but the binding or net wrapping mechanism STOP continues to run. -
Page 80: Sensor Test
Control unit Comfort 8.11Sensor Test To ensure trouble-free functioning, the control unit comfort require data collected by the twine or wrapping sensor, blade sensor, and tailgate sensor. The mounting positions and required settings are described in “Maintenance”. Activate the sensor test on the control unit comfort. 1) Switch off the control unit comfort •... - Page 81 Control unit Comfort Function Test: Wrap Stop Sensors Check the function of the sensors for the wrapping sensors by rotating the wrapping mechanism. Sensortest Twine:.0 Power:00V Knives:.0 :.00 chamber:00 Sensor 1: wrapping in progress (b) proceed..yes=quit Prog Quit Sensor 2: linear motor centre position (a) During rotation of the wrapping mechanism actuating wheel, the display reading (a) and (b) should alternate STOP...
-
Page 82: 0-Setting Of The Baling Pressure Indicators
Control unit Comfort 8.12 0-setting of the baling pressure indicators - Nulleinstellung 1 Before any correction of the values Wegaufn. Links: Wegaufn. Rechts: 0 transmitted by the distance sensors, it must weiter..ja=quit Prog Quit be checked that the mechanical adjustment is correct (see section „Adjustment of the baling pressure indicators“). -
Page 83: Language Setting For The Control Unit Comfort
Control unit Comfort 8.13 Language Setting for the Control unit Comfort The display can be used in different language versions. Setting the Language 1) Switch off the control unit comfort • Press the ON/OFF key (11) 2) Call up the sensor test program •... - Page 84 Control unit Comfort VIII - 16...
-
Page 85: Maintenance
Maintenance Maintenance Adjustments 9.1.1 Special Safety Instructions • The adjustments listed below should be done only when the machine is at a complete standstill. Switch off the motor, remove the ignition key and disconnect the 12 V supply voltage. • Secure the tractor and round baler against rolling. -
Page 86: Adjusting The Baling Pressure Indicator
Maintenance The distance a between the callipers (1) on the rear panel hook to the bar (2) should be a = 38 mm on both sides. RP-99-011 Adjustment is carried out on both sides of the round baler on the eye bolts (2), which are connected to the applicable side's baling pressure indicators via steel cable (1). - Page 87 Maintenance Periodically check the smoothness in operation of all components of the bale density indicator and make sure that the mechanism is not dirtied. For this: • Clean rope guide tube (1) at regular intervals. • Check cross shaft (2) and guide pin (3) for smooth operation and clean if required.
- Page 88 Maintenance Adjusting the rope for the “bale chamber shut and locked” display The baling pressure indicator – on the left side of the machine – indicates whether the tailgate is locked properly using information transferred by the rope (1). If the locking hook is in the down position but the tailgate has not been shut properly, the left-hand baling pressure indicator should be located between the numbers 1 - 3.
-
Page 89: Net Wrapping System
Maintenance 9.1.4 Net Wrapping System • Unintentional actuation of the net wrapping system must be prevented. • The cutter blade on the net wrapping system is extremely sharp. Extreme risk of injury! Adjusting the cutter blades a=2mm b=8mm If blade support stop (1) fits close to stop (2), the gap between spring bar (3) and bearing tube (4) should be a = approx. -
Page 90: Adjusting The Sensors
Maintenance Adjusting the Sensors The tigthening torque of all sensors must not exceed 10 Nm. 9.2.1 Twine Mechanism Sensor The twine mechanism sensor (1) is located in the centre behind the twine mechanism. The gap (x) between the sensor and the switch rocker (2) must equal approximately 1 - 2 mm. -
Page 91: Wrapping Mechanism Sensors
Maintenance 9.2.4 Wrapping Mechanism Sensors Medium / Comfort The first sensor (1) is located on the wrapping mechanism in front of the V-belt pulley. The gap between the sensor and the toothed disk (2) must be a = 1 - 2 mm. Adjustment: •... -
Page 92: Sensor For The Cutting System Blades (Special Equipment
Maintenance 9.2.7 Sensor for the Cutting System Blades (Special Equipment) Comfort The sensor (1) for the cutting system blades is located on the right side of the machine on the blade shaft. Adjustment: • Undo lock nuts (2). • Adjust sensor so that gap a between the sensor and the lever (3) is a = 1 - 2 mm when the lever is in the raised position. -
Page 93: Maintenance Tasks
Maintenance Maintenance Tasks 9.3.1 Special Safety Instructions • Maintenance, cleaning and repair work should be done only when the machine is at a complete standstill. Switch off the motor, remove the ignition key and disconnect the 12 V supply voltage. •... -
Page 94: Checking The Brake Settings
Maintenance Maintenance at specified intervals Intervals Machine component after initial 8 operating hours wheels, wheel nuts and after every wheel change after extended PTO shaft slip clutch downtimes (friction clutch only) after first time use chain tension: then after every 100 bales floor conveyor drive pick-up drive chain tension:... - Page 95 Maintenance Single axle - hydraulic brake system Hydraulic air Hydraul. - Bremse brake system At an oil pressure of ca. 100 bar, the brake lever should be ca. 55 mm from the plate (2) when in brake position. 55 mm max.
- Page 96 Maintenance IX - 12...
- Page 97 Maintenance • The adjustment jobs listed below must only be performed while the machine is turned off. Switch off the engine, remove the ignition key and disconnect the 12 V supply voltage. • Secure the round baler and tractor against rolling. Tandem axle Compressed air system and hydraulic brake After the brake linkage (2a, 2b) has...
-
Page 98: Tyres
Maintenance 9.3.5 Tyres • Repairs to the tyres should be carried out by trained personnel only using the right tools. • Park the round baler on firm, level ground. Place wheel chocks under the tyres to prevent unintended rolling. • Regularly check that wheel nuts are properly seated and tighten if necessary! •... -
Page 99: Required Quantities And Lubricant Designations For Gearboxes
Maintenance 9.3.7 Required Quantities and Lubricant Designations for Gearboxes Biological lubricants Required quantity [litres] Oil typ Brand name on request Main gearbox 1,6 l SAE 90 9.3.8 Oil level check and oil change intervals (gearboxes) • Gearbox oil should be changed after •... -
Page 100: Setting Drive Chain Tension
Maintenance 9.4.3 Setting Drive Chain Tension Front Floor Conveyor Drive The front floor conveyor drive is located on the left-hand side of the machine. length of stretched spring a = 80 - 90 mm. • Slacken lock nut (1). • Rotate the nut (2) until a = 80 - 90 mm. - Page 101 Maintenance Roller Drive The roller drive is located on the right-hand side of the machine. length of stretched spring a = 90 mm. • Rotate the nut (2) until a = 90 mm. RP-A-004 Cutting System Drive The cutting system drive is located on the right-hand side of the machine.
-
Page 102: Hydraulic System
Maintenance Hydraulic System 9.5.1 Special Safety Instructions • Depressurize the hydraulic system before doing any work on the hydraulics. Hydraulic fluids escaping at high pressure can cause serious injuries. Seek medical help immediately should injuries occur. • Work on the hydraulic system, especially on the accumulators, should be done by specially trained personnel only! •... -
Page 103: Round Baler Hydraulic Circuit Diagram
Maintenance 9.5.3 Round Baler Hydraulic Circuit Diagram Messer 0 RP-A-002 Drawbar Ring Hitch If the wear limit of the bushing inside the ring hitch has been reached, the bushing should be replaced. The wear limit of the bushing inside the ring hitch (1) is a = 43 mm. -
Page 104: Sharpen Cutting System Blades
Check the sharpness of the blades (2) daily. When needed, sharpen the detached blades on the back side of the cutting edge (1). Never grind the rippled side. If possible, use the KRONE Sharpening Device to sharpen the blades. KRS-1-061... -
Page 105: Air Filter For Piping
Maintenance 9.8.2 Air Filter for Piping Use: The air filter for piping is installed in front of the brake valve. It cleans the compressed air which prevents malfunctions. The brake system remains functional even if the filter element is clogged in both flow directions. Maintenance The filter element should be cleaned at regular intervals e.g. -
Page 106: Lubrication
Maintenance Lubrication 9.9.1 Special Safety Instructions • Maintenance, cleaning and repair work should be done only when the machine is at a complete standstill. Switch off the motor, remove the ignition key and disconnect the 12 V supply voltage. • Secure the tractor and round baler against rolling. - Page 107 Maintenance Lubricating Points The following chart lists the lubrication points on the round baler and the number of lubrication nipples. Lubrication points Number of lubrication nipples pick-up cam track (right) support top guide wheel (left + right) rear panel bearings (right + left) floor conveyor inside front floor conveyor deflector (rear) floor conveyor tension (rear)
-
Page 108: Lubrication Points On The Round Baler (Right-Hand Side
Maintenance 9.9.2 Lubrication Points on the Round Baler (right-hand side) IX - 24... -
Page 109: Lubrication Points On The Round Baler (Left-Hand Side
Maintenance 9.9.3 Lubrication Points on the Round Baler (left-hand side) IX - 25... -
Page 110: Chain Lubrication If Round Baler Is Not Equipped With Central Lubrication
Maintenance 9.9.4 Chain Lubrication If Round Baler Is Not Equipped With Central Lubrication IX - 26... - Page 111 Maintenance IX - 27...
- Page 112 Maintenance IX - 28...
-
Page 113: Winter Storage
Complete the required repair work immediately following the harvest season. Prepare a list of all required spare parts. This makes it easier for your KRONE dealer to process orders and you can be certain that your machine will be available for use in top condition at the start of the next season. - Page 114 Winter Storage X - 2...
-
Page 115: Return To Service
Return to Service Return to Service Special Safety Instructions • The following general rules apply to all maintenance, assembly, repair and adjustment work: Bring the machine to a complete standstill. Switch off the engine, remove the ignition key and disconnect the 12 V supply voltage. •... -
Page 116: Vent Overload Coupling On The Pto Shaft
Return to Service 11.2 Vent Overload Coupling on the PTO Shaft (friction clutch only) Following extended downtimes, overload coupling surfaces (2) may stick to the contact surfaces. Vent the overload coupling before use. • Undo the bolts (1) crosswise. • Turn the PTO shaft manually. -
Page 117: Faults - Causes And Remedy
Faults – Causes and Remedy 12 Faults – Causes and Remedy Special Safety Instructions • Maintenance, cleaning and repair work should be done only when the machine is at a complete standstill. Switch off the motor, remove the ignition key and disconnect the 12 V supply voltage. - Page 118 Faults – Causes and Remedy Fault Possible Cause Remedy Bale chamber is filled unevenly. Wrapping material Drive onto the swath from altern. directions. used for barrel- shaped bales rips Increase the number of wraps. Number of wraps is too low. open in the middle.
- Page 119 Faults – Causes and Remedy Fault Possible Cause Remedy Cutter bar drops again immediately after Repeat start procedure. Netting rips apart starting. immediately after the start or during Roller brake is set too tightly. Check the brake setting. wrapping. Check cutter bar setting. Cutter bar too low.
- Page 120 Faults – Causes and Remedy Fault Possible Cause Remedy The net does not reach Deflector plate (3) is pushed to the Install bolt (1) M8 x 40 with nuts (2) at either side of the bale. top by crumbly crops. deflector plate (3).
-
Page 121: Faults, Causes And Remedy In The Central Chain Lubrication Device
Faults – Causes and Remedy 12.2 Faults, Causes and Remedy in the Central Chain Lubrication Device Fault Possible Cause Remedy Low oil consumption Low pressure Pump working excessively Dirt in the pump area -> Clean Pump is not being pressed at full stroke ->... - Page 122 Faults – Causes and Remedy XII - 6...
-
Page 123: A1 Commissioning
Appendix A1 Commissioning A1.1 Preparing for Commissioning Due to transport considerations, the PTO shaft and straw trap are not attached to the round baler at delivery. The round baler needs to be fully assembled prior to commissioning and adjusted to the type of tractor used. The following parts are packed separately at delivery. - Page 124 Appendix Park the round baler on firm, level ground. Place two wheel chocks under the wheels to prevent the baler from rolling. KR-1-081 Take parts (1, 3 + 5) out of the twine box. RP-A-027 Depressurise the tractor hydraulics. Connect hydraulic hoses (1), (2) and (3) to the tractor hydraulics according to colour.
- Page 125 Appendix Set the control valve for “open tailgate” to “raise”. RBV0116A Risk of accidents! Secure the open tailgate to prevent it from closing unintentionally. • Rotate the shut-off tap (1) in the return of the left-hand lifting cylinder from position (b) into position (a). RP-99-018 Take parts (2), (4) + (6) out of the bale chamber.
-
Page 126: A1.2 Adjusting Drawbar Height
Appendix A1.2 Adjusting Drawbar Height To ensure optimum pick-up of baling material, the drawbar height must be adapted to the type of tractor being used. When attached to the tractor, the pick-up (1) must be parallel to the ground when lowered into working position.The height of the ring hitch should then be matched to the height of the tractor hitch. - Page 127 Appendix Adjust drawbar height. • Slacken the self-locking nuts (3) until you can turn the drawbar (1) inside the toothed disk connection. • Adjust the drawbar to the height of the tractor hitch. VP-1-014 • Undo screw connection (4). • Align the ring hitch (3) horizontally (parallel to the ground).
-
Page 128: A1.3 Attaching The Pto Shaft
Appendix A1.3 Attaching the PTO Shaft A1.3.1 Installing the PTO Shaft • Hook the PTO shaft support bracket (2) to the PTO shaft holder (1). RP-99-012 • Slide the PTO shaft (1) with overload protection feature onto the machine shaft until the safety mechanism engages or the PTO shaft can be fastened (refer to the operating instructions provided by the manufacturer if the PTO shaft). -
Page 129: A1.3.2 Attaching The Guard Cup For Universal Shaft
Appendix A1.3.2 Attaching the guard cup for universal shaft DANGER! Danger of entrainment at P.T.O. shaft. Effect: Risk of injury when drawing in open long hair, jewellery or baggy clothes. • The machine may only be operated with an attached guard cup. •... -
Page 130: A1.4 Attaching The Hose Bracket
Appendix A1.4 Attaching the Hose Bracket Attach the hose bracket (1) to the drawbar using the fastener (2). RBV01080 • Slide the hose bracket (5) through the slots on the drawbar (6). • Fasten the hose bracket to the drawbar using clamps (4), screws (1), washers (2) and self-locking nuts (3). -
Page 131: A1.5 Lighting System
Appendix A1.5 Lighting System Install the three-unit lamps (1) on the right and left rear of the round baler with the lamp facing backwards and secure the cable with the cable band (2). RBV07150 A - 9... -
Page 132: A2 Electrical Circuit Diagram
Appendix A2 Electrical Circuit Diagram A2.1 Electrical Circuit Diagram - Medium A - 10... -
Page 133: A2.2 Electrical Circuit Diagram - Comfort
Appendix A2.2 Electrical Circuit Diagram - Comfort A - 11... - Page 134 Appendix A - 12...
- Page 135 Appendix A - 13...
- Page 136 . . konsequent, kompetent Maschinenfabrik Bernard Krone GmbH Heinrich-Krone-Straße 10, D-48480 Spelle Postfach 11 63, D-48478 Spelle Phone +049 (0) 59 77/935-0 +049 (0) 59 77/935-339 Internet: http://www.krone.de eMail: info.ldm@krone.de...
Need help?
Do you have a question about the Round Pack 1250 and is the answer not in the manual?
Questions and answers