Table of Contents
Advertisement
Quick Links
QSG166: WF200 Wi-Fi Development Kit
Quick Start Guide
The WF200 Wi-Fi Development Kit is an excellent way to get star-
ted with WF200 Wi-Fi transceiver IC to achieve performance eval-
uation and software development.
It supports various hardware and software use cases, as described below.
Two versions of devkits are available:
• SLEXP8022A contains WF200 development board (BRD8022A), that can be connec-
ted to Silicon Labs EFM32 Starter kits (STK3701 for GG11) or to a Raspberry Pi for
the Linux case. It also contains a micro-SD card allowing fast startup with a Raspber-
ry Pi.
• SLEXP8022B is a superset of SLEXP8022A with a Raspberry Pi 2 model V1.2 inclu-
ded.
This document described the first steps to get a Wi-Fi connection for the Linux case
(Raspberry Pi), Silicon Labs MCUs, as well as a case with a 3rd party MCU.
Note: Refer to
UG379
for more details about the board.
silabs.com | Building a more connected world.
KEY CONTENTS
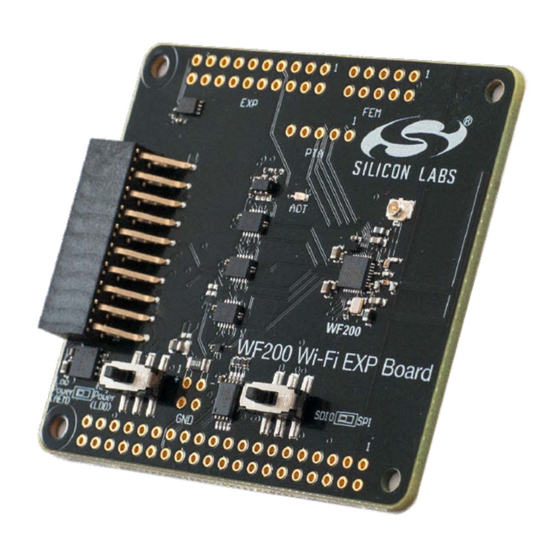
• Expansion Board with the WF200 Wi-Fi
transceiver IC onboard.
• Direct connection to Silicon Labs EFM32
hosts (20 pin EXP)
• Direct connection to Raspberry Pi for the
Linux use case
• Support of 3rd party MCUs
• Selectable SPI or SDIO host interface
Rev. 0.4
Advertisement
Table of Contents

Related Manuals for Silicon Laboratories WF200


Summary of Contents for Silicon Laboratories WF200
- Page 1 QSG166: WF200 Wi-Fi Development Kit Quick Start Guide The WF200 Wi-Fi Development Kit is an excellent way to get star- ted with WF200 Wi-Fi transceiver IC to achieve performance eval- KEY CONTENTS uation and software development. • Expansion Board with the WF200 Wi-Fi transceiver IC onboard.
-
Page 2: Table Of Contents
Table of Contents 1. Getting Started with Raspberry Pi and Linux ....3 1.1 Requirements ......3 1.1.1 Hardware . -
Page 3: Getting Started With Raspberry Pi And Linux
1.2 Hardware Setup 1. Insert Silabs SD card in Raspberry Pi. 2. Plug the WF200 devkit on top of the Raspberry Pi (WARNING: make sure the devkit does not touch HDMI connector on Raspberry Pi). 3. Configure the switches on WF200 devkit: •... -
Page 4: Ssh Connection
1.4.1 Station Demo This demo configures the Raspberry Pi and WF200 to work as a Wi-Fi station which can connect to an access point. To start it run: sudo wfx_demo_station Note: Minimize MobaXterm window, then wait a few seconds for the Wi-Fi tool to appear. -
Page 5: Access Point Demo
Getting Started with Raspberry Pi and Linux 1.4.2 Access Point Demo This demo configures the Raspberry Pi and WF200 to work as a Wi-Fi access point which can accept stations. To start it, run: sudo wfx_demo_ap Then it is possible to connect to the Raspberry Pi using a Wi-Fi capable device and the following credentials: •... -
Page 6: Getting Started With Stm32 Mcu, With Freertos, And Lwip
QSG166: WF200 Wi-Fi Development Kit Quick Start Guide Getting Started with STM32 MCU, with FreeRTOS, and LwIP 2. Getting Started with STM32 MCU, with FreeRTOS, and LwIP 2.1 Requirements 2.1.1 Hardware To use the WF200_driver_F429ZI_FreeRTOS project, a user will need the following list: •... -
Page 7: Hardware Setup
2.2 Hardware Setup Mount the WF200 expansion board on top on the NUCLEO board using the hardware interposer as shown on the figure below. Make sure the power switch is on the “on Board LDO” position and the bus switch on the “SPI” one. -
Page 8: Getting Started
QSG166: WF200 Wi-Fi Development Kit Quick Start Guide Getting Started with STM32 MCU, with FreeRTOS, and LwIP 2.3 Getting Started 2.3.1 Flashing the STM32 Using IAR 1. Open the IAR project “Project.eww” located in the path \WF200_driver_F429ZI_FreeRTOS-LwIP\EWARM. 2. In IAR Workspace view, open the header file “lwip_freertos.h”. The project workspace is shown in the Figure 2.3. -
Page 9: Flashing The Stm32 Using Truestudio
QSG166: WF200 Wi-Fi Development Kit Quick Start Guide Getting Started with STM32 MCU, with FreeRTOS, and LwIP 2.3.2 Flashing the STM32 using TrueSTUDIO 1. Import the project by opening the File menu and choosing “Import…”. You will see the dialog box below. - Page 10 QSG166: WF200 Wi-Fi Development Kit Quick Start Guide Getting Started with STM32 MCU, with FreeRTOS, and LwIP 2. Choose “Existing Projects into Workspace” and then select the path \WF200_driver_F429ZI_FreeRTOS-LwIP\TrueSTUDIO. You will see the following result: Figure 2.5. TrueSTUDIO Import Projects Dialog silabs.com | Building a more connected world.
- Page 11 QSG166: WF200 Wi-Fi Development Kit Quick Start Guide Getting Started with STM32 MCU, with FreeRTOS, and LwIP 3. In the project explorer, you will find "lwip_freertos.h" under Application\User. Figure 2.6. TrueSTUDIO Project Explorer 4. In “lwip_freertos.h”, change the WLAN_SSID, WLAN_PASSKEY, and WLAN_SECURITY defines to the values of the access point you want to use.
-
Page 12: Using The Demo
QSG166: WF200 Wi-Fi Development Kit Quick Start Guide Getting Started with STM32 MCU, with FreeRTOS, and LwIP 2.4 Using the Demo 1. In the terminal window, you should see the text below, where xxx.xxx.xxx.xxx is replaced with the STM32 IP address... -
Page 13: Additional Information
QSG166: WF200 Wi-Fi Development Kit Quick Start Guide Additional Information 3. Additional Information 3.1 Additional Resources For more information review the following: • WF200 Wi-Fi Expansion Kit User’s Guide • WF200 Wi-Fi transceiver IC Data Short 3.2 Customer Support For customer support: 1. - Page 14 Trademark Information Silicon Laboratories Inc.® , Silicon Laboratories®, Silicon Labs®, SiLabs® and the Silicon Labs logo®, Bluegiga®, Bluegiga Logo®, Clockbuilder®, CMEMS®, DSPLL®, EFM®, EFM32®, EFR, Ember®, Energy Micro, Energy Micro logo and combinations thereof, "the world’s most energy friendly microcontrollers", Ember®, EZLink®, EZRadio®, EZRadioPRO®, Gecko®, Gecko OS, Gecko OS Studio, ISOmodem®, Precision32®, ProSLIC®, Simplicity Studio®, SiPHY®, Telegesis, the Telegesis Logo®, USBXpress®...
Need help?
Do you have a question about the WF200 and is the answer not in the manual?
Questions and answers