
Related Manuals for Ricoh SR3130


Summary of Contents for Ricoh SR3130
- Page 1 Internal Finisher SR3130 Machine Code: D690 Field Service Manual July, 2014 Subject to change...
-
Page 3: Revision Lists
Revision Lists Version Section Details Initial release of this document. 1.00 Created this manual for D176/D177 series. Revised all sections according to the 1.10 release of D197 series. Modified some parts name. Added the following sections: > Covers and Trays >... - Page 4 Version Section Details Replacement and Adjustment > Added the picture, and items need to be Sensors > Paper Exit Full Sensor removed in Step 2. Replacement and Adjustment > Added the picture, and items need to be Sensors > Paper Bail Home Position removed in Step 2.
- Page 5 Version Section Details Added the picture, and items need to be Replacement and Adjustment > removed in Step 3. Sensors > Paper Detection Sensor Modified a Note for Step 4. Deleted some steps Replacement and Adjustment > Motors Added the picture, and items need to be >...
- Page 6 Version Section Details Added the picture, and items need to be removed in Step 3. Added items need to be removed in Step Replacement and Adjustment > Motors Modified Step 5 > Paper Output Motor Added the picture, and items need to be removed in Step 5.
-
Page 7: Safety And Symbols
Safety and Symbols This manual uses several symbols and abbreviations. The meaning of those symbols and abbreviations are as follows: Clip ring Screw Connector Clamp E-ring Short Edge Feed Long Edge Feed [A] Short Edge Feed (SEF) [B] Long Edge Feed (LEF) Trademarks ®... -
Page 8: The Aim Of Anti-Tip Components And Precautions
The Aim of Anti-tip Components and Precautions The anti-tip components are necessary for meeting the requirements of IEC60950-1, the international standard for safety. The aim of these components is to prevent the products, which are heavy in weight, from toppling as a result of people running into or leaning onto the products, which can lead to serious accidents such as persons becoming trapped under the product. -
Page 9: Table Of Contents
TABLE OF CONTENTS Revision Lists................................1 Safety and Symbols............................5 Trademarks..............................5 The Aim of Anti-tip Components and Precautions..................6 1. Replacement and Adjustment Inner Finisher...............................9 Covers and Trays.............................12 Finisher Front Cover.............................12 Finisher Upper Cover...........................13 Finisher Rear Cover............................14 Paper Output Tray............................14 Paper Output Cover............................15 Control Board..............................16 Sensors................................18 Entrance Sensor............................18... - Page 10 Shift Motor..............................36 Stapler Displacement Motor........................38 Jogger Fence Motor (Front / Rear)......................40 Transport Motor............................42 Paper Output Motor............................43 Stapler Unit...............................45...
-
Page 11: Replacement And Adjustment
1. Replacement and Adjustment Inner Finisher Interface cable [A]. Open the front cover [A]. - Page 12 1. Replacement and Adjustment Left upper cover [A] ( ×1). Left rear cover [A] ( ×2, hook×1). Inner finisher [A] ( ×1).
- Page 13 Inner Finisher Bridge guide plate [A] ( ×2).
-
Page 14: Covers And Trays
1. Replacement and Adjustment Covers and Trays Finisher Front Cover Pull the finisher [A]. -
Page 15: Finisher Upper Cover
Covers and Trays Finisher front cover [A] ( ×2). Finisher Upper Cover Finisher front cover (page 12). Finisher upper cover [A] ( ×2). -
Page 16: Finisher Rear Cover
1. Replacement and Adjustment Finisher Rear Cover Inner finisher (page Finisher rear cover [A] ( ×2). Paper Output Tray Left lower cover [A] ( ×2). -
Page 17: Paper Output Cover
Covers and Trays Paper output tray [A] ( ×2). Paper Output Cover Paper output tray (page 14). Paper output cover [A] ( ×3, ×3, ×2). -
Page 18: Control Board
1. Replacement and Adjustment Control Board • When a control board is replaced, use the same DIP switch settings as those of the control board before replacement. Finisher front cover (page 12). Control board [A] ( ×3, ×all, plastic rivet×1). Release four clamps and remove the harness bracket [A] on the control board bracket ( ×4). - Page 19 Control Board Control board bracket [A] ( x2).
-
Page 20: Sensors
1. Replacement and Adjustment Sensors Entrance Sensor Inner finisher (page Open/Close upper cover [A] ( ×2). Entrance sensor unit [A] ( ×1, ×1, ×1). -
Page 21: Paper Exit Full Sensor
Sensors Entrance sensor [A]. Paper Exit Full Sensor Paper output tray (page 14). Paper exit full sensor [A] ( ×1, ×1). Paper Bail Home Position Sensor Paper output cover (page 15). -
Page 22: Paper Surface Detection Sensor
1. Replacement and Adjustment Paper bail home position sensor [A] ( ×1). Paper Surface Detection Sensor Paper output cover (page 15). Paper surface detection sensor [A] ( ×1). Transport Sensor Finisher upper cover (page 13). -
Page 23: Strike Roller Home Position Sensor
Sensors Transport sensor unit [A] ( ×1, ×1, ×1). Transport sensor [A]. Strike Roller Home Position Sensor Finisher upper cover (page 13). Finisher rear cover (page 14). - Page 24 1. Replacement and Adjustment Rotate the timing belt [A], and release the strike roller arm unit [B] from the strike roller HP sensor [C]. Strike roller home position sensor unit [A] ( ×1, ×1, ×1).
-
Page 25: Paper Output Guide Plate Home Position Sensor
Sensors Strike roller home position sensor [A]. Paper Output Guide Plate Home Position Sensor Control board (page 16). Rotate the paper output guide plate gear [A] counterclockwise, and release the paper output guide plate [B] from the paper output guide plate HP sensor [C]. -
Page 26: Shift Roller Home Position Sensor
1. Replacement and Adjustment Paper Output Guide Plate Home Position Sensor [A] ( ×1). Shift Roller Home Position Sensor Control board bracket (page 16). Shift roller home position sensor unit [A] ( ×1, ×1, ×2). -
Page 27: Stapler Home Position Sensor
Sensors Shift roller home position sensor [A]. Stapler Home Position Sensor Control board bracket (page 16). Knob [A]. - Page 28 1. Replacement and Adjustment Entrance cover [A] ( ×2). Stapler home position sensor unit [A] ( ×1, ×1).
-
Page 29: Jogger Fence Home Position Sensor (Front)
Sensors Stapler home position sensor [A]. • If it is difficult to remove and attach, push the stapler unit inside. Jogger Fence Home Position Sensor (Front) Paper output cover (page 15). Jogger fence home position sensor (front) unit [A] ( ×1, ×1, ×1). -
Page 30: Jogger Fence Home Position Sensor (Rear)
1. Replacement and Adjustment Jogger fence home position sensor (front) [A]. Jogger Fence Home Position Sensor (Rear) Paper output cover (page 15). Jogger fence home position sensor (rear) unit [A] ( ×1, ×1). -
Page 31: Stapler Tray Jam Detection Sensor
Sensors Jogger fence home position sensor (rear) [A]. Stapler Tray Jam Detection Sensor Paper output cover (page 15). Paper exit roller unit [A] ( ×1). -
Page 32: Paper Detection Sensor
1. Replacement and Adjustment Stapler tray jam detection sensor unit [A] ( ×1, ×1, ×1). Stapler tray jam detection sensor [A] ( ×1). Paper Detection Sensor Jogger fence motor (rear) (page... - Page 33 Sensors Jogger fence motor (rear) bracket [A] ( ×2, ×3). Paper detection sensor unit [A] ( ×1, ×1, ×1).
- Page 34 1. Replacement and Adjustment Paper detection sensor [A]. • When installing this sensor, be careful not to damage the sensor actuator.
-
Page 35: Motors
Motors Motors Entrance Motor Finisher rear cover (page 14). Finisher right rear bracket [A] ( ×2). Entrance motor [A] ( ×2, ×1, Timing belt×1). Tray Lift Motor Paper output tray (page 14). - Page 36 1. Replacement and Adjustment Tray lift motor unit [A] ( ×2, ×1, ×1). Cam [A], bearing [B] ( ×1). Tray lift motor [A] ( ×2).
-
Page 37: Paper Bail Motor
Motors Paper Bail Motor Paper output cover (page 15). Paper bail motor [A] ( ×2, ×1). Paper Output Guide Plate Motor Control board (page 16). Paper output guide plate motor [A] ( ×2, ×1, ×1). Strike Roller Motor Paper output cover (page 15). -
Page 38: Shift Motor
1. Replacement and Adjustment Finisher rear cover (page 14). Rear rail [A] ( ×2). Strike roller motor [A] ( ×2, ×1). Shift Motor • After attaching, rotate the knob, and check that all gear trains can rotate. • After attachment, when the cam [A] is rotated, check that the link [B] interlocks. - Page 39 Motors Control board bracket (page 16). Pulley [A], Timing belt [B] ( ×1).
-
Page 40: Stapler Displacement Motor
1. Replacement and Adjustment Shift motor unit [A] ( ×2, ×1, ×1). Shift motor [A] ( ×2). Stapler Displacement Motor • When the finisher is inverted, be careful not to deform the frame. Paper output cover (page 15). - Page 41 Motors Remove the four clamps ( ×4). Place the inner finisher upside down on the table with holding the parts below [A]. • Hold the parts [A] shown below to lift the inner finisher. Otherwise, other brackets and parts may be deformed.
-
Page 42: Jogger Fence Motor (Front / Rear)
1. Replacement and Adjustment Base cover [A] ( ×3) Stapler displacement motor [A]( ×2, ×1) Jogger Fence Motor (Front / Rear) Base cover (page... - Page 43 Motors Jogger fence motor (front) [A] ( ×2, ×1, Timing belt×1) • During attachment, remove the jogger fence motor (rear) bracket, and check that the motor pulley has not separated from the timing belt.
-
Page 44: Transport Motor
1. Replacement and Adjustment Jogger fence motor (rear) [A] ( ×2, ×1, Timing belt×1) • During attachment, check that the motor pulley has not separated from the timing belt. Transport Motor Paper output cover (page 15). Control board (page Finisher rear cover (page Pulley [A], Timing belt [B] ( ×1). -
Page 45: Paper Output Motor
Motors Transport Motor [A] ( ×2, ×1, Timing belt×1) Paper Output Motor Transport motor (page Control board bracket (page Gear [A] ( ×1) - Page 46 1. Replacement and Adjustment Two clip rings [A] and Shaft bracket [B] ( ×2). Remove the screws of the fan [A] and then lay it down ( ×2). Paper Output Motor [A] ( ×2, ×1).
-
Page 47: Stapler Unit
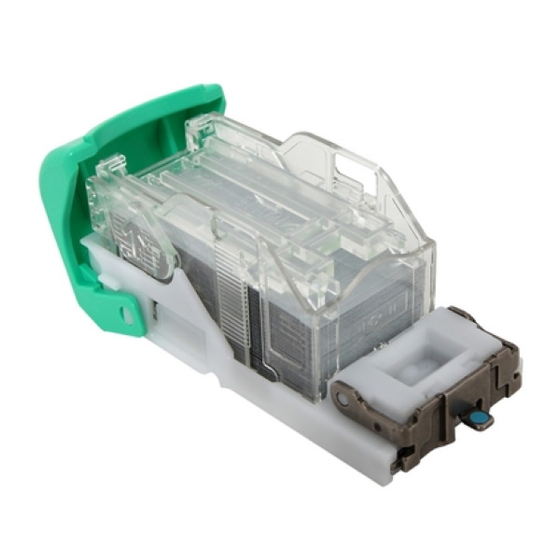
Stapler Unit Stapler Unit Control board bracket (page 16). Insert the stapler unit [A] into the rear.. Rear end reference fence [A] ( ×2). Stapler home position sensor (page 25). - Page 48 1. Replacement and Adjustment Cover open/close switch unit [A] ( ×1, ×2). Harness guide unit [A] ( ×1). Move the stapler unit to the front, and remove the cartridge [A].
- Page 49 Stapler Unit • During installation, install the cartridge last. Remove the unit fixing screw of the stapler unit ( ×1) Stapler unit [A] ( ×1, ×2)
- Page 50 MEMO...
Need help?
Do you have a question about the SR3130 and is the answer not in the manual?
Questions and answers