
Related Manuals for Hussmann Q3-M/FV-EP


Summary of Contents for Hussmann Q3-M/FV-EP
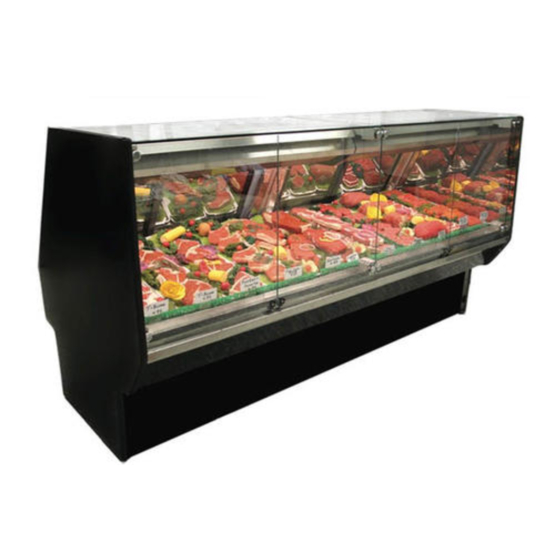
- Page 1 092015 /SPECIALTY MEAT VERTICAL MERCHANDISER U S E R M A N U A L - Q3-MV 4’/ Straight Vertical Case Remote...
-
Page 2: Table Of Contents
Line Sizing Oil Traps Refrigeration Spec Sheets Pipining Schematic DOE 2012 Hussmann refrigerated merchandisers con gured for sale for use in the United States Energy E ciency meet or surpass the requirements of the DOE 2012 energy e ciency standards. Compliant... -
Page 3: Notice
Notice WARNING 1. DO NOT load or stand over top of case. Glass breakage may occur if precauions are disregarded. *Broken glass can cause lacerations, cuts, and puncture wounds which may result in severed arteries or tendons, amputations, eye injuries, or exposure to disease. -
Page 4: General Information
Shortages: Check your shipment for any possible shortages of material. If a shortage should exist and is found to be the responsibility of Hussmann Chino, notify Hussmann Chino. If such a shortage involves the carrier, notify the carrier immediately, and request an inspection. Hussmann Chino will acknowledge shortages within ten days from receipt of equipment. -
Page 5: Case Sections
Case Sections Q3-M/FV-EP Multi-Deck Vertical Glass Service Meat Case (673) (200) (305) optional shelf (1327) (391) (581) (654) (279) (648) (149) (1076) Q3-M/FV-EP (149) (562) (638) (714) (203) (127) (156) (1076) Elec Drain Refrig (264) End Panels customer side (1219) -
Page 6: Installation
Case is to arrive at store as was shipped form factory. See reference above for proper shipment referencing. (Not actual case) Receiving Case Upon receiving your new Hussmann Case all equipment should be thoroughly examined for shipping damage before and during unloading. This equipment has been carefully inspected at our factory. -
Page 7: Placement
Installation (cont’d) Placement panels. Check for damage before discarding packaging. Important: See lifting instructions to properly lift In the case a fork lift truck is not available follow case when being placed on dollies or permanent the demonstration below to properly lift case us- location. -
Page 8: Q3-Mv Lifting And Transport Instructions
Installation (cont’d) Q3-MV Lifting and Transport 5. The Q3-MV merchandiser can be raised at Instructions one end underneath the deck with a forklift to allow the placement of rollers or dollies. 1. The Q3-MV can be lifted by a forklift at typical 6. -
Page 9: Front Body Panel Install
Installation (cont’d) Front Body Panel Install Fasten Rear Body Panel Install (1) Align pre drilled holes to base of case A Phillips Screw Driver/Bit will be needed to (2) Secure top and bottom of rear panel using install body panels. fasteners as shown below. -
Page 10: Leveler Adjustment
Installation (cont’d) Leveler Adjustment Note: To avoid removing concrete flooring, begin line up levelling from the Highest point of the Position the case at the highest point. Set a long store floor. magnetized level (4ft [1220 mm] or more) on either underneath the deck or on top of the case. Ensure to level case from front to back and side to side. -
Page 11: Parts List
Q3-DV & MV/FV PACKLIST CH Parts List ITEM PART # PANEL USE? □ TRIM A 1H63905002 □ TRIM B 143394-2B □ 1H97637004 (STAINLESS) TRIM C □ 1H97637007 (EXT COLOR) □ 1H97784004 (STAINLESS) TRIM D □ 1H97784007 (EXT COLOR) 2H00636004 (STR TO STR) □... - Page 12 CKLIST CHECKSHEET INSPECTOR _________________ SALES ORDER # _____________ EXT COLOR _________________ *SEE INSTALLATION GUIDE NEL USE? INT FINISH __SS__/__BLACK___ J, K J, K J, K J, K J, K REV B 05/08/2015...
-
Page 13: Arm Adjustment
Installation (cont’d) Q3-MV Arm/Glass Adjustment The LED light can now be removed to access Before any adjustments are made ensure the Turn Buckle. that the case is completely level from front to back and left to right. A level case will ensure optimal alignments as well to like cases. -
Page 14: Q3-Mv Case
Installation (cont’d) -
Page 15: Joining Preparation
Installation (cont’d) Setting and Joining 1. Using case blueprints, measure off and mark The sectional construction of these models en- on the floor the exact dimensions of where the able them to be joined in line to give the effect of cases will sit. Snap chalk line for front and back one continuous display. - Page 16 Installation (cont’d) 3. Set second case within one foot (1’) of the first 5. Apply liberal bead of case joint sealant case. Keep the supports along the length of the (butyl) to first case. Sealant area is shown case and far end of case. Level case to the first using a striped line in illustration in page 14. using the instructions in step one. Apply heavy amount to cover entire shaded area.
- Page 17 Installation (cont’d) 7. To compress butyl at joint, use two Jurgenson wood clamps. Make sure case is level from front to back and side to side on inside bulkheads at joint. 8. Attach sections together via the bolts pictured in the illustration below. 9.
-
Page 18: Refrigeration
In the case pressure was not maintained sealed at factory already. Seal both the inside contact your Hussmann Service Tech for further and outside. We recommend using an expanding assistance. -
Page 19: Refrigeration Spec Sheets
Refrigeration Spec Sheets MEAT /FISH SERVICE CASE HUSSMANN - Q3-MV /FV -EP (CHINO) Q3-‐ M V / F V-‐ E P MULTI-‐ D ECK VERTICAL G LASS SERVICE MEAT / FISH C ASE ... -
Page 20: Pipining Schematic
Refrigeration (cont’d) - Page 21 Refrigeration (cont’d) See demonstrations below for detailed overview of the Q3-MV Piping schematic. DRIER FILTER HAND VALVE SUCTION STOP SOLENOID HEAT EXCHANGER (OPTIONAL)
- Page 22 Refrigeration (cont’d)
- Page 23 Refrigeration (cont’d) Piping schematic w/serpentine coils and Gravity Coil...
-
Page 24: Electrical
Electrical Field Wiring Merchandiser Electrical Data Field wiring must be sized for component am- Technical data sheets are shipped with this peres stamped on the serial plate (refer to pg 16 manual. The data sheets provide merchandiser for location). Actual ampere draw may be less electrical data. -
Page 25: Remove Rear Raceway
Electrical Cont’d Remove Rear Raceway Electrical Conduit (Electrical Box) The Merchandisers Electrical access is located The Merchandisers Electrical conduit can be at the rear of the case. Fasteners must be re- found inside the compartmentat the rear. Remov- moved in order to gain access. See illustration ing the raceway will gain access to the electrical below. -
Page 26: Electrical Wiring Diagram
Wiring Diagram... - Page 27 Wiring Diagram (Cont’d)
- Page 28 Wiring Diagram (Cont’d)
- Page 29 Wiring Diagram (Cont’d)
-
Page 30: User Information
User Information Start Up Load Limit See the merchandisers Data Sheet Set for refrig- Each Merchandiser has a Load Limit. Shelf life of erant settings and defrost requirements. Bring perishables will shorten if Load Limit is violated. merchandisers down to the operating tempera- AT NO TIME SHOULD THE MERCHANDISER tures listed on the Data Sheet. - Page 31 SETUP TROUBLE SHOOTING sec- equipped with easy adjustment features for vary- tion. ing store conditions. Please refer published case specifications on Baseline Settings Hussmann website 75°F and 55%RH* ambient store conditions • Evaporator temperature: 28° F specific re- Refer to A419 Display Symbols, Control Func- frigerant equivalent (with coils under load) tion, Ranges, Units, Values, and Factory Settings •...
- Page 32 User Information (cont’d) Merchandising Requirements Use a consistent display strategy in each case . Rotate product every several hours. Bottom layer Hussmann recommends the use of flat bottomed should be rotated to the top and flipped. This aluminum or high density plastic trays as the ensures even cooling, dehydration and color ideal merchandising display method.
- Page 33 Products can be stacked too high on trays or dis- rations are NOT RECOMMENDED and working play ware, the Spiral serpentine coil underneathe outside of the Hussmann requirements will ad- the deck pans are the main source for cooling versely affect product and/or case performance.
-
Page 34: Fault Codes
* The sum of the Setpoint and Differential values must be within the Setpoint range, or the control may not function properly. Also, dIF (Differential) applies below the SP, and not a ± value (i.e. . SP - dIF = Cutout Value) † Hussmann Set Values are recommended, but each Operational Environment may dictate minor adjustments. -
Page 35: Maintenance Case Cleaning
Maintenance Case Cleaning Clean frequently to avoid build-up of hard, stub- Long life and satisfactory performance of any born stains. A stainless steel cleaning solution equipment are dependent upon the care it re- may be used periodically to minimize scratching ceives. - Page 36 Maintenance Cont’d Do Not Use: • Abrasive cleaners and scouring pads, as these will damage the finish. • A hose on lighted shelves or submerge light- ed shelves in water. • Solvent, oil or acidic based cleaners on any interior surfaces. • A hose on LED Lights or any other electrical component.
-
Page 37: Troubleshooting
Troubleshooting Problem Possible Cause Possible Solution Product too cold Spiral Deck Coil (SDC) is Probe the deck with the product in place. If the deck is less and/ or freezing too cold. than 29°F increase the SDC thermostatic SP incrementally. Allow approximately 60 minutes or stable temperatures for system to react then recheck temperatures. - Page 38 MERCHANDIZING RECOMMENDATIONS (page 29) section the conduction cooling for further information. from the SDC Incorrect replacement Use only Hussmann genuine replacement parts or equivalent. lighting is adding too much heat Case temperature is Ambient conditions may Check case position in store. Is the case located near an too warm.
- Page 39 Troubleshooting Cont’d Problem Possible Cause Possible Solution Case temperature is The t-stat temp is set too Check settings. See Technical Specifications section. too cold. low. Ambient conditions may Check case position in store. Is the case located near an be affecting the case open door, window, electric fan or air conditioning vent that operation.
- Page 40 To obtain warranty information or other support, contact your Hussmann representative. Please include the model and serial number of the product. Hussmann Warranty / Technical Assistance (800) 592-2060 Hussmann Corporation, Corporate Headquarters: Bridgeton, Missouri 63044 2014...
Need help?
Do you have a question about the Q3-M/FV-EP and is the answer not in the manual?
Questions and answers