Table of Contents
Advertisement
Quick Links
Advertisement
Table of Contents

Related Manuals for Insportline Gemini R200


Summary of Contents for Insportline Gemini R200
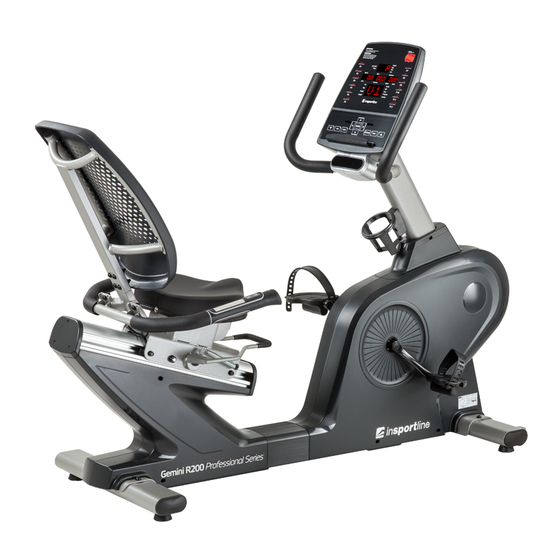
- Page 1 USER MANUAL – EN IN 14172 Recumbent inSPORTline Gemini R200...
-
Page 2: Table Of Contents
CONTENTS SAFETY PRECAUTIONS........................PARTS DETAILS ............................. SCREW BAG ............................EXPLODED DRAWING........................... PARTS LIST ............................ASSEMBLY STEPS ..........................12 CONSOLE OPERATION INSTRUCTIONS................... 15 DISPLAY INTRODUCTION ....................... 15 DISPLAY AND START-UP OF THE BOOT WINDOW ..............15 KEY INSTRUCTIONS ........................15 PROGRAM FUNCTION ........................16 PROGRAM GRAPHS .......................... -
Page 3: Safety Precautions
SAFETY PRECAUTIONS Read carefully this manual before first using. Pay attention to all warnings and precautions to avoid an injury. WARNING: To reduce the risk of an electric shock always unplug this device from electrical outlet immediately after using and before cleaning. To use it safely follow these recommendations: 1. -
Page 4: Parts Details
PARTS DETAILS A. Console mast set B. Main frame set C. Front stabilizer set D. Rear stabilizer set E. Handrail tube set F. Back seat pad G. Seat pad... - Page 5 H. Console mast decoration cover (L/R) Left and right pedal set J. Console set (LED) K. Water bottle holder L. Accessory holder M. Console front decoration cover (L/R) N. Console lower decoration cover...
-
Page 6: Screw Bag
SCREW BAG Item Description Qty Item Description K01 Truss inner hex screw M8xP1.25x25 K13 Truss inner hex screw M8xP1.25x20 K02 Spring washer M8 K14 Spring washer M8 K03 Washer Φ8xΦ16x1.5t K15 Flat washer 8x 16x1.0t K04 CKS inner hex steel screw K16 Truss cross screw M4xP0.7x12 M8xP1.25x20 K05 Washer 8x 12x1.0t... -
Page 7: Exploded Drawing
EXPLODED DRAWING... -
Page 8: Parts List
PARTS LIST Item Main frame welding Bearing Five-direction bearing seat bushing Sensor fixing seat Truss cross screw M4xP0.7x10 Al rail Belt 2.5x160mm (black) Rear rail fixing plate Counter sink inner hex steel screw M8xP1.25x15 Seat baffle Truss inner hex screw M8xP1.25x15 Main frame side cover (left) Main frame side cover (right) Anti-shock soft tube... - Page 9 Belt -52"x6 groove Small dynamo fixing iron slice Truss philips screw M4xP0.7x10 Dynamo Washer Φ6xΦ19x1.5t Truss philips screw M6xP1.0x12 Belt 350" J2 Small motor Cable Nylon nut M5xP0.8 Truss philips screw M5xP0.8x40 EMS lower controller Truss cross screwM4xP0.7x10 Battery 6V 2.3Ah Buckle-F 38X50 Buckle-M 38X50 Belt 2.5x160mm (black)
- Page 10 Adjusting shaft Seat brake block set Washer ψ5xψ12x1.0t Pressing head cross screw M4xP0.7x8 Adjusting ring bushing Adjusting handle bar welding dipping PU Nylon nut M12xP1.75 Wire fixing knob UC-0.5 Truss cross screw M4xP0.7x10 Extention spring Washer Φ6xΦ19x1.5t Truss inner hex screw M6xP1.0x15 Copper bushing Washer Φ8xΦ20x1.5t Spring washer M8...
- Page 11 139-24 Wireless heart board connection wire 139-25 Mult-media board connection wire 139-26 Control wire (upper) 139-27 Hand grip fast key connection wire (upper) Computer console lower decoration cover Computer console front decoration cover (left) Computer console front decoration cover (right) Stuff bottle shelf Bottle shelf Control tube decoration cover (left)
-
Page 12: Assembly Steps
ASSEMBLY STEPS To assemble this device correctly, follow these steps: Step 1 Fix and fasten the main frame set (B) and the front and rear stabilizer set (C, D) with the screws (K01), spring washers (K02) and washers (K03). ... - Page 13 Step 2 According to the picture connect the relative wires. Thereafter lock the handrail set (E) to the main frame set (B) with the screws (K09), washers (K10 and K11) and nylon nuts (K12). Don’t fasten them too tightly. ...
- Page 14 Step 3 Connect the console (J) to the wires of the console mast set. Fasten the console (J) with the screws (K17). Then fix and fasten the front decorative cover of the console (M) with the screws (K18 and K19)....
-
Page 15: Console Operation Instructions
CONSOLE OPERATION INSTRUCTIONS DISPLAY INTRODUCTION This is a LED display console, and the functions shown include: RPM, SPEED, TIME, CALORIES, DISTANCE, WATTS, LEVEL, dot matrix display of the PROGRAM graph. DISPLAY AND START-UP OF THE BOOT WINDOW 1. Standby mode After the console starts to light up, dot matrix display shows Metric or British unit (“KM”... -
Page 16: Program Function
PAUSE : If you press this button while exercising, the program will immediately operate the “PAUSE” operation. If you press it during the program setting you can go back to the program selected page and rework it. : Press the “STOP” key to stop it. You can use “ENTER” key to switch the display screen STOP in this order: “SPEED - TIME –... - Page 17 After the setting of “DISTANCE”, press “ENTER” key, the CALORIES indicator lights up and the LED indicator light shines on the display of “CALORIES”. The initial value of “CALORIES” is “0”. Press direction keys to set “CALORIES”. The TIME – DISTANCE – CALORIES can be set as a cycle. After the target values of TIME, DISTANCE and CALORIES have been set in, press the key “START”.
- Page 18 Press “STOP” and you will stop the program. Press it again and you will clean the exercise data and will go back to the main program selecting page for MANUAL/PROGRAM/USER/HRC/WATTS. Dot matrix displayed messages during exercising: If the RPM of 30 (during exercising) has not been reached, the screen displays twice a rolling string of “RPM↑”...
- Page 19 B) Operating program of “HEART RATE CONTROL” function 1) In the program, comparison between “actual heart rate” and “preset heart rate (55% / 75% / 90% / TARGET)” will be conducted once each 10 seconds. 2) When the program fails to detect “actual heart rate”, then the program will be paused and resistance won’t be increased.
-
Page 20: Program Graphs
Dot matrix displayed messages during exercising: If the RPM of 30 (during exercising) has not been reached, the screen displays twice a rolling string of “RPM↑” for 5 seconds. After this message, if the RPM still has not the required value (30), there will appear twice the rolling string of “PAUSE”... -
Page 21: Terms And Conditions Of Warranty, Warranty Claims
TERMS AND CONDITIONS OF WARRANTY, WARRANTY CLAIMS General Conditions of Warranty and Definition of Terms All Warranty Conditions stated hereunder determine Warranty Coverage and Warranty Claim Procedure. The seller is SAXO LTD with its registered office in Sakar Planina Street 1, Ruse, Bulgaria. Company Registration Number: 117028813, registered in the Trade Register. - Page 22 Buyer shall make an agreement about an alternative solution. In case such agreement is not made, the Seller is obliged to provide the Buyer with a financial compensation in the form of a refund. Office: Ruse, "TEC Iztok" 20 Street Phone: 0894 566 060 E-mail: office@yako.bg Web: www.yakosport.eu www.insportline.bg...
Need help?
Do you have a question about the Gemini R200 and is the answer not in the manual?
Questions and answers