Table of Contents
Advertisement
Quick Links
Advertisement
Chapters
Table of Contents
Troubleshooting

Related Manuals for Scantron OpScan 4ES


Summary of Contents for Scantron OpScan 4ES
- Page 1 ® OpScan 4ES & iNSIGHT 4ES Operator’s Guide...
- Page 3 Prosper, Remark, ScanBook, ScanFlex, ScanMark, ScanTools Plus, ScanTools Prisma, Scantron DesignExpert, SelfScore, Survey Tracker Plus, TransOptic, Scantron, and the logo are trademarks in the U.S. and/or other countries, of Scantron Corporation or its affiliate(s). PostScript is a trademark of Adobe Corporation.
- Page 5 This manual covers the following models: • OpScan 4ES • OpScan 4ES with SelfScore • iNSIGHT 4ES • iNSIGHT 4ES with SelfScore When important, differences between the scanners are explained in the text.
- Page 6 • Chapter 7, “ES/ScanMark Emulation” describes how to use ES/ScanMark mode to emulate a Scantron ES 2010, ES 2260, or ES 2800 scanner. • Chapter 8, “Cleaning the Scanner” explains how to clean the scanner. Scantron OpScan 4ES and NSIGHT 4ES Scanners...
- Page 7 OpScan 4ES and iNSIGHT 4ES Quick Tips - Maintenance (part number 277 298 xxx*) • OpScan 4ES and iNSIGHT 4ES Quick Tips - Display Panel Messages (part number 277 285 xxx*) • Elements of Data Collection (part number 277 292 xxx*) Operator’s Guide...
- Page 8 If you require assistance, see “Product Support and Support Services” on page 157 for information on contacting Scantron Customer Support. World Wide Web You can access our Web site at www.scantron.com. Access viii Scantron OpScan 4ES and NSIGHT 4ES Scanners...
- Page 9 Preface NOTES Operator’s Guide...
- Page 10 Preface Scantron OpScan 4ES and NSIGHT 4ES Scanners...
-
Page 11: Table Of Contents
OpScan 4ES Standard Features ........ - Page 12 Clearing Document Jams ..........43 Scantron OpScan 4ES and iNSIGHT 4ES Scanners...
- Page 13 Scantron Score Emulation Mode ........
- Page 14 Background Menu Flowchart ........104 Scantron OpScan 4ES and iNSIGHT 4ES Scanners...
- Page 15 Scanner Information ..........105 Scanner Model .
- Page 16 Troubleshooting Chart ..........154 Chapter 10: Product Support and Services Scantron OpScan 4ES and iNSIGHT 4ES Scanners...
- Page 17 Standard Form Orders ......... . 157 Custom Form Orders .
- Page 18 Terminology ........... 214 Scantron OpScan 4ES and iNSIGHT 4ES Scanners...
- Page 19 Select Stacker Messages ........215 Cleaning the Select Stacker.
- Page 20 Scantron OpScan 4ES and iNSIGHT 4ES Scanners xxiv...
-
Page 21: Chapter 1: Scanner Basics
Scanner Components ..... . page 2 OpScan 4ES Standard Features ....page 7 iNSIGHT 4ES Standard Features . -
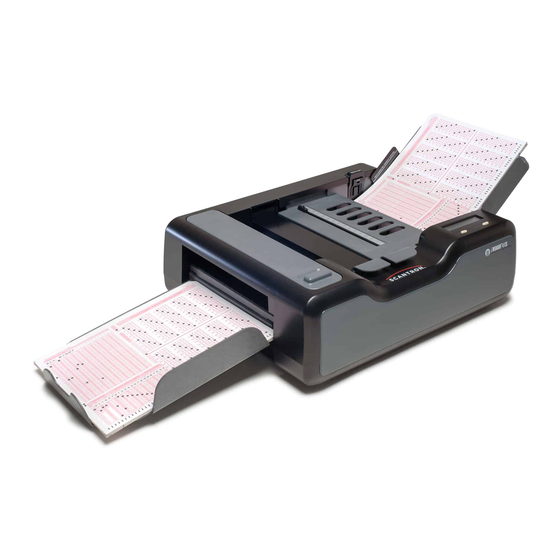
Page 22: Scanner Components
Read head components go here. Thickness sensor Used to detect thickness of forms to ensure only one sheet is being scanned at a time. Transport bed Supports the sheet as it moves through the scanner. Scantron OpScan 4ES and NSIGHT 4ES Scanners... -
Page 23: Transport Bed Closed View
Chapter 1: Scanner Basics Scanner Components Transport Bed Closed View Component Function Adjustment bar Stops the sheet in the output tray as the sheet leaves the transport bed. Prior to scanning, the adjustment bar needs to be adjusted to the length of the sheets being scanned. Buttons Enable you to start and stop the scanner and perform other menu driven functions. -
Page 24: Side And Back Views
Component Function Model and Provides model and serial number information. You will be serial number asked for these numbers when calling Scantron Customer Support for assistance. On/Off Switch Turns scanner on (1) and off (0). Positioning Must be extended to position the scanner at the proper stand angle for scanning. -
Page 25: Front And Top View
Chapter 1: Scanner Basics Scanner Components Component Function Quick Tips slot Provides a location on the scanner for the Quick Tips guides. The slot is located on the back of the upper input tray. Select Stacker Provides a connection point for the data cable going to the port optional Select Stacker. - Page 26 Locks the input tray in the down position for easier loading of sheets. The input tray lever releases the tray lock. The input tray must be up for the scanner to function properly. Scantron OpScan 4ES and NSIGHT 4ES Scanners...
-
Page 27: Opscan 4Es Standard Features
Chapter 1: Scanner Basics OpScan 4ES Standard Features OpScan 4ES Standard Features Standard Features • 2800 sheet per hour throughput • Automatic-feed • Pencil mark detection • Jam, multiple-sheet, and skew detection • 40 character alphanumeric display panel • Integrated diagnostics system with messages sent to scanner display panel and host computer •... -
Page 28: Specifications
100-240 volt operation: 100-240 volts AC (- 10%, +6%): 47-63 Hz; US 3-prong plug; 15 amp dedicated circuit • Communications • USB 1.1 or 2.0 - OpScan 4ES operates asynchro- nous using a virtual com port with user-defined protocol • Operation •... - Page 29 Chapter 1: Scanner Basics OpScan 4ES Standard Features from the forms and the amount of processing done on the data while scanning) Operator’s Guide...
-
Page 30: Insight 4Es Standard Features
.200 inline, .200 offset, .200 line read, and .300 line read • Input tray and output tray capacity of up to 100 sheets • Sheet-handling capacity of 2.5 x 5-inch to 9 x 14- inch, 60-100 lb. offset sheets Scantron OpScan 4ES and NSIGHT 4ES Scanners... -
Page 31: Options
Chapter 1: Scanner Basics iNSIGHT 4ES Standard Features Options • Programmable interactive printer(s) that print information on the sheet being scanned based on the scanned data. The printer(s) can print error codes, alphanumeric messages, serial numbers, validation flags, and test scores with no effect on the throughput rate. - Page 32 Imaging mode, or 2800 sheets per hour in OMR only mode. (Actual scanning rate depends on quantity of data read from the form and the amount of processing done on the data while scanning). Scantron OpScan 4ES and NSIGHT 4ES Scanners...
-
Page 33: System Requirements
Chapter 1: Scanner Basics System Requirements System Requirements For information about system requirements for the OpScan 4ES or iNSIGHT 4ES scanner, go to www.scantron.com/scanners. Operator’s Guide... -
Page 34: User Precautions
Use only the recommended cleaning supplies to prevent damage to scanner components. Supervisors should review their practices and make compliance with these precautions a part of the job description for operation of the scanner. Scantron OpScan 4ES and NSIGHT 4ES Scanners... -
Page 35: Environmental Information
Chapter 1: Scanner Basics Environmental Information Environmental Information • Scantron scanners are designed to meet worldwide environmental requirements. • Guidelines are available for the disposal of consumable items that are replaced during maintenance or service. Follow local regulations or contact your local sales agent for more information. -
Page 36: Ul Regulatory Compliance Statement
This class is eye-safe under all operating conditions • Array pulse duration 256usec, maximum power output 0.34mW. CAUTION: Use of controls or adjustments or performance of procedures other than those specified herein may result in hazardous radiation exposure. LED Aperture Scantron OpScan 4ES and NSIGHT 4ES Scanners... -
Page 37: Setting Up Your Scanner
Handling “Recalibrate/See Manual” Messages . page 31 Uninstalling Scanner Utilities Software ..page 32 Chapter 2: Setting Up Your Scanner This chapter covers setup of your OpScan 4ES or iNSIGHT 4ES scanner. Operator’s Guide... -
Page 38: Selecting A Good Location
The scanner itself is 21 X 15 X 9 in. (54 X 37 X 23 cm). Temperature. Place the scanner in a location with temperatures between 60° and 85° F (16° and 29° Scantron OpScan 4ES and NSIGHT 4ES Scanners... -
Page 39: Assembling The Scanner
Chapter 2: Setting Up Your Scanner Assembling the Scanner Assembling the Scanner Extend the positioning stand so that the scanner is placed at the proper angle for operation. Install the paper guide by sliding it into the slot in the input tray. Operator’s Guide... - Page 40 This helps prevent loss of the instructions. Install the output tray (or the Select Stacker (see Appendix D then continue with the next step Scantron OpScan 4ES and NSIGHT 4ES Scanners...
- Page 41 Chapter 2: Setting Up Your Scanner Assembling the Scanner below)). Hook the end of the tray that has two prong-like tabs into the end of the scanner. Adjust the adjustment bar to the length of the sheets that you will be scanning. Operator’s Guide...
-
Page 42: Installing Printer Cartridge(S)
Installing Printer Cartridge(s) Installing Printer Cartridge(s) If your scanner is equipped with the transport printer option, use the following instructions to install the printer cartridges. Unlatch and remove the printer cover. Locate the cartridge holder(s). Scantron OpScan 4ES and NSIGHT 4ES Scanners... - Page 43 Chapter 2: Setting Up Your Scanner Installing Printer Cartridge(s) Slide the printer cartridge into the cartridge holder “feet first” then press the top of the cartridge firmly into the cartridge holder until you feel two clicks. This ensures that the cartridge is fully seated.
-
Page 44: Installing Scanner Utilities Software
Browse to your CD-ROM drive. Double-click the setup.exe file to run the setup program. Follow the on-screen instructions to install the drivers and scanner utilities appropriate for your computer. Click Finish when setup is complete. Scantron OpScan 4ES and NSIGHT 4ES Scanners... -
Page 45: Connecting The Scanner
Chapter 2: Setting Up Your Scanner Connecting the Scanner Connecting the Scanner This section describes how to connect the power supply and computer to your scanner. IMPORTANT: Before connecting the scanner to the computer and turning it on, be sure to install the drivers and scanner utilities on the host computer as described in the previous section. - Page 46 Plug the rounded end of the power supply into the power port on the back of the scanner. CAUTION: Do not plug the rounded end of the power supply into any part of the computer. Scantron OpScan 4ES and NSIGHT 4ES Scanners...
-
Page 47: Connecting The Scanner To The Computer
Locate the USB ports on the back of your com- puter. Plug the A end (flat end) of the USB cable into the USB communications port NOTE: A USB 1.1 (OpScan 4ES) or 2.0 (OpScan 4ES or iNSIGHT 4ES) communications port is required. NOTE:... - Page 48 Plug the USB B connector (square end) into the USB port on the back of the scanner. IMPORTANT: There may be a sticker covering the USB port. If so, remove it before plugging in the USB cable. Scantron OpScan 4ES and NSIGHT 4ES Scanners...
-
Page 49: Turning The Scanner On
Chapter 2: Setting Up Your Scanner Turning the Scanner On Turning the Scanner On CAUTION: Do not turn on the scanner before installing the drivers and scanner utilities software. Doing so may result in incorrect drivers being loaded. (This statement does not apply if you are using the scanner in SelfScore mode without a computer.) Press the switch on the back of the scanner to turn the scanner on (l) or off (0). -
Page 50: Installing Scanning Software
In most cases, your older scanning software will work if you select an earlier version scanner that is compatible with the OpScan 4ES or iNSIGHT 4ES. Use the following as guidelines: •... -
Page 51: Handling "Recalibrate/See Manual" Messages
Chapter 2: Setting Up Your Scanner Handling “Recalibrate/See Manual” Messages Handling “Recalibrate/See Manual” Messages The scanner firmware does diagnostics checks each time the unit is powered on and during scanning. If the firmware determines that the read heads need to be recalibrated, you will see the following messages on the display panel. -
Page 52: Uninstalling Scanner Utilities Software
Uninstall. A message appears asking you to confirm that remove the selected application and all of its features. Click Yes. Click Finish when the uninstall is complete. Scantron OpScan 4ES and NSIGHT 4ES Scanners... -
Page 53: Operating Your Scanner
In this chapter: Verifying Proper Setup ....page 34 Configuring the Scanner ....page 37 Scanning Procedure . -
Page 54: Verifying Proper Setup
Ensure that the positioning stand is in the down position. Ensure that the power supply is plugged into both a wall outlet or power strip and the back of the scanner. Scantron OpScan 4ES and NSIGHT 4ES Scanners... - Page 55 Chapter 3: Operating Your Scanner Verifying Proper Setup Ensure that the scanner is connected to the computer via USB cable. Ensure that the input tray and output tray (or Select Stacker) are in place and that the adjustment bar is properly positioned for the sheets being scanned.
- Page 56 Chapter 3: Operating Your Scanner Verifying Proper Setup Ensure that the covers on the sheet deflector (or optional bar code reader), read head, and printer (optional) are closed and fully seated. Scantron OpScan 4ES and NSIGHT 4ES Scanners...
-
Page 57: Configuring The Scanner
Chapter 3: Operating Your Scanner Configuring the Scanner Configuring the Scanner Your scanner comes preconfigured by Scantron ready to meet most scanning needs. However, should you have special requirements, use the background menus to configure the scanner. See Chapter 6, “Using the Background Menu”... -
Page 58: Scanning Procedure
If the display does not match one of the two above, verify that you have properly set up the scanner as described in Chapter 2, “Setting Up Your Scanner”. If you are unable to correct the problem, refer to Chapter 9, “Troubleshooting”. Scantron OpScan 4ES and NSIGHT 4ES Scanners... - Page 59 Chapter 3: Operating Your Scanner Scanning Procedure Press the Press To Load button on the side of the input tray and while holding it down, complete steps 4 (optional), 5, and 6 in this procedure. NOTE: Depressing this lever allows the sheets you load to slide as far up into the input tray area as possible.
- Page 60 Verify that the sheets are as far toward the read head as possible. Slide the paper guide so that it just touches the sheets. Open your scanning software on the host computer and use it to control the scanning process. Scantron OpScan 4ES and NSIGHT 4ES Scanners...
- Page 61 Chapter 3: Operating Your Scanner Scanning Procedure For software instructions, refer to the documentation for the software you are using. Operator’s Guide...
-
Page 62: Understanding Display Panel Messages
The display panel displays information regarding: • Scanner status • Errors • What to do next • Button functionality See Chapter 5, “Display Panel Messages” for explanations of all display panel messages. They are listed alphabetically. Scantron OpScan 4ES and NSIGHT 4ES Scanners... -
Page 63: Clearing Document Jams
Chapter 3: Operating Your Scanner Clearing Document Jams Clearing Document Jams If documents jam during scanning, the display panel will display an error message. You can use the following general procedure for clearing jams, or see Chapter 5, “Display Panel Messages” for more information on the specific error message that you received. - Page 64 Chapter 3: Operating Your Scanner Clearing Document Jams NOTES Scantron OpScan 4ES and NSIGHT 4ES Scanners...
-
Page 65: Scanner Modes
SelfScore Mode ......page 55 Scantron Score Emulation Mode ... . page 57... -
Page 66: Omr With Imaging Mode
Bar code image data is converted to its ASCII equivalent. And, if optical character recognition (OCR) or intelligent character recognition (ICR) is being used, those grids are converted to their ASCII equivalent as well. Scantron OpScan 4ES and NSIGHT 4ES Scanners... - Page 67 Chapter 4: Scanner Modes OMR with Imaging Mode The resulting data is stored on the PC as an ASCII data record and image data. This process is performed for each sheet scanned until the operator ends the session. NOTE: Because the ScanTools data collection soft- ware handles the image data sent from the scanner, you should consult your software doc- umentation to realize the full potential of OMR...
- Page 68 • You simply want to score tests or tally surveys or ballots and do not need to retain the ASCII data (SelfScore mode is simple to use and does not require a PC) Scantron OpScan 4ES and NSIGHT 4ES Scanners...
-
Page 69: Omr Only Mode
In this mode, the scanner sends an ASCII representation of the marks on the sheet to the computer for each sheet scanned. In OMR Only mode, the scanner must be connected to a PC with Scantron software (e.g. ScanTools, ® Remark , Prosper , SurveyTracker Plus ). - Page 70 PC and does not require Scantron data collection software) • You simply want to score tests and do not need to retain data (SelfScore mode is simple to use and does not require a PC or software) Scantron OpScan 4ES and NSIGHT 4ES Scanners...
-
Page 71: Es/Scanmark Mode
4ES with SelfScore scanners Overview ES/ScanMark emulation mode enables the OpScan 4ES or iNSIGHT 4ES to function like a Scantron ES 2010, ES 2260, or ES 2800 scanner. This allows you to use your existing software and form definitions with your new scanner. - Page 72 You cannot use Scantron data collection software • You simply want to score tests and do not need to retain data (SelfScore mode is simple to use and does not require a PC or software) Scantron OpScan 4ES and NSIGHT 4ES Scanners...
-
Page 73: Download Run And Download Debug Mode
Select Download Run mode to run download programs. Select Download Debug to debug Download programs. Applies To • OpScan 4ES scanners • OpScan 4ES with SelfScore scanners • iNSIGHT 4ES scanners • iNSIGHT 4ES with SelfScore scanners Overview NOTE:... - Page 74 Use a host computer that is not a PC When To Avoid Select a different mode if: • You do not have someone to set the communications parameters and to do the command line programming Scantron OpScan 4ES and NSIGHT 4ES Scanners...
-
Page 75: Selfscore Mode
ASCII data. In SelfScore mode, the scanner has form definitions for standard test forms available from Scantron so there is no need to create or download a form definition. To start a new session, load the key into the input tray and press the START button. - Page 76 You want to use the scanner as a stand alone test scoring machine • You want to error mark and score tests • You do not want to use a Scantron software application to collect data • You have a PC and ScanTools software and want to collect ASCII data...
-
Page 77: Scantron Score Emulation Mode
Chapter 4: Scanner Modes Scantron Score Emulation Mode Scantron Score Emulation Mode Applies To All iNSIGHT 4ES, OpScan 4ES with SelfScore, and SelfScore scanners. Overview Scantron Score mode allows you to use your iNSIGHT 4ES scanner to perform the following Scantron Score functions. - Page 78 Total subjective points possible = 163 Ballots • Counts ballots and gives you results for student elections, etc Surveys • Tallies responses from teacher evaluations, community surveys, etc Prerequisites Firmware version 8.0 or greater is required. Scantron OpScan 4ES and NSIGHT 4ES Scanners...
- Page 79 Printer Positioning There are small triangles on the scanner printer ruler indicating printer position locations. When operating in Scantron Score emulation mode, the printer position must be set to 2.5 inches and 6.2 inches to properly print the incorrect marks, percentage, score, etc.
- Page 80 2. Note the location of the cartridge holder inside the printer assembly. Also note the ruler, printer alignment mark, and thumbscrew that sits beside the cartridge holder. These are the elements used to position the printer. Scantron OpScan 4ES and NSIGHT 4ES Scanners...
- Page 81 Chapter 4: Scanner Modes Scantron Score Emulation Mode 3. Scantron Score forms require that printers used with an iNSIGHT 4ES scanner are positioned at 2.5 inches and 6.2 inches. Check the printer(s) to ensure that they are in the correct position.
- Page 82 Chapter 4: Scanner Modes Scantron Score Emulation Mode 4. If the printer position requires adjustment, loosen the thumbscrew so you can move the printer. Scantron OpScan 4ES and NSIGHT 4ES Scanners...
- Page 83 Chapter 4: Scanner Modes Scantron Score Emulation Mode 5. Adjust the position of the second printer to the 6.2 inch mark. Operator’s Guide...
- Page 84 Chapter 4: Scanner Modes Scantron Score Emulation Mode 6. Move the printer to the 2.5 inch mark and lightly tighten the thumbscrew. Scantron OpScan 4ES and NSIGHT 4ES Scanners...
- Page 85 Chapter 4: Scanner Modes Scantron Score Emulation Mode Replace the printer cover, ensuring that it is firmly seated. Select Stacker Note that the Select Stacker is not supported on the iNSIGHT 4ES scanner operating in Scantron Score emulation mode. Operator’s Guide...
- Page 86 When finished feeding forms, press End. NOTE: If scanning to software (for example, Remark Classic OMR) press Save to transfer the data to the computer before pressing End. Scantron OpScan 4ES and NSIGHT 4ES Scanners...
- Page 87 For Two Sided Keys: When using a 4ES form, such as the SC882-4ES on a dual head 4ES scanner, Scantron Score emulation mode allows you to scan both sides of a form simultaneously, and print a total for both sides. Other...
- Page 88 When finished feeding forms, press End. NOTE: If scanning to software (for example, Remark Classic OMR) press Save to transfer the data to the computer before pressing End. Scantron OpScan 4ES and NSIGHT 4ES Scanners...
- Page 89 Chapter 4: Scanner Modes Scantron Score Emulation Mode For Multiple Key Versions (on select forms): Mark the Key Mark the key marking rows as you would nor- mally for a single or two sided key (see above). Locate the version ID area on the test form.
- Page 90 Scan key(s) and tests as you would normally (see above). Rescoring Tests The Rescore button offsets the printing slightly, so you can score tests a second time and see differences clearly. Press Rescore. Scantron OpScan 4ES and NSIGHT 4ES Scanners...
- Page 91 Feed the ballot or survey key. Feed the ballot or survey forms (up to 9,999). Feed a Tally form. Troubleshooting • View on-screen error messages for error type and recovery information. • For technical assistance, contact Scantron Support at 1 800 338 5544. Operator’s Guide...
- Page 92 Chapter 4: Scanner Modes Scantron Score Emulation Mode Scantron OpScan 4ES and NSIGHT 4ES Scanners...
-
Page 93: Chapter 5 Display Panel Messages
Display Panel Messages ....page 76 Chapter 5: Display Panel Messages One of the key features of the OpScan 4ES and iNSIGHT 4ES scanners is the integrated diagnostics system. During operation, the scanner performs numerous checks to ensure that the scanner is functioning properly. - Page 94 Chapter 5: Display Panel Messages for awhile. Press any key on the panel to reactivate Scantron OpScan 4ES and NSIGHT 4ES Scanners...
-
Page 95: Scanner Paper Path
Chapter 5: Display Panel Messages Scanner Paper Path Scanner Paper Path The arrows in the illustration below show the path that a sheet takes while moving through the scanner. Use this illustration as a guide to the terminology found in this chapter. -
Page 96: Display Panel Messages
Adjust the paper guide if necessary. Press START to resume scanning. Press OFF to put the scanner into sleep mode. Scantron OpScan 4ES and NSIGHT 4ES Scanners... -
Page 97: Clean Read Head/Last Sheet Selected/Refeed Last Sheet
Chapter 5: Display Panel Messages Display Panel Messages Clean Read Head/Last Sheet Selected/Refeed Last Sheet This message appears when the image quality check, done after the sheet is scanned, fails. This is sometimes caused by a sheet that jams in the read head area. -
Page 98: Clean Read Head/Refeed Last Sheet
Single read head scanners do not have a bottom read head. Place the sheet not scanned successfully back in the input tray. Press START to resume scanning. Press OFF to put the scanner into sleep mode. Scantron OpScan 4ES and NSIGHT 4ES Scanners... -
Page 99: Clear Paper Path/Refeed Last Sheet
Chapter 5: Display Panel Messages Display Panel Messages Clear Paper Path/Refeed Last Sheet This message appears when a sheet remains under the read head or in another area of the transport bed too long, resulting in a jam. To resolve this condition: Clear all sheets from the transport bed. -
Page 100: End Of Batch
Adjust the paper guide. Press Cont to resume scanning. End of Batch This message appears after you pressed End on the control panel after a valid read. This message is information only and requires no action. Scantron OpScan 4ES and NSIGHT 4ES Scanners... -
Page 101: Feed Form/End
Chapter 5: Display Panel Messages Display Panel Messages Feed Form/End This message appears after the scanner received a valid READ command from the computer. It indicates that the scanner is ready to read a form and that the input tray is empty. Press End to end the scanning job. -
Page 102: Feeding Form
Form Error This message indicates that the form scanned does not match the form definition downloaded to the scanner. To resolve this condition, verify that the correct form was fed. Press Cont to continue. Scantron OpScan 4ES and NSIGHT 4ES Scanners... -
Page 103: F=
Chapter 5: Display Panel Messages Display Panel Messages F=<XXX> Z=<XXX> M=<XXXXX>Kb C=<XXXXX> This message appears during form definition download. F is the number of form definitions uploaded. Z is the number of zones in the last form definition uploaded. M is the amount of memory remaining.Z= M= Kb C= -
Page 104: Not Ready
This message means that the scanner is not ready to scan sheets. Press START to ready the scanner to accept commands from the host computer’s software. Press OFF to put the scanner into sleep mode. Scantron OpScan 4ES and NSIGHT 4ES Scanners... -
Page 105: Paper Jam
Chapter 5: Display Panel Messages Display Panel Messages Paper Jam This message appears when a sheet remains under the read head or in another area of the transport bed too long, resulting in a jam. To resolve this condition: Clear all sheets from the transport bed. CAUTION: When removing a sheet from the transport bed, remove it by pulling it forward... -
Page 106: Ready
Recalibrate/See Manual This message appears when the firmware within the scanner determines that recalibration is necessary. See Appendix A, “Recalibration” for instructions regarding how to recalibrate the scanner. Scantron OpScan 4ES and NSIGHT 4ES Scanners... -
Page 107: Reconfigure Host/See Manual
Chapter 5: Display Panel Messages Display Panel Messages Reconfigure Host/See Manual This message appears when not in ES/ScanMark mode and when the firmware determines that the communications parameters need to be set. To resolve this condition, reset the communications parameters to the factory standard settings. See “Comm Configuration (When Not in ES/ScanMark Mode)”... -
Page 108: Scanmark Init Reqd
To resolve this condition, press Cont. The scanner will automatically reinitialize the internal nonvolatile memory. You should not see the message again. If you get the message repeatedly, contact Scantron Customer Support. Sensor 1 Blocked This message appears on initialization only. It indicates that the read head is blocked by paper. -
Page 109: Sheet Did Not Feed/Check Input Path
Chapter 5: Display Panel Messages Display Panel Messages Sheet Did Not Feed/Check Input Path This message appears when the read head cannot detect a sheet in the transport bed within a specified period of time. This is usually caused by the sheets in the input tray not being pushed fully toward the read head when loaded. -
Page 110: Sheet Did Not Leave Output Stacker
Place any sheet(s) not processed by the host software back in the input tray. Press START to continue scanning after taking corrective action. Press OFF to put the scanner in sleep mode. Scantron OpScan 4ES and NSIGHT 4ES Scanners... -
Page 111: Sheet Did Not Leave Select Stacker
To resolve this condition: Clear all sheets from the scanner and Select Stacker transport bed. Blow canned air (Scantron recommends a non- condensing propellant) onto the select sensor and surrounding area to remove paper dust and debris. Place any sheet(s) not processed by the host software back in the input tray. -
Page 112: Sheet Did Not Reach Output Stacker
Sheet Did Not Reach Select Stacker The scanner displays this message when a sheet jams, a sheet skews too far out to be read by the stacker sensor, or a cable became disconnected. Scantron OpScan 4ES and NSIGHT 4ES Scanners... -
Page 113: Sheet Skewed/Last Sheet Selected/Refeed Last Sheet
Chapter 5: Display Panel Messages Display Panel Messages NOTE: To clear a jam, remove the sheet(s) from the transport bed. You may need to turn the roller knob to eject the sheet. To resolve this condition: Clear all sheets from the scanner and Select Stacker transport bed. -
Page 114: Sheet Too Thin/See Manual
Consequently, the second sheet (not a multiple) will cause a “Sheet Too Thin” message to be displayed. To resolve this condition: Scantron OpScan 4ES and NSIGHT 4ES Scanners... -
Page 115: Stopped
Chapter 5: Display Panel Messages Display Panel Messages Verify that the last two sheets in the output tray (top tray for scanner with a Select Stacker) were processed correctly. • The sheet left on the transport bed needs to be rescanned. -
Page 116: Stopping
Unexpected Sheet At Output Stacker This message displays when a sheet arrives at the wrong stacker. This message is also displayed as a result of a dirty sensor and/or dirty conditions surrounding the sensor area. Scantron OpScan 4ES and NSIGHT 4ES Scanners... -
Page 117: Unexpected Sheet At Select Stacker
Chapter 5: Display Panel Messages Display Panel Messages NOTE: Refer to “Cleaning the Select Stacker” on page 216 of this manual for directions on cleaning the select stacker. To resolve this condition: Clear all sheets from the scanner and Select Stacker transport bed. -
Page 118: User Program
This message is information only and requires no action. Waiting This message indicates that the scanner is waiting for instructions from your scanning software. This message is information only and requires no action. Scantron OpScan 4ES and NSIGHT 4ES Scanners... -
Page 119: Waiting For Computer
Chapter 5: Display Panel Messages Display Panel Messages Waiting For Computer This message means that the scanner is ready to scan and is waiting for instructions from the computer. It appears after forms have been loaded and the START button has been pressed Press STOP to take the scanner out of the “ready”... - Page 120 Chapter 5: Display Panel Messages Display Panel Messages NOTES Scantron OpScan 4ES and NSIGHT 4ES Scanners...
-
Page 121: Chapter 6 Using The Background Menu
In this chapter: Entering the Background Menu ... . page 103 Background Menu Flowchart ....page 104 Scanner Information . - Page 122 See the description for each menu item to determine if it applies to the model you have and the mode that you are in. Scantron OpScan 4ES and iNSIGHT 4ES Scanners...
-
Page 123: Entering The Background Menu
Chapter 6: Using the Background Menu Entering the Background Menu Entering the Background Menu Enter the background menu by holding down both buttons for about five seconds. When the message “Background Menu” appears briefly, release the buttons. Operator’s Guide... -
Page 124: Background Menu Flowchart
The flowchart shows ALL menu items (for all model scanners and for all modes). See the individual menu item descriptions to see if the menu items apply to your model scanner and the mode that you are in. Scantron OpScan 4ES and iNSIGHT 4ES Scanners... -
Page 125: Scanner Information
Description The scanner model is displayed immediately after entering the background menu. OpScan 4ES is displayed for both OpScan 4ES and OpScan 4ES with SelfScore models. iNSIGHT 4ES is displayed for both iNSIGHT 4ES and iNSIGHT 4ES with SelfScore scanner models. - Page 126 All models, all modes Description Sheet count refers to the number of sheets that have been scanned since the scanner was put into service. Press Next to advance to the next menu item. Scantron OpScan 4ES and iNSIGHT 4ES Scanners...
-
Page 127: Mode Select
• ES/ScanMark • Download Run • Download Debug • SelfScore (shown only for OpScan 4ES with SelfScore and iNSIGHT 4ES with SelfScore scanners) Shown For All models, all modes Description Use this menu item to change scanner modes. For a description of each of the modes and when to use them, see Chapter 4, “Scanner Modes”. -
Page 128: Defaults Menu
Press Next to advance to the Utilities menu (See “Utilities Menu” on page 113.) Form Type Variables Where <Type>= • Pencil • Shown For iNSIGHT 4ES and iNSIGHT 4ES with Selfscore scanners, all modes Scantron OpScan 4ES and iNSIGHT 4ES Scanners... -
Page 129: Double Sheet
Chapter 6: Using the Background Menu Defaults Menu Description This menu item allows you to select the form type you want to use: pencil or ink. NOTE: This setting can also be controlled in the ScanTools software used on the host computer. NOTE: Both form types will read forms that have been pre-slugged on a laser printer. -
Page 130: Reverse Printing
When reverse printing is off, the characters will print right side up. Press Change to change reverse print status. Press Next to advance to the next menu item. Scantron OpScan 4ES and iNSIGHT 4ES Scanners... -
Page 131: Show Comm Status
Chapter 6: Using the Background Menu Defaults Menu Show Comm Status Variables Where <Status>= • • Shown For All models, all modes except ES/ScanMark Description This menu item allows you to either display or not display communication status. If you select “On,” characters appear in the display panel indicating communication status. - Page 132 Reset to Off • Start over at 5 minutes NOTE: The default setting for the power saver is 15 minutes. Press Next to accept the displayed setting and to advance to the next menu item. Scantron OpScan 4ES and iNSIGHT 4ES Scanners...
-
Page 133: Utilities Menu
See below for a full description of each menu item. NOTE: Scantron recommends powering on the scanner for 10 minutes prior to running any calibration program. NOTE: See “Background Menu Flowchart”... - Page 134 Received a Recalibrate Scanner message on the scanner display • Moved the scanner to a new location. • Been instructed to do so by Scantron Customer Support. For best results, perform the following before calibrating: • Clean the scanner and the read heads. See Chapter 8, “Cleaning the Scanner”...
-
Page 135: Bot Head Calibrate
Chapter 6: Using the Background Menu Utilities Menu Load the calibration forms (part # 202-989-008) that came with your scanner by placing them in the input tray and depressing the Press To Load button. The orientation of the calibration sheets does not matter. Press Quit at any time to abort calibration. -
Page 136: Comm Configuration (When Not In Es/Scanmark Mode)
Press Run to enter a submenu that allows you to display communications parameters, set the communications parameters to the factory default as well as to set a custom configuration. The following menu items appear. Scantron OpScan 4ES and iNSIGHT 4ES Scanners... - Page 137 Chapter 6: Using the Background Menu Utilities Menu Default Config - Set Variables Where <Scanner Model>= • OpScan 4ES • iNSIGHT 4ES Shown For All models, all modes except ES/ScanMark Description This menu item allows you to set the communications parameters to the factory default.
- Page 138 Press Set to set the communications parameters to the default configuration shown above. A Comm Config Complete message will display. Press Quit to complete communications configuration and to exit this submenu. Scantron OpScan 4ES and iNSIGHT 4ES Scanners...
- Page 139 Chapter 6: Using the Background Menu Utilities Menu Config Sheet - Scan Shown For All models, all modes except ES/ScanMark Description This menu item in the Comm Configuration submenu allows you to scan a completed Host Port Communication Configuration Sheet (form number 202-879-003).
-
Page 140: Comm Configuration (When In Es/Scanmark Mode)
Press Show Next to show the next parameter. Press Next at any time to abort the function and advance to the next menu item. Comm Configuration (When in ES/ScanMark Mode) Variables Where <Scanner Model>= • ES/ScanMark Scantron OpScan 4ES and iNSIGHT 4ES Scanners... - Page 141 Chapter 6: Using the Background Menu Utilities Menu Shown For All models, ES/ScanMark mode only NOTE: The Comm Configuration menu item is not displayed if the scanner is displaying the “Recalibrate... See Manual” message. Description This menu item allows you to display and configure the communications parameters.
- Page 142 Press Scan to scan a configuration sheet. The following menu item appears. Feed the Scantron Configuration Sheet by simply placing it in the input tray. It will automatically scan. A Comm Config Complete message will display. Press Scantron OpScan 4ES and iNSIGHT 4ES Scanners...
-
Page 143: Display Brightness
Chapter 6: Using the Background Menu Utilities Menu Quit to complete communications configuration and to exit the Comm Configuration submenu. Comm Config - Display Variables Where <Scanner Model>= • ES/ScanMark Description This menu item allows you to display the communications configuration. Press Next to skip this function and to advance to the next menu item. -
Page 144: Ldg Edge Skew
If that occurs, this function allows you to turn leading edge skew detection off to suppress the errors. However, Scantron cannot guarantee the accuracy of the data collected when leading edge skew detection is turned off. -
Page 145: Print Offset
Where <Position #>= • Whole numbers from -10 to +10 Shown For OpScan 4ES with SelfScore and iNSIGHT 4ES with SelfScore models in SelfScore modes only Description This menu item allows you to adjust the printer offset. Printer offset is used in SelfScore mode and helps ensure that the error marks or answer verification marks are printed right next to the question. -
Page 146: Diagnostics Menu
This menu item allows you to test the scanner’s feed and print capabilities. The test feeds sheets loaded in the input tray, and, if printing is on, the installed printer(s) print a string of characters. Scantron OpScan 4ES and iNSIGHT 4ES Scanners... -
Page 147: Feed/Select
Chapter 6: Using the Background Menu Diagnostics Menu Press Next to skip this test and to advance to the next menu item. Press Run to proceed with the test. The following menu item appears. Load an expendable form or two into the input tray. (Do not use the calibration sheets that came with your scanner as you may need these in the future.) Press Start to scan the sheet(s). -
Page 148: Top Read Validation
This test requires Scantron Reflective Calibration sheets (part number 202-171-989). Press Next to skip this test and to advance to the next menu item. Press Run to proceed with the test. The following menu item appears. Scantron OpScan 4ES and iNSIGHT 4ES Scanners... - Page 149 Place a stack of five, Scantron Reflective Calibration Sheets (part number 202-171-989) into the input tray so that the words “Scantron Reflective” are on top and enter the scanner first. Press QUIT to abort the test. Press START to perform the test.
-
Page 150: Bot Read Validation
Refer to the instructions for Top Read Validation above with the following exception: Place the Calibration Sheets in the input tray so that the words “Scantron Reflective” are face down and enter the scanner last. Bar Code Test NOTE: This menu item displays only if the bar code reader option is installed. - Page 151 Chapter 6: Using the Background Menu Diagnostics Menu Press Run if you want to run the test. The following menu items appear. Load a stack of five Bar Code Diagnostic Forms #91892 (part # 202-167-144) into the input tray. Once the forms are loaded the Start prompt appears.
- Page 152 Scantron Customer Support as described in “Product Support and Services” on page 157. Press Continue to run another test. Press Next to abort the test and advance to the next menu item. Scantron OpScan 4ES and iNSIGHT 4ES Scanners...
-
Page 153: Exiting The Background Menu
Chapter 6: Using the Background Menu Exiting the Background Menu Exiting the Background Menu Shown For All models, all modes Description After you have navigated through the background menu, the menu item shown above appears. Press Enter to re-enter the background menu. Press Exit to exit the background menu. - Page 154 Chapter 6: Using the Background Menu Exiting the Background Menu NOTES Scantron OpScan 4ES and iNSIGHT 4ES Scanners...
-
Page 155: Es/Scanmark Emulation
Chapter 7: ES/ScanMark Emulation Running the scanner in ES/ScanMark mode makes the scanner function like a Scantron ES 2010, ES 2260, or ES 2800 scanner so that you can use your legacy Scantron software and applications with your new scanner. You can even create new form definitions with your legacy software. -
Page 156: Selecting Es/Scanmark Mode
Selecting ES/ScanMark Mode Selecting ES/ScanMark Mode Select the ES/ScanMark mode to make the scanner function like a Scantron ES 2010, ES 2260, or ES 2800 scanner. Enter the background menu by holding both but- tons until the background menu appears (about five seconds). - Page 157 Chapter 7: ES/ScanMark Emulation Selecting ES/ScanMark Mode Press Change until Mode=ES/ScanMark appears in the display. Press Next three times to get to the Background Menu item. Press Exit to exit the background menu. The scanner is now ready for operation in ES/ScanMark mode.
-
Page 158: Set Up, Configure, And Operate The Scanner
• Chapter 2, “Setting Up Your Scanner” • Chapter 6, “Using the Background Menu” • Chapter 3, “Operating Your Scanner” Scantron OpScan 4ES and iNSIGHT 4ES Scanners... -
Page 159: Display Panel Messages
Chapter 7: ES/ScanMark Emulation Display Panel Messages Display Panel Messages Explanations of the display panel messages that appear while in ES/ScanMark mode can be found in Chapter 5, “Display Panel Messages”. The ES/ ScanMark messages are listed alphabetically along with messages displayed in other modes. Operator’s Guide... -
Page 160: Detecting Double Sheets
Clear the paper path, being sure to get all the pieces if the form has torn. Return any unscanned sheets to the input tray. Press Cont to continue. Scantron OpScan 4ES and iNSIGHT 4ES Scanners... -
Page 161: Form Handling
Chapter 7: ES/ScanMark Emulation Form Handling Form Handling The OpScan 4ES and iNSIGHT 4ES scanners can perform form handling using the optional Select Stacker. For information on how to attach and use the Select Stacker, see Appendix D, “Select Stacker”. -
Page 162: Scoring Forms
ES/ScanMark emulation mode do not have that special scoring mode. However, some software applications that can be used with the OpScan 4ES and iNSIGHT 4ES scanners in ScanMark emulation mode (e.g. ParScore) can score and print the score on the forms. See your software documentation for details. -
Page 163: Chapter 8 Cleaning The Scanner
Procedure ......page 146 Chapter 8: Cleaning the Scanner This chapter covers how to clean your OpScan 4ES or iNSIGHT 4ES scanner to keep it in top operating condition. -
Page 164: Schedule
Perforated sheets generate a considerable amount of paper dust. • Read head contamination - Eraser fragments and white out, if used, can build up on the read head. Scantron OpScan 4ES and iNSIGHT 4ES Scanners... -
Page 165: Supplies
Chapter 8: Cleaning the Scanner Supplies Supplies Recommended cleaning supplies are shown below. • Ammonia-based glass-cleaning solution (do not spray directly on the scanner) • Static reducing spray (do not spray directly on the scanner) • Lint-free cloths • Canned air (with non-condensing propellant) Operator’s Guide... -
Page 166: Procedure
Chapter 8: Cleaning the Scanner Procedure Procedure IMPORTANT: Turn the scanner off before cleaning. An illustration to help you identify key parts that need to be cleaned is shown below. The recommended cleaning procedure follows Scantron OpScan 4ES and iNSIGHT 4ES Scanners... - Page 167 Chapter 8: Cleaning the Scanner Procedure Raise the covers for the read head and sheet deflector and remove the printer cover. Spray canned air (with a non-condensing propellant) directly on the transport bed area. This removes large amounts of dust and other types of debris.
- Page 168 CAUTION: Do not use the canned air after this step as it can blow dust on areas that have been cleaned. Lightly dampen a lint-free cloth with water or with a static-reducing spray. Scantron OpScan 4ES and iNSIGHT 4ES Scanners...
- Page 169 Chapter 8: Cleaning the Scanner Procedure Using the dampened cloth, wipe along the transport bed. Start at one end of the bed and work to the other. Lightly dampen a lint-free cloth with soapy water. Locate the drive rollers. Wipe the drive rollers using the lightly dampened cloth.
- Page 170 Using the same cloth, clean the glass on the bottom read head. NOTE: Single read head units do not have glass beneath the top read head. Instead, they have a black shiny strip. Scantron OpScan 4ES and iNSIGHT 4ES Scanners...
- Page 171 Chapter 8: Cleaning the Scanner Procedure Close the read head and sheet deflector. Also replace the printer cover. Turn the scanner back on after it has had a chance to dry. Operator’s Guide...
- Page 172 Chapter 8: Cleaning the Scanner Procedure Scantron OpScan 4ES and iNSIGHT 4ES Scanners...
-
Page 173: Troubleshooting
Use the troubleshooting chart in this chapter to diagnose any issue you encounter with your scanner. If you are still unable to resolve the problem, contact Scantron Customer Support as described in “Product Support and Services” on page 157. NOTE: For optional components, see the appropriate appendix for troubleshooting information. -
Page 174: Troubleshooting Chart
• all jammed sheets have been removed from the paper path. • the scanner has been cleaned as outlined in Chap- ter 8, “Cleaning the Scanner”. • your sheets are printed by Scantron or PrintFlex/ ScanFlex. Scantron OpScan 4ES and iNSIGHT 4ES Scanners... - Page 175 (jogged). • the scanner covers are firmly closed. • the scanner has been cleaned as outlined in Chap- ter 8, “Cleaning the Scanner”. • your sheets are printed by Scantron. Scanner pauses excessively Make sure that: during scanning or is •...
- Page 176 Chapter 9: Troubleshooting Troubleshooting Chart NOTES Scantron OpScan 4ES and iNSIGHT 4ES Scanners...
-
Page 177: Chapter 10 Product Support And Services
Live Chat ......page 159 Chapter 10: Product Support and Services This chapter explains how and where to get assistance with and supplies for your OpScan 4ES or iNSIGHT 4ES scanner. Standard Form Orders Hardware Support and Form Orders www.ScantronStore.com... -
Page 178: Hardware Support
Software Support The Scantron Technical Support Department can provide product support in a variety of ways. Call (800) 445-3141 between 7:30 A.M. and 6:30 P.M., Central Time, Monday through Friday. Scantron OpScan 4ES and NSIGHT 4ES Scanners... - Page 179 Type of computer and the operating system you are using • Steps required to reproduce the problem Website/Email www.scantron.com support@scantron.com. Live Chat You can also choose GoToAssist Live Chat, an instant messaging solution, for Technical Support. Live Chat is available during Technical Support’s normal business hours.
- Page 180 Chapter 10: Product Support and Services NOTES Scantron OpScan 4ES and NSIGHT 4ES Scanners...
-
Page 181: Recalibration
Recalibration should be performed only if you Recalibrate received a “Recalibrate..See Manual” message on the scanner display panel or if instructed to do so by Scantron Customer Support. NOTE: Do not recalibrate unless required to do so. Recalibrating too often can produce less than optimal results. - Page 182 Perform a Bot Head Calibrate function (if your scanner is equipped with a bottom read head) • Exit the background menu Instructions for the above tasks are found in the pages that follow. Scantron OpScan 4ES and iNSIGHT 4ES Scanners...
-
Page 183: Preparing For Recalibration
Clean the scanner and the read head(s) as outlined in Chapter 8, “Cleaning the Scanner”. • Ensure that the calibration forms are clean and undamaged. NOTE: Scantron recommends powering on the scanner for 10 minutes prior to running any calibration program. Operator’s Guide... -
Page 184: Navigating The Background Menu
“Background Menu” appears briefly, release the buttons. Press Next five times or until you reach this menu item. Press Enter to enter the Utilities submenu. The first menu item displayed is the one you need (shown below). Scantron OpScan 4ES and iNSIGHT 4ES Scanners... -
Page 185: Top Head Calibration
Chapter : Recalibration Top Head Calibration Top Head Calibration From the menu item shown below, perform a top read head calibration using the following instructions. Press Run to calibrate the top read head. The fol- lowing menu item appears. NOTE: iNSIGHT 4ES scanners require ten calibra- tion sheets for calibration. -
Page 186: Bottom Head Calibration
From the menu item shown above, perform a bottom read head calibration using the Bot Head Calibrate function. Use the instructions for the Top Head Calibrate function to guide you through the process. Scantron OpScan 4ES and iNSIGHT 4ES Scanners... -
Page 187: Exiting The Background Menu
Chapter : Recalibration Exiting the Background Menu Exiting the Background Menu Press Next until you reach the following menu item. Press Exit to exit the background menu. Operator’s Guide... - Page 188 Chapter : Recalibration Exiting the Background Menu NOTES Scantron OpScan 4ES and iNSIGHT 4ES Scanners...
-
Page 189: Transport Printer
Troubleshooting ......page 186 Appendix B: Transport Printer This chapter covers setting up and using the optional transport printer(s) for the OpScan 4ES and iNSIGHT 4ES scanners. Both single and dual printers are available. IMPORTANT:... -
Page 190: Printer Features
See “Reverse Printing” on page 110 of this manual, for instructions on how to set up the option for reverse printing orientation on your scanner. Scantron OpScan 4ES and iNSIGHT 4ES Scanners... -
Page 191: Getting Started
Chapter : Transport Printer Getting Started Getting Started To prepare your scanner for printing while scanning, perform the following: • Install the printer cartridge(s) • Position the printer(s) • Turn on the printer(s) • (optional) Test the printer(s) • Set up your scanning software to print Instructions for each of these tasks are found in the sections that follow. -
Page 192: Installing Or Replacing Ink Cartridges
Unlatch the printer cover and remove it. If replacing a used cartridge, remove it by holding the printer cartridge tab and pivoting the used cartridge out of the cartridge holder. Prepare the new cartridge. Scantron OpScan 4ES and iNSIGHT 4ES Scanners... - Page 193 Chapter : Transport Printer Installing or Replacing Ink Cartridges • Remove the new cartridge from the box and peel off the tape that covers the ink cartridge nozzles. • Be careful to not touch the cartridge contacts with your fingers. Install the new cartridge.
- Page 194 Installing or Replacing Ink Cartridges If your scanner is equipped with dual printers, repeat steps 2, 3, and 4 for the other printer. Adjust the position of the printer(s) as described in the next section. Scantron OpScan 4ES and iNSIGHT 4ES Scanners...
-
Page 195: Positioning The Printer(S)
Chapter : Transport Printer Positioning the Printer(s) Positioning the Printer(s) If the printer cover is not already removed (from a previous procedure) unlatch it and remove it. Notice the location of the cartridge holder that is inside the printer assembly. Also notice the ruler, the printer alignment mark, and the thumbscrew that sit beside the cartridge holder. - Page 196 However, these concepts can be applied to any form by simply using the measurement you obtained above. Check the printer(s) to see if they are in the correct position. If not, use the following steps to position the printer(s). Scantron OpScan 4ES and iNSIGHT 4ES Scanners...
- Page 197 Chapter : Transport Printer Positioning the Printer(s) Loosen the thumbscrew so that you can move the printer. Move the printer to the desired position and lightly tighten the thumbscrew. Operator’s Guide...
- Page 198 Replace the printer cover, making sure that it is firmly seated. Ensure that the printer is turned on and perform a printer test using the instructions in the sections that follow. Scantron OpScan 4ES and iNSIGHT 4ES Scanners...
-
Page 199: Turning The Printer(S) On Or Off
Chapter : Transport Printer Turning the Printer(s) On Or Off Turning the Printer(s) On Or Off You can turn the printer(s) on or off using the background menu. This allows you turn off printing without having to remove the printer cartridge. NOTE: If you are setting up printing for the first time, you should check to verify that the printer is... - Page 200 Change if you want to change the printer status. Once you have the printer status set the way you want it, press Next seven times or until you reach the following menu item. Press Exit to exit the background menu. Scantron OpScan 4ES and iNSIGHT 4ES Scanners...
-
Page 201: Testing The Printer(S)
Chapter : Transport Printer Testing the Printer(s) Testing the Printer(s) To test the printer, perform the following steps: Load five expendable 8.5 by 11-inch data collection sheets in the input tray. (Do not use Calibration Sheets as you may need them in the future.) Hold down (at the same time) the left and right buttons found under the display panel for about five seconds to enter the background menu. - Page 202 Repeat the testing procedure. If printing still does not appear, call Scantron Customer Support for assistance as described in “Product Support and Services” on page 157.
-
Page 203: Set Up Scanning Software For Printing
Chapter : Transport Printer Set Up Scanning Software for Printing Set Up Scanning Software for Printing In order to print, your scanning software must tell the scanner printer(s) what to print. This requires proper setup of the scanning software for printing. For information regarding how to do this, consult your scanning software documentation. -
Page 204: Cleaning The Cartridge Holder
To clean the cartridge holder: Unlatch the printer cover and remove it. Remove the cartridge by holding the printer cartridge tab and pivoting the used cartridge out of the cartridge holder. Scantron OpScan 4ES and iNSIGHT 4ES Scanners... - Page 205 Chapter : Transport Printer Cleaning the Cartridge Holder CAUTION: Watch for excess ink on the cartridge that can soil your hands, clothes, or other items. Using a clean swab, gently wipe the area of the cartridge holder that contains the electrical contacts.
-
Page 206: Troubleshooting
Check to see if ink is accumulating on the silver completely plate on the bottom of the cartridge. If so, remove the ink using a dry, lint-free cloth. Clean the contacts on the cartridge holder. Scantron OpScan 4ES and iNSIGHT 4ES Scanners... - Page 207 Chapter : Transport Printer Troubleshooting If you have: Do the following: No printing at all Ensure that you have turned on the printer using the background menu. Also, consult the documentation that supports the software application that you have installed on your computer.
- Page 208 Chapter : Transport Printer Troubleshooting Scantron OpScan 4ES and iNSIGHT 4ES Scanners...
-
Page 209: Bar Code Reader
In this chapter: Components ......page 190 Read Capability ......page 193 Scanning Bar Codes . -
Page 210: Components
The figure below shows the location of the bar code reader. The bar code reader has three parts major parts. These parts are: • Index Bar • Sensor Head • Sensor Pointer Scantron OpScan 4ES and NSIGHT 4ES Scanners... -
Page 211: Index Bar
Chapter : Bar Code Reader Components Each of these parts is illustrated and described below. Index Bar The index bar is located on top of the cover of the bar code reader. It resembles a ruler and spans the width of the transport bed below. - Page 212 Chapter : Bar Code Reader Components used to set the sensor head to the proper position for scanning bar codes. Scantron OpScan 4ES and NSIGHT 4ES Scanners...
-
Page 213: Read Capability
Chapter : Bar Code Reader Read Capability Read Capability The bar code reader reads six types of bar code formats. The table below summarizes some of the important features of each type. Character Code Type Character Set Representation Codabar Alphanumeric 0 through 9, Start and stop (limited) - Page 214 Lowercase “a”, “b”, “c”, “d”, and “s”, are reserved for OpScan 4ES and iNSIGHT 4ES scanner use. Code 128 B cannot be used to encode data which includes these characters. These characters are defined by Scantron and cannot be changed.
- Page 215 Chapter : Bar Code Reader Read Capability • The bar code reader reads all bar codes on a sheet in a single pass (scan). You can print bar codes directly on a sheet or print them on a label that is attached to a sheet.
-
Page 216: Scanning Bar Codes
Measure to the nearest tenth of an inch. NOTE: The ruler measurement is the indicator number. (For example, if the measurement is 3.5 inches, the indicator number is 3.5.) Scantron OpScan 4ES and NSIGHT 4ES Scanners... - Page 217 Chapter : Bar Code Reader Scanning Bar Codes Locate the number on the index bar that matches the indicator number you found in step 1. Slide the sensor head along the index bar until the sensor pointer lines up with the indicator number. Scan bar coded sheets the same way as you would any others.
-
Page 218: Troubleshooting
(left) edge of the sheet to the center of the bar code. Then set the sensor pointer to that indicator number. Center Index Bar Bar Code Sensor Head 4.,5 Sensor Pointer 2..0 Guide Edge Indicator Number Scantron OpScan 4ES and NSIGHT 4ES Scanners... - Page 219 Chapter : Bar Code Reader Troubleshooting Check the scan path on the sheet. Make sure that there are no stray marks, black marks or printing in the scan path that leads to or from the bar code. Scan Path Bar Code Timing Marks Guide Edge Make certain that the read head, printer (optional),...
- Page 220 The label is affixed in the proper spot and aligned parallel to the guide edge (if the bar code is a label). Test the function of the bar code reader using the procedure in the section that follows. Scantron OpScan 4ES and NSIGHT 4ES Scanners...
-
Page 221: Testing The Bar Code Reader
Use bar code diagnostic form #91892 shown below with the testing procedure that follows. NOTE: Scantron forms are changed from time to time. The appearance of Bar Code Diagnostic Form #91892 as shown below may differ slightly from the one that was shipped with your bar code reader. -
Page 222: Using The Bar Code Test Function
When the Background Menu message appears briefly, release the buttons. Press the Next button five times or until you see the following menu item. Press Enter to enter the diagnostics menu. Scantron OpScan 4ES and NSIGHT 4ES Scanners... - Page 223 Chapter : Bar Code Reader Testing the Bar Code Reader Press Next three times or until you see the following menu item. Press Run to run the bar code test. The bar code reader is reading correctly as long as the sheets continue to feed through the scanner.
-
Page 224: Testing The Bar Code Reader
If your bar code reader can read either position 25 or 80 correctly—but not the other, the problem usually lies with the bar codes or with the depth of field on the bar code reader. (The depth of field Scantron OpScan 4ES and NSIGHT 4ES Scanners... - Page 225 30 and 75 again. If your bar code reader can read both positions 30 and 75 correctly, the problem lies with your bar code reader. Contact Scantron Customer Support as described in “Product Support and Services” on page 157.
- Page 226 Chapter : Bar Code Reader Testing the Bar Code Reader Scantron OpScan 4ES and NSIGHT 4ES Scanners...
-
Page 227: Appendix D Select Stacker
Cleaning the Select Stacker ....page 216 Appendix D: Select Stacker Adding a Select Stacker to your OpScan 4ES or iNSIGHT 4ES scanner enables your scanning software to select sheets with errors (or other criteria you specify) and send them to a separate tray. -
Page 228: Setting Up The Select Stacker
Mount the Select Stacker to the scanner by placing the two mounting tabs securely into the holes on the scanner. Install the sheet deflector as shown. Scantron OpScan 4ES and iNSIGHT 4ES Scanners... - Page 229 Chapter : Select Stacker Setting Up the Select Stacker Mount the select stacker (lower) tray to the Select Stacker. The metal hooks go into the slots in the Select Stacker. Mount the output stacker (upper) tray to the Select Stacker. Operator’s Guide...
- Page 230 Connect the power supply to the power cord. Finally, connect the power cable to the Select Stacker as shown. It is acceptable to plug the Select Stacker, the scanner, and the host computer into the same power strip. Scantron OpScan 4ES and iNSIGHT 4ES Scanners...
-
Page 231: Testing The Select Stacker
Chapter : Select Stacker Testing the Select Stacker Testing the Select Stacker Once you have set up the Select Stacker, you can test it to ensure that sheets are properly placed in either the output stacker (top tray) or the select stacker (bottom tray). - Page 232 Support as described in “Product Support and Services” on page 157. When you have completed testing, press Next. You will be advanced to the Background Menu menu item. Press Exit to exit the background menu. Scantron OpScan 4ES and iNSIGHT 4ES Scanners...
-
Page 233: Scanning Procedure
Chapter : Select Stacker Scanning Procedure Scanning Procedure The scanning procedure is essentially the same as described in “Scanning Procedure” on page 38. The only difference is in the set up of your scanning software. You will need to set up the conditions upon which sheets are selected in your scanning software. -
Page 234: Understanding Select Stacker Messages
When connected, the Select Stacker is part of the integrated diagnostics system that is standard on OpScan 4ES and iNSIGHT 4ES scanners. If an error occurs, an error message appears in the display panel. This chapter identifies error messages associated with the Select Stacker, tells how to resolve issues, and explains button functionality. -
Page 235: Select Stacker Messages
Chapter 5, “Display Panel Messages”. The messages are listed in alphabetical order. If an error persists after you perform the suggested procedure, contact Scantron Customer Support as described in “Product Support and Services” on page 157. Operator’s Guide... -
Page 236: Cleaning The Select Stacker
Supplies We recommend the following supplies for cleaning the Select Stacker: • Lint-free cloths • Static-reducing spray • Canned air (with a non-condensing propellant) Scantron OpScan 4ES and iNSIGHT 4ES Scanners... -
Page 237: Procedure
Chapter : Select Stacker Cleaning the Select Stacker Procedure The illustration below shows the location of key components. To clean the select stacker, follow the steps that follow. Sheet Deflector Output Stacker Tray Output Stacker Sensor Select Stacker Tray Select Stacker Bed Area Select Stacker Sensor Clean the output and select stacker sensors. - Page 238 Once cleaning is completed, replace the sheet deflector, the output and select stacker trays, and (if necessary) reconnect the Select Stacker to the scanner. Scantron OpScan 4ES and iNSIGHT 4ES Scanners...
-
Page 239: Index
....79, 109 ..7 Double Sheet OpScan 4ES Standard Features ....5 Download Run and Download Debug Mode Optional Equipment View . - Page 240 ....... 93 Sheet ... . 94 Sheet Too Thin/See Manual Scantron OpScan 4ES and NSIGHT 4ES Scanners...
- Page 241 NOTES Operator’s Guide...
- Page 242 OpScan 4ES & iNSIGHT 4ES scanner capabilities or call us at 1-800-SCANTRON (1-800-722-6876) for more information. © 2019 Scantron Corporation. All rights reserved. Scantron and the Scantron logo are registered trademarks of Scantron Corporation. P/N 277 283 073...
Need help?
Do you have a question about the OpScan 4ES and is the answer not in the manual?
Questions and answers