Table of Contents
Advertisement
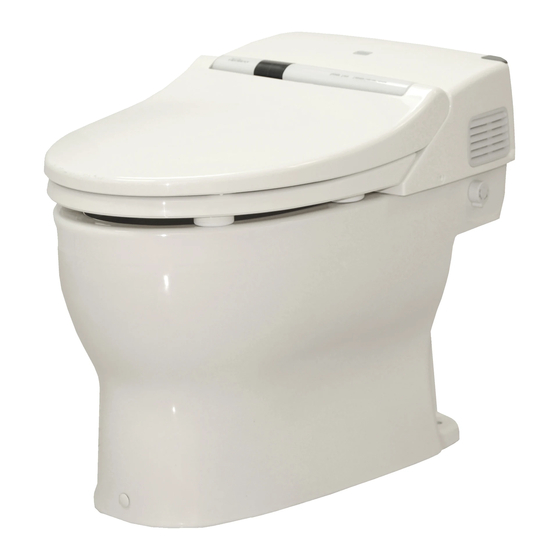
NEOREST
MS950CG
Thank you for your recent purchase of the TOTO
this manual carefully to ensure safe use of your product.
®
500
®
Instruction Manual
Important Safety Instructions . . . .
Operational Instructions . . . . . . . .
Performance Features . . . . . . . . .
Parts and Features . . . . . . . . . . .
For Best Results . . . . . . . . . . . . .
Adjusting the Temperature . . . . .
Deodorizing . . . . . . . . . . . . . . . . .
Seat and Lid . . . . . . . . . . . . . . . .
Flushing the Toilet . . . . . . . . . . . .
To Conserve Energy . . . . . . . . . .
Caring for your NEOREST 500 . .
Daily Care and Maintenance . . . .
Product . . . . . . . . . . . . . . . . . . . .
Care . . . . . . . . . . . . . . . . . . . . .
Power Plug . . . . . . . . . . . . . . . .
Deodorizer Filter Care . . . . . . .
Cleaning the wand . . . . . . . . . .
Cleaning the toilet bowl . . . . . .
Water Pipes . . . . . . . . . . . . . . . . . . . . . . .
How to Prevent Damage (Running water
®
Troubleshooting . . . . . . . . . . . . . . . . . . . .
Specifications . . . . . . . . . . . . . . . . . . . . . .
Limited Warranty . . . . . . . . . . . . . 46
. . . . . . . . . . . . . . . . . . . . . . . . .
2
5
6
7
9
11
13
15
15
16
17
19
22
22
24
26
26
27
28
28
30
30
30
31
33
34
36
36
38
45
Advertisement
Table of Contents

Related Manuals for Toto NEOREST 500


Summary of Contents for Toto NEOREST 500
-
Page 1: Table Of Contents
Water Pipes ..... . . How to Prevent Damage (Running water Thank you for your recent purchase of the TOTO Neorest . -
Page 2: Important Safety Instructions
Important Safety Instructions When using electrical products, especially when children are present, basic safety precautions should always be followed, including the following: READ ALL INSTRUCTIONS BEFORE USING To reduce the risk of electrocution: DANGER 1. Do not use while bathing. 2. - Page 3 To reduce the risk of electrocution: DANGER 13. Periodically remove dust and dirt from the electrical plugs and make sure they are tightly plugged into the wall outlet. Failure to do so may result in electrical shock or fire. Pull the plug out from the outlet and wipe clean with a dry cloth. 14.
- Page 4 To reduce the risk of burns, electrocution, fire WARNING or injury to persons: 18. Always use the NEOREST at a room temperature of 32°F (freezing temperature) or above to prevent frozen pipes and hoses. Frozen water pipes will cause the toilet and the pipes to break resulting in water leakage. Refer to Page 36 for instructions on how to prevent frozen pipes.
-
Page 5: Operational Instructions
Operational Instructions Always follow these precautions to ensure the safe use of your product. Do not wipe the toilet unit or seat with Do not expose the NEOREST ® to direct a dry cloth or toilet paper. sunlight. Use of a dry cloth or toilet paper to wipe Use of the product under direct sunlight the toilet bowl, seat or cover will scratch may result in discoloration of the plastic,... -
Page 6: Tips For Using The Neorest 500
Tips for Using the NEOREST ® Protect the environment and reduce the use of water and electricity. Use the timer and Use the Auto save energy. Energy Saver. Set the timer so that it Use the Auto Energy 81-97°F shuts off the toilet seat Saver to automatically heater each day at the reduce the toilet seat... -
Page 7: Performance Features
Performance Features Washlet Functions Page The Pulsating wash alternates cycles strong and soft sprays of Pulsating Rear wash water approximately 70 times per second for a very thorough rear wash. Pulsating Soft wash The soft wash and Front features provide a soft, yet thorough, whirling flow of water. - Page 8 Energy Saving Features Page Conserve energy by pre-setting the timer to turn off the toilet Energy Saving Timer seat heater for the same time period each day.(Can be set for 3, 22, 23 6 or 9 hour periods of time). The unit memorizes the time of day at which the toilet is least Auto Temperature used and automatically reduces the toilet seat temperature to...
-
Page 9: Parts And Features
Parts and Features Label Remote Antibacterial controller deodorizer exhaust port Washlet Water shutoff with filter Water Drain lever (grey) Remote controller hanger Manual Flushing knob (See page 21) Main unit Seat sensor (See page 14) Washlet shutoff Valve (See page 12) Motion Detection sensor (See page 18) Power plug... - Page 10 The main control buttons have imprints for vision-impaired users. Remote Controller Cover Closed The control buttons have been Anti- treated with an anti-bacterial bacterial finish. Remote Control button for flushing the toilet bowl (See page 19) Remote Control transmitter Remote Control button for OPEN/CLOSE toilet seat and lid (See page 17) Remote Control transmitter...
-
Page 11: Before Using The Neorest 500
Before Using the NEOREST ® Preparation Insert batteries into the remote controller. Remove the remote controller from its wall hanger. Grasp the remote controller at each side and pull straight Remote Hanger Open the battery cover on the back of the remote 2 AA batteries controller. - Page 12 Insert the plug into the wall outlet. Connect the power cord to a 120V (60 Hz) GFCI protected power outlet. Open the water shutoff valve. Use the wrench provided or a flat head screwdriver Turn to left to open the water shutoff valve. Water shutoff valve Use a flat-head...
-
Page 13: How To Use The Neorest 500
How to Use the NEOREST ® When you stand at a distance of approximately 1 foot from the front of the toilet, the seat cover will automatically open. (Auto OPEN/CLOSE, see page 17, 18) Sit on the Seat Functions become available when toilet seat sensor is activated In preparation for wash, water is released from wand Deodorizer starts automatically Wash... - Page 14 Dryer Dryer button Stop Button Dry wet areas with the Turns the Dryer OFF. warm air dryer. Wipe excess water away with a piece of toilet paper for faster drying. Stand up from the toilet The toilet will automatically flush after 5 seconds (See page 20 for Auto flushing). The deodorizer will automatically shut off after 1 minute.
-
Page 15: For Best Results
For Best Results Adjusting the Temperature Use the remote controller to adjust the water temperature, toilet seat temperature, or dryer heat to the desired setting. Open the Remote Controller Cover. Cover Adjust the temperature Adjust the temperature setting for the water and toilet seat by pushing the buttons. -
Page 16: Deodorizing
Deodorizing Sit on the toilet seat Lights up The deodizer function automatically starts The “DEODORIZER” light on the main unit display lights up. Move away from the toilet seat Light goes out The deodorizer function automatically stops after 1 minute. The "DEODORIZER"... -
Page 17: Opening And Closing The Toilet Seat And Lid
Opening and Closing the Toilet Seat and Lid The toilet seat and lid may be opened or closed in two ways: remotely or automatically. How to open or close the toilet seat or lid using the Remote controller. Press one of the This closes the toilet seat and lid. - Page 18 When sitting on the toilet seat After use, move at least 1 foot (30cm) away from the toilet. After approximately 90 seconds, the toilet lid will close automatically. Motion- When it no longer detects a person, the "Sensor" light on detection the Main Unit Display will go off.
-
Page 19: Flushing The Toilet
Flushing the Toilet The toilet may be flushed in two ways: remotely or automatically. How to flush the toilet using the Remote Control. The toilet can be flushed by pushing the flush button on the remote controller. Press the following button Flush on the remote controller. - Page 20 When sitting on the toilet seat The toilet will not flush automatically unless the person is seated for at least 6 seconds. When finished, stand up from the toilet seat. After approximately 5 seconds, the toilet flushes. Motion- detection sensor Even when seated on the toilet, the sitting position or posture could cause the sensor to mis-detect and start an automatic flush.
- Page 21 Flushing the toilet during power outages Please flush the toilet using the manual flush knob on the right side (as you face the toilet). Turn the manual flushing knob toward the back for at least 2 seconds. Back The toilet will be flushed. Front When the water stops Knob...
-
Page 22: To Conserve Energy
To Conserve Energy Using the Energy Saver Feature - “Timer ON/OFF” What timer energy saving is Press the button Once it's set, energy saving works at at 1:00 pm. Main Unit Display that time automatically everyday. The toilet seat heater turns off during 0:00 1:00 timed energy saving. - Page 23 Changing the Energy saving time Press the Timer On/Off button Each time the button is pressed, the Press display changes in the following order Off (No display). Please choose the desired time for the setting. When you wish to change the energy saving time (3, 6, 9 hours), please reset the energy saving start time once again.
-
Page 24: Using The Energy Saver - "Auto On/Off
Using the Energy Saver - “Auto ON/OFF” Automatic Energy saving is, Main Unit Display The Washlet will learn when times of the 0:00 day the toilet is used and save power by lowering the toilet seat temperature during low-use time periods. (orange light) 18:00 6:00... - Page 25 Turning off Automatic Energy Saving Press the Auto On/Off button. Press Disappears Automatic Energy Saving will be shut off. The "Auto" light in the Main Unit Display will disappear. The "Power" light will go on in the Main Unit Lights up Display.
-
Page 26: Before Cleaning The Neorest
Caring for your NEOREST ® Before cleaning the NEOREST Each component can be disassembled for a thorough cleaning. Caution! Before starting please turn the Auto Flush and Auto Open/Close buttons to "Off." Otherwise, the auto flush or auto open features may function during cleaning. -
Page 27: Daily Care And Maintenance
Daily Care and Maintenance Cleaning the Main Unit, Toilet Seat and Lid Wipe with a soft, damp cloth. Please wipe with a soft, damp cloth that has been wrung out thoroughly. 1, 2 Please note! The toilet seat and lid are designed so that they can be easily removed and cleaned. -
Page 28: Thorough Cleaning Of The Product
Thorough Cleaning of the Product Cleaning the main unit, toilet seat and lid. The toilet seat and lid can be removed, allowing cleaning everywhere. Removing the toilet seat and lid Raise the toilet seat and lid and lift up Important Point Toilet seat and lid the seat lock lever (grey) until it clicks. - Page 29 The toilet lid can be removed from the toilet seat! Removal Installationl Place finger on the seat lock Lay the toilet lid over the toilet seat from Hinge Assembly lever on the right side and move the left. Toilet Lid the hinge assembly toward the Move the hinge assembly on the right inside (approximately ¼"...
-
Page 30: Other Care And Maintenance
Lower the seat lock lever (grey) until it Toilet Seat and Lid clicks into place. If the lock lever won't go back into place, the Seat Lock Lever toilet seat and lid will not be attached. Please reattach the toilet seat and lid. Click Other Care and Maintenance Cleaning and inspecting the Power Plug... -
Page 31: Cleaning The Feed Water Filter
Filter Clean Clean dust or debris on the filter with a toothbrush or similar tool. Reattach deodorizer filter. With the mark on the deodorizer filter facing up, place the filter in the guiding grooves of the Guide Washlet and press into place until it clicks. (The filter cannot be inserted upsidedown.) If the deodorizer filter is not completely inside Click... - Page 32 Remove the water supply filter Water supply filter Remove the filter cover with the wrench. Filter The filter will come out with the filter cover. Filter cover Water shutoff valve unit Wrench Turn to the left Container to catch the water that leaks out when removing the filter Clean the filter Remove the filter and clean the mesh by...
-
Page 33: Cleaning The Wand
Cleaning the wand The wand can be cleaned without spraying hot water. Extend the wand. Push the “Wand Cleaning” button on the remote controller. The wand comes out. The wand will automatically retract after 5 minutes. Wand “Wand Cleaning” button Clean the wand. -
Page 34: Cleaning The Toilet Bowl
Cleaning the toilet bowl The Rinse Cycle flushing switches automatically between two modes, making cleaning easy. Please be careful that toilet bowl cleansers do not get on the plastic parts. Press the Rinse Cycle button on the remote. Toilet bowl cleaning will begin. Press the Rinse Cycle On/Off button for toilet cleaning. - Page 35 Press the Rinse Cycle button on the remote. Toilet bowl cleaning will begin. When you want to stop cleaning the toilet part way through, Please press the Rinse Cycle button once more. The water in the toilet will be flushed out and the process will stop.
-
Page 36: Preventing Damage Due To Frozen Water Pipes
Preventing Damage Due to Frozen Water Pipes When freezing temperatures are anticipated. Please either heat the toilet interior or, where impossible, remove the water if the ambient temperatures are going to fall below freezing. If there is a risk of freezing, please implement the following procedure. - Page 37 When Not Using for Long Periods When there is no danger of freezing temperatures. Prolonged Disuse Remove the power plug Turning the water back on after prolonged disuse Insert the power plug into the Spray water out of the wand outlet.
-
Page 38: Troubleshooting
Troubleshooting If you suspect a problem, please read this section and try out these troubleshooting methods. If the problem doesn't go away, please contact a representative, dealer or Toto Technical Support Caution If water leak occurs, shut off the water supply at the Turn to right water shutoff valve. - Page 39 Rear Wash · Front wash (Continued) Problem Possible Cause Solution Please press the pressing the Rear Wash, Approximately 5 minutes after pressing the The wash water stops Soft Wash or Front Wash buttons again. Rear Wash, Soft Wash or Front Wash buttons, while the unit is in See Page 13.
- Page 40 Deodorizer Problem Possible Cause Solution Is the Seat Sensor working properly? Refer to the Section on "Seat Sensor." The deodorizer fails See Page 44. to operate. Is the deodorizer filter blocked? Clean the filter. Sometimes, Odors See Page 30. are not completely eliminated.
- Page 41 Auto OPEN/CLOSE Problem Possible Cause Solution Is the Auto Open/Close set to "Off?" (If it is set to Please press the “Auto Open/Close” Off, the words "AUTO Open/Close" will not be button on the remote and set to On. visible on the remote controller display .) See page 17 and 18 Is the "Sensor"...
- Page 42 Automatic Flush Problem Possible Cause Solution Is the Auto Flush set to Off? (If off, the word Press the “Auto Flush ON/OFF” button "Flush" will not appear in the display module on and set the function to On. the remote.) See Pages 19 ~ 21 After automatically flushing once, Auto Flush will Please use the button on the remote...
- Page 43 Remote Controller Problem Possible Cause Solution Do the batteries need replacing? Please replace them with new batteries. See Page 11 Are the batteries inserted in the correct position Please insert the batteries correctly. (+/-)? See Page 11 Is the remote control transmitterfor the remote Please remove anything that might be covered by something? covering them.
- Page 44 Seat Sensor Problem Possible Cause Solution Is the Seat Sensor covered by something? Please keep the Seat Sensor uncovered. See Pages 9 and 14 Pressing the buttons runs the Rear Cleansing and deodorizer runs even though no one is Are there debris or water droplets on the Seat Please remove the debris or water seated on the toilet.
-
Page 45: Specifications
Specifications Item Contents Rated Power Supply 120V, 60Hz AC Rated Power Consumption 1281W Standard Power Consumption per Hour 22Wh Power Supply Cord Length 3 feet (1.0m) Flush Volume 1.6 gpf (6L), 1.2 gpf (4.5L) light flush Flush Type "Cyclone" Siphon jet Bowl Style Elongated Washlet... -
Page 46: Limited Warranty
(NOTE: Product model codes allow a maximum of 80 PSI. Check local codes or standards for requirements). e) Damage or loss resulting from electrical surges or lightning strikes or other acts which are not the fault of TOTO or which the Product is not specified to tolerate. - Page 47 Is the power plug covered with dust? Is the outlet loose? Is your Neorest 500 operating differently than usual? * In case anything is abnormal, contact TOTO USA to prevent a fire or an electrical shock. ©2005 TOTO USA, Inc. 0GU9100 2005.8.1...
Need help?
Do you have a question about the NEOREST 500 and is the answer not in the manual?
Questions and answers