Breville the Barista Pro BES878 Instruction Book
Hide thumbs
Also See for the Barista Pro BES878:
- Instruction book (80 pages) ,
- Instruction book (52 pages) ,
- Instruction book (28 pages)
Table of Contents
Advertisement
Advertisement
Table of Contents

Related Manuals for Breville the Barista Pro BES878


Summary of Contents for Breville the Barista Pro BES878
- Page 1 Barista Pro ™ Instruction Book - BES878...
- Page 2 RECOMMENDS • Do not place the product SAFETY FIRST near the edge of a bench At Breville we are very safety or table during operation. conscious. We design and Ensure the surface is level, manufacture consumer clean and free of water products with the safety of you, and other substances.
- Page 3 Cleaning and user the nearest authorised maintenance shall not be Breville Service Centre for carried out by children examination, replacement unless they are aged or repair. from 8 years and above •...
- Page 4 The installation of Do not use in moving a residual current vehicles or boats. Do device (safety switch) not use outdoors. is recommended to • If the appliance is to be: provide additional safety − left unattended protection when using −...
-
Page 5: Save These Instructions
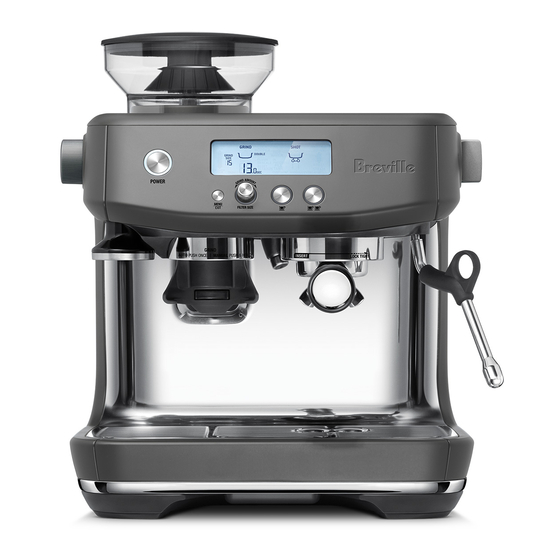
head before starting an WARNING extraction. Never remove Do not immerse power the portafilter during the cord, power plug or extraction process. appliance in water or • Do not touch hot surfaces. any other liquid. Allow the product to cool SPECIFIC down before moving or INSTRUCTIONS... - Page 6 Components A. 250g bean hopper L. 2L removable water tank With locking system for easy removal, storage With replaceable water filters and transfer of coffee beans. to reduce scale and impurities. B. Integrated conical burr grinder M. Steam dial Selector control for steam and hot water. C.
- Page 7 All parts of the Barista Pro™ that come into contact with coffee, water and milk are BPA Free. ACCESSORIES 1. Stainless steel milk jug 5. Cleaning disc With MIN and MAX markings. 6. Cleaning tablets 2. Dual wall filter baskets (1 cup & 2 cup) 7.
- Page 8 Barista Pro Features THERMOJET™ HEATING SYSTEM PID TEMPERATURE CONTROL Innovative heating system achieves ideal Electronic PID temperature control for extraction temperature in 3 seconds. increased temperature stability. INTEGRATED CONICAL BURR INSTANT HOT WATER GRINDER Dedicated hot water outlet for making Long Blacks and pre-heating cups.
- Page 9 NOTE NOTE Replace the water daily. The water tank should be For replacement water filters, visit the Breville filled with fresh, cold tap water before each use. webpage or contact Breville Customer Service. Rinse filter and...
- Page 10 Assembly ATTACHING THE HOPPER FIRST USE CYCLE Insert the bean hopper into position on top A first use cycle must be completed before of the machine. the initial use of the machine. The first use cycle rinses the machine and primes the heating system.
- Page 11 Functions Regardless of whether you use Single Wall or TURNING OFF THE MACHINE Dual Wall filters baskets, use the 1 CUP basket To turn the machine off, press the POWER when brewing a single cup and the 2 CUP button. Alternatively, the machine has auto-off, basket when brewing two cups or a stronger if it is not used for 30 minutes.
-
Page 12: The Grind
THE GRIND DOSING THE COFFEE When grinding coffee beans, the grind size • Fill the hopper with fresh coffee beans. should be fine, but not too fine. The grind size • Insert the required filter basket into the will affect the rate at which water flows through portafilter. - Page 13 TAMPING THE GROUND COFFEE • Rotate the Razor™ dose trimming tool back and forth while holding the portafilter on • Remove the portafilter from the an angle over a knock box to trim off excess grinding cradle. coffee grinds. Your filter basket is now dosed •...
- Page 14 EXTRACTING ESPRESSO • As a guide the espresso will start to flow after 8–10 seconds (infusion time) and should be the consistency of dripping honey. • If the espresso starts to flow after less than 6 seconds, you have either under dosed the filter basket and /or the grind is too coarse.
- Page 15 PRE-PROGRAMMED SHOT VOLUME – PROGRAMMING ESPRESSO SHOT 1 CUP • Press the MENU button to enter the main menu. Press the 1 CUP button once, the button will flash, indicating that it has been selected. The GRIND LOCK SHOT SHOT TEMP FASTER LCD will display PRE-INFUSE and the shot PRE-INFUSE...
-
Page 16: Texturing Milk
RESETTING TO DEFAULTS surface of the milk, close to the right-hand side of the jug at a 3 o’clock position. • Press the MENU button to enter the main • Turn the STEAM dial to the . menu. • Keep the steam wand tip just under the •... - Page 17 STEAM WAND PURGING NOTE After texturing milk, it is recommended to Ensure the STEAM dial is in the vertical purge the steam wand. With the steam wand position before removing the steam wand from positioned over the drip tray and turn the the milk jug.
- Page 18 • Fill the water tank with cold water before sliding back into position on the back of the machine and locking into place. NOTE Replacement water filters can be purchased from the Breville website or by contacting Breville customer service.
- Page 19 FLUSH CLEANING CYCLE 1. Empty the drip tray and reattach to the machine. Remove the water tank from the The LCD will display a FLUSH alert when a machine and remove the filter from the cleaning cycle is required. The cleaning cycle is water tank.
- Page 20 CLEANING THE CONICAL BURR GRINDER This grinder cleaning cycle removes oil build-up on the burrs which can impede performance. PUSH Unlock hopper Empty hopper Replace hopper Lock hopper Run grinder Unlock hopper Remove hopper empty Unlock top burr Remove top burr Clean top burr Clean lower Clean chute...
- Page 21 ERROR MODE a short flow of water to rinse out any residual If your machine displays on the LCD, coffee. Press the 1 CUP button again to stop contact Breville Customer Service. the hot water. Remove the portafilter and rinse thoroughly.
-
Page 22: Troubleshooting
Troubleshooting PROBLEM POSSIBLE CAUSES EASY SOLUTION Water does not flow Water tank is empty. Fill tank. from the group head. Water tank is not fully inserted and Push water tank down completely to No hot water. locked into position. lock into place. Perform descale cycle. - Page 23 PROBLEM POSSIBLE CAUSES EASY SOLUTION Espresso runs out Coffee is ground too coarsely. Use slightly finer grind. too quickly. Refer to ‘Setting the Grind Size’, page 12 and ‘Under Extraction’, page 14. Not enough coffee in the filter Increase dose of coffee. basket.
- Page 24 PROBLEM POSSIBLE CAUSES EASY SOLUTION Coffee not hot enough. Cups not pre-heated. Rinse cups under hot water outlet. Portafilter not pre-heated. Rinse portafilter under hot water outlet. Dry thoroughly. Milk not hot enough Texture milk for a longer period of time. (if making a cappuccino or latté...
- Page 25 Allow to cool for about 30–60 minutes. If problem persists, call Breville Support. No ground coffee No coffee beans in hopper. Filler hopper with fresh coffee beans.
- Page 26 Notes...
- Page 27 Notes...
- Page 28 Web: www.breville.com www.breville.com Breville, the Breville logo, Barista Pro, ThermoJet, the Razor and Master Every Moment are trademarks of Breville Pty Ltd ("Breville"). A.B.N. 98 000 092 928. Copyright Breville Pty. Ltd. 2018. Due to continued product improvement, the products illustrated/photographed in this brochure may vary slightly from the actual product.
Need help?
Do you have a question about the the Barista Pro BES878 and is the answer not in the manual?
Questions and answers