Table of Contents
Advertisement
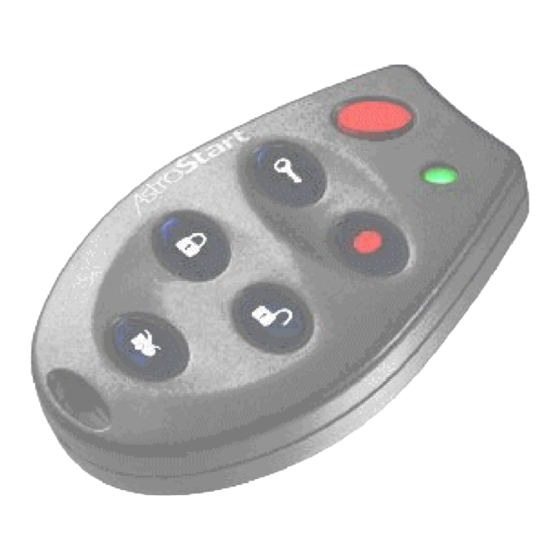
REMOTE
CONTROL
ENGINE
STARTER
Installation Manual
SERIES
500, 1100,
2100, 4100
FOR
ALL AUTOMATIC
TRANSMISSION GAS- AND
DIESEL POWERED VEHICLES.
NOT FOR USE ON VEHICLES EQUIPPED
WITH MANUAL TRANSMISSION!
T
HIS PRODUCT MUST BE INSTALLED
.
BY A QUALIFIED INSTALLER
(Instructions en français au verso)
PATENT NUMBERS
M
C
:
ANUFACTURED IN
ANADA BY
CAN 1.130.426
USA: 4.345.554 - 5.614.883
5.617.819 - 5.673.017
AND OTHER PATENTS PENDING
Litho'd in Canada
193-127-200-01
All rights reserved © Astroflex 2000
Advertisement
Table of Contents

Related Manuals for Astroflex 500 Series


Summary of Contents for Astroflex 500 Series
- Page 1 HIS PRODUCT MUST BE INSTALLED BY A QUALIFIED INSTALLER (Instructions en français au verso) PATENT NUMBERS ANUFACTURED IN ANADA BY CAN 1.130.426 USA: 4.345.554 - 5.614.883 5.617.819 - 5.673.017 AND OTHER PATENTS PENDING Litho’d in Canada 193-127-200-01 All rights reserved © Astroflex 2000...
-
Page 2: Table Of Contents
Table of Contents Quick Guide for Professionals Quick Programming Quick Programming Charts (LEVEL 1 and 2) Transmitter Coding Tachometer & Cylinder Settings Detailed Programming Programming Tables (LEVEL 3 through 15) Diagnostic Codes Detailed Features P2 : I NPUT UTPUT P2-1 &2 : Red P2-3 : White/orange: PARK / NEUTRAL INPUT P2-4 : White/green: POSITIVE BRAKE SWITCH INPUT P2-5 : Orange/white: WAIT TO START (Glowplug) -
Page 3: Quick Guide For Professionals
Quick Guide for Professionals This section of the installation manual is intended for experienced installers of remote starter and mobile security products. Only the most frequently needed information is included in the following few pages. It has been laid out to allow you to quickly access connection and operational details to maximize your installa- tion performance. - Page 4 P2 CONNECTOR (models 500, 1100, 2100, 4100) ! t u ! t u / k r / e t i k r a a r t y t e c e t . r o t s i h r i c i u c s i t y t i r...
- Page 5 P3 CONNECTOR (models 1100, 2100, 4100) i t o l e r e t i i t o l e r e t i i t o l e r i t o l e r / e t i t o l e r e t i i t o...
- Page 6 P5 CONNECTOR (models 1100, 2100, 4100) i t o l e r i t o l e r i t o l e r The default is set for Ignition. (Level 13) Power supply for this circuit must be protected with an appropriate fuse. PLUG-IN ACCESSORIES CONNECTOR LIST p - r r o t...
-
Page 7: Quick Programming
Quick Programming You may believe that a product as versatile as the AstroStart would be a program- ming nightmare. In most cases, you will not need to change from the factory default programming. In addition, Astrostart’s sophisticated processor allows direct entry into a multitude of programming options with little effort. All programming is performed through a 9 button DIP switch module. -
Page 8: Quick Programming Charts
Quick Programming Charts (LEVEL 1 and 2) This information assumes that you understand how to program an Astrostart. If not, refer to Detailed Programming. In most cases you will need to program only the tachometer and cylinder setting, and occasionally a remote transmitter. Transmitter Coding In the event that a transmitter needs to be re-coded, the following table outlines the settings. -
Page 9: Detailed Programming
Detailed Programming Programming is very simple once you have programmed your first Astrostart. Programming parameters are divided into 15 groups called "levels" (see program- ming tables, pages 9 to 12). These parameters are selected by setting a series of 9 DIP switches. DIP switches 1, 2, 3 and 4 are used to ...while DIP switches 5 to 9 are select programming levels.. -
Page 10: Programming Tables
Programming Tables (LEVEL 3 through 15) The following programming tables outline the settings for the remaining LEVELS. Note that if you are changing one feature on a LEVEL, all of the other features on that LEVEL need to be placed in the desired positions or they will be reset. ENGINE CONFIGURATION LEVEL 3 ò... - Page 11 PROGRAMMABLE OUTPUTS 1, 2, 3 & 4 LEVEL 5 & t r a ò ò ò ò t l u r e t ò ò ò t l u LEVEL 6 ò ò ò e l i ò ò ò ò...
- Page 12 LOCK/UNLOCK OPTIONS LEVEL 10 ò i t i i t a i t i i t a Default: ò Pulse before ignition = 0.7 sec. Door Lock Pulse = 0.7 sec. ò Autolock = OFF Unlock Pulse = single ò Second Unlock Confirmation = OFF ò...
-
Page 13: Detailed Features 1
2-BUTTON REMOTE TRANSMITTER LEVEL 15 Sentinel ò ò Sentinel ò Default : ò Start - Stop -Sentinel Diagnostic Codes When module is in operating mode (ready to start), the LED may display different diagnostic codes for troubleshooting. COMMAND RECEPTION The LED flashes rapidly when command is sent to confirm that control module is receiving remote control signals. -
Page 14: P2-3 : White/Orange: Park / Neutral Input
P2-3 : White/orange: PARK / NEUTRAL INPUT Ground signal input which makes starting the vehicle possible when this wire receives a signal from a park/neutral safety switch, or by connecting this wire to the park tab wire (P-17). It is very important that the vehicle doesn’t remote start when the gear selector lever is not in park or neutral. -
Page 15: P2-7 : Orange: Anti Theft Output
Anti theft Output P2-7 : Orange: ANTI THEFT OUTPUT Note: On Model 500 do not use if module is not configured to accept <<UNLOCK>> function. Negative output used to control a relay that neutralizes a vehicle circuit to IGNITION prevent starting, or an LED to indicate antitheft status. -
Page 16: P2-9 : Red/White: +12V Output
Note: For additional protection, it is recommended that a 0.5 amp fuse is added at the junction to ignition coil. Astroflex has regrouped useful information related to vehicle circuitry (wire colors) on CD ROM available under P/N 193-901-204. DIESEL-POWERED VEHICLES : You have to add a (DTS-2) module which converts electromagnetic fields gener- ated by alternator into a tach signal. -
Page 17: P2-12 : Black/Red: Hood Input
P2-12 : Black/red: HOOD INPUT Programmable polarity input allowing the module to detect the hood being opened. This circuit is a safety feature that must be hooked up. • Run Black/red wire into engine compartment through a rubber grommet. Cover wire with plastic loom and secure with plastic ties, away from any heat source or sharp metal parts. -
Page 18: P2-13 : Brown: Programmable Output #1
P2-13 : Brown: PROGRAMMABLE OUTPUT #1 Negative output where the function can be determined during LEVEL 5 program- ming. In this instance the factory programmed setting is PULSE BEFORE. P2-14 : White/blue: PROGRAMMABLE OUTPUT #2 Negative output where the function can be determined during LEVEL 6 program- ming. -
Page 19: P4 : Main Power
P4 : MAIN POWER P4-1 : Red: POWER INPUT 30 Amp input that provides power to the yellow accessory wire and the blue start wire. This wire should be hooked to a circuit in the main ignition switch harness that is capable of providing 30 amps of current. -
Page 20: P4-6 : Light Blue: Starter Kill Input
P10 - P17 : CONNECTORS FOR PLUG-IN ACCESSORIES P10 : TIMER CONTROL This is a four-pin connector which permits an ASTROFLEX timer (or similar Nega- tive pulse device) to trigger the start up procedure of the remote start. P11 : VALET SWITCH... -
Page 21: P13 : On/Off Switch
P16 : ORIGINAL ALARM INTERFACING CONNECTOR This is an eight-pin connector designed to plug directly into an ASTROFLEX alarm/ antitheft interfacing module. All dedicated devices interfacing the remote start module to an OEM or immobili- zation alarm will be equipped with a connector allowing connection to this P16 location. -
Page 22: Main Harness Test 2
•If engine still does not start or stalls shortly after starting, vehicle may be equipped with an immobilizing system. If this is the case, you must interface with this system. •Astroflex has several interfacing modules; please check with your dealer. -
Page 23: Post-Installation Tests 2
POST-INSTALLATION TESTS When installation is complete, check all safety devices. Start vehicle with remote control (see User Guide for information on commands). Verify that engine does not start or that it stops when: •main switch is in "OFF" position; •hood is open; •transmission is not in "P "or "N";...
Need help?
Do you have a question about the 500 Series and is the answer not in the manual?
Questions and answers
How do I reprogram my Astro start?
To reprogram your Astroflex 500 Series remote start, follow these steps:
1. Locate the 9-button DIP switch module used for programming.
2. Ensure the vehicle is in the appropriate mode (e.g., ignition on if required).
3. Follow the programming instructions specific to your model, as most settings do not need changes from the factory defaults.
4. Use the DIP switch settings to enter the desired programming mode.
5. If additional configuration is needed, refer to the Quick Programming section in the manual.
If further assistance is needed, contact your dealer.
This answer is automatically generated