
Related Manuals for Wildlife Acoustics Echo Meter Touch 2

Summary of Contents for Wildlife Acoustics Echo Meter Touch 2
- Page 1 1 Overview Echo Meter Touch Ultrasonic Modules App Features Leave Feedback or Review the App 2 Using Echo Meter Touch Connecting the Ultrasonic Module Navigating the app Monitoring in Live Mode Configuring Auto-ID Recording in Live Mode The Recording List Viewing Spectrograms of Recordings GPS View Advanced Settings Screen...
- Page 2 Echo Meter Touch Ultrasonic Modules The app is compatible with the original Echo Meter Touch Ultrasonic Module as well as the upcoming Echo Meter Touch 2 and Echo Meter Touch 2 Pro Modules. Echo Meter Touch (original) The original Echo Meter Touch was released in 2014 and discontinued in early 2017.
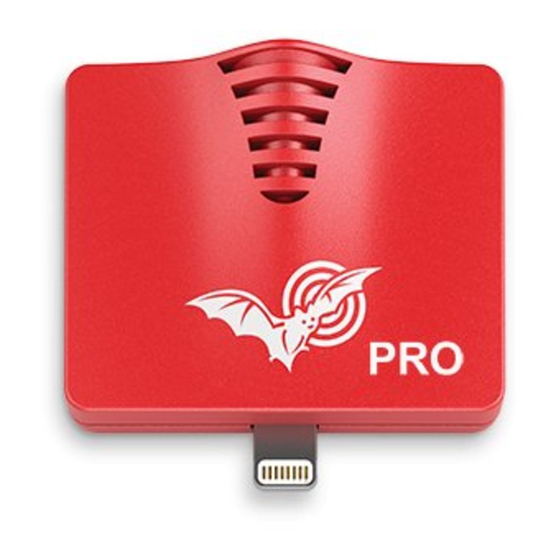
- Page 3 Echo Meter Touch 2 Pro The Echo Meter Touch 2 Pro ($349) is designed for bat professionals and features a higher quality microphone, adjustable gain, and higher sample rate. App Features Listen to bat echolocations in real time Echo Meter Touch translates bat echolocations into frequencies that are audible to humans using two technologies.
- Page 4 Africa. For more information on Kaleidoscope and a full list of species, visit our website. AUTO-ID FINE PRINT: Because bats vary their echolocation calls in response to a wide variety of needs, no automated call identification can achieve 100% accuracy in species identification.
- Page 5 See your path and recording locations View your path, including recording locations in satellite or road map view. View identified species codes directly on the map. Go to the recording's spectrogram from the map view. Transfer to your computer to view in Google Earth. Your iOS device must have GPS capability or you must use a Bluetooth GPS receiver for this functionality.
- Page 6 Using Echo Meter Touch This section describes how to use the Echo Meter Touch app to monitor bats. NOTE: The display examples in this guide were composed on iPhone in portrait orientation. You can also view the app in landscape mode. On iPad, there are minor differences in layout due to the larger display size.
- Page 7 NOTE: The module should be pointed in the general direction of the bats which requires the iOS device to be turned upside down as shown above. iPhone X, XR and XS require the user to flip Live Mode with a rotate icon that appears at the top of the screen.
- Page 8 Waveform Spectrogram Frequency scale in kHz Time scale in milliseconds In LIVE MODE you can scroll back and zoom into portions of the scrolling spectrogram. After scrolling back in time, a “Return to real-time” button appears at the top right of the screen; press to jump forward to real-time.
- Page 9 (drag to move) RTE/HET/OFF toggle Spectrogram Settings You can listen to bats using Wildlife Acoustics patented Real Time Expansion (RTE) or Heterodyne (HET). RTE translates the ultrasonic sounds to a range that is audible to humans by taking tiny snippets of the sound and slowing it down. Since there is...
- Page 10 Trigger Minimum Frequency setting (see below) or a minimum of 10 kHz for EMT1 and EMT2 Pro or 16 kHz for EMT2. Just drag the grey slider on the left side to manually tune. A bandpass filter is implemented based on the zoom level of the frequency axis in all listening modes.
- Page 11 echolocations. Because the signals scroll too quickly, this mode is not recommended for monitoring. Tap the STOP button to stop streaming data and put the Ultrasonic Module into a low-power state. Press START to resume. Toggle between Compressed and Expanded Mode (Expanded shown) Configuring Auto-ID Enter Auto ID mode to view a list of available regions.
- Page 12 Use dropdown to select only bats in your area for most accurate results Tap a species to learn more about the species or view the Merlin Tuttle portrait. Grey checks indicate the species is in your area but the app can’t yet identify it.
- Page 13 not act on manual recordings and Auto-ID will only run in real time if the length is under 60 seconds. During triggered recording, the Trigger Minimum Frequency, in the Spectrogram Settings panel, should be set as high as possible but lower than any expected bat echolocation. For North America and the UK, 12 kHz works well.
- Page 14 recording is stopped and started. Each nightly session exports in its own folder with its own KML file. Using manual recording, the app automatically uses nightly session mode for those recordings so as to avoid making a folder for every recording. The recording timer at the top of the screen starts at the beginning of triggered recording session.
- Page 15 Time ID is set on, the app will not be able to trigger for a couple seconds following a recording while ID takes place. The species code or NoID is assigned as a prefix to the recording name. You can rerun Auto-ID if you should choose to select different bat species to ID.
- Page 16 Save Note Record voice note: tap to start and stop Write text note The Recording List Here you can see a list of all of your recordings. The list can be sorted by Time or Species. The latter is useful to sort by species for identified recordings or to sort out noise or NoID recordings.
- Page 17 Icons indicate recordings with voice or text notes and recordings with an identified species Colored recording session identifier Show summary pop- Press the Summary button to show a pop up screen with the number of recordings with each identified species, NoIDs, and the NOISE files.
- Page 18 Delete checked recordings Exit Edit mode Check all recordings Identify checked recordings or manually label bat species Transfer checked recordings via Wi-Fi or share via Email or MMS Check individually The app has a limit of 10,000 recordings and recordings will need to be transferred or deleted to activate recordings once that limit has been reached.
- Page 19 Press the up or down buttons to go to the next or previous recording in the recording list. The order of the recordings will match the sorting chosen in the list. Colored vertical bars at the beginning of each recording show the corresponding recording session and match the color shown in the recording list as well as the path in GPS view.
- Page 20 GPS View In GPS VIEW, you can see the locations of recordings and species ID and the track of your recording session on a map. Each recording session is shown with a different path color. NOISE files are not shown in GPS view. A KML file is generated and stored with the session recordings in the session folder.
- Page 21 The zoom to current location triangle in the lower right of the GPS view zooms to your current location and scrolls the map as you move. The blue dot indicates it is in auto-scroll mode. If you scroll away from your location, the dot turns gray and auto-scroll turns off.
- Page 22 Default: OFF Real-Time Auto ID If ON, Auto-ID will run immediately after concluding a recording and the Auto-ID pop-up will be displayed. Values: ON, OFF Default: ON Real-Time Auto ID Sensitivity Adjusts how conservative the ID results will be. On SENSITIVE, more bats will be identified even if the algorithm is less confident of the result.
- Page 23 Default: 15 seconds Gain (EMT 2 Pro only) The Echo Meter Touch 2 Pro has configurable gain. The HIGH setting roughly corresponds to the gain on the Echo Meter Touch 1 and the SM4BAT FS set to the default 12dB level. This can be useful for recording very distant or quiet bats.
- Page 24 Sample Rate (EMT 2 Pro only) The sample rate on the Echo Meter Touch 2 Pro can be set to 256k or 384k. 256k will record up to 128kHz which is sufficient for all North American and European bats. 384k will record up to 192kHz but will use proportionately more storage for recordings.
- Page 25 Metadata Included in Recordings Metadata is stored in the recording file in the standard GUANO format as well as Wildlife Acoustics’ proprietary format. For more information om the format, visit www.wildlifeacoustics.com/SCHEMA/GUANO.html. Metadata is...
- Page 26 Settings: Including Gain, Sample Rate, Max Trigger Length, Trigger Window, Trigger Sensitivity, and Trigger Minimum Frequency. Sharing Recordings via Email or Text Message Recordings can be shared via Email or MMS text messaging via iMessage. Tap the Edit button at the top right to make the edit bat appear.
- Page 27 >Storage-->Manage Storage and click on appropriate back up in the BACKUPS section. From there you can turn off Echo Meter Touch backups. Press "Show All Apps" if you don't see it listed. If you are not sure if you use iCloud backup, go to Settings-- >iCloud and see if Backup shows "On"...
- Page 28 Preparing files Ready to download Using iTunes Recordings can also be transferred to your computer using iTunes software on a Mac or PC via a Lightning-to-USB cable (charging cable that comes with the iOS device). Download and install Apple iTunes software on your computer.
- Page 29 It doesn't matter where this folder resides as long as you can find it. Copy all session folders and/or independent recordings that you wish to import into your EMT device into this folder. Note that the files must not be inside a .zip file.
- Page 30 Testing the Microphone Element Use the available Ultrasonic Calibrator to test the microphone element on the Echo Meter Touch. Since ultrasound is beyond the range of human hearing, verifying performance requires special equipment. The Ultrasonic Calibrator helps you test both the microphone and the full recording system.
- Page 31 volume on your phone or tablet down so as to avoid acoustic feedback affecting the test. Drag the slider to maximize the size of the red waveform at the top of the screen. Point the acoustic horn of the Echo Meter Touch directly at the calibrator speaker.
-
Page 32: Specifications
100 dB SPL. Prolonged exposure to high intensity ultrasonic signals may cause permanent hearing loss at audible frequencies. Specifications Physical Echo Meter Touch Echo Meter Touch 2 (original) and 2 Pro Length w/o Lightning: 1.8 inches (46 mm) 1.4 inches (35mm) Width: 1.9 inches (48 mm) 1.9 inches (48 mm) - Page 33 Audio EMT 1 EMT 2 EMT 2 Pro Recording Format: 12-bit WAV 16-bit WAV 16-bit WAV Gain: Fixed Fixed 3 settings Sample Rate: 256kHz 256kHz 256kHz/384kHz Directionality: Slightly Slightly Omnidirectional Directional Directional Maximum Recording Frequency: Half of the sample rate (up to 128 kHz for 256 kHz sample rate and up to 192 kHz for 384 kHz sample rate) Signal to Noise Ratio (chart below): This is a measure of quality...
- Page 34 Directionality (charts below): The waveguide on the EMT 2 provides some directionality to reduce extraneous noise and echoes. See the chart below. Echo Meter Touch 2 and Pro Directionality (Horizontal) 15° 15° 30° 30° 45° 45° 60° 60° 75° 75° 20 kHz 40 kHz 90° 90° 60 kHz 80 kHz 105° 105°...
- Page 35 Echo Meter Touch 2 and Pro Directionality (Vertical) 15° 15° 30° 30° 45° 45° 60° 60° 75° 75° 20 kHz 40 kHz 90° 90° 60 kHz 80 kHz 105° 105° 100 kHz 120° 120° 135° 135° 150° 150° 165° 165° 180° Storage Requirements How many recordings you can store on your iOS device depends on the capacity of your iPad or iPhone and how much memory is available.
- Page 36 Hardware Compatibility The devices listed below are compatible with Echo Meter Touch 2 and Echo Meter Touch 2 Pro with iOS versions up to 12. There is no guarantee that future iOS versions (released each year in the fall) will work on older devices on this list. With each new iOS version, more processing is required to run the increasingly advanced features.
- Page 37 Wildlife Acoustics, Echo Meter, and Kaleidoscope are registered with the U.S. Patent and Trademark Office. All other trademarks are the property of their respective owners. The Echo Meter Touch is covered under the following patents: U.S. Pat. No. 8,599,647 U.K. Pat. No. GB 2480358 European Pat.
Need help?
Do you have a question about the Echo Meter Touch 2 and is the answer not in the manual?
Questions and answers