Table of Contents
Advertisement
Advertisement
Table of Contents

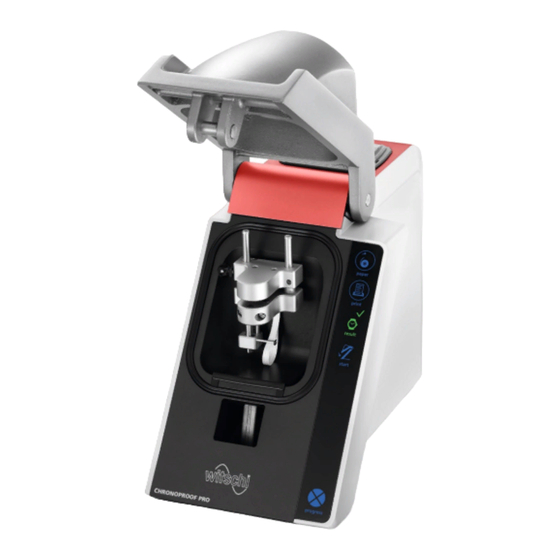
Summary of Contents for Witschi ChronoProof PRO
- Page 1 ® ChronoProof USER MANUAL Please read before you work with the device!
- Page 2 Witschi Electronic Ltd. Bahnhofstrasse 26 3294 Büren an der Aare Switzerland Phone: +41 (0)32 - 352 05 00 Fax: +41 (0)32 - 351 32 92 Internet: www.witschi.com E-Mail: welcome@witschi.com Original Manual Document No. 31.223xD35e Rel. 1.0 August 2015 Witschi Electronic AG ChronoProof ®...
-
Page 3: Table Of Contents
TARTING THE TIGHTNESS TEST ..........................11 EST RESULT ......................12 RINTING THE TEST RESULTS MAINTENANCE ..........................13 DISPOSAL OF THE DEVICE ........................ 13 TECHNICAL DATA ..........................13 EU DECLARATION OF CONFORMITY ....................14 Witschi Electronic AG ChronoProof ® page 3... -
Page 4: Safety Information
The device may be used only for its intended purpose as outlined in this user manual. If the testing device or watches are damaged or persons are injured due to improper operation and use, the manufacturer, Witschi Electronic AG in 3294 BÜREN an der Aare, SWITZERLAND refuses any responsibility! Scope of delivery •... -
Page 5: System Requirement
For entering text, 6 rows are available at the top (X1 – X6) and 3 rows at the bottom (X7 – X9) each with 24 characters. To enter text, click on the start of the row in the text block. Witschi Electronic AG ChronoProof ®... -
Page 6: Designing The Ticket
Then click on “Send ticket to device”. The ticket configuration is transferred to the ChronoProof. The transmission takes about 1 minute and should not be interrupted. The transmission is confirmed with “Applied ok”. The progress is displayed in the footer. Witschi Electronic AG ChronoProof ® page6... -
Page 7: Other Menu Items And Functions
Other menu items and functions Program: Ticket: Test program: Program configurator…. (For details, see chapter 4.7) Language: Display window: Serial number of the device Firmware version Witschi Electronic AG ChronoProof ® page 7... -
Page 8: Program Configuration
The pressures are adjustable in steps of 0.1bar. Both measurement pressures can be set as vacuum or pressure. Important! The first test pressure must always be lower than the second test pressure (however, incorrect entries are not permitted by the program) Witschi Electronic AG ChronoProof ® page8... -
Page 9: Operation
When it is switched on, the test chamber automatically opens by about 90°. Open the test chamber by hand up to the stop. As soon as this display lights up, the device is ready for testing. Witschi Electronic AG ChronoProof ® page 9... -
Page 10: Preparations For The Tightness Test
Move the sensor down slowly, until it lies on the watch. The sensor is blocked if you let go of the button. lights up if the sensor has been start lowered correctly. The measurement can be started. Witschi Electronic AG ChronoProof ® page10... -
Page 11: Starting The Tightness Test
The pressure is released and then the test chamber is opened Test result The test is finished. The test chamber opens by about 90° and the result is displayed. Test not passed Test passed Witschi Electronic AG ChronoProof ® page 11... -
Page 12: Printing The Test Results
Tapping results in a paper feed of paper about 20 mm. To configure a personalised ticket, the “ChronoProof PRO Setup” software is installed on the USB flash drive enclosed, with instructions. Witschi Electronic AG ChronoProof ® page12... -
Page 13: Maintenance
Only use a soft cloth to clean the device and remove dirt. Never use aggressive cleaning agents or solvents. For technical support, please consult our customer service at our company’s head office. Tel. +41 (0)32 352 05 80, email service@witschi.com) or one of our representatives. Disposal of the device This electronic device may not be disposed of along with household waste. -
Page 14: Eu Declaration Of Conformity
EU DECLARATION OF CONFORMITY Witschi Electronic AG ChronoProof ® page14...


Need help?
Do you have a question about the ChronoProof PRO and is the answer not in the manual?
Questions and answers