Subscribe to Our Youtube Channel
Summary of Contents for Ridgetec Lookout
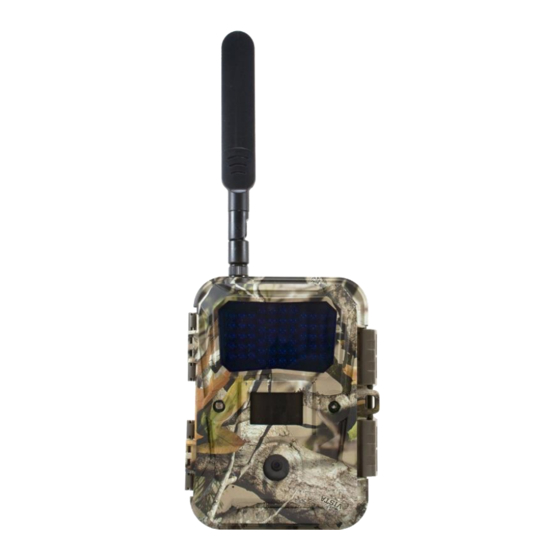
- Page 1 Instruction Manual Model: Lookout LTE 4G Cellular Camera Model PLEASE READ CAREFULLY BEFORE USING CAMERA...
- Page 2 We are continually working to improve the camera function and image quality. The RidgeTec Lookout is a high quality digital surveillance camera. It has been precisely engineered and tuned to provide you with optimal and consistent performance. This...
- Page 3 Remove batteries when storing camera. Removing batteries from the camera during storage reduces the risk of battery acid leakage and battery drain. Do not mix old and new batteries together in the camera. LCD SCREEN: Avoid exposing screen to direct sunlight or at high temperatures as LCD damage may occur.
-
Page 4: Cellular Information
Mounting camera too high or angling camera may result in animal or humans going under or above the PIR motion detection range. The Lookout contains a PIR sensitivity switch on the bottom of the camera to adjust between High, Medium, and Low sensitivity. -
Page 5: Getting Started
GETTING STARTED Please visit the following link for complete instructions on setting up camera on the portal: https://portal.ridgetec.com/help/quick-start SD MEMORY CARD The camera supports both SD and SDHC memory cards up to 64 GB. The camera does not have any internal memory and will not work without SD card inserted. -
Page 6: Live Preview
The Menu has 3 options: I. Cellular Setup, II. Non-Cellular Setup, or III. Additional Settings. IMPORTANT: The Lookout is managed completely by the web portal/mobile app; many settings cannot be changed directly when in cellular mode (they are greyed out) as you will need to setup the camera through the web portal/mobile app. -
Page 7: Photo / Video Playback
This menu is for testing the cellular network. ICCID You will need this number to activate your camera at: https://portal.ridgetec.com/login Cellular Mode Turn Cellular Mode ON or OFF. If turned OFF, you can use camera without SIM card and cellular function. - Page 8 2. Select PHOTO mode or VIDEO mode PHOTO RESOLUTION Photo resolution can be set at (4:3): 12MP, 8MP or 5MP or (16:9): 6MP, or 4MP. 1. Select PHOTO RESOLUTION 2. Select desired photo resolution and push OK to set PHOTO BURST This feature allows the camera to take from 1-3 photos in rapid succession following each trigger.
-
Page 9: Video Sound
VIDEO SOUND Video sound recording can be turned ON or OFF. 1. Select VIDEO SOUND 2. Select ON or OFF and push OK to set QUIET TIME Also known as, “Time Interval or Delay Time”, this feature puts the camera to sleep after capturing an image for the selected period of time before it can be re-activated by motion. - Page 10 Push LEFT arrow button to return to menu III. ADDITIONAL SETTINGS LANGUAGE Select your desired language DATE / TIME STAMP (greyed out when in cellular mode) This allows the user to have the date, time, and temperature stamped onto each photo or video.
-
Page 11: Additional Information
3. Push OK to proceed with formatting SD card DEFAULT SET This feature resets the camera to factory default settings. CAMERA INFORMATION Select CAMERA INFORMATION from main menu STORAGE Displays SD memory card USED SPACE and FREE SPACE FIRMWARE VERSION Displays the current camera firmware version CAMERA NAME You can provide a customized name for the camera... -
Page 12: Troubleshooting
I cannot get the camera to transmit pictures properly Ensure your account is setup correctly and your camera is attached to your account at: https://portal.ridgetec.com/login Follow camera setup at: https://portal.ridgetec.com/help/quick-start The camera shows full or partial reception bars and I get login failure or no... - Page 13 The camera does not turn ON Ensure batteries are inserted properly with correct polarity and fully charged. If possible test each battery with battery tester. Approximately 1.7V each for new Lithium AA batteries. Ensure SD card is properly inserted and not in locked position Cold temperature may decrease battery output sufficiently to prevent camera from turning ON;...
- Page 14 PIR motion detection window; adjust camera position and try again. 13. Images are blurry (stills or motion) Ridgetec offers some of the best picture quality. Although we try to cover every scenario, it is important to realize that different environments and conditions will affect the picture quality.
-
Page 15: Specifications
Adjust PIR sensitivity switch on bottom of the camera to lower position. Ensure camera is mounted on a solid surface; trees and surface may move in wind causing camera to trigger falsely. iii. Adjust camera height and angle. Remove brush and branches from detection zone that may be triggering camera. A close running animal/human may make it across detection zone before triggering the camera Sunlight and heat waves may result in certain scenarios of false triggers;... - Page 16 In no event shall Ridgetec be liable to any party or any person, except for replacement or repair of the product, for the cases, including but not limited to below: 1) any damage and loss, including without limitation, direct or indirect, special, consequential or exemplary, arising out of the use of this product.
-
Page 17: Camera Repair
Some problems may be solved easily with help from customer service. CAMERA REPAIR Repairs for damages not covered by the warranty will be subject to a charge. Please contact RidgeTec to discuss repair options not covered under warranty. CUSTOMER SERVICE CONTACT: USA:...


Need help?
Do you have a question about the Lookout and is the answer not in the manual?
Questions and answers