
Related Manuals for Easy@Home EPA080BAUW

Summary of Contents for Easy@Home EPA080BAUW
- Page 1 User Manual Manual del usuario PORTABLE AIR CONDITIONER ACONDICIONADOR DE AIRE PORTÁTIL English.... 1 Español..25 2018.01.03...
-
Page 2: Table Of Contents
Contents CONTENTS / ÍNDICE Important safety information ....2 Operating conditions......2 Electrical requirements ....... 3 Grounding instructions......4 Safety precautions ......5 Installation instructions ......7 Features ..........7 Accessories ........8 Location ..........9 Tools for window kit installation ..9 Window slider kit installation..... - Page 3 TO OBTAIN WARRANTY SERVICE YOU MUST PROVIDE A VALID PROOF OF PURCHASE. PLEASE STAPLE YOUR RECEIPT TO THIS PAGE FOR FUTURE REFERENCE. Model Number: Serial Number: Date of Purchase: IMPORTANT - GROUNDING METHOD This product is factory equipped with a power supply cord that has a three-pronged grounded plug.
-
Page 4: Important Safety Information
Safety Important safety information Read and follow all safety instructions To prevent injury to the user or other people and to prevent property damage, the following instructions must be followed. Incorrect operation resulting from ignoring these instructions may cause harm or damage. Note The instructions issued in this manual are not meant to cover all possible conditions and... -
Page 5: Electrical Requirements
Safety Important safety information Read and follow all safety instructions Electrical requirements To reduce the risk of fire, electric shock, or personal injury, all wiring and grounding must conform to the latest edition of Local and National Electrical codes. • It is the customer’s responsibility to have the wiring and fuses checked by a qualified electrician to make sure adequate electrical... -
Page 6: Grounding Instructions
Safety Important safety information Read and follow all safety instructions Grounding instructions Improper connection of the equipment-grounding conductor can result in a risk of electrical shock. Check with a qualified electrician or service person if you are in doubt as to whether your appliance outlets are properly grounded. -
Page 7: Safety Precautions
Safety Important safety information Read and follow all safety instructions Safety precautions When using this air conditioner, always follow basic safety precautions, including the following: • Use this appliance only for its intended purpose as described in this Owner’s Manual. •... - Page 8 Safety Important safety information Read and follow all safety instructions Safety precautions • If the unit is placed on its back or side, allow the unit to remain upright and undisturbed for a minimum of 2 hours to avoid damage to internal components.
-
Page 9: Installation Instructions
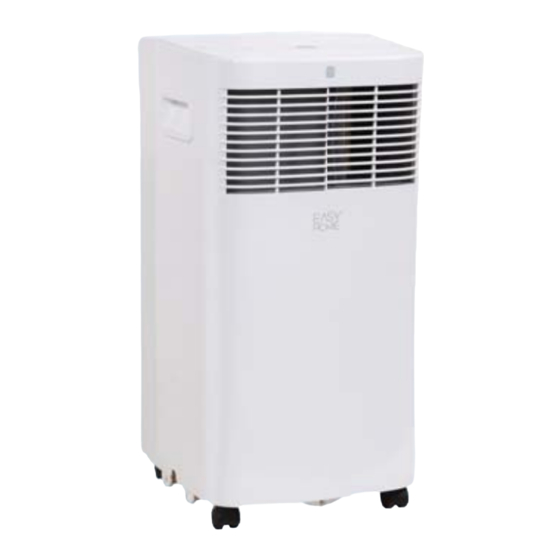
Installation Features Front Rear... -
Page 10: Accessories
Installation Accessories Ensure that all the accessories are included in the package and refer to the installation instructions for their usage. Note: All the illustrations in this manual are for explanatory purposes only. Your air conditioner may be slightly different. -
Page 11: Location
Installation Location The air conditioner should be placed on a fi rm foundation to minimize noise and vibration. For safe and secure positioning, place the unit on a smooth, level fl oor strong enough to support the unit. The unit has casters to aid placement, but it should only be rolled on smooth, fl... -
Page 12: Window Slider Kit Installation
Installation Window slider kit installation Your window slider kit has been designed to fi t most standard vertical and horizontal window applications, however, it may be necessary for you to modify some aspects of the installation procedures for certain types of windows. Visit www.danby.com for general instruction videos. -
Page 13: Double-Hung Sash Window
Installation Installation in a double-hung sash window adapter... -
Page 14: Sliding Sash Window
Installation Installation in a sliding sash window adapter... -
Page 15: Water Drainage
Installation Water drainage When the internal drain pan becomes full the unit will beep 8 times and the digital display will show error code P1. The air conditioning or dehumidifying action will stop but the fan may continue to operate. Turn the unit off and unplug it from the power source. - Page 16 Installation Continuous drain During the DRY mode, you may wish to set up the continuous drain option so that the unit will automatically drain collected water. Remove the exhaust hose during DRY mode, it is not necessary. Ensure that the unit is turned off and unplugged from the power source before setting up the drain hose.
-
Page 17: Operating Instructions
Operation Control panel instructions Cool POWER Mode button: Press to select the desired mode. Modes will cycle in sequence with each press of the button; COOL, DRY, FAN. Light will indicate current mode. Fan speed can be chosen on COOL and FAN modes using the remote control. - Page 18 Operation Control panel instructions Power button: Press to turn the unit on or off. LED Display: - While on COOL mode shows the set temperature in °C or °F - When on FAN and DRY mode shows the room temperature - Displays error codes AUTO mode - Can only be activated by remote control...
-
Page 19: Timer Operation
Operation Timer operation Note: Timer function can only be activated by the remote control. This unit has two timer related functions: - Timer on: sets the amount of time after which the unit will turn on - Timer off: sets the amount of time after which the unit will turn off Timer on function: - Press the Timer On button on the remote control... - Page 20 Operation Timer functions Using the Auto-on and Auto-off feature at the same time You can set the air conditioner to run the Auto-on and Auto-off features at the same time. Keep in mind that the hours displayed on the unit refer to the number of hours that will pass from the current time before the action is taken.
-
Page 21: Remote Control Operation
Operation Remote control instructions 1. Power Button: Press to turn the unit on or off. 2. Mode Button: Press to select the desired mode. 3. Fan Button: Press to select fan speed. 4. Sleep/Filter Button: • Press to start the Sleep function. •... -
Page 22: Replacing The Remote Batteries
Operation Replacing the remote batteries Your air conditioning unit comes with two AAA batteries. Place the batteries in the remote control before use. 1. Slide the back cover from the remote downward to expose the battery compartment. 2. Insert the batteries, ensure to match the (+) and (-) symbols on the ends of the batteries with the symbols inside the battery compartment. -
Page 23: Remote Control Certifi Cation
Operation Remote control certifi cation NOTE: This equipment has been tested and found to comply with the limits for a Class B digital device, pursuant to Part 15 of the FCC Rules. These limits are designed to provide reasonable protection against harmful interference in a residential installation. -
Page 24: Care And Maintenance
Care and maintenance Air fi lter • Clean the air fi lter every two weeks to ensure optimal performance. • In households with animals, you will need to periodically wipe down the grill to prevent blocked air fl ow due to animal hair. •... -
Page 25: Long-Term Storage
Care and maintenance Unit enclosure Use a lint-free cloth soaked with neutral detergent to clean the unit enclosure, be sure to wring the cloth of excess water. Finish by wiping with a clean dry cloth. Long-term storage • Remove the rubber plug at the back of the unit and attach a hose to the drain outlet. -
Page 26: Troubleshooting
Troubleshooting Consumer Service: 1-800-263-2629 PROBLEM POSSIBLE CAUSE SOLUTION Unit does not • P1 appears in the • Drain the start when display window water in the pressing on/ • Room bottom tray off button temperature is • Reset the lower than the set temperature temperature. -
Page 27: Warranty
Índice Información de seguridad importante .....29 Condiciones de operación ......29 Requisitos eléctricos........30 Instrucciones de conexión a tierra ....31 Precauciones de seguridad ......32 Instrucciones de instalación ......34 Caracteristicas ..........34 Accesorios ............35 Ubicación ............36 Herramientas necesarias para instalar el juego de ventana ..............36 Instalación del juego de moldura para ventana 37 Ventana de guillotina vertical ......38 Ventana de guillotina horizontal......39... - Page 28 PARA OBTENER SERVICIO DE GARANTÍA, DEBE PROVEER UN RECIBO ORIGINAL. POR FAVOR ENGRAPE SU RECIBO A ÉSTA PÁGINA EN CASO QUE NECESITE HACER UNA RECLAMACIÓN. Número de modelo: Número de serie: Fecha de compra: IMPORTANTE - MÉTODO DE CONEXIÓN A TIERRA Este producto viene equipado de fábrica con un cable de alimentación que tiene un enchufe de tres clavijas.
-
Page 29: Información De Seguridad Importante
Seguridad Información importante de seguridad Lea y siga todas las instrucciones de seguridad Para evitar heridas al usuario u otras personas y para evitar los daños materiales, deberá seguir las siguientes instrucciones. La operación incorrecta al ignorar estas instrucciones podría causar lesiones o daños. Nota Las instrucciones en este manual no tienen como objetivo cubrir todas las posibles condiciones y... -
Page 30: Requisitos Eléctricos
Seguridad Información importante de seguridad Lea y siga todas las instrucciones de seguridad Requisitos eléctricos Para reducir el riesgo de incendio, descarga eléctrica o lesión personal, todo la instalación eléctrica y toda la conexión a tierra deben cumplir con la última versión de los códigos locales y nacionales de electricidad. -
Page 31: Instrucciones De Conexión A Tierra
Seguridad Información importante de seguridad Lea y siga todas las instrucciones de seguridad Instrucciones de conexión a tierra Una conexión inadecuada del conductor de conexión a tierra del equipo puede dar como resultado un riesgo de descarga eléctrica. Verifique con un electricista calificado o con personal de servicio si tiene dudas respecto a si los enchufes de su aparato tienen una buena conexión a tierra. -
Page 32: Precauciones De Seguridad
Seguridad Información importante de seguridad Lea y siga todas las instrucciones de seguridad Precauciones de seguridad Al usar este aparato, siga siempre las precauciones de seguridad básicas, incluidas las siguientes: • Utilice este aparato solamente para su uso previsto según se describe en este manual del usuario. - Page 33 Seguridad Información importante de seguridad Lea y siga todas las instrucciones de seguridad Precauciones de seguridad • Si la unidad se coloca sobre su parte posterior o de costado, deje que la unidad permanezca en posición vertical e inmovil durante un mínimo de 2 horas para permitir que el líquido refrigerante se asiente.
-
Page 34: Instrucciones De Instalación
Instalación Caracteristicas Vista frontal Vista posterior... -
Page 35: Accesorios
Instalación Accesorios Verifi que que todos los accesorios estén incluidos en la caja y consulte las instrucciones de instalación para poder usarlos. Nota: Todas las ilustraciones de este manual son únicamente con motivos explicativos. Su acondicionador de aire puede ser ligeramente diferente. -
Page 36: Ubicación
Instalación Ubicación El acondicionador de aire debe colocarse sobre una base fi rme para minimizar el ruido y la vibración. Para una colocación segura, coloque la unidad en un piso liso y nivelado lo sufi cientemente fuerte como para soportar la unidad. La unidad tiene ruedas para facilitar la colocación, pero solo debe rodar sobre superfi... -
Page 37: Instalación Del Juego De Moldura Para Ventana
Instalación Instalación del juego de moldura para ventana El juego de moldura para ventana fue diseñado para adaptarse a la mayoría de las ventanas verticales y horizontales estándar, sin embargo, podría tener que modifi car algunos aspectos del proceso de instalación para ciertos tipos de ventana. -
Page 38: Ventana De Guillotina Vertical
Instalación Instalación en una ventana de guillotina vertical Cinta selladora de gomaespuma B (tipo adhesivo; más corta) Paneles correderos B y C Panel corredero A (si se necesitan) Cinta selladora de gomaespu- ma A (tipo adhe- sivo) Corte las cintas Instale el panel corredero selladoras adhesivas de la ventana en la... -
Page 39: Ventana De Guillotina Horizontal
Instalación Instalación en una ventana de guillotina horizontal Cinta selladora de gomaespuma B (tipo adhesivo; más corta) Cinta Paneles selladora de correderos B y C gomaespu- (si se necesitan) ma A (tipo adhe- sivo;) Panel corredero A Corte las cintas Instale el panel corredero selladoras adhesivas de la ventana en la... -
Page 40: Drenaje De Agua
Instalación Drenaje de agua Cuando la bandeja interna de drenaje se llena, la unidad emite 8 pitidos y la pantalla digital muestra el código de error P1. Se detendrá el funcionamiento del acondicionador de aire o del deshumidifi cador, pero el ventilador puede seguir funcionando. - Page 41 Instalación Drenaje continuo En el modo DRY (deshumidifi cación), podría ser conveniente instalar la opción de drenaje continuo para que la unidad drene el agua recolectada automáticamente al exterior. Quite la manguera de salida en el modo DRY (deshumidifi cación), no es necesaria. Verifi que que la unidad esté...
-
Page 42: Instrucciones De Operación
Operación Instrucciones del panel de control Cool POWER Botón MODE: Presionar para seleccionar el modo deseado. El modo cambiará en secuencia con cada pulsación del botón: COOL (enfriamiento), DRY (deshumidifi cación), FAN (ventilador). La luz indicará el modo actual. Se puede seleccionar la velocidad del ventilador en los modos COOL y FAN con el control remoto. - Page 43 Operación Instrucciones del panel de control Botones + y -: Se usan para ajustar la temperatura en el modo COOL. Mantenga presionados los botones + y - durante 3 segundos para cambiar la indicación de °C a °F. Botón POWER: Presiónelo para encender y apagar la unidad. Pantalla LED: - En modo COOL indica la temperatura seleccionada en °C o °F.
-
Page 44: Funcionamiento Del Temporizador
Operación Funcionamiento del temporizador Nota: El temporizador solamente se puede activar con el control remoto. Esta unidad tiene dos funciones relacionadas con el temporizador: - Encendido temporizado: fi ja el retardo de tiempo antes de encender la unidad. - Apagado temporizado: fi ja el retardo de tiempo antes de apagar la unidad. - Page 45 Operación Función del temporizador Cómo usar las funciones de encendido y apagado automático al mismo tiempo Puede programar el acondicionador de aire para que utilice las funciones de encendido y apagado automático al mismo tiempo. Tenga en cuenta que las horas que indique la unidad se refi...
-
Page 46: Instrucciones Del Control Remoto
Operación Instrucciones del control remoto 1. Botón de encendido: presione para encender o apagar la unidad. 2. Botón de modo: presione para seleccionar el modo deseado. 3. Botón de ventilador: presione para seleccionar la velocidad del ventilador. 4. Botón de dormir / fi ltro: •... -
Page 47: Reemplazo De Las Pilas Del Control Remoto
Operación Reemplazo de las pilas del control remoto Su acondicionador de aire viene con dos pilas AAA. Coloque las pilas dentro del control remoto antes de usarlo. Deslice la cubierta posterior del control remoto hacia abajo para abrir el compartimiento de las pilas. Inserte las pilas, verifi... -
Page 48: Certifi Cación Del Control Remoto
Operación Certifi cación del control remoto NOTA: Este equipo ha sido probado y cumple con los límites de la Clase B de dispositivos digitales, de acuerdo con la Parte 15 de las normas de la FCC. Estos límites están diseñados para proporcionar una protección razonable contra interferencia perjudicial en una instalación residencial. -
Page 49: Cuidado Y Maintenimiento
Cuidado y mantenimiento Filtro de aire • Limpie el fi ltro de aire cada dos semanas para asegurar el rendimiento óptimo. • En las casas con animales, tendrá que limpiar periódicamente la rejilla para evitar que los pelos de los animales bloqueen el fl ujo de aire. •... -
Page 50: Limpieza
Cuidado y mantenimiento Carcasa de la unidad Use un trapo que no deje pelusa humedecido con detergente neutro para limpiar la carcasa de la unidad. Asegúrese de escurrir el exceso de agua del trapo. Al fi nal, repáselo con un trapo seco y limpio. Almacenamiento a largo plazo •... -
Page 51: Resolución De Problemas
Resolución de problemas Servicio al consumidor: 1-800-263-2629 PROBLEMA CAUSA POSIBLE SOLUCIÓN La unidad • La pantalla • Drene el agua en no arranca muestra el la bandeja inferior al pulsar el mensaje P1 • Restablecer la botón de • La temperatura temperatura encendido / ambiente es... -
Page 52: Garantía
DISTRIBUTED BY • DISTRIBUIDO POR: ALDI INC., BATAVIA, IL 60510 WWW.ALDI.US AFTER SALES SUPPORT • SERVICIO POSVENTA 49876 1-800-263-2629 consumerservice@danby.com YEAR WARRANTY MODEL/NO DEL MODELO: AÑOS DE GARANTÍA 05/2018 EPA080BAUW Printed in China Impreso en China... - Page 53 AFTER SALES SUPPORT 49876 Return your completed warranty card to: 1-800-263-2629 Danby Products Ltd 5070 Whitelaw Rd consumerservice@danby.com Guelph, Ontario MODEL: EPA080BAUW 05/2018 Canada N1H 6Z9 Hotline: 1-800-263-2629 Call charges from your regular consumerservice@danby.com landline operator. Phone lines available: Monday - Thursday...
- Page 54 ALDI INC. FULL WARRANTY CONDITIONS Dear Customer: The ALDI warranty is a full warranty offering you the following benefi ts: Warranty Period: 2 years from date of purchase. 6 months for movable parts and consumables under normal and proper conditions of use. Costs: Free repair/exchange or refund at manufacturer’s discretion.
- Page 55 49876 Devuelva su tarjeta de garantía completada a: 1-800-263-2629 Danby Products Ltd 5070 Whitelaw Rd consumerservice@danby.com Guelph, Ontario MODELO: EPA080BAUW 05/2018 Canada N1H 6Z9 Línea directa: 1-800-263-2629 Llame a los cargos de su operador consumerservice@danby.com de línea fi ja regular.
- Page 56 ALDI INC. CONDICIONES DE LA GARANTÍA Estimado cliente: La garantía de ALDI es una garantía completa que le ofrece los siguientes benefi cios: Período de garantía: 2 años a partir de la fecha de compra. 6 meses para piezas móviles y consumibles en condiciones normales y adecuadas de uso.
Need help?
Do you have a question about the EPA080BAUW and is the answer not in the manual?
Questions and answers