Table of Contents
Advertisement
Quick Links
Advertisement
Table of Contents

Related Manuals for SPRT SP-T5


Summary of Contents for SPRT SP-T5
- Page 1 SPRT SP-T5 Portable Dot Matrix Printer User’s Manual...
-
Page 2: Table Of Contents
Content Content................. 2 Operating Precautions............5 Notes on Safety ............5 Notes on Using ............. 6 Notes on Handling............7 Chapter 1 Outer Appearance and Accessories....8 1.1 Outer Appearance........... 8 1.2 Standard Accessories ..........8 Chapter 2 General Specifications ........8 Chapter 3 Operation............ - Page 3 3.3.3 (Bluetooth)Interface ....... 16 3.4 Other Functions............. 17 3.4.1 Stand-by & Turn Off Automatically Mode..17 3.4.2 Paper End Alarming ........18 3.4.3 Black Mark ..........18 3.5 Indicators and Buzzer ........... 19 3.6 Printer setting ............20 Chapter 4 Printing Control Command ........ 20 4.1 Summary...............
- Page 4 4.2.7 ESC V n ............30 4.3 Print setting commands......... 30 4.3.1 ESC $ nL nH ..........30 4.3.2 ESC D n1 n2…nk NULL......31 4.3.3 ESC \ nL nH ..........32 4.3.4 ESC 2 ............33 4.3.5 ESC 3 n............33 4.3.6 ESC SP n............
-
Page 5: Operating Precautions
Operating Precautions This section presents important information intended to ensure safe and effective use of the printer. Please read the following carefully. Notes on Safety Be sure to use the specified battery and power source provided by our company. Connection to an improper power source may cause fire, explosion or damage to the printer. -
Page 6: Notes On Using
Notes on Using Be sure not to print continuously over 1 meter, otherwise may cause damage to the print head. Water or other liquid should not spill into the printer, also the printer should not be appeared in the rain, or else may cause printer damage. -
Page 7: Notes On Handling
Be sure to use up the electricity of the battery before charge it, as it can ensure the using life of the battery. Notes on Handling The printer should be placed in such an environment that the temperature is between -20℃ and 60℃, and the relative humidity is between 5% and 95%. -
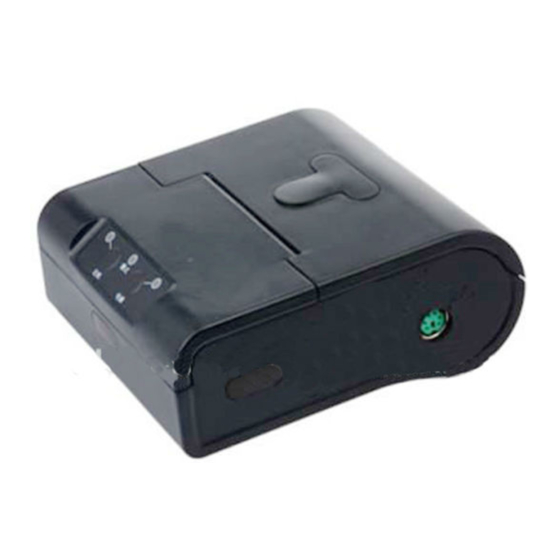
Page 8: Chapter 1 Outer Appearance And Accessories
Chapter 1 Outer Appearance and Accessories 1.1 Outer Appearance 1.2 Standard Accessories Power Adaptor 1 unit Rechargeable Li-ion Battery 1 unit Testing Paper 1 roll Environmental Case 1 unit Shoulder Strap 1 unit Interface Cable 1 unit Chapter 2 General Specifications Model SP-T5... - Page 9 Physical Specification Outer Dimension 112×98×46(L×W×H) Weight 340g(Paper roll excluded) Paper Diameter ≤60mm Printing Specification Printing Method Impact Dot Matrix Paper Width 58±0.5mm Dot/line 240dots Printing Speed >5.5mm /s Paper Thickness 0.06~0.085mm Black Mark Checking Available Reliability 50 km Built-in Character Set English: ASCII(6×12 / 8×16)...
-
Page 10: Chapter 3 Operation
Temperature/Humidity Storage -20℃~60℃/5%~95% Temperature/Humidity Chapter 3 Operation 3.1 Using Preparation 3.1.1 Battery Installation 3.1.2 Paper Installation... -
Page 11: Operation Specification
3.2 Operation Specification 3.2.1 Printer On/Off The printer is powered on by pressing the power button for about 1 second; the power indicator is on with blue color when the printer is on. If press the power button for about 1 second again, the printer will be turned off, all the indicators are off when the printer is off. -
Page 12: Self-Test
3.2.2 Self-test The self-test checks the printer’s current settings, status and whether the printer has any problems. Turn on the power while holding down the FEED button, the self-test begins. The printer is ready to receive data as soon as it completes the self-test. -
Page 13: Printer Interface Connection
printer, so the power charging begins, during the course of power charging, the charging indicator goes red, and turns to blue when the charging is over. It takes about 3 hours to charge the battery. When the charging indicator is purple, it means battery uninstalled or battery not contacted well. - Page 14 Data Bit: 7 bit, 8 bit optional Parity: Odd, Even, None optional Stop Bit: 1 bit The ex-factory default setting is: Baud rate: 9600bps Handshaking: hardware Data Bit: 8 bit Parity: none User can change the settings by using the Setting Tool. Definition for the PS/2 socket: 1.TXD: send data 2.DTR: ready signal...
-
Page 15: Irda Interface
please don’t use this pin if making connecting line, otherwise the printer might be not used normally or damaged. When prints large quantities of data, the handshaking need to be used. When using Bluetooth and IrCOMM, developers need not to consider handshaking. When use Raw-Ir can not use hardware control. -
Page 16: Bluetooth)Interface
RAW-Ir can work under 9600bps, 19200bps, 38400bps, 57600bps, 115200bps, the baud rate of RAW-Ir is same to that of serial interface. Notice: 1) To use the T5’s infrared port, a computer or Personal Digital Assistant (PDA) with IR port is required. 2) Position a PDA conforming to the specifications in point not more than 50 centimeter away from the printer’s infrared port. -
Page 17: Other Functions
3. If there are other Bluetooth devices, please select T5 Bluetooth Printer; 4. Put in password “1234” 5. Pairing finished. Notice: If the printer name has been changed, please be sure not turn on more than one printer, otherwise it will be difficult to justify which printer been paired. -
Page 18: Paper End Alarming
The printer also can be set to turn off automatically mode by T5 Setting Tools. In turn off automatically mode, the printer will power off if without data sent in within 5 minutes. 3.4.2 Paper End Alarming When the paper is run out, the buzzer of the printer will ring 2 times, informs the user to load paper. -
Page 19: Indicators And Buzzer
3.5 Indicators and Buzzer There are three indicators for T5 printer, they are 【POWER】 , 【MODE】 and 【FEED】, the 【POWER】and 【MODE】 indicators are blue, the 【FEED】 indicator is red. Indicator Status Buzzer Normal working Beep once when Solid blue (right) mode power on/off Solid blue (right) -
Page 20: Printer Setting
Solid blue Charging finish - (middle) Solid red(middle) Charging - Solid Battery error purple(middle) 3.6 Printer setting Users can set the printer by using the〈T5 Setting Tools〉 software provided by us. The settings include: serial baud rate, data format, black mark, language, font, density, RAW-IR baud rate(only for T5-Ra), IrDA device name (oly for T5-Ir), Bluetooth device name and password etc. - Page 21 mark position 4.1.4 Print and feed line 4.1.5 Print and carriage return 4.1.6 ESC J n Print and feed paper for n lines 4.1.7 ESC d n Print and feed paper for n lines 4.1.8 Horizontal tab 4.1.9 FS U nL nH Print Unicode Character Character setting commands 4.2.1...
-
Page 22: Basic Control Commands
4.3.6 ESC SP n Set line character spacing 4.3.7 GS L nl nH Set left spacing 4.3.8 ESC a n Set alignment Graphic/Image print commands 4.4.1 ESC * m nL nH Set bit-image d1…dk 4.4.2 GS * x y d1…dk Define downloaded bit-image... -
Page 23: Null
[Format]: ASCII Hexadecimal Decimal [Description]:Clear the data in the print buffer; Restore the default of each print command. [Notice]: If not restore to ex-factory setting, the default setting won’t be changed. 4.1.2 NULL [Name]:Awaken printer [Format]: ASCII Null Hexadecimal Decimal [Description]:Awaken printer. - Page 24 Decimal [Description]:Print and feed paper to the position of black mark, if there is no black mark, then feed paper about 30mm and stop, the criterion for black mark please refer to Appendix B. This command is only valid for black mark mode printer.
-
Page 25: Esc J N
[Notice]: Sets the print starting position to the beginning of the line. 4.1.6 ESC J n [Name]: Print and feed paper [Format]: ASCII Hexadecimal 4A n Decimal 74 n [Description]: Feed paper for n vertical dot spacing. [Range]: 0 ≤ n ≤ 255. •... -
Page 26: Print Unicode Character
4.1.8 HT [Name]: Horizontal tab [Format]: ASCII Hexadecimal Decimal [Description]: Moves the print position to the next horizontal tab position. [Notice]: • Horizontal tab positions are set with ESC D. • This command is ignored unless the next horizontal tab position has been set. - Page 27 [Format]: ASCII Hexadecimal 21 n Decimal 33 n [Description]: Select print mode(s) using n as follows: Value Description 6*12/12*12 8*16/16*16 Undefined Undefined Cancel bold font Select bold font Cancel double height mode Select double height mode Cancel double width mode Select double width mode Undefined Cancel underline mode...
-
Page 28: Gs ! N
setting of the last received command is effective. • ESC + can also select character size. However, the setting of the last received command is effective. • This command is effective for both alphanumeric and Chinese character. [Default]: n = 0 [Reference]: ESC -, ESC + 4.2.2 GS ! n [Name]:Enlarge character... -
Page 29: Esc E N
Description Cancel underline Select underline (1 dot width) [Reference]: ESC ! 4.2.4 ESC E n [Name]: Select/Cancel bold font print [Format]: ASCII Hexadecimal 45 n Decimal 69 n [Description]:When the lowest bit of n is 0, cancel bold font print. When the lowest bit of n is 1, select bold font print 4.2.5 ESC G n [Name]: Select/cancel overprinting [Format]:... -
Page 30: Esc V N
[Description]: If n=1, select reverse print; n=0, cancel reverse print。Default set n=0。 4.2.7 ESC V n [Name]:Select/cancel character rotation [Format]: ASCII Hexadecimal 56 n Decimal 86 n [Description]: n. Meaning Cancel rotation 90 clockwise 180 clockwise 270 clockwise 4.3 Print setting commands 4.3.1 ESC $ nL nH [Name]: Set absolute print position [Format]:... -
Page 31: Esc D N1 N2
print position is [( nL + nH × 256) (vertical or horizontal motion unit)] inches. [Notice]: Settings outside the specified printable area are ignored. [Reference]: ESC \ 4.3.2 ESC D n1 n2…nk NULL [Name]:Sets horizontal tab positions. [Format]: ASCII ESC D n1 n2 n3… NULL Hexadecimal 1B 44 n1 n2 n3…... -
Page 32: Esc \ Nl Nh
• Transmit [ n] k in ascending order and place a NUL code 0 at the end. • When [ n] k is less than or equal to the preceding value [ n] k-1, tab setting is finished and the following data is processed as normal data. -
Page 33: Esc 2
• The print starting position moves from the current position to [ N × horizontal motion unit] 4.3.4 ESC 2 [Name]: Select default line spacing [Format]: ASCII ESC 2 Hexadecimal 1B 32 Decimal 27 50 [Description]: Set the current character line spacing as the default one: 6 dot spacing. -
Page 34: Esc Sp N
Should input the command:1B 33 03 4.3.6 ESC SP n [Name]: Set character spacing [Format]: ASCII ESC SP n Hexadecimal 1B 20 n Decimal 27 32 n [Range]:0 ≤ n ≤ 255 [Description]:Set n horizontal dot spacing as the character’s right spacing (exclude the character’s height). -
Page 35: Esc A N
position, Set n horizontal dot spacing as the character’s left spacing, nL nH are n’s LSB and MSB, N=nL + nH × 256. [Default]: n=0,that means there is not any left margin. 4.3.8 ESC a n [Name]:Set alignment [Format]: ASCII ESC a Hexadecimal 1B 61 n... -
Page 36: Gs * X Y D[]
[Description]: Selects a bit-image mode using m for the number of dots specified by n1 and n1, as follows: Vertical Dot Horizontal Number (Height) Enlargement 32 24 33 24 4.4.2 GS * x y d[] [Name]: Define downloaded bit-image [Format]: ASCII GS * x y d[]... -
Page 37: Gs / N
• If x*y is off-limit, then the command is forbidden. • d means the image data. 1 print, 0 not print • use this command to define the downloaded bit-image, use command GS/n to print the downloaded bit-image. • In the following circumstances , clear the definition of downloaded bit-image. -
Page 38: Curve Print Commands
Hexadecimal 1D 50 n Decimal 29 80 n [Description]: 0<=n<=9.Print prestored bit-image, the number of image is 1<=n<=9 [Note]: • The command is invalid when the number of bit-image has not been defined. • The command is not affected by the print mode (bold font, overlapping, underline, etc.). - Page 39 command is used to print n line segments on one horizontal line. Using the command continuously can print out the line segment the user required. • N is the number of line segment. • xksL is the LSB for the horizontal coordinate of initial dot for No.
-
Page 40: Esc
want to print other characters, then need to set the character code to 0 or 1; • Only can print 2 characters on each horizontal dot line. [Reference]: GS ‘ 4.5.3 ESC ‘ [Name]:Print curve [Format]: ASCII ESC ’ n x1 x2 ……... -
Page 41: User-Defined Character Commands
4.6 User-defined character commands 4.6.1 ESC % n [Name]: Select/cancel user-defined character [Format]: ASCII Hexadecimal 25 n Decimal 37 n [Range]: 0 ≤ n ≤ 255 [Description]: Select or cancel user-defined character set. When n (LSB)=0,cancel user-defined character set. When n (LSB)=1,select user-defined character set. [Notice]: •... - Page 42 [Range]: y = 3, font A (12 × 24), y = 2, font B (8× 16), 32 ≤ c1 ≤ c2 ≤ 126 x = 12, font A (12 × 24), x = 8, font B (8× 16), 0 ≤ d1 ...
- Page 43 • Defining the data of user-defined character is (y × x) bytes. • Setting the printing dot’s corresponding bit is 1 or non-printing dot’s one is 0.
-
Page 44: Esc
• The user-defined characters will be deleted in the following situation: 1. Carry out ESC @. 2. Printer reset or power turn off. [Default] Built-in character set. [Reference]: ESC %. 4.6.3 ESC ? [Name]: Delete user-defined character [Format]: ASCII Hexadecimal Decimal 63 n [Range]: 32 ≤... -
Page 45: Chapter 5 Appendix
Chapter 5 Appendix Character Set...
Need help?
Do you have a question about the SP-T5 and is the answer not in the manual?
Questions and answers