
Summary of Contents for dtm FX510e
- Page 1 User’s Manual ©2019, DTM Print GmbH. All rights reserved For the most recent version of this manual please visit http://dtm-print.eu/europe/manuals.html...
- Page 2 Windows is a registered trademark of Microsoft Corporation. All other trademarks are the property of their respective owners. Printing History Edition 1.0, #190305, Copyright 2019, DTM Print GmbH. All rights reserved. FCC Compliance Statement This equipment has been tested and found to comply with the limits for a CLASS A digital device, pursuant to Part 15 of the FCC Rules.
-
Page 3: Table Of Contents
Table of Contents Section 1: Getting Started ..............................5 Choosing a Good Location .................................5 Box Content ........................................5 Getting to Know Your Printer ................................5 Section 2: Printer Setup ................................8 Open the Printer Cover ..................................8 Open the Printing Mechanism ................................8 Loading the Ribbon ....................................8 Loading the Label Roll ..................................10 Installing the Label Supply Hub ..............................11 Sensor Position .......................................12... -
Page 5: Section 1: Getting Started
Section 1: Getting Started Thank you… … for choosing an FX510e/FX510ec Foil Imprinting System. The FX510e Foil Imprinter adds brilliant, shiny highlights to your pre-printed or blank labels. This User’s Manual is your complete step-by-step guide to quickly and easily setting up and printing with your new Foil Imprinting System. -
Page 6: C Getting To Know Your Printer
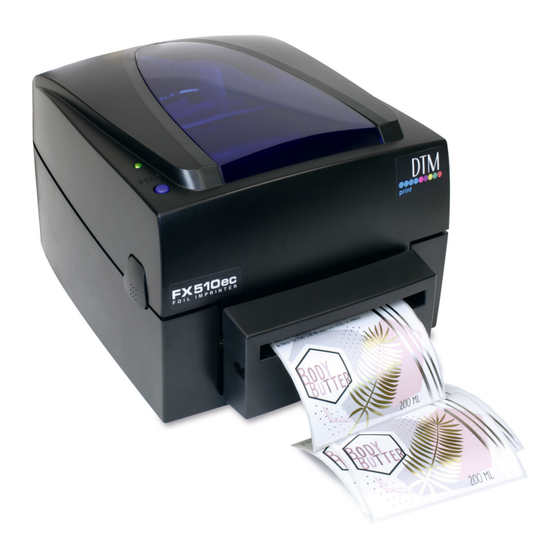
1 C Getting To Know Your Printer FX510e Overview Front View. This illustration shows the front of the printer with its control buttons and LED indicator light. Top Cover Operation Panel Front Cover Cover Open Buttons Release buttons for opening the printer cover Rear View. - Page 7 Open The Printer Cover This illustration shows the interior view of the printer. Label Supply Module - Label Supply Hub Ribbon Module - Label Guide Plates (set of two) - Ribbon feed mechanism - Ribbon hub - Empty ribbon core Adjustment Screw (Left) Adjustment Screw (Right) Screw for adjusting the print head pressure...
-
Page 8: Section 2: Printer Setup
Section 2: Printer Setup 2A Open The Printer Cover Pressing The Cover Open Buttons Place the printer on a flat surface. Open the printer cover by pressing the release buttons on both sides of the printer housing and lift the printer cover backward. 2B Open The Printing Mechanism Pressing The Release Catches Release and lift the printing mechanism. - Page 9 Stick the ribbon supply hub on the ribbon rewind hub and wind the rewind hub 2~3 circles. Install The Ribbon On The Printer Place the ribbon supply hub at the back of the printing mechanism. Pass the ribbon supply hub under the print head. Note: The ribbon supply hub accepts the coated side of ribbon to be wound ink-inside IN or wound ink-side OUT.
-
Page 10: Loading The Label Roll
2 D Loading The Label Roll A New Label Roll Module Installation Place the label stock on the label supply hub, attach the guide plates to the label stock holder. Install The Label Roll Module On The Printer Now load the label stock into the printer. Release the printing mechanism and lift it. ... -
Page 11: Installing The Label Supply Hub
2 E Installing The Label Supply Hub 1” Cores Installing the label supply hub for 1” cores. 1.5” Cores Installing the label supply hub for 1.5” cores. 3” Cores Installing the label supply hub for 3” cores. 11 | Printer Setup... -
Page 12: Sensor Position
3. Connect the USB cable to the printer and host computer. 4. Switch on the printer, the LED indicator should now lights up. 2 H Installing The Driver 1. Download the driver at fx510e.dtm-print.eu. 2. Select the icon for the driver file and double-click to start the instal- lation. - Page 13 6. Enter a printer name and assign the appropriate rights. 7. Once the installation is complete, a summary of the printer settings is displayed. 8. Check whether the printer settings are correct and click “Finish” to start copying the driver files. 9.
-
Page 14: Section 3: Operation Panel
(See Section 3 B. for the label size calibration function) on the label stock. LED Indicators LED Indicator Beeps Status Description The FX510e is ready for LED ON (Green) none Standby mode operation 2x 2 beeps The printer has detected... -
Page 15: Error Alerts
The contents of a self-test printout are listed below. Model & Firmware Version FX510e DTMFX1U.XO USB Port Setting USB S/N: XXXXXXXX Serial port: 96, N, 8, 1 Serial Port Setting Card Status: Not detected [00] PORT State ############################### Number of Forms... -
Page 16: Section 4: Printing
Section 4: Printing Your printer ships with a version NiceLabel Free 2019 DTM Edition. These easy-to-use software’s are designed to allow you to create label designs with text, shapes or bar codes quickly and simply. The following is a tutorial to guide you through creating and printing a sample label in NiceLabel. - Page 17 3. Choose Orientation. Click “Next”. 4. Set the dimensions of your label and unit of measure. Click “Next”. 5. Review the label setup summary. If it is correct, click “Finish”. Your blank label will be displayed. 17 | Printing...
- Page 18 After you click “Finish”, you can always go back and change any of these “Label Properties” settings, by going to the Menu Bar and select “Document Properties” or double click on the blank label. Once you have created your label size you can start to design your label using tools from the tool box/button bar. You will need to add text, rectangles, lines and/or graphics.
-
Page 19: Printing From Nicelabel
Also, you can find more tips and hints by simply clicking Help in the main menu 4 C Sealing labels with clear film Clear film is also available for FX510e. It lets you produce labels with a higher resistance to water and UV or other environ- mental factors. -
Page 20: Printer Driver Settings
NiceLabel (File Menu – “Print” – “Printer Settings”) Find Driver Settings in Windows: Click the Windows Start Menu button, search for “Devices & Printers” and click on “DTM FX510e”. Choose “Manage” and a new window opens up. Select “Printing preferences”. - Page 21 Page Setup Tab In the first area you can pre-define settings for specific label stock. The pre-defined settings are available in the Stock – Name drop-down menu. The button Edit… opens the window to edit stock. Choose the Sensor Type your label is using (“Die-Cut Labels” for labels that are die-cut with or without a black mark in the back and “Continuous (Fixed Length)”...
- Page 22 Choose “Thermal Transfer” as print method, when you’re using usual pre-printed or blank label stock in combination to one of DTM’s certified metallic, clear or spot colour ribbons. With FX510ec you have the option to cut your media horizontally. Choose “Cut” in the Post-Print Action and select the right occurrence.
-
Page 23: Printing From Other Programs
3. Choose the right printing program. There are many different applications that are capable of printing to the FX510e. However there are only a few that are ideal printing applications. For example, Adobe Illustrator or Photoshop is an excellent design program but is not always the best printing program. -
Page 24: Section 5: Troubleshooting And Maintenance
Section 5: Troubleshooting and Maintenance 5 A Cleaning The Print Head Dirt on the print head or ribbon, or glue residue from the label stock may result in inadequate print quality. The printer cover must therefore always be closed during printing. Keeping dirt and dust away from the paper or labels ensures a good print quality and a longer lifespan of the print head. -
Page 25: Adjusting The Print Line
5 C Adjusting The Print Line Direction A When the print line is incorrectly set, the print quality on one side of the medium may suffer. In such a case, the print line must be adjusted so it is positioned parallel to the paper feed roller Adjustment Methods Direction B 1. -
Page 26: Troubleshooting
5 E Troubleshooting Problem Solution The printer is switched on but the LED does not light up Check the power supply. Check the software settings (driver settings) or command codes. Look for the error alert in the table in Section 3C Error The LED lights up red and printing is interrupted alerts. -
Page 27: Miscellaneous
If you have difficulties in operating your printer, the procedures in this manual and the software User’s Guide should, in most cases, solve the problem. If you still have difficulty, feel free to contact the DTM Print Support Team using one of the methods listed below. -
Page 28: Section 6: Label And Ribbon Specifications
Note: See table below for Max and Min values in inches and mm. Important: Test all custom made label stock with the intended printer before ordering large quantities! DTM Print will only assume responsibility for custom label stock ordered from DTM Print. -
Page 29: Label Specifications
For these reasons the weight or thick- ness of the liner is a variable that can not easily be defined. DTM Print recommends and uses 70# liner with most label stock. -
Page 30: Section 7: Technical Specifications
300 m (981’) Minimum print height specification compliance can be dependent on non-standard material variables such as label type, thickness, spacing, liner construction, etc. DTM Print is pleased to test non-standard materials for minimum height printing capability. Supply Ribbon Roll: 25.4 mm (1”) ID core with max. - Page 31 FX510E-190305...
- Page 32 DTM Print GmbH Mainzer Strasse 131 65187 Wiesbaden Germany Phone: +49 611 92777-0 Mail: support@dtm-print.eu http://dtm-print.eu...
Need help?
Do you have a question about the FX510e and is the answer not in the manual?
Questions and answers