Table of Contents
Advertisement
Advertisement
Table of Contents

Related Manuals for RockShox 35 2020


Summary of Contents for RockShox 35 2020
- Page 1 2020 SERVICE MANUAL GEN.0000000005886 Rev A © 2019 SRAM, LLC...
- Page 2 This warranty does not apply to products that have been incorrectly installed and/or adjusted according to the respective SRAM user manual. The SRAM user manuals can be found online at sram.com, rockshox.com, avidbike.com, truvativ.com, or zipp.com. This warranty does not apply to damage to the product caused by a crash, impact, abuse of the product, non-compliance with manufacturers specifications of usage or any other circumstances in which the product has been subjected to forces or loads beyond its design.
- Page 3 SAFETY FIRST! We care about YOU. Please, always wear your safety glasses and protective gloves when servicing RockShox® products. Protect yourself! Wear your safety gear!
-
Page 4: Table Of Contents
TABLE OF CONTENTS ROCKSHOX® SERVICE ......................................5 PART PREPARATION ..............................................5 SERVICE PROCEDURES ..............................................5 PARTS, TOOLS, AND SUPPLIES ..........................................6 RECOMMENDED SERVICE INTERVALS ........................................7 RECORD YOUR SETTINGS ............................................7 TORQUE VALUES ................................................7 OIL VOLUME AND LUBRICANT ...........................................8 EXPLODED VIEW - 35™ GOLD RL - DEBONAIR™ .............................9 LOWER LEG REMOVAL AND SERVICE ................................10... -
Page 5: Rockshox® Service
P a r t P r e p a r a t i o n Remove the component from the bicycle before service. Disconnect and remove the remote cable or hydraulic hose from the fork or rear shock, if applicable. For additional information about RockShox remotes, user manuals are available at www.sram.com/service. -
Page 6: Parts, Tools, And Supplies
• RockShox 5wt suspension oil • Rubber or plastic mallet • RockShox 15wt suspension oil • Socket: RockShox x Abbey Bike Tools 24 mm Top Cap Socket or 24 mm, • RockShox Suspension Cleaner or isopropyl alcohol 8 mm (remote compression damper only) •... -
Page 7: Recommended Service Intervals
R e c o m m e n d e d S e r v i c e I n t e r v a l s Regular service is required to keep your RockShox® product working at peak performance. Follow this maintenance schedule and install the service parts included in each service kit that corresponds with the Service Hours Interval recommendation below. -
Page 8: Oil Volume And Lubricant
O i l V o l u m e a n d L u b r i c a n t Damper Spring Upper Tube Lower Leg Upper Tube Lower Leg Model Fork Model Damper Spring Year Weight‡ Volume Volume Volume Oil Weight Volume... -
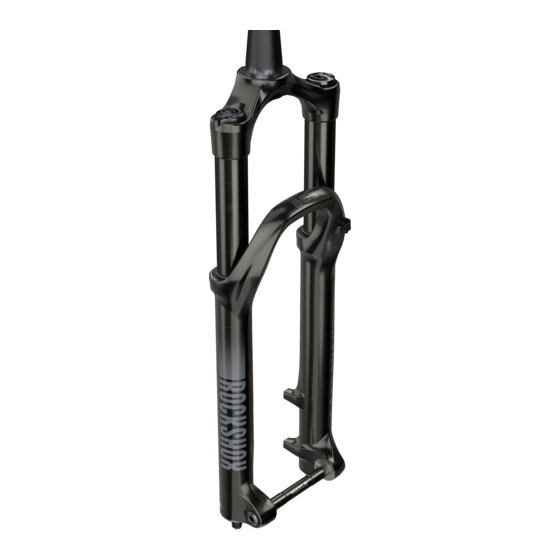
Page 9: Exploded View - 35™ Gold Rl - Debonair
E x p l o d e d V i e w - 3 5 ™ G o l d R L - D e b o n A i r ™ Steerer tube Air Spring Assembly Air cap Retaining screw Air valve Compression Damper Assembly... -
Page 10: Lower Leg Removal And Service
L o w e r L e g R e m o v a l a n d S e r v i c e 5 0 / 2 0 0 H o u r S e r v i c e L o w e r L e g R e m o v a l Remove the air valve cap. -
Page 11: 50 Hour Service
Strike each bolt head to dislodge the shafts from the lower leg. The Spring side bolt head should contact the bottom of the lower leg. Remove each bottom bolt. Clean each bolt and set them aside. Mallet Spring side Damper side Mallet Damper side Firmly pull the lower leg downward until fluid begins to drain. -
Page 12: Lower Leg Service
5 0 H o u r S e r v i c e L o w e r L e g S e r v i c e Remove the foam rings. Pick Clean the foam rings. Replace the foam rings if worn, damaged, or excessively contaminated. Lower Leg Service... - Page 13 Confirm the foam rings are installed evenly and sqaure in the space under the wiper seals, and do not protrude out of the groove. Saturate the foam rings with suspension oil. 15 wt RockShox® Bleed Syringe 50 Hour Service Continue the 50 Hour Service with Lower Leg Installation.
-
Page 14: 200 Hour Service
2 0 0 H o u r S e r v i c e L o w e r L e g S e a l S e r v i c e Remove and discard the foam rings. Remove the outer wire springs from the dust wiper seals. Stabilize the lower leg on a bench top. - Page 15 35 mm Dust Seal Installation tool. NOTI CE If the RockShox x Abbey Bike Tools™ installation tool is used, confirm the 35 mm installation puck is tightened hand tight on the installation tool handle to avoid damage to the installation puck during use.
- Page 16 Pressing the wiper seal below the top surface of the lower leg will compress the foam ring. RockShox® 35 mm Dust Seal Installation Tool Abbey Bike Tools 35 mm Dust Seal Installation Tool Install the outer wire springs.
-
Page 17: Air Spring Service
A i r S p r i n g S e r v i c e 2 0 0 H o u r S e r v i c e A i r S p r i n g R e m o v a l ⚠... - Page 18 Remove the retaining ring. Use your finger to guide the retaining ring over the air spring shaft. Retaining ring pliers Thread the shaft bolt into the end of the air spring shaft and pull the shaft out. Wrap a shop towel around the bottom bolt. Air Spring Removal...
- Page 19 Push the air shaft in, then pull the air shaft out firmly to dislodge the seal head. Remove the air spring assembly from the upper tube. Remove the bolt. Air Spring Removal...
- Page 20 Remove the base plate, wave spring, retaining washer, bumper, All-Travel spacer (A) if installed, seal head, and top out bumper. Clean and inspect the shaft for damage. NOTI CE Scratches on the air spring shaft can cause air to leak. If a scratch is visible the air spring assembly may need to be replaced.
- Page 21 Apply grease to the ball end of a clean 8 mm hex wrench. Insert the 8 mm ball end of the wrench into the seal head and stop just below the inner o-ring gland of the seal head. Apply grease to the new inner o-ring and insert it into the inner gland. Apply grease to the ball end of a second clean 8 mm hex wrench and use it to push the inner o-ring into the gland using the 8 mm hex wrench to guide the o-ring into the gland.
- Page 22 Clean the inside and outside of the upper tube. Inspect the inside and outside of the upper tube for damage. NOTI CE Scratches on the inside surface of the upper tube can cause air to leak. If an internal scratch is visible, the crown steerer upper tube assembly may need to be replaced.
-
Page 23: Air Spring Travel Change And Bottomless Tokens™ (Optional)
RockShox 35 Gold is compatible with black 32 mm Bottomless Tokens which can be added to, or removed from, the air top cap to fine-tune the spring curve and bottom out feel. Use the table below to help determine the number of Bottomless Tokens that can be used with each fork travel option. If fork travel is changed from stock, it may be necessary to add or remove Bottomless Tokens. -
Page 24: Bottomless Tokens Installation (Optional)
B o t t o m l e s s T o k e n s ™ I n s t a l l a t i o n ( o p t i o n a l ) Bottomless Tokens reduce air volume in your fork and create greater ramp at the end of the fork travel. Add Tokens to tune your fork's bottomless feel. -
Page 25: Air Spring Installation
2 0 0 H o u r S e r v i c e A i r S p r i n g I n s t a l l a t i o n Apply a liberal amount of grease to the inside of the upper tube, from the end of the tube to approximately 60 mm into the tube. - Page 26 Install the All-Travel spacer (A) if originally equipped or added if travel is reduced, seal head, and seal head bumper. All-Travel: Refer to page 23 for spacer configurations. Install the retaining washer, a new wave spring, and the base plate, in that order, onto the air shaft.
- Page 27 Insert the air spring assembly into the upper tube. Firmly push the air piston into the upper tube. Position the (A) flat retaining washer into the upper tube, followed by the (B) wavy washer. Press the base plate into the upper tube until it stops. Push the air shaft into the base plate.
- Page 28 Thread the bottom bolt into the air shaft and pull the air shaft until it stops. Inject or pour RockShox® suspension oil into the air spring upper tube. RockShox Bleed Syringe 2 mL Air Spring Installation...
- Page 29 Install the air spring top cap into the upper tube and tighten it. 24 mm 28.2 N•m (250 in-lb) Air Spring Installation...
-
Page 30: Damper Service
D a m p e r S e r v i c e 2 0 0 H o u r S e r v i c e D a m p e r R e m o v a l RL: Turn the compression adjuster knob counter clockwise to the full open position. - Page 31 Unthread the compression damper top cap. Remove the compression damper by pulling up firmly and slowly, while gently rotating the damper in a circular motion. NOTI CE Do not force the damper out of the upper tube if there is resistance. This can cause separation of the piston from the damper tube.
- Page 32 Remove the retaining ring. Use your finger to guide the retaining ring over the rebound shaft. NOTI CE Do not scratch the rebound damper shaft. Scratches will allow oil to leak into the lower leg, resulting in reduced damper performance and potential damage to the fork.
- Page 33 Clean the inside and outside of the upper tube. Dowel Inspect the inside and outside of the upper tube for scratches. NOTI CE Scratches on the inside surface of the upper tube can cause oil to leak. If an internal scratch is visible, the crown steerer upper tube assembly may need to be replaced.
-
Page 34: Damper Service
2 0 0 H o u r S e r v i c e D a m p e r S e r v i c e Remove the compression damper o-rings and discard them. Apply grease to new o-rings and install them. Remove the bottom bolt. - Page 35 Remove the inner and outer seal head o-rings and discard them. Apply grease to the new o-rings and install them. Damper Service...
- Page 36 Remove the glide ring and discard it. Install a new glide ring. Install the seal head onto the rebound damper shaft. Damper Service...
-
Page 37: Rebound Damper Installation
2 0 0 H o u r S e r v i c e R e b o u n d D a m p e r I n s t a l l a t i o n Insert the rebound damper piston and seal head into the upper tube. Push the seal head into the upper tube until the retaining ring groove is visible. - Page 38 Pull the rebound damper shaft out to the fully extended position and remove the bottom bolt. Rebound Damper Installation...
-
Page 39: Compression Damper Installation
2 0 0 H o u r S e r v i c e C o m p r e s s i o n D a m p e r I n s t a l l a t i o n Pour RockShox® suspension oil into the upper tube. NOTI CE Suspension oil volume is critical. - Page 40 Thread the top cap into the upper tube and tighten it. 24 mm 12.4 N·m (110 in-lb) RL: Apply grease to the top cap detents and detent spring. RL: Install the adjuster knob with the tab in the 7-8 o'clock, unlocked position.
- Page 41 (B) 20-40 degrees from the edge of the cable stop groove, towards the front of the crown. Install and tighten the retaining screw. Consult the applicable remote user manual at www.sram.com/rockshox/component/remotes for cable and remote installation instructions. Compression Damper Installation...
-
Page 42: Lower Leg Assembly
L o w e r L e g A s s e m b l y 5 0 / 2 0 0 H o u r S e r v i c e L o w e r L e g I n s t a l l a t i o n Clean the upper tubes. - Page 43 Position the fork at an angle with the bolt holes oriented upward. Inject RockShox® suspension oil into each lower leg through the bottom bolt holes. NOTI CE Do not exceed the recommended oil volume per leg as this can damage the fork.
- Page 44 200 Hour Service Remove the old crush washer retainer and crush 5 mm Needle nose pliers washer from each bottom bolt. Compress and hold the crush washer retainer with needle nose pliers and unthread it, and the crush washer, from the bolt by turning the bolt counter-clockwise.
- Page 45 Compressing the fork will equalize the positive and negative air chambers. After the fork is cycled 3-4 times, check the pressure and add air as needed. Shock pump Install the air valve cap. Clean the entire fork. This concludes the service of your RockShox® suspension fork. Lower Leg Installation...
- Page 46 This publication includes trademarks and registered trademarks of the following companies: Abbey Bike Tools™ is a trademark owned by Abbey Bike Tools, LLC. Boost™ is a trademark owned by Trek Bicycle Corporation. Liquid-O-Ring® is a registered trademark of Oil Center Research, Inc.
- Page 47 ASIAN HEADQUARTERS WORLD HEADQUARTERS EUROPEAN HEADQUARTERS SRAM Taiwan SRAM LLC SRAM Europe No. 1598-8 Chung Shan Road 1000 W. Fulton Market, 4th Floor Paasbosweg 14-16 Shen Kang Hsiang, Taichung City Chicago, Illinois 60607 3862ZS Nijkerk Taiwan R.O.C. U.S.A. The Netherlands...
Need help?
Do you have a question about the 35 2020 and is the answer not in the manual?
Questions and answers