
Related Manuals for KRUEGER SVE

Summary of Contents for KRUEGER SVE
- Page 1 Installation, Operation, and Maintenance Manual Single-Duct and Retrofit Terminal Units Models: LMHS, RVE, SVE Form #: SIDOM.4 Revised: 03/19...
-
Page 2: Pre-Installation
Inspect for damage upon receipt. Shipping damage claims should be filed with shipper at time of delivery. LMHS units with basic configuration or with hot water coils, RVE units, and SVE units are packaged into boxes and are stacked onto pallets. LMHS units with attenuation or electric heat are stacked directly onto pallets. -
Page 3: Unit Identification
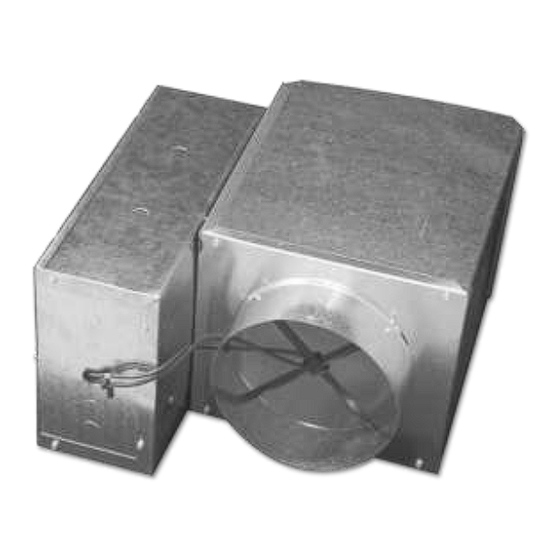
Unit Identification Each unit is supplied with a shipping label and an identification label. The following Figure 2 is an example of the identification label that is attached to each unit. Figure 2 – Example Identification Label Warning Disconnect all power to the unit before performing maintenance or service. Unit may automatically start if power is not disconnected. -
Page 4: Service Access
No periodic preventative maintenance is required, unless called for by a specific control sequence. Control Arrangements The LMHS single duct and RVE / SVE retrofit units are offered with a wide variety of factory-mounted controls that regulate the volume of air delivery from the unit and respond to cooling and heating load requirements of the conditioned space. - Page 5 Pneumatic Control Arrangement - All control packages are pressure independent (unless otherwise noted below) and available with or without hot water heat, dual maximum airflow, heating and cooling maximum airflow and dual minimum airflow. All control arrangements include a standard K4 LineaCross inlet flow sensor.
-
Page 6: Installation
Installation Step 1 - Install Unit Move unit to installation area. Remove unit from shipping package. Do not handle by controls, flow sensors or damper extension rod. Optionally, the unit may have factory-installed hanger brackets. Suspend units from building structure with appropriate field supplied straps, rods, or hanger wires. - Page 7 Step 3 – Install Sensors and Make Field Wiring Connections (Electric Analog or Direct Digital Controls ) Refer to specific unit dimensional submittals and control application diagrams for control specifications. All field wiring must comply with National Electrical Code (NEC) and local requirements.
- Page 8 Single duct terminal units with electric heat are supplied with a single point wiring connection in the heater control box. All unit power is supplied through this connection. Models with electric heat are factory equipped with a control transformer. The following Figure 5 illustrates an example of a high voltage wiring diagram that includes electric heat.
-
Page 9: Controls Setup
The relationship between the inlet airflow pressures and CFM is shown in Figure 6 – Krueger Inlet Airflow Sensor Chart (pg. 11). This chart is also attached to each unit. The controls on most new projects are Direct Digital Controls (DDC). These controls require that flow parameters be loaded during start-up to translate the sensed pressure into a measured flow rate. - Page 10 Inlet Airflow Sensor Area and K Factor LMHS, RVE Inlet Diameter, inches Velocity Magnification 1.52 1.52 1.52 1.52 1.52 1.52 1.52 1.52 1.52 1.52 1.52 Velocity Factor 2625 2625 2625 2625 2625 2625 2625 2625 2625 2625 2625 CFM K Factor 1160 1432 2062...
- Page 11 Form #: SIDOM.4 Page | 11 Revised: 03/19...
-
Page 12: Pneumatic Controls
Pneumatic Controls Volume controllers for LMHS units are shown in Figure 7 below. Each control sequence, function arrangement and controller is shown in Table 2. Pneumatic Volume Controllers KMC - CSC 2004 KMC - CSC 2003 KMC - CSC 3011 (Normally Closed) (Normally Open) (Multi-Function Controller) - Page 13 7. Read the differential pressure and refer to the Krueger Inlet Airflow Sensor Chart, Figure 6 (pg. 11) to determine the airflow in the terminal unit. For example, a differential pressure of 0.10 in.
- Page 14 To determine the required pressure differential, refer to Table 1, Table 2, and the Krueger Inlet Airflow Sensor Chart that is provided on the side of the VAV unit and in Figure 6 (pg. 11).
- Page 15 Figure 8 – CSC 3011 Adjusting Minimums and Maximums When adjusting the minimum and maximum airflow settings, the output responds slowly to changes in the set point. Wait for the flow rate to stabilize after making an adjustment (usually 20 to 30 seconds) before making further adjustments. Also, if the damper position is completely closed or open when starting this step, turn the adjustment one full turn then wait 20 to 30 seconds for a change in the flow reading of the Magnehelic gauge.
- Page 16 For RA Cooling or DA Heating (See Table 2 on pg. 12): Adjust HI STAT ∆P to the desired minimum airflow by turning knob CLOCKWISE with 20 psig (or a pressure greater than the reset stop point) at port “T”. The HI STAT ∆P must be set last. The HI STAT ∆P setting will be affected by the LO STAT ∆P setting.
-
Page 17: Preventative Maintenance
Figure 9 – Reset Cycle for CSC 3011 Control Preventative Maintenance 1. Inspect pneumatic tubing for loose connections or leaks. 2. Clean out pneumatic line filters regularly according to manufacturer’s recommendations. Pneumatic Control Troubleshooting PROBLEM PROBABLE CAUSE Controller does not reset to maximum or minimum set point during Balancer is using the thermostat for control signal. -
Page 18: Thermostat Installation
Analog Controls Installation and Balancing Procedures The Analog Electronic Control System is a pressure independent volume reset control that uses a KMC CSP-4702 controller-actuator (see Figure 10). Figure 10 – Analog Controller CSP 4702 Adjustments for the minimum and maximum airflow settings are made at the thermostat. The thermostat (CTE-5202) operates on a 16 VDC power supply from the CSP 4702 controller and outputs a 0 to 10 VDC signal on the AO1 and AO2 terminals. -
Page 19: Programming Thermostat
CFM per inlet size. 3. For details on how to program the thermostat for each control sequence refer to the specific control sequence submittal. The control sequence submittals can be on the Krueger Website: www.krueger-hvac.com. NOTE: Default Settings are as follows: ... - Page 20 AO1 & Sensor CFMs Per Inlet Size Signal Setting "W.G. 0.00 0.03 111 145 1107 0.05 115 157 205 1565 0.08 141 192 251 1004 1917 0.10 113 163 222 290 1159 2214 0.13 127 182 248 324 1296 2475 0.15 139 200 272 355 1087 1420...
- Page 21 Analog Control Troubleshooting The following troubleshooting guide pertains to single duct cooling applications but the same concepts can be applied to other configurations. NOTE: For approximately 15 seconds after power is applied, no rotation will occur and one or both of the controller/actuator LEDs will flash.
- Page 22 4. Check “Requested Flow” DC voltage on terminal “2-10 IN” and “COM“. a. Use Table 4 (pg. 19) to correlate into cubic feet per minute (CFM). b. If reading is not what is desired, then adjust thermostat to give correct CFM. NOTE: Never jumper terminal 16 VDC to “-”...
- Page 23 Appendix A Hot Water Hot Water LMHS Unit Weights (lbs.) Coil (Dry, Coil (With lbs.) Water, lbs.) w/ DDC Bare Size w/pneumatic Electric Attenuator Analog Heat 4,5,6 +5.6 +8.4 +5.8 +9.9 9,10 +8.5 +12.6 +11.0 +16.5 +12.7 +21.8 +15.1 +26.6 +21.4 +36.2 Table 5 –...
- Page 24 LMHS Basic Pressure and Airflow Data Minimum Airflow Minimum Inlet Static Pressure Electric (CFM) (Unit & Heat Pressure Drop) Heat* Inlet Maximum Max Kw per Cooling Basic Basic Basic Basic Basic w/ Size Velocity Basic Airflow Only w/ 1R w/ 2R w/ 3R w/ 4R Elec...
- Page 25 NOTES: 1.) ∆ PS is the difference in static pressure across the assembly, with the damper fully open. 2.) To obtain Total Pressure, add the Velocity Pressure for a given CFM to the Static Pressure drop (D PS). 3.) Max and Min kW shown assumes 55F entering air and is limited by unit's selected voltage, phase and max capacity.
- Page 26 RVE Basic Pressure and Airflow Data Maximum Airflow Minimum Airflow Flow Rate Min ∆Ps ("WG) Inlet Size (area ft² ) (CFM) (CFM) (CFM) 0.007 0.048 (0.09) 0.126 0.239 0.008 0.052 (0.14) 0.137 0.261 0.007 0.05 (0.20) 0.131 0.249 0.007 0.056 (0.27) 0.142 0.252...
- Page 27 3281 1775 0.541 2414 NOTES: 1.) Minimum CFM value is based on a signal of 0.03 in w.g. differential pressure of the inlet. Table 6.C – SVE Basic Pressure and Airflow Data Form #: SIDOM.4 Page | 27 Revised: 03/19...
- Page 28 Heater 120V Heater 208V Heater 240V Heater 277V Heater 208V 3Φ Heater 480V 3Φ Heater Size BTUH (kW) AWG* AWG* AWG* AWG* AWG* AWG* 1,701 3,413 6,826 16.7 10,239 25.0 14.4 12.5 10.8 13,652 33.3 19.2 16.7 14.4 11.1 17,065 41.7 24.0 20.8 18.1...
-
Page 29: Replacement Parts
Replacement Parts Part Number Primary Damper Assembly 30182001 4, 5, 6" round (Includes damper blade and shaft) 30182002 7" round (Includes damper blade and shaft) 30182003 8" round (Includes damper blade and shaft) 30182004 9" round (Includes damper blade and shaft) 30182005 10"... - Page 30 Electric Heat and LineaHeat 10052101 Thermal cutout, automatic reset (115-130° Limit) 10118801 Thermal cutout, manual reset (160° Limit) 31453101 Disconnect Switch 40A Assembly (Does not include Snap-In Neutral Block) 31453102 Disconnect Switch 60A Assembly (Does not include Snap-In Neutral Block) 10341201 Disconnect Neutral Block - 40A (Snap-In) 10341202...
- Page 31 3 Row: Unit Size: 41410195 (RH) 15020301 (LH) 41410196 (RH) 15020302 (LH) 41410197 (RH) 9-10 15020303 (LH) 41410198 (RH) 15020304 (LH) 41410199 (RH) 15020305 (LH) 41410200 (RH) 15020306 (LH) 41410216 (RH) 15020307 (LH) 4 Row: Unit Size: 41410201 (RH) 15020401 (LH) 41410202 (RH) 15020402 (LH) 41410203 (RH)
Need help?
Do you have a question about the SVE and is the answer not in the manual?
Questions and answers