Table of Contents
Advertisement
Quick Links
Advertisement
Table of Contents

Summary of Contents for PrintDreams PrintBrush XDR
- Page 1 Operating and Maintenance Manual PrintBrush XDR Mobile Printer...
-
Page 2: Table Of Contents
Table of contents INTRODUCTION ........................... 6 ................................6 REFACE ..............................6 DENTIFICATION ..............................6 EGAL DETAILS ................................7 IABILITY ..............................7 NTENDED USE ......................8 ARGET GROUPS AND PREVIOUS KNOWLEDGE ....................8 HE CONTENT AND PURPOSE OF THIS DOCUMENTATION ................................8 RINCIPLE SAFETY .............................. - Page 3 DISCONTINUED USE AND DISPOSAL ....................59 APPENDIX ............................60 Index of illustrations Fig. 1: Safety instructions on the underside of the PrintBrush XDR ............15 Fig. 2: Package content ......................... 16 Fig. 3: PrintBrush XDR parts ........................16 Fig. 4: Printing device assembly ......................17 Fig.5: Docking station assembly ......................
- Page 4 Fig. 30: Slide print head wiper out ......................40 Fig.31: Clean print head with the wiper ....................41 Fig. 38: Example test imprint found on the Quick Setup Guide with SSID and password ....... 41 Fig. 39: Example images of WIFI connection connecting (left) and connected (right) ......42 Fig.
- Page 5 (including photocopying, microfilm, or any other process) or be saved, processed, duplicated or distributed using any electronic system, without written permission from COLOP Digital GmbH. Contraventions can entail prosecution under criminal law. © 2018-2019 COLOP Digital GmbH © 2001-2019 PrintDreams International AB...
-
Page 6: Introduction
This original documentation is intended to assure safety-aware work on and with the product. It contains safety notices that must be followed! All those working with the PrintBrush XDR must have access to this documentation and must observe the relevant specifications and instructions. The documentation must always be completely and easily legible. -
Page 7: Liability
(SW). Transfer is via a WIFI connection from a smart phone or tablet or USB interface on a computer. Printing begins automatically if the PrintBrush XDR is in print mode and the device is moved over the printing background by hand. If rotation or height of the device above the surface exceeds a maximum range, printing is interrupted, and navigation continues. -
Page 8: Target Groups And Previous Knowledge
Users of the PrintBrush XDR are non-professionals, aware of the hazards associated with using the device via the safety pictograms on the PrintBrush XDR and instructions in the Short Operating Manual and in this Operating and Maintenance Manual. Users can recharge the PrintBrush XDR with the charger (supplied) and change ink cartridges. -
Page 9: Safety
AFETY This documentation is structured in accordance with valid EU directives and contains safety notices. The user of the PrintBrush XDR is responsible for complying with safety-related information in this documentation. This Section contains a general description of the warning and safety instructions, and important safety notices. -
Page 10: Symbols Used In Safety Notices
Operating and Maintenance Manual PrintBrush XDR mobile printer 2.2 Symbols used in safety notices General warning symbol, this danger symbol warns of risks of injury. Follow all measures designated with this danger symbol to prevent serious or fatal injuries! This safety notice draws attention to the possible hazards of electrical voltage. -
Page 11: Residual Hazards
Cleaning the outside of the PrintBrush XDR: - Ensure that the mains cable of the PrintBrush XDR charger has been removed from the socket and the device is switched off. - Use neutral cleaning agent. Using liquids such as thinners or petrol damages the outer surface of the PrintBrush XDR. - Page 12 Operating and Maintenance Manual PrintBrush XDR mobile printer WARNING! Hazard from damaged electrical components or damaged insulation. In the event the device, housing or insulation is damaged, stop using the device and have it tested and repaired by an electrician or the manufacturer's customer service.
- Page 13 Operating and Maintenance Manual PrintBrush XDR mobile printer CAUTION! Hazard from hot surfaces. Immediately after using the PrintBrush XDR, certain parts can be hot. Do not touch the print head on the underside of the printing device. Leave to cool before replacing. CAUTION! Hazard from hot surfaces.
-
Page 14: General Safety Instructions And Provisions
Operating and Maintenance Manual PrintBrush XDR mobile printer 2.4 General safety instructions and provisions Without exception, observe the following safety provisions and obligations when working at or on the machine: • The product must always be operated in operationally perfect and clean condition. -
Page 15: Description
XDR, rubber lips and flap to prevent the ink cartridge from drying out, an opening to access the on and off switch on the PrintBrush XDR when docked, non-slip pads and a removable wiper to wipe the underside of the ink cartridge. -
Page 16: Layout
Operating and Maintenance Manual PrintBrush XDR mobile printer Fig. 2: Package content 3.2 Layout The following section contains an overview of the parts and main components of the PrintBrush XDR: Fig. 3: PrintBrush XDR parts Main constituent elements No. Description No. -
Page 17: Components
Operating and Maintenance Manual PrintBrush XDR mobile printer 3.3 Components Printing device: Underside Fig. 4: Printing device assembly Main components of the PrintBrush XDR No. Description Description Cover Magnet Light guide Cover opening Rollers USB port (10) Contacts (docking station connection) -
Page 18: Fig.5: Docking Station Assembly
Operating and Maintenance Manual PrintBrush XDR mobile printer Docking station: Underside Top section Fig.5: Docking station assembly Main components of the docking station No. Description Description Docking station Non-slip feet Print head wiper Print head cap to prevent drying out... -
Page 19: Technical Specifications And Dimensions
Fig.6: Reference imprint 14 x 100 mm Surfaces: The PrintBrush XDR can print directly onto a variety of absorbent level surfaces including standard paper, cardboard, fabric, wood, cork, dry wall, high-gloss paper, photo paper, etc. Other types of surfaces can be printed but the standard ink can be easily wiped off. -
Page 20: Operating Systems
Operating and Maintenance Manual PrintBrush XDR mobile printer 3.5 Operating systems The PrintBrush XDR APP is available on Android and iOS platforms and is compatible from the following versions: - Android 5.0 - iOS 11 There may be issues with previous versions and certain functions may be limited. -
Page 21: Fig.7: Packaging
Protect the battery contacts against short-circuit with insulating tape. • Return the battery back to the housing. • Return the PrintBrush XDR to the original packaging (1) and secure it with the plastic ring (2). (Fig.7) Fig.7: Packaging CODI Standard 1.0... -
Page 22: Assembly And Switching On
Remove the inner card and remove the mains plug and separate ink cartridge packaging (print head and container with 3-color ink). • Open the PrintBrush XDR cover and remove it. Fig. 8: Opening and removing the cover • Remove the battery from the battery compartment. -
Page 23: Fig. 10: Opening The Battery Compartment
Remove the plastic tab from the battery contacts and dispose of responsibly. • Pull down the lower flap. - Slide the underside of the PrintBrush XDR in the direction of the arrow. - Press the panel downwards at an angle. CODI Standard 1.0... -
Page 24: Fig. 12: Opening The Sliding Panel
Fig. 13: Sliding panel open NOTICE Always press open the lower panel first, otherwise the ink cartridge cannot be removed or inserted without damaging the PrintBrush XDR! • Remove the ink cartridge from the packaging and dispose of the packaging responsibly. -
Page 25: Fig. 14: Ink Cartridge
Operating and Maintenance Manual PrintBrush XDR mobile printer Fig. 14: Ink cartridge • Insert ink cartridge - Press towards the front end of the compartment. - Cartridge clicks in. Fig. 15: Insert ink cartridge • Close lower flap cover - Close the cover (click). -
Page 26: Fig. 16: Insert Battery
NOTICE the ink cartridge head dries out, affecting print quality. A warning signal sounds if the PrintBrush XDR is switched on and not placed in the docking station immediately. Return the PrintBrush XDR to the docking station. If the PrintBrush XDR is switched off, NO warning signal sounds, but the PrintBrush XDR should always be placed in the docking station even if switched off. - Page 27 Operating and Maintenance Manual PrintBrush XDR mobile printer An image is saved in the PrintBrush XDR before shipping, which also displays the SSID and password for making the WIFI connection. • Does the print function work? • For more details on making a test image, see chapter Fel! Hittar inte referenskälla..
-
Page 28: Software
5.7). The SSID and password are automatically saved as an image in the PrintBrush XDR and can be found in the Short Operating Manual (make a note of the password or save it in a secure location. To change the password, see the software description) Fig. -
Page 29: Operation
Sleep mode: If the PrintBrush XDR is switched on and is not used for 3 minutes, the device goes into sleep mode. If the PrintBrush XDR is placed in the docking station, it automatically goes into sleep mode. -
Page 30: Image Transfer
(see chapter 5.3) displays a continuous purple flashing LED. Do not switch off the PrintBrush XDR during the saving process, otherwise the image will not be saved correctly. A brief signal sounds at the end of the saving process. CODI Standard 1.0... -
Page 31: Printing
PrintBrush XDR mobile printer 5.2 Printing Switch on the PrintBrush XDR (in the docking station). The Light Guide shows that the PrintBrush XDR is powering up (flashing green LED). The PrintBrush XDR is held in the docking station by magnets. -
Page 32: Fig. 21: Printing From Left To Right
Changing imprints stored on the PrintBrush XDR: The last imprint that was sent to the PrintBrush XDR, is always stored on the green position (green LEDs on the side of the PrintBrush XDR). In addition, three further imprints can be stored permanently on the PrintBrush XDR. -
Page 33: Fig. 24: Multi-Line Imprint Procedure
Operating and Maintenance Manual PrintBrush XDR mobile printer of the LEDs of the lightpipe on the side of the PrintBrush XDR. Thus, four imprints can be used even without connection to the App. There are two possibilities to make one of these imprints that are stored on the PrintBrush XDR. The respective imprint can either be chosen in the App or you can tap twice double on top of the PrintBrush XDR (four times in total) to change between imprints. -
Page 34: Fig. 25: Place Into Docking Station
If the PrintBrush XDR is switched on and is not placed in the docking station for one minute, a warning signal sounds and the Light Guide displays a flashing red warning light. A warning is also displayed in the APP interface in online mode. -
Page 35: Light Guide And Symbols
Fig. 27: Light Guide directions The color LEDs 1 to 7 (right angle RGB LEDs) on the Light Guide indicate the PrintBrush XDR operating modes depending on the color, light position and light pattern (see table on the next page). - Page 36 LED7 lights up blue WIFI connection The WIFI is connected LED7 An image is being transferred to the PrintBrush XDR via the Continues blue flashing, long An image is being WIFI connection. A long signal LED1 → signal tone at the end...
- Page 37 PrintBrush XDR mobile printer Light Guide Designation Description Images are being transferred Continuous blue flashing (0.8 s, to the PrintBrush XDR via the Several images are continuously), long signal sounds WIFI connection. A long signal LED7+1 being transferred when complete sounds when transfer is →...
- Page 38 Operating and Maintenance Manual PrintBrush XDR mobile printer Symbols in the App: Symbol Designation Description WIFI symbol Excellent WIFI connection to the PrintBrush XDR WIFI symbol Good WIFI connection WIFI symbol Poor WIFI connection WIFI symbol No WIFI connection Battery level display green...
-
Page 39: Automatic Cleaning Cycle
Spitting is completed immediately after the device is raised so that the mist is released directly into the air. Try directing the PrintBrush XDR to the side while this happens. Do not let it spit on top of the docking station, neither on top of the print surface. Do not rotate the PrintBrush XDR towards your face directly after raising from the docking station. -
Page 40: Manual Cleaning Cycle
Recommendation: Always place the PrintBrush XDR in the docking station first and then switch it off. If the PrintBrush XDR is switched off, NO warning signal sounds, but the PrintBrush XDR should always be placed in the docking station even if switched off. -
Page 41: Software
In the event the connection set up via the APP is unsuccessful, the WIFI connection can also be set up manually via the settings on a computer, smart phone or tablet. The PrintBrush XDR must be switched on. Select the SSID on your PrintBrush XDR in the WIFI settings on your mobile device, click "Connect" and enter the password. -
Page 42: Usb Cable Connection
The PrintBrush XDR is now connected by WIFI to the mobile device. 5.8 USB cable connection The PrintBrush XDR can also be connected via the USB cable (NOT included) and a computer. Connect the USB cable to the PrintBrush XDR and to a computer. -
Page 43: Storage
(www.printbrush.com). 5.9 Storage Store the product in a dry place. When storing the PrintBrush XDR, always place in the docking station to prevent drying out the print head. Ensure the batteries are stored correctly: always charge before storing. When stored for extended periods, it is recommended to activate the PrintBrush XDR at least once a month to prevent the print head from completely drying out. -
Page 44: Maintenance
• Product cleanliness (general condition, damage, contamination) • General component inspection: Check the PrintBrush XDR housing, docking station, charger and cable, LED light bar, contacts and battery for any obvious signs of damage or excessive dirt etc. • If any damage is detected, stop using the product. If damaged, please contact your distributor. - Page 45 Never expose the battery and charger, including USB port, to water and/or rain. • The PrintBrush XDR can be charged when switched on or off. Charging starts whenever it is placed in the docking station. • Observe charge indicator lights (charging cable is connected) on the Light Guide (see chapter 5.3):...
- Page 46 Operating and Maintenance Manual PrintBrush XDR mobile printer Hazard from rechargeable batteries (short-circuit, overheating, fire). WARNING! - Do not expose lithium batteries to heat, cold or water (do not leave in direct sunlight or charge or store outdoors). - Do not (forcibly) open or expose to large impacts or shocks.
-
Page 47: C Hanging The Ink Cartridge
An empty ink cartridge as indicated on the Light Guide and a red light and in online mode with the following symbol in the APP. Change the ink cartridge as follows: • Open and remove the PrintBrush XDR cover. Fig. 37: Open and remove cover • Remove the battery from the battery compartment. - Page 48 Fig. 40: Opening the sliding panel • Pull down the lower sliding panel. - Slide the underside of the PrintBrush XDR in the direction of the arrow. - Press the panel downwards at an angle. Fig. 41: Sliding panel open •...
- Page 49 Pull out the strip from the print head and dispose of responsibly. Fig. 43: Ink cartridge New original ink cartridges are available directly from the app and from the PrintBrush XDR website www.printbrush.com They will also available at major retailer stores.
- Page 50 Operating and Maintenance Manual PrintBrush XDR mobile printer • Insert new ink cartridge. - Press towards the front end of the compartment. - Cartridge clicks in. Fig. 44: Insert ink cartridge • Close lower flap cover - Shut with a click.
- Page 51 NOTICE the ink cartridge head dries out, affecting print quality. A warning signal sounds if the PrintBrush XDR is switched on and not placed in the docking station immediately. Return the PrintBrush XDR to the docking station. If the PrintBrush XDR is switched off, NO warning signal sounds, but the PrintBrush XDR should always be placed in the docking station even if switched off.
-
Page 52: C Leaning
Operating and Maintenance Manual PrintBrush XDR mobile printer 6.3 Cleaning WARNING! Cleaning could make electrical components damp, causing injury to people through electrocution. During cleaning work, avoid any ingress of water, steam or cleaning agent in the electrical components of the product. -
Page 53: T Roubleshooting
Ink cartridge empty chapter 6.2 in the printing Adjust printing speed: Move the Excessive printing speed PrintBrush XDR by hand from right to left or from left to right 100 mm/s (max. 300 mm/s) see chapter Fel! Hittar inte r eferenskälla. - Page 54 Problem Cause Action PrintBrush XDR leaves spots Spitting Place PrintBrush XDR in the docking station. After raising for the spitting cycle, hold in mid air and then return to the printing surface see chapter 5.4 Imprint is not printed even...
- Page 55 Always place the PrintBrush and flashes red station; PrintBrush XDR signal XDR in the docking station. sounds after one minute PrintBrush XDR sounds a signal Contact problem Change PrintBrush XDR and flashes red even though it is position in the docking station...
-
Page 56: Reset
In case of returning the PrintBrush XDR, the contacts of the battery need to be covered. A standard adhesive tape can be used for that. Put the battery back into the PrintBrush XDR and pack it ideally in its original packaging (see chapter 4.1) or in similar quality packaging. -
Page 57: S Pare And Wear Parts
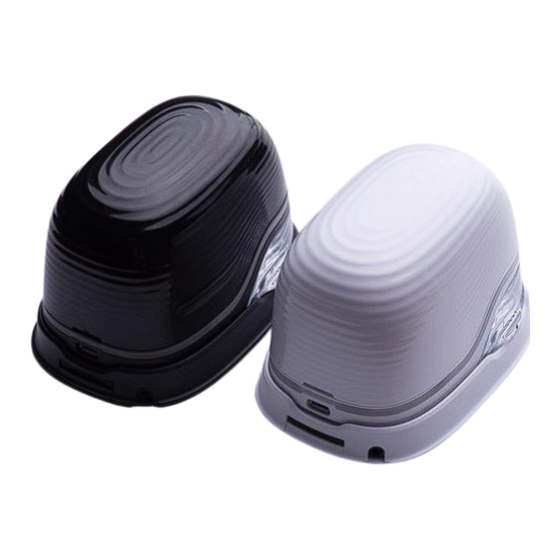
PrintBrush XDR housing and docking station must not be dismantled. The battery must never be dismantled! 6.7 Spare and wear parts There are various spare parts available for the PrintBrush XDR which can be ordered from the manufacturer. More information is available here: www.printbrush.com WARNING! Unauthorized repairs on the product may be dangerous. - Page 58 Operating and Maintenance Manual PrintBrush XDR mobile printer Electronics compartment Black/white Power adapter Docking station Black/white Cover Black/white CODI Standard 1.0 Page 58 of 60...
-
Page 59: Discontinued Use And Disposal
Operating and Maintenance Manual PrintBrush XDR mobile printer ISCONTINUED USE AND DISPOSAL This chapter contains information about discontinuing use and disposal of the product at the end of its service life. Principal: Before disposing of product parts, check to see whether they can be recycled. Send away as much as possible for recycling. -
Page 60: Appendix
Operating and Maintenance Manual PrintBrush XDR mobile printer PPENDIX EU – Declaration of Conformity Directive 2014/35/EU to harmonize the laws of the member states relating to the provision of electrical equipment for use within certain voltage limits on the market (Low Voltage Directive)
Need help?
Do you have a question about the PrintBrush XDR and is the answer not in the manual?
Questions and answers