
Summary of Contents for Cheetah Xi
- Page 1 Programming Manual ® 10-068, Cheetah Addressable Fire Suppression Control System P/N 06-651, Rev. 1 September 2013...
- Page 2 TRADEMARKS Fike is a registered trademark of Fike. ® Cheetah is a registered trademark of Fike. QUALITY Fike has maintained ISO 9001 certification since 1996. Prior to shipment, we thoroughly test our products and review our documentation to assure the highest quality in all respects.
-
Page 3: Table Of Contents
Product Support ....................... 1-1 Safety Information ......................1-1 Related Information ......................1-2 Revision History ....................... 1-2 C-Linx Programming Options ..................2-1 Understanding Cheetah Xi ....................2-1 Software Programming Features ..................2-2 Getting Started ....................... 3-1 User Interface ........................3-1 Password Protection ......................3-2 3.2.1... -
Page 4: Table Of Contents
How to Set Panel’s LED Operation ................4-54 Configuration Menu 8 ..................... 4-55 4.8.1 How to Enable AHU Key Requirement Feature ............. 4-55 APPENDIX A CyberCat Menu Structure (V6.XX) ................A-1 Cheetah Xi Programming Manual Rev 1, 09/2013 P/N: 06-651... -
Page 5: Table Of Contents
Time Control Screen ......................4-19 4-30 System Silence Screen ......................4-20 4-31 Power Screen ........................4-21 4-32 Daytime Sensitivity Menu ...................... 4-22 4-33 Daytime Sensitivity Range Screen ..................4-22 4-34 Holidays Screen ........................4-23 Cheetah Xi Programming Manual P/N: 06-651 Rev 1, 09/2013... -
Page 6: Table Of Contents
IP Time Screen ........................4-53 4-86 Panel Switch Operation Screen .................... 4-54 4-87 Panel LED Operation Screen ....................4-54 4-88 Configuration Menu 7 ......................4-55 4-89 AHU Key Screen ........................4-55 Cheetah Xi Programming Manual Rev 1, 09/2013 P/N: 06-651... -
Page 7: Safety Information
1.0 ABOUT THIS MANUAL ABOUT THIS MANUAL This manual is intended for those individuals who are responsible for the programming of the Fike Cheetah Xi Addressable Control System. It provides a detailed description of how use the control panels configuration menus to field-program the systems operating parameters. -
Page 8: Revision History
1.0 ABOUT THIS MANUAL RELATED DOCUMENTATION To obtain a complete understanding of the specific features of the Cheetah Xi or to become familiar with related functions in general, refer to the documentation listed below. Please reference the most current version or the version noted on the label located on the product. -
Page 9: C-Linx Programming Options
2.0 C-Linx PROGRAMMING OPTIONS UNDERSTANDING CHEETAH Xi The Cheetah Xi system is equipped with an extensive list of configuration parameters. Changes to these parameters can be made either directly at the panel using its integral configuration menus, or by using the system’s PC configuration software C-Linx. -
Page 10: Software Programming Features
The following tables identify the configurable features that can be changed by using the panel’s programming software C-Linx. The table also identifies features that are available, but not permitted to be used per the Cheetah Xi system’s UL listing. Exhibit 2-1: Programming Features NOTICE TO USERS, INSTALLERS, AUTHORITIES HAVING JURISDICTION, AND OTHER INVOLVED PARTIES This product incorporates field-programmable software. - Page 11 No other functions are effected or disabled Allows on board relays to be configured from the default setting of Alarm for R1 and Supervisory for R2 to the states listed in State (Activation) Cheetah Xi Programming Manual P/N: 06-651 Rev 1, 09/2013...
- Page 12 Release Zone Custom Message 20 character user defined Automatic Countdown 0 – 255 (30) Manual Countdown 0 – 30 (15) Zone Enabled Enabled / Disabled Zone Chimes Assign chime code to zones Cheetah Xi Programming Manual Rev 1, 09/2013 P/N: 06-651...
- Page 13 This command contains status for Alarm, Supervisory, Trouble and all other states. Peripheral devices that have firmware version before 3.00 should set this variable to STD, which is the original Cheetah Xi format. The ESP selection refers to an “Expanded” format. Peripheral devices with 3.00 firmware or newer will used this command. The EXP setting speeds up operation of the peripheral bus.
- Page 14 Defines the unique Internet Protocol (IP) address for the panel that is to receive history events from the selected panel. Defines the unique Internet Protocol (IP) address for the panel that is to supervision responses from the selected panel. Used to synchronize panel time over the network. Cheetah Xi Programming Manual Rev 1, 09/2013 P/N: 06-651...
- Page 15 Notes: Cheetah Xi can have up to four (4) addressable loops. Can be assigned to 4 discrete zones, 2 zone ranges or 1 range and 2 discrete zones. Pre-Alarm 2 setting must always be set equal or higher than Pre-Alarm 1 setting.
- Page 16 If annunciator type is set to Independent Operation, Sounder Base, or Relay Base an 8-row priority table will be displayed. Table values are set using the Output Settings fields. If annunciator type is set to Sounder Base, Silence and Positive Alarm Sequence (PAS) options will be displayed. Cheetah Xi Programming Manual Rev 1, 09/2013 P/N: 06-651...
- Page 17 Remote Annunciator (See Exhibit 2-7 for programming features) Notes: Cheetah Xi can have up to four (4) addressable loops. Can be assigned to 4 discrete zones, 2 zone ranges or 1 range and 2 discrete zones. Pre-Alarm 2 setting must always be set equal or higher than Pre-Alarm 1 setting.
- Page 18 Remote Annunciator (See Exhibit 2-7 for programming features) Notes: Cheetah Xi can have up to four (4) addressable loops. Can be assigned to 4 discrete zones, 2 zone ranges or 1 range and 2 discrete zones. Pre-Alarm 2 setting must always be set equal or higher than Pre-Alarm 1 setting.
- Page 19 Remote Annunciator (See Exhibit 2-7 for programming features) Notes: Cheetah Xi can have up to four (4) addressable loops. Can be assigned to 4 discrete zones, 2 zone ranges or 1 range and 2 discrete zones. Pre-Alarm 2 setting must always be set equal or higher than Pre-Alarm 1 setting.
- Page 20 Remote Annunciator (See Exhibit 2-7 for programming features) Notes: Cheetah Xi can have up to four (4) addressable loops. Can be assigned to 4 discrete zones, 2 zone ranges or 1 range and 2 discrete zones. Pre-Alarm 2 setting must always be set equal or higher than Pre-Alarm 1 setting.
- Page 21 Detection Notes: Cheetah Xi can have up to four (4) addressable loops. Can be assigned to 4 discrete zones, 2 zone ranges or 1 range and 2 discrete zones. If monitor module function type is set to Detection or Watermist Activation, an alarm verification time can be set.
- Page 22 Detection Notes: Cheetah Xi can have up to four (4) addressable loops. Can be assigned to 4 discrete zones, 2 zone ranges or 1 range and 2 discrete zones. If monitor module function type is set to Detection, an alarm verification time can be set.
- Page 23 Alarm / Manual Release / Manual Release with Countdown Notes: Cheetah Xi can have up to four (4) addressable loops. Can be assigned to 4 discrete zones, 2 zone ranges or 1 range and 2 discrete zones. Cheetah Xi Programming Manual 2-15...
- Page 24 0 - 255 Notes: Cheetah Xi can have up to four (4) addressable loops. Can be assigned to 4 discrete zones, 2 zone ranges or 1 range and 2 discrete zones. Modifies control module configuration for use with Pre-Action solenoid.
- Page 25 0 - 255 Notes: Cheetah Xi can have up to four (4) addressable loops. Timeout delay becomes active if relay state is set to ‘Time Delay’. Can be assigned to any 3 zones, 254 any zone, or 255 any zone (non-disable).
- Page 26 Masterbox / ARM/IRM / Expanded ARM/IRM / Watermist System Output State No Output State / Alarm / Pre- Discharge / Release Notes: Cheetah Xi can have up to four (4) addressable loops. 2-18 Cheetah Xi Programming Manual Rev 1, 09/2013 P/N: 06-651...
- Page 27 (1%ft – 3.98818%ft) Notes: Cheetah Xi can have up to four (4) addressable loops. Can be assigned to 4 discrete zones, 2 zone ranges or 1 range and 2 discrete zones. Each detection level on the FAAST detector can be mapped to a panel state (user defined).
- Page 28 Urgent / Filter Door / Config / Aspirator / Low Voltage / Comm / Time / Sensor Notes: Set to 255 to disable Analog Broadcast. Reference detector cannot use Acclimate feature. 2-20 Cheetah Xi Programming Manual Rev 1, 09/2013 P/N: 06-651...
- Page 29 Air Sampling Devices Yes / No (Restores all device custom messages to default) Defaults Used to assign a unique Level 2 4 digit user defined password (8 available) (Password) Cheetah Xi Programming Manual 2-21 P/N: 06-651 Rev 1, 09/2013...
- Page 30 Countdown Filter Show All Zone Countdowns / Filter Countdown by Zone / Do not show Countdown Notes: Process and Zone Disable will require a zone number be assigned (1 – 253). 2-22 Cheetah Xi Programming Manual Rev 1, 09/2013 P/N: 06-651...
- Page 31 Configuration options become available if LED Function is set to ‘Device’. Configuration options become available if LED Function is set to ‘Zone State Activation’. Configuration options become available if LED Function is set to ‘Network Device’. Cheetah Xi Programming Manual 2-23 P/N: 06-651...
- Page 32 Computer Ethernet Address 2 - 32 Port DACT Address 2 – 32 Mounting Internal / External Notes: Configuration options become available if LED Function is set to ‘Zone State Activation’. 2-24 Cheetah Xi Programming Manual Rev 1, 09/2013 P/N: 06-651...
- Page 33 Alarm Signal Cancel / On – Battery Trouble LED Assignment Device / Zone / Panel / Net Device / LED Notes: LED assignment options are tied to the specific LED function selected. Cheetah Xi Programming Manual 2-25 P/N: 06-651 Rev 1, 09/2013...
- Page 34 All Releasing Modules / All FAAST Sensors On Panel 1 – 128 On Loop 1 - 4 Between 1 - 254 And 1 - 254 Select All / Clear All / Invert All 2-26 Cheetah Xi Programming Manual Rev 1, 09/2013 P/N: 06-651...
- Page 35 Modules / All Relay Modules / All Releasing Modules / All FAAST Sensors On Loop: 1 – 4 Between: 1 – 254 And: 1 – 254 Select All / Clear All / Invert Cheetah Xi Programming Manual 2-27 P/N: 06-651 Rev 1, 09/2013...
- Page 36 On Panel: 1 – 128 On Loop: 1 – 4 Between: 1 – 254 And: 1 – 254 Select All / Clear All / Invert Class A Card Peripheral Address 2 - 32 2-28 Cheetah Xi Programming Manual Rev 1, 09/2013 P/N: 06-651...
- Page 37 Point ID Information – Address ID 1 – 254 Notes: Four zones available. Applicable to Laser Focus and Laser Plus detectors. Point ID used only for reporting device information to DACT and EVAX. Cheetah Xi Programming Manual 2-29 P/N: 06-651 Rev 1, 09/2013...
- Page 38 2.0 C-Linx PROGRAMMING OPTIONS Reserved for future use. 2-30 Cheetah Xi Programming Manual Rev 1, 09/2013 P/N: 06-651...
-
Page 39: User Interface
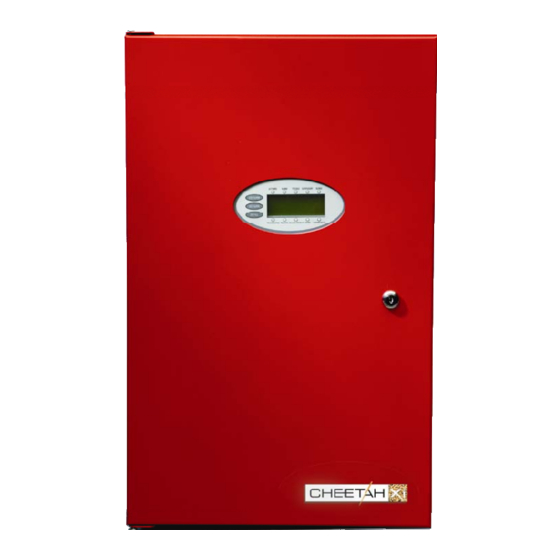
3.0 GETTING STARTED USER INTERFACE The programmable features of the Cheetah Xi control panel can be changed by using the front panel keys and LCD display, as shown in Exhibit 3-1. HISTORY NAVIGATION BUTTONS SYSTEM STATUS LEDs LCD DISPLAY WINDOW... -
Page 40: Password Protection
Access to the Cheetah Xi’s menu system is password protected to restrict access to those who require it. Each Cheetah Xi allows up to eight (8) User level passwords and a single System Administrator password to be assigned by the system installer. -
Page 41: How To Log Onto The System
• Row D - Random 4 digit-code that changes periodically. Used by the factory to gain access to the system if the Administrator password has been forgotten. Cheetah Xi Programming Manual P/N: 06-651 Rev 1, 09/2013... -
Page 42: Configuring The System
3.0 GETTING STARTED CONFIGURING THE SYSTEM There are two basic methods for configuring the Cheetah Xi system: AUTOPROGRAM or ENGINEERED CONFIGURE. 3.3.1 AUTOPROGRAM This configuration method is used for small systems requiring typically no more than one zone of operation. -
Page 43: How To Address A Device
SLC circuit. As each new device is recognized by the panel, it is automatically assigned the next available address. To Auto Address devices: 1. Press the ESCAPE key until the Cheetah Xi’s TOP LEVEL MENU is displayed. 2. Press the F4 key to enter the systems PASSWORD entry screen, and then enter a valid Level 3 password. -
Page 44: How To Use The Panel's Device Address Function
(SLC). To Address devices: 1. Press the ESCAPE key until the Cheetah Xi’s TOP LEVEL MENU is displayed. 2. Press the F5 key to enter the systems MAINTENANCE MENU. 3. Press the F2 key to enter the DEVICE ADDRESS screen (DEV ADR). -
Page 45: New Device Detected Screen
Remove/disconnect the device being addressed from the programmer and press the ENTER key to return to step #3 and repeat the process. 6. If complete, remove/disconnect all devices and power down the Hand Held Programmer. Cheetah Xi Programming Manual P/N: 06-651 Rev 1, 09/2013... -
Page 46: How To Address Devices With The Ir Tool
(SLC). By default the IR communication is disabled on the Cheetah Xi loops. The user must first enable the IR communication to allow the tool the ability to communicate with the devices connected to the SLC. Enabling the IR communication requires a Level 3 password (Distributor Level). -
Page 47: Ir Communication Tool
3.0 GETTING STARTED The IR Tool, as shown in Exhibit 3-13, has many uses with the Cheetah Xi addressable devices. Consult the individual Installation and Maintenance Instructions (P/N 55-051) for a complete description of its operation. To address a device using the IR Tool: 1. -
Page 48: How To Address Devices With The Hand-Held Programmer
3.4.4 HOW TO ADDRESS DEVICES WITH THE HAND-HELD PROGRAMMER (P/N 10-2648) The Hand-Held programmer contains the same operating code as the Cheetah Xi and can be used to assign an address to a new addressable device. Refer to Fike document 06-390, “Hand-Held Programmer Operating Instructions”... - Page 49 Remove/disconnect the device being addressed from the programmer and press the ENTER key to return to step #2 and repeat the process. 6. If complete, remove/disconnect all devices and power down the Hand Held Programmer. Cheetah Xi Programming Manual 3-11 P/N: 06-651...
- Page 50 If you have already built a configuration file using the C-Linx configuration software; you can use the programs Device Addressing Wizard found in the Diagnostics menu to address devices that are connected to a Cheetah Xi panel or Hand-Held programmer: 1. Use C-Linx to open your existing configuration or create the configuration for the panel.
- Page 51 13. Close Assign Device address screen. If properly completed, all devices should now have valid addresses. Note: This diagnostic is intended for full loop of devices that are already wired in the field. Cheetah Xi Programming Manual 3-13 P/N: 06-651 Rev 1, 09/2013...
- Page 52 3.0 GETTING STARTED Reserved for future use. 3-14 Cheetah Xi Programming Manual Rev 1, 09/2013 P/N: 06-651...
-
Page 53: Configuration Menu
It is intended for those who have been factory trained and authorized to program the Cheetah Xi system. Refer to Appendix A for a breakdown of the Cheetah Xi’s menu structure. -
Page 54: How To Change A Devices Alarm Features
Row B to go away prior to leaving the screen. Exiting the screen with the asterisk still visible will cause the selected device to be partially configured which will result in improper operation. Cheetah Xi Programming Manual Rev 1, 09/2013 P/N: 06-651... -
Page 55: A. How To Modify A Sensor
Row D - The fields in this row change depending upon the device function displayed in Row B. The programming options available for each device function are described as follows. Note: These programming options are typical for both the control and relay modules. Cheetah Xi Programming Manual P/N: 06-651 Rev 1, 09/2013... -
Page 56: Any Of 3 Zones Function Screen
T = TEMPORAL S = SLOW W = WALKTEST) Use the ◄► arrow keys to position the cursor under pattern field; then use the +/- keys to change the activation pattern. Cheetah Xi Programming Manual Rev 1, 09/2013 P/N: 06-651... -
Page 57: All Of 3 Zones Function Screen
T = TEMPORAL S = SLOW W = WALKTEST) Use the ◄► arrow keys to position the cursor under pattern field; then use the +/- keys to change the activation pattern. Cheetah Xi Programming Manual P/N: 06-651 Rev 1, 09/2013... -
Page 58: Select Device Function Screen
T = TEMPORAL S = SLOW W = WALKTEST) Use the ◄► arrow keys to position the cursor under pattern field; then use the +/- keys to change the activation pattern. Cheetah Xi Programming Manual Rev 1, 09/2013 P/N: 06-651... -
Page 59: C. How To Modify A Monitor Module
2nd-3rd zone number fields; then use the +/- keys to change or add the zone number. Note: These programming options are typical for the mini monitor module as well. Cheetah Xi Programming Manual P/N: 06-651 Rev 1, 09/2013... -
Page 60: D. How To Modify A Pull Station
(if connected). The device type field is not editable, but will change for each device type found on the loop. Press the ENTER key to remove the device address from the list of devices to supervise. Cheetah Xi Programming Manual Rev 1, 09/2013 P/N: 06-651... -
Page 61: F. How To Read, Write, Enable Or Disable A Device
At this point, you must use C-Linx to download the original configuration to the panel to re-enable the device. Cheetah Xi Programming Manual P/N: 06-651 Rev 1, 09/2013... -
Page 62: G. How To Set The Ahu Relay Re-Start Delay
Row B - This field allows you to set a restart time delay (0 – 255 seconds). Use the ◄► arrow keys to position the cursor under the field; then use the +/- keys to increment or decrement the number value. 4-10 Cheetah Xi Programming Manual Rev 1, 09/2013 P/N: 06-651... -
Page 63: How To Change A Devices Release Features
Sensors and input modules connected to the signaling line circuit (SLC) can be assigned a pre-discharge type and countdown type variable, each of which affects how the Cheetah Xi system responds when the device goes into alarm. Both variables are stored in both panel memory and device memory. When the panel “LEARN”... -
Page 64: How To Perform A Configuration Check
Exhibit 4-17: NAC Configuration Menu Press the corresponding function key to display the selected configuration screen: F1 = NAC Functions Screen F2 = NAC Zone Assignment Screen F3 = NAC Synchronization Protocol Screen 4-12 Cheetah Xi Programming Manual Rev 1, 09/2013 P/N: 06-651... -
Page 65: How To Modify Nac Functions
Waterflow Alarm. To change the Enabled/Disabled status of these fields, use the ◄► arrow keys to position cursor under Y or N; then use the +/- keys to toggle the field. Cheetah Xi Programming Manual 4-13 P/N: 06-651... -
Page 66: How To Set Nac Zone Assignments
Note: The Any Zone option sets the selected NAC to activate on the configured state for any zone. The Multi Zone option sets the selected NAC to activate on the configured state for any zone selected in Row D. 4-14 Cheetah Xi Programming Manual Rev 1, 09/2013 P/N: 06-651... -
Page 67: How To Set Nac Sync Protocol
HOW TO SET NAC SYNC PROTOCOL The NAC Protocol screen allows you to configure which synchronization protocol (i.e. Gentex or System Sensor) will be used by the Cheetah Xi’s notification appliance circuits (see 4.2.2.1). The selected sync protocol applies to both NAC circuits. -
Page 68: How To Set Slc Command Mode Functions
4.2.3.1 HOW TO SET SLC COMMAND MODE FUNCTIONS This screen allows you set how the Cheetah Xi will respond to SLC devices that have been inadvertently locked into the “Command Mode”. From the “SLC Configuration” screen, press the F1 key to access the “SLC Command Mode” screen, as... -
Page 69: How To Execute The Learn Function
T R : 0 0 0 Exhibit 4-25: LEARN Mode Active Screen The display keypad is locked while learn mode is Active. Panel will display “LEARN MODE COMPLETE” when process ends. Cheetah Xi Programming Manual 4-17 P/N: 06-651 Rev 1, 09/2013... -
Page 70: Learn All Devices
4.2.4.2 LEARN All devices The Learn All Devices option erases the device supervision list stored in the Cheetah Xi controller and creates a new supervision list by identifying all addressable devices connected to a signaling line circuit (SLC). All device addresses, serial numbers, and device type information will be learned. The configurations held by the devices will NOT be altered (nor will the custom messages). -
Page 71: Configuration Menu 2
Row D - This field allows you to set whether Daylight savings time will be recognized by the system (Yes/No). Use the ◄► arrow keys to position the cursor under the field; then use the +/- keys to toggle the status. Cheetah Xi Programming Manual 4-19 P/N: 06-651... -
Page 72: How To Set System Silencing Options
Row C (Alarm Unsilence:) - This field allows you to select whether a new alarm event will un-silence the supervisory, trouble and process states. Use the ◄► arrow keys to position the cursor under the field; then use the +/- keys to toggle status. 4-20 Cheetah Xi Programming Manual Rev 1, 09/2013 P/N: 06-651... -
Page 73: How To Set System Power Options
Row D - This field allows you to turn on/off supervision of the 24 VDC Auxiliary Power circuits (Yes/No). Use the ◄► arrow keys to position the cursor under the field; then use the +/- keys to toggle status. Cheetah Xi Programming Manual 4-21 P/N: 06-651... -
Page 74: How To Modify Daytime Sensitivity Settings
Use the ◄► arrow keys to position the cursor under the field; then use the +/- keys to turn ON letter representing the day of the week. Toggle letter OFF if it stays with night sensitivity all day. 4-22 Cheetah Xi Programming Manual Rev 1, 09/2013 P/N: 06-651... -
Page 75: How To Set Holiday Settings For Daytime Sensitivity
The Zone Configuration screen allows you to enable/disable and assign a custom message to any of the Cheetah Xi’s 254 available operating zones. From the “Configuration Menu 2” screen, press the F5 key to access the “Zone” screen, as shown below:... -
Page 76: How To Assign A Chime Code To A Zone
4.3.5.1 HOW TO ASSIGN A CHIME CODE TO A ZONE The Chime Code screen allows you to assign a custom chime code to any of the Cheetah Xi’s 254 available operating zones. The chime codes conform to the City of Chicago, IL 1 stage activation requirements. -
Page 77: Configuration Menu 3
F1 = Peripheral Device Configuration Screen F2 = Peripheral Communication Source Screen F3 = Peripheral Bus Communication Speed Screen F4 = Peripheral Device Command Set Screen F5 = Not Used F6 = Not Used Cheetah Xi Programming Manual 4-25 P/N: 06-651 Rev 1, 09/2013... -
Page 78: How To Configure Peripheral Devices
Note: Peripheral devices with control capabilities must be supervised (i.e., Remote display with reset button). The zone field (Z:) only applies to Cheetah Xi releasing panels and associated remote displays. Configuration of this field will have no effect on a Cheetah Xi system. -
Page 79: Peripheral Device Testing
Row D (BATT) - Allows you to Enable/Disable supervision of the battery input to the graphic controller card (Y/N). Use the ◄► arrow keys to position the cursor under each field; then use the +/- keys to toggle the value at the cursor. Cheetah Xi Programming Manual 4-27 P/N: 06-651 Rev 1, 09/2013... -
Page 80: How To Set The Peripheral Bus Command Source
PANEL mode is set by default and allows the panel to communicate with peripheral devices connected to the Cheetah Xi panel’s RS485 bus. In this mode, peripheral device configuration is transmitted during the panel configuration process via the panel’s P5 Peripherals jack. You will be prompted by the C-Linx software to move the programming cable from the P3 Computer jack to the P5 Peripherals jack to transmit the device configurations. -
Page 81: How To Set The Peripheral Bus Command Set
Exhibit 4-46: Peripheral Command Set Screen • Row A - The EVAC field allows you to set whether the Cheetah Xi will be tied to an EVAX or Fike integrated voice evacuation system. NONE = Select if no voice evacuation system present... -
Page 82: How To Enable/Disable System Walktest
Row C - This field shows the ENABLED / DISABLED status of the panels Ground Fault Level 2 detection. • Row D - This field shows the offset used by the panel to provide an adjustment to Ground Fault measurements. 4-30 Cheetah Xi Programming Manual Rev 1, 09/2013 P/N: 06-651... -
Page 83: How To Set Panel Abort Type
HOW TO SET PANEL ABORT TYPE The “Panel Abort” screen reflects the current abort type used by the panel. Any input configured for “Abort” will delay system release initiated by the Cheetah Xi automatic detection schemes. Manual Release inputs will override abort activation. -
Page 84: How To Enable/Disable Day/Night Sensitivity Feature
F1 = AC Trouble Delay Screen F2 = VESDA Configuration Menu F3 = Auxiliary Power and NAC Configuration Menu F4 = Power Cutoff Configuration Menu F5 = Relay Configuration Screen F6 = Configuration Menu 5 4-32 Cheetah Xi Programming Manual Rev 1, 09/2013 P/N: 06-651... -
Page 85: How To Set Ac Trouble Delay
F1 = VESDA Alarm Configuration Screen F2 = VESDA Sector Zone Assignment Screen F3 = VESDA Point Configuration Screen F4 = VESDA Release Configuration Screen F5 = VESDA HLI Command Set Screen Cheetah Xi Programming Manual 4-33 P/N: 06-651 Rev 1, 09/2013... -
Page 86: How To Set Vesda Alarm Features
Repeat for each field until custom message is completed. • Row D - These fields allow you to select up to four Cheetah Xi zones that this detector will participate in. Use the ◄► arrow keys to position the cursor under each field; then use the +/- keys to change zones to that desired. -
Page 87: How To Set Vesda Sector/Zone Correlation
• Rows B & C - These fields allow you to set a Cheetah Xi zone number that the VESDA sector (Sector 1 – 4) will participate in and what operational state it will cause the panel to enter. Use the ◄►... -
Page 88: How To Set Vesda Release Features
In order to participate, each VESDA unit must be assigned a pre- discharge type, pre-discharge level, and countdown type. Each of these variables affects how the Cheetah Xi system will respond when the VESDA unit activates. All three variables are stored in panel memory. -
Page 89: Vesda Command Set Screen
ATTENTION: These programming options are not available at this time, but will be added to the Cheetah Xi panel in the future. The current Cheetah Xi hardware does not support these features. Any changes made to these programming features will have no effect on the panel operation. -
Page 90: How To Set An Auxiliary Power Circuit As An Aux/Nac
HOW TO SET AN AUXILIARY POWER CIRCUIT AS AN AUX/NAC The Aux/NAC option lets you change the function of any of the Cheetah Xi’s auxiliary power circuits to operate as a notification appliance circuit (NAC). From the Aux/NAC Menu, press the F1 key to access the... -
Page 91: How To Assign Zones To The Aux/Nac Circuit
ATTENTION: These programming options are not available at this time, but will be added to the Cheetah Xi panel in the future. The current Cheetah Xi hardware does not support these features. Any changes made to these programming features will have no effect on the panel operation. -
Page 92: How To Assign Power Cut-Off Relay Address
4.5.5 HOW TO CONFIGURE PANEL RELAYS AND OPTIONAL MODULES The Relay options menu lets you change the programming of the Cheetah Xi’s on-board relays and optional modules (CRM4, RPM or DACT) installed at the P12 and P13 optional mounting positions. -
Page 93: How To Set Optional Module Mounting Location
4.0 CONFIGURATION MENU 4.5.5.1 HOW TO SET OPTIONAL MODULE MOUNTING LOCATION The Select Module screen allows you to select the type of module that is installed in the Cheetah Xi’s P12 and P13 optional card mounting positions. From the “Relay Configuration Menu” screen, press the F1 key to access the “Select Module” screen, as... -
Page 94: How To Set The Function Of The Panel's On-Board Relays
4.0 CONFIGURATION MENU 4.5.5.2 HOW TO SET THE FUNCTION OF THE PANEL’S ON-BOARD RELAYS The Relay Functions screen lets you change the operating parameters of the Cheetah Xi’s three on-board relays and optional CRM4 relays if installed. From the “Relay Configuration Menu” screen, press the F2 key to access the “Relay Functions” screen, as... -
Page 95: How To Assign Relays To A Zone
Note: The Any Zone option sets the selected relay to activate on the configured state for any zone. The Multi Zone option sets the selected relay to activate on the configured state for any zone selected in Row D. Cheetah Xi Programming Manual 4-43 P/N: 06-651... -
Page 96: How To Set Fan Restart Mode
F1 = Edit Panel Logo Screen F2 = Auto Addressing Screen F3 = Not Used F4 = Dialer Auto Test Screen F5 = Network Configuration Menu F6 = Configuration Menu 6 4-44 Cheetah Xi Programming Manual Rev 1, 09/2013 P/N: 06-651... -
Page 97: How To Change System Logo
Row D - When you have the address range that you would like to have auto addressed, press the Enter key. Devices will NOT be addressed until it is added to the loop (NEW DEVICE record identified) and the panel is reset. Cheetah Xi Programming Manual 4-45 P/N: 06-651... -
Page 98: How To Configure Dialer Test
HOW TO CONFIGURE DIALER TEST The Dialer screen allows you to configure the Cheetah Xi panel to periodically perform an operational test of the dialer. This test will send a contact ID code 50 (Auto Test) to the monitoring facility. -
Page 99: How To Set Panel's Network Id
The Network Panel ID (Network Address) screen allows you to set a unique panel ID that identifies the respective Cheetah Xi panel on the network. A Cheetah Xi network can contain up to 128 panels. Each panel connected to the same network must have a unique Panel ID. -
Page 100: How To Configure Network Module
The network module will continue to operate and pass along messages to other panels as long as the network wiring remains in place. FIRST – A Cheetah Xi network must have at least two panels. One of the two panels, regardless of wiring style, must be configured as the First panel. -
Page 101: How To Assign Panel To Network Zones
(1 – 253) is disabled, but still allow the panel to react on “Any Zone”, you will need to specifically select zones 1 – 253 and leave Zone 254 not selected. Cheetah Xi Programming Manual 4-49... -
Page 102: How To Set The Number Of History Repeats
4.0 CONFIGURATION MENU 4.6.4.4 HOW TO SET THE NUMBER OF HISTORY REPEATS The History Trouble screen allows you to adjust the number of times the Cheetah Xi panel transmits history records across the network. From the “Network Configuration Menu” screen, press the F4 key to access the “History Trouble” screen, as... -
Page 103: Configuration Menu 6
Process, then the “Monitor” panel will not request histories from the panels it is supervising. If the “Monitor” has any of these five states active prior to reset, then the “Monitor” will request a re- send of the histories received via the Ethernet port. Cheetah Xi Programming Manual 4-51 P/N: 06-651... -
Page 104: How To Configure Panel For Network Supervision
Row D - This field allows you to assign the custom message for the respective panel. Use the ◄► arrow keys to move cursor to the field; then use the +/- keys to change the field value. 4-52 Cheetah Xi Programming Manual Rev 1, 09/2013 P/N: 06-651... -
Page 105: How To Set Ip Time Parameters
Each panel will use its own date/time settings. ACCEPT = Sets panel to accept date/time synchronization settings from sending panel. SEND = Sets panel to transmit date/time synchronization settings to all network panels. Cheetah Xi Programming Manual 4-53 P/N: 06-651 Rev 1, 09/2013... -
Page 106: How To Disable Panel's Switch Operation
4.7.5 HOW TO SET PANEL’S LED OPERATION The LED Operation screen allows you to set the panel’s LEDs to function for either fire alarm (Cheetah Xi) or fire suppression (Cheetah Xi). From the “Configuration Menu 6” screen, press the F5 key to access the “LED Operation” screen, as shown... -
Page 107: Configuration Menu 8
Exhibit 4-89: AHU Key Screen Row A - Use the +/- keys to toggle the field from ‘No’ to ‘Yes’. ‘Yes’ will require an AHU fire key switch to be active before fan restart sequence is allowed. Cheetah Xi Programming Manual 4-55 P/N: 06-651... - Page 108 4.0 CONFIGURATION MENU Reserved for future use. 4-56 Cheetah Xi Programming Manual Rev 1, 09/2013 P/N: 06-651...
- Page 109 APPENDIX A A.1 CHEETAH Xi MENU STRUCTURE (V6.40) SYSTEM STATUS <ESCAPE> SYSTEM EVENT <ESCAPE> FUNCTION SWITCH / TOP LEVEL MENU Time/Date F1 – EVENT SOURCE See Below #alm, #supv, #trbl F2 – EXPANDED CUSTOM MESSAGE FUNCTION SWITCHES / TOP LEVEL MENU...
- Page 110 APPENDIX A A.1 CHEETAH Xi MENU STRUCTURE (V6.40) MAINTENANCE MENU 2 F3 – SW TIME F4 – CFG RD F5 – FAAST F6 – AHU ON DIAGNOSTICS MENU 2 CONFIGURATION MENU 5 ► F6 – MENU 3 -- F1 – LOGO DIAGNOSTIC MENU 3 F1 –...
- Page 112 704 SW 10 Street Tel: (816) 229-3405 P.O. Box 610 Fax: (816) 229-0314 Blue Springs, Missouri 64013 www.fike.com...
Need help?
Do you have a question about the Xi and is the answer not in the manual?
Questions and answers