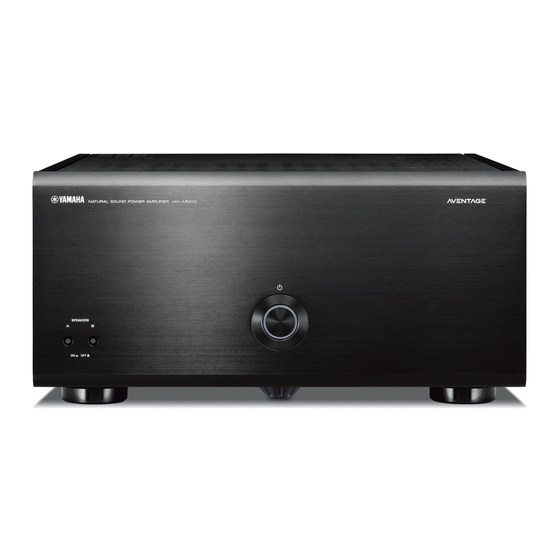
Yamaha MX-A5200 Owner's Manual
Hide thumbs
Also See for MX-A5200:
- Owner's manual (152 pages) ,
- Connection example (2 pages) ,
- Owner's manual (24 pages)

Related Manuals for Yamaha MX-A5200


Summary of Contents for Yamaha MX-A5200
- Page 1 English Français Español Português Русский Power Amplifier/Ampli de Puissance/Усилитель мощности Owner’s Manual Mode d’emploi Manual de Instrucciones Manual do Proprietário Инструкция по эксплуатации...
- Page 2 English 12 Use only with the cart, stand, tripod, bracket, or table specified by the IMPORTANT SAFETY INSTRUCTIONS manufacturer, or sold with the apparatus. When a cart is used, use caution when moving the cart/apparatus combination to avoid injury from tip-over. 13 Unplug this apparatus during lightning storms or when unused for long periods of time.
- Page 3 Yamaha Corporation of America A/V Division, 6600 Orangethorpe Avenue, Buena Park, CA 90620, USA. The above statements apply ONLY to those products distributed by Yamaha Corporation of America or its subsidiaries. * This applies only to products distributed by YAMAHA CORPORATION OF AMERICA.
- Page 4 If you notice any irregularities, be sure to request an the products caused by improper use or modifications to the unit, or inspection or repair from the dealer where you purchased the unit or from qualified Yamaha data that is lost or destroyed.
- Page 5 • When transporting or moving the unit always use two or more people. Attempting to lift the inspection or repair from the dealer where you purchased the unit or from qualified Yamaha unit by yourself may damage your back, result in other injury, or cause damage to the unit service personnel.
- Page 6 • Do not do the following: Information - put heavy items on top of the equipment. - place the equipment in a stack. - apply unreasonable force to buttons, switches, input/output terminals, etc. About content in this manual • Avoid pulling the connected cables to prevent injuries or damage to the unit by causing it to fall. •...
- Page 7 Read the supplied booklet “Safety Brochure” before using the unit. Install the unit in a well ventilated, cool, dry, clean place – away from direct sunlight, heat Since the unit adopts bare metallic speaker terminals, make sure keeping enough space on sources, vibration, dust, moisture, and/or cold.
-
Page 8: Table Of Contents
CONTENTS Accessories Check that the following accessories are supplied with the product. Accessories ..........9 ... -
Page 9: Features
Yamaha ■ Chassis structure that maximizes subwoofer (THROUGH OUT). In addition, another device can... -
Page 10: Part Names And Functions
Part names and functions Front panel SPEAKERS z (power) key SPEAKERS A/B keys Turns on/off (standby) the unit (p.16). Turns on /off the speakers connected to the CH.3 A/B terminals (p.20). Power indicator Lights up when the unit is turned on. If the indicator blinks, the protection circuitry has been activated. -
Page 11: Rear Panel
Rear panel INPUT SPEAKERS SPEAKERS TRIGGER +12V CH.5 CH.3 CH.1 CH.3 CH.5 SURROUND FRONT CENTER FRONT SURROUND CH.6 CH.6 REAR REAR PRESENCE PRESENCE THROUGH CH.5 CH.5 SURROUND SURROUND CH.6 AMP ASSIGN CH.4 AMP ASSIGN CH.2 AMP ASSIGN CH.2 AMP ASSIGN CH.4 AMP ASSIGN CH.6 AMP ASSIGN CH.3... - Page 12 INPUT (XLR) jack INPUT (RCA) jack For connecting to a pre-amplifier with XLR output jacks (p.14). For connecting to a pre-amplifier with RCA output jacks (p.14). To use the XLR jack, set the corresponding BAL/UNBAL switch to To use the RCA jack, set the corresponding BAL/UNBAL switch to “BAL”.
-
Page 13: Connections
Connections Caution • Remove the unit’s power cable from an AC wall outlet before making any connections or operating the switches and/or selectors. Connect a pre-amplifier and speakers to the unit. To connect a pre-amplifier, use an XLR balanced cable (for balanced connection) or an RCA unbalanced cable (for unbalanced connection) for each channel depending on the output jacks available on your pre-amplifier. -
Page 14: Connecting Speakers
Connecting speakers ■ Note on the speaker impedance ■ Connecting speaker cables The unit supports the following speaker impedance. Speaker cables have two wires. One is for connecting the negative (-) terminal of the unit and the speaker, and the other is for the positive (+) terminal. If the wires are colored to prevent confusion, •... -
Page 15: Connecting The Power Cable
Using a Y-shaped lug connector Connecting the power cable a Loosen the speaker terminal. b Insert the Y-shaped lug connector into the groove between the knob and base part of the After all the connections and switch operations are complete, connect the supplied power cable to the unit and then to an AC wall outlet. -
Page 16: Other Functions
Other functions Turning off the unit automatically Dimming the power indicator (auto-standby function) You can dim the power indicator on the front panel of the unit. The unit will automatically go into standby mode 8 hours after the unit is turned on. To disable the auto-standby function, set the AUTO POWER STANDBY switch to “OFF”. -
Page 17: Turning On The Unit In Conjunction With Operating Other Devices (Trigger Function)
If you have a power TRIGGER (+12 V) (IN/THROUGH OUT/OUT) jacks amplifier or a Yamaha subwoofer that supports the trigger function, you can use the trigger The unit (rear) Pre-amplifier function by connecting your devices to the TRIGGER jacks with the supplied system control cable. -
Page 18: Advanced Speaker Configuration
Advanced speaker configuration Making a Bridge Connection Between the Front Speakers Caution • Remove the unit’s power cable from an AC wall outlet before making any connections or operating the You can enjoy high-powered sound by bridging the front speakers. switches. -
Page 19: Using Two Pairs Of Front Speakers (Speakers A/B)
Using two pairs of front speakers (SPEAKERS A/B) Using three speakers for one channel (multi-speaker) If you connect two pairs of front speakers to the CH.3 A/B terminals, you can switch the front If you want to use three speakers for reproducing CH.1 audio signals (such as center channel speakers to be used by pressing SPEAKERS A/B on the front panel of the unit. -
Page 20: Appendix
Appendix Input-output signal path diagram INPUT (RCA/XLR) jacks SPEAKERS (L) terminals SPEAKERS (R) terminals CH SELECTOR BAL/UNBAL switch BAL/UNBAL switch CH SELECTOR UNBAL UNBAL CH.6 CH.6 CH.6 CH.6 CH.6 CH.5 CH.5 UNBAL UNBAL CH.5 CH.5 CH.5 UNBAL UNBAL CH.4 CH.4 CH.3 CH.3 CH.4... -
Page 21: Troubleshooting
Refer to the table below when the unit does not function properly. If the problem you are experiencing is not listed below or if the instructions below do not help, turn off the unit, disconnect the power cable, and contact the nearest authorized Yamaha dealer or service center. -
Page 22: Specifications
Specifications Input jacks • Rated Output Power (1-channel driven) • Dynamic Power (IHF) (1 kHz, 0.9% THD, 6 ) 1-channel driven (8/6/4/2 ) ........190/250/350/500 W • Audio CH.1 ....................230 W/ch • Damping Factor Analog RCA (Unbalance) x 11 CH.2 (L/R)..................230 W/ch All Channels, 1 kHz, 8 ............ - Page 23 • Dimensions (W x H x D) .........435 x 211 x 464 mm (17-1/8” x 8-1/4” x 18-1/4”) * Including legs and protrusions • Weight ..................26.4 kg (58.2 lbs) * Specifications are subject to change without notice. Appendix...
- Page 24 Information for users on collection and disposal of old equipment: Información para usuarios sobre la recogida y eliminación de los equipos antiguos This symbol on the products, packaging, and/or accompanying documents means Este símbolo en los productos, embalajes y documentos anexos significa que los that used electrical and electronic products should not be mixed with general productos eléctricos y electrónicos no deben mezclarse con los desperdicios household waste.
- Page 25 Français les clients de l’EEE et la Suisse Pour des informations plus détaillées sur la garantie de ce produit Yamaha et sur le service de garantie applicable dans l’ensemble de l’EEE ainsi qu’en Suisse, consultez notre site Web à l’adresse ci-dessous (le fichier imprimable est disponible sur notre site Web) ou contactez directement Yamaha dans votre pays de résidence.
- Page 26 Yamaha Global Site https://www.yamaha.com/ Yamaha Downloads https://download.yamaha.com/ Manual Development Group © 2018 Yamaha Corporation Published 10/2018 AM-A0 VAA2420...
- Page 27 5 canales (fig. A). Para el En associant un « Préampli Audio-Vidéo CX-A5200 » et un « Ampli de Puissance MX-A5200 », vous • Ce guide présente uniquement des exemples de raccordement. Pour des informations relatives aux bornes ou pour connaître les réglages de canal central, puede también utilizar tres altavoces centrales en vez de conexiones de...
- Page 28 Este sistema permite disfrutar de sonido de alta potencia puenteando los altavoces delanteros. Español (MX-A5200) paires d’enceintes avant pour la Zone2 ou la Zone3. Este sistema permite que você desfrute de som de alta potência, fazendo a ponte com os caixas Português...