Advertisement
Table of Contents
- 1 Let's Talk Safety
- 2 Included with Your Machine
- 3 Getting to Know Your Machine
- 4 Technical Specification
- 5 Getting Started
- 6 Before You Begin
- 7 Charging the Battery
- 8 Using Your Machine
- 9 Taking Care of Your Machine
- 10 Let's Talk Technical
- 11 What to Do if It Goes Wrong
- 12 Getting in Touch
- Download this manual
See also:
Let's Get Started
Advertisement
Table of Contents

Related Manuals for Vax Blade TBT3V1B1


Summary of Contents for Vax Blade TBT3V1B1
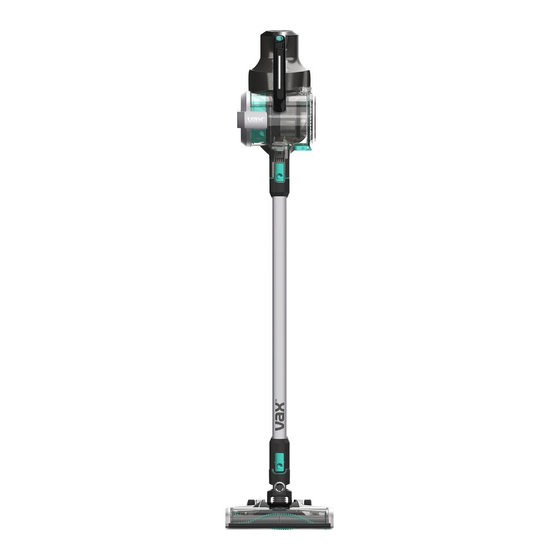
- Page 1 CORDLESS Blade CORDLESS SLIM VAC WITH DETACHABLE HANDHELD LET’S GET STARTED. TBT3V1B1 TBT3V1P1 TBT3V1P2 TBT3V1B2 TBT3V1F1 TBT3V1H1...
-
Page 2: Let's Talk Safety
Let’s talk safety This vacuum cleaner is intended for household use only and NOT for commercial or industrial use. • This vacuum cleaner does not stay upright without constant support, in between uses lie flat on the floor in a suitable location Basic so it does not become a trip hazard or can be stepped on. - Page 3 Children should not play with the vacuum cleaner. Cleaning and user maintenance should not be made by children without supervision. • Only Vax recommended charger, tools and accessories should be used with this vacuum cleaner. • The battery must be removed from the appliance before it is scrapped.
- Page 4 Thank you for buying this Vax Cordless Blade. Taking care of your carpets and hard floors The Vax Cordless Blade series is designed to make vacuuming carpets and hard floors regularly, as effective and efficient as possible and this user guide will help you get the most out of your machine.
-
Page 5: Included With Your Machine
Contents Let’s talk safety Cordless Blade 32V Getting to know your machine Cordless Blade 24V Getting started Included with your machine Using your machine Crevice Tool Taking care of your machine Dusting Brush What to do if it goes wrong Cordless Blade Getting in touch 32V Pro... -
Page 6: Getting To Know Your Machine
Powered Head/ accessory release clip Powered Head Brushbar Technical Specification Accessories & Consumables Name Vax Cordless Blade 24V Name Vax Cordless Blade 32V Foam filter 1-7-138744 Battery voltage See product rating label Battery voltage See product rating label Run time 35 minutes... -
Page 7: Getting Started
Getting started PLEASE READ ‘LET’S TALK SAFETY’ AT THE BEGINNING BEFORE USE Before you begin CAUTION: Always switch off the vacuum cleaner before connecting or disconnecting the handheld/attachments or removing and emptying the dirt container. For best cleaning results, filters require cleaning at least every 3 months and should be replaced every 12 months depending upon use. - Page 8 Getting started Fixing the wall bracket Fully assemble Slot the wall bracket through the groove Choose a position where the vacuum. and lift upwards into position. you would like to keep the vacuum stored, preferably near a mains supply. With the wall bracket attached, stand the vacuum close to the wall, in the upright...
- Page 9 Getting started PLEASE READ ‘LET’S TALK SAFETY’ BEFORE USE CAUTION: The battery used in this device may present a risk of fire or chemical burn if mistreated. Do not disassemble or heat above manufacturer’s maximum temperature limit (60°C/140°F) or incinerate. Use of another battery may present a risk of fire or explosion.
-
Page 10: Charging The Battery
Getting started Charging the battery WARNING: Do not use the vacuum cleaner when the machine is plugged in and charging. NOTE: Once the battery is fully depleted the vacuum will still turn on for a few seconds. Plug in the charger until fully charged. -
Page 11: Using Your Machine
Using your machine CAUTION: For use on delicate hard floors, the brushbar must be turned off to enable slow suction. To prevent any damage being sustained test on an inconspicuous area of the flooring. Using as a stick vacuum cleaner Place your foot on the To turn the machine on, To activate and deactivate... - Page 12 Using your machine Using as a handheld vacuum cleaner CAUTION: Always take extra care when using the vacuum cleaner on the stairs. Press the handheld The reach wand, when Choose an accessory Push the chosen release clip. Pull to attached to the Powered (pictures illustrated accessory into the separate the handheld...
- Page 13 Using your machine Using as a reach stick vacuum cleaner The reach wand can be used for hard to reach places. Press the Powered Head/ Choose an accessory Push the chosen To turn the machine on, accessory release clip (pictures illustrated accessory into the press the on/off button and pull to remove the...
-
Page 14: Taking Care Of Your Machine
Taking care of your machine Emptying and cleaning the dirt container WARNING: Don’t over fill the dirt container to avoid blocking the air flow through the vacuum cleaner. Press the handheld The reach wand when Hold the handheld over a bin, press the dirt release release clip. - Page 15 Taking care of your machine 24hr 24hr Remove the filter Tap the filter, foam and Wash the foam and Leave for 24hrs or until from the lid. separator over a bin filter under running fully dry before replacing. to remove any dirt and water (max 40°C).
-
Page 16: Let's Talk Technical
Let’s talk technical IMPORTANT: If the brushbar has been obstructed, the Motor Protection Sensor may have been activated and the brushbar will seize. Remove the Powered Head from the machine and clear any obstruction. Refit the Powered Head, switch on the vacuum cleaner by pressing the trigger and press the brushbar on/off button. Removing blockages from the Powered Head and reach wand Using scissors, remove To test for a blockage in the reach wand, drop a small ball... - Page 17 Accessories Also available Vax Cordless Blade Tools Order at: www.vax.co.uk/spares-and-solutions Refer to ‘using your machine’ section for tool assembly instructions. Vax Cordless Blade tools Crevice Tool 1-9-138758 The crevice tool is ideal for use all around the home. It’s perfect for those tricky corners and crevices.
-
Page 18: What To Do If It Goes Wrong
What to do if it goes wrong Problem Solution • Check the contents panel on the box to make sure the part is included with your vacuum cleaner. There is an accessory missing • The battery may not be charged. Go to ‘Getting Started’. •... -
Page 19: Getting In Touch
† Registration required. Terms and conditions apply, see vax.co.uk for details. 1 year guarantee on battery. * Calls are charged at the UK local rate. Please make a note of the serial number and model number of the product before calling. - Page 20 Local Authority or retailer for recycling advice. © 2016 Vax Limited. All rights reserved. The VAX trade mark and Vax lozenge are the property of Techtronic Floor Care Technology Ltd and are registered in the EU and may be pending or registered in other countries.
Need help?
Do you have a question about the Blade TBT3V1B1 and is the answer not in the manual?
Questions and answers