Table of Contents
Advertisement
Advertisement
Table of Contents

Related Manuals for Reichert ClearChart 4


Summary of Contents for Reichert ClearChart 4
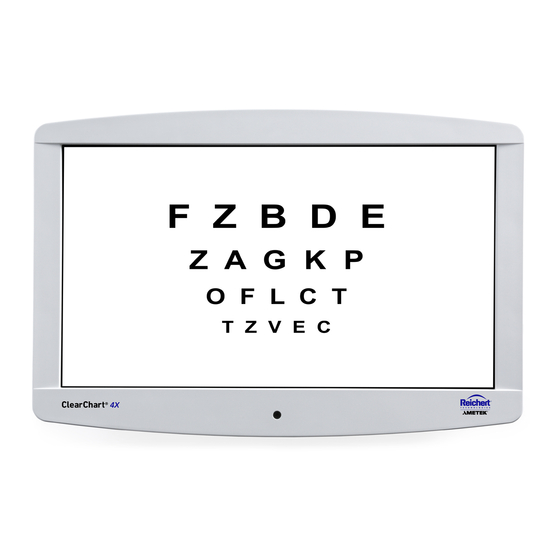
- Page 1 ClearChart 4/4X/AcuityChek™ ® Digital Acuity Systems User’s Guide...
- Page 2 The information contained in this document was accurate at time of publication. Specifications subject to change without notice. Reichert, Inc. reserves the right to make changes in the product described in this manual without notice and without incorporating those changes in any products already sold.
-
Page 3: Table Of Contents
Parts Included in the Articulating Wall Mount ..........10 Wood Stud Wall Mounting ................. 11 Drywall, Plaster, Solid Brick and Concrete Block Mounting ....... 12 Attaching the ClearChart 4 to the Mount ............ 13 Pitching Angle Adjustment ................. 14 Maintenance ....................14 Old Style ClearChart Wall Mount Bracket ............ -
Page 4: Warnings And Cautions
Warnings & Cautions Reichert, Inc. (Reichert) is not responsible for the safety and reliability of this instrument when: • Assembly, disassembly, repair, or modification is made by unauthorized dealers or persons. • Instrument is not used in accordance with this User’s Guide. WARNING: AN INSTRUCTION THAT DRAWS ATTENTION TO RISK OF INJURY OR DEATH. - Page 5 EQUIPMENT. CAUTION: THIS INSTRUMENT IS NOT INTENDED TO BE CONNECTED TO EQUIPMENT OUTSIDE THE CONTROL OF REICHERT TECHNOLOGIES UNLESS THE OTHER EQUIPMENT HAS BEEN TESTED TO APPLICABLE IEC OR ISO STANDARDS. CAUTION: DO NOT INSTALL ANY ADDITIONAL SOFTWARE OTHER THAN WHAT WAS SUPPLIED WITH THIS INSTRUMENT.
-
Page 6: Symbol Information
Symbol Information The following symbols appear on the instrument: Warning Alternating Current Power Follow instructions for use Protective Earth Connection ON / OFF Catalog Number Serial Number Date of Manufacture YYYY-MM-DD Manufacturer Waste of Electrical and Electronic Equipment Compliance to Medical Device Directive 93/42/EEC Authorized to mark given by Intertek ETL Semko for conformance with electrical standards Fragile Contents in Shipping Container - handle with care... -
Page 7: Introduction
Please retain this manual for future reference and to share with other users. For additional copies of this manual or questions related to the ClearChart 4, 4X, or AcuityChek, contact your local authorized Reichert dealer or contact our Customer Service department directly at:... -
Page 8: Installation, Features, & Functions
Installation, Features, & Functions Unpacking and Contents Great care has been taken to deliver your ClearChart 4, 4X, or AcuityChek to you. The packaging was specifically designed to transport this instrument. Please retain the packaging for future use in case transportation is required. To remove the unit from its packaging: 1. Remove the accessories from the top tray in the box. -
Page 9: Wall Mounting Instructions
3. Hang the ClearChart 4 by lining-up the holes on the back of the device with the four holes on the mounting bracket. Secure the ClearChart 4 to the mounting bracket with the 4 screws provided. -
Page 10: Articulating Wall Mount
Make sure you have received all of the parts in the component checklist before installing the mount. Refer to Figure SU-04. If any parts are missing or faulty contact Reichert for a replacement. (Con- tact information is located on the back page of this User’s Guide.) -
Page 11: Wood Stud Wall Mounting
1. Remove the part of the mount that attaches to the back of the ClearChart 4 from the part of the mount that attaches to the wall by sliding that part up and removing it. Refer to Figure SU-05. -
Page 12: Drywall, Plaster, Solid Brick And Concrete Block Mounting
Wall 1. Remove the part of the mount that attaches to Surface the back of the ClearChart 4 from the part of the mount that attaches to the wall by sliding that part Drill Holes & up and removing it. Refer to Figure SU-05. -
Page 13: Attaching The Clearchart 4 To The Mount
Note: There is a slot on the back of the mount. Be sure this slot remains in the vertical position when aligning the mount to the back of the ClearChart 4. Refer to Figure SU-11. 2. Using the Thumb Screws, secure the mount to the ClearChart 4 by hand-tightening the 4 screws into the outer screw holes on the back of the case of the ClearChart 4. -
Page 14: Pitching Angle Adjustment
Figure SU-14 Angling Bracket Maintenance Once you have mounted the bracket and the ClearChart 4, check that they are secure and safe to use. Check that the screws are fixed well every two months. If you have any concerns about the installation contact Reichert Technical Service. -
Page 15: Old Style Clearchart Wall Mount Bracket
4. Place the Wall Mount Bracket on the wall, and screw the supplied screws into the Drywall Fasteners. Refer to Figure SU-17. 5. Hang the ClearChart 4 by lining-up the holes on the back of the adaptor plate with the metal tabs of the Wall Mount Bracket and hang the unit from these tabs. -
Page 16: Application Of Input Power
To terminate operation of the ClearChart 4, press the ON / OFF switch to the OFF position (O). Note: If the ClearChart 4 is intended to be OFF for an extended period of time, the ClearChart 4 can be disconnected from power by detaching the power cord from the receptacle. -
Page 17: Communication Ports
(continued) Communication Ports The ClearChart 4 has a 9 pin female serial port on the bottom of the instrument housing that can be used for either hard-wired or wireless connection to a Reichert digital refraction system. The ClearChart 4 also has two exposed USB ports to power a wireless serial adapter, connect a USB Blue- tooth adaptor, or to upload photos and videos (ClearChart 4X only). - Page 18 Figure SU-21 Connect Dongle to Cable Connect the other end of the Null Modem Cable to the port on the bottom of the ClearChart 4. If using the USB Power Adaptor, connect it to the USB port on the bottom. Refer to Figure SU-22.
-
Page 19: Remote Control Power
2. Put in two AAA batteries in the position shown on the remote control. Remote Control Layout The remote control will operate all the test charts on your ClearChart 4. The image and chart below indicate the functions of each button. The numbered buttons in the image below represent the optotype progression. -
Page 20: Configuring The Clearchart 4
(continued) Configuring the ClearChart 4 Press the ON/OFF switch located on the bottom of the instrument. The ClearChart 4 will boot-up. When the ClearChart 4 welcome screen appears, press the MENU button on the remote to enter the configuration mode. Use the UP and DOWN arrows to navigate through different options. ROOM Using the LEFT/RIGHT arrows on your remote, select DIRECT THROW or MIRRORED based on the configuration of your office. When you are finished, press the DOWN arrow. - Page 21 Quadruple/Same • Column Uneven • Triple Same • Quadruple/Decreasing • Single Line • Single Letter • Double Same Note: You will be able to access any line presentation while using the ClearChart 4. When you are finished, press the DOWN arrow. 13795-101 Rev. F...
- Page 22 Using the LEFT/RIGHT arrows on your remote, select standard or logmar for the default size progression you would like the ClearChart 4 to display. Note: You will be able to change size progression while using the ClearChart 4. When you are finished, press the DOWN arrow.
-
Page 23: Optotypes
Unlike the seventeen letter set, no letter is easier or harder to identify than another. Since these letters can be presented in many combinations by the ClearChart 4, the few letters in the letter set do not pose a problem of memorization. -
Page 24: Size Progressions
20/80 6/24.0 0.250 20/100 6/30.0 0.200 20/200 6/60.0 0.100 20/400 6/120 0.050 Another line size progression available in ClearChart 4 is the LogMAR progression. This progression has proved useful in prescribing low vision magnification aids and permits a more pre- cise method of scoring visual acuity. Snellen Snellen(metric) LogMAR 20/10 6/3.0 -0.3 20/12.5 6/3.8 -0.2 20/16 6/4.8... -
Page 25: Remote Control Functions
Installation, Features, & Functions (continued) Remote Control Functions This button will present lines of the same size of optotypes. Multiple presses of this button will change the number of lines presented on the screen from 1 to 4. Note: At larger optotype sizes, there will be a limit of how many lines can be displayed. - Page 26 This is the LEFT arrow button. Pressing the LEFT arrow button will randomize the optotypes on the screen. The LEFT arrow button is also used to select options during the initial setup of the ClearChart 4, as well as making selections in the menu screen.
- Page 27 Installation, Features, & Functions (continued) Remote Control Functions (continued) Menu Item Options 1. NOTATION Snellen, Metric, Decimal 2. DEFAULT OPTOTYPE 17 Letter Set, 8 Letter Set, ETDRS, Sloan, Tumbling E, Landolt C, O Landolt C, HOTV, Numbers, Kolt, Children’s Shapes, Allen Symbols 3. ALTERNATE OPTOTYPE 17 Letter Set, 8 Letter Set, ETDRS, Sloan, Tumbling E, Landolt C, O Landolt C, HOTV, Numbers, Kolt, Children’s Shapes,...
- Page 28 Installation, Features, & Functions (continued) Remote Control Functions (continued) Press the Contrast MIN button to decreases the contrast of the opto character or the sine gratings in the contrast sensitivity mode. Note: RED/GREEN tests will only display maximum contrast letters even if less than maximum contrast is selected. Pressing the LIGHT button changes the illumination of the screen.
- Page 29 Installation, Features, & Functions (continued) Remote Control Functions (continued) Pressing the XCYL button will present a Cross Cylinder test. Press- XCYL ing the XCYL button a second time will exit the Cross Cylinder Test mode. ASTIG Pressing the ASTIG button will present an Astigmatic dial. Pressing the ASTIG button a second time will exit the Astigmatic Dial.
- Page 30 Installation, Features, & Functions (continued) Remote Control Functions (continued) Use the UP and DOWN arrow buttons to change the size of the opto- type. You can also use the individual optotype size buttons to change the size of the optotype. Pressing the SUPP button a second time will present the second SUPP screen of the Color Suppression mode.
- Page 31 The RIGHT/ LEFT arrows will change the character displayed. Pressing the DARK button will darken the screen and present col- DARK umns of the ClearChart 4 logo. Press any button to leave dark mode. 13795-101 Rev. F...
-
Page 32: Video And Image File Feature For The Clearchart 4X
Additional video and image files of certain formats and file sizes can be imported into the device and displayed on the screen. Note: Only the ClearChart 4X has the capability to upload photos and video. The ClearChart 4 and the AcuityChek do not. -
Page 33: Organizing Video Files
Select the video file you wish to delete using the up/down arrow buttons. Press the button in the lower right corner of the remote control to delete the video file. Note: The Reichert ClearChart 4 children’s video may be deactivated but cannot be deleted. -
Page 34: Organizing Image Files
Select the image file you wish to delete using the up/down arrow buttons. Press the button in the lower right corner of the remote control to delete the image file. Note: The Reichert education slides may be deactivated but cannot be deleted from the image file list. -
Page 35: Restoring The Default Screen Saver
Installation, Features, & Functions (continued) Images (continued) Changing the Screen Saver (continued) SIZE Exit the image file management screen by pressing MENU twice. The new screen saver MENU logo will appear on the display when the screen saver time out period is reached. Restoring the Default Screen Saver SIZE Go to the image management menu using the MENU and EDU buttons and select the... -
Page 36: Cleaning And Maintenance
Cleaning & Maintenance Cleaning ClearChart 4 Use a lint-free, soft cloth lightly damped with 90% Isopropyl Alcohol to clean the ClearChart 4, ClearChart 4X, and AcuityChek screen and the unit. Cleaning of the ClearChart should be performed when the screen has contaminants on it or when visually, there is dust accumulation on the instrument. -
Page 37: Troubleshooting
Troubleshooting Troubleshooting The following is a chart of errors with the ClearChart 4 and how to resolve them. If the following does not solve an issue with the ClearChart 4, the unit may require servicing. Problem Probable Cause Possible Solution... -
Page 38: Specifications
Software Revision The software revision is shown on the splash screen at start up. Users can also contact Reichert for the software revision. The serial number identifies the manufacture date and will be used to identify the software version. -
Page 39: Classifications
According to the mode of operation, the ClearChart 4 is a continuous operation instrument. The ClearChart 4 does not have any essential performance functions. There is no risk to patient or operator due to a failure. -
Page 40: Guidance And Manufacturer's Declarations
Electromagnetic Emissions All Equipment and Systems Guidance and Manufacturer’s Declaration – Electromagnetic Emissions The ClearChart 4 is intended for use in the electromagnetic environment specified below. The customer or user of the ClearChart 4 should ensure that it is used in such an environment. Electromagnetic Environment Emissions Test Compliance - Guidance -... - Page 41 Electromagnetic Immunity All Equipment and Systems Guidance and Manufacturer’s Declaration – Electromagnetic Immunity The ClearChart 4 is suitable for use in all establishments and is intended for use in the elec- tromagnetic environment specified below. The customer or user of the ClearChart 4 should ensure that it is used in such an environment.
- Page 42 – Guidance and Manufacturer’s Declaration Electromagnetic Immunity Equipment and Systems that are NOT Life-supporting Guidance and Manufacturer’s Declaration – Electromagnetic Immunity The ClearChart 4 is intended for use in the electromagnetic environment specified below. The customer or user of the ClearChart 4 should ensure that it is used in such an environment. Immunity IEC 60601 Compliance Electromagnetic...
- Page 43 Portable and Mobile RF Communications Equipment and the ClearChart 4 The ClearChart 4 is intended for use in the electromagnetic environment in which radiated RF disturbances are controlled. The customer or user of the ClearChart 4 can help prevent elec-...
- Page 44 28 V/m at tions equipment should 430-470 FRS 460 deviation 0,3 m be no closer to any part 1 kHs sine of the ClearChart 4, in- cluding cables, than the Pulse recommended separa- LTE Band 13, 9 V/m at 704-787 Modulation...
-
Page 45: Wireless Communication Integration
Wireless Communication Integration The ClearChart 4 has the ability to work with two types of RF transmitters with the following specifi- cations and characteristic: Configuration USB Module Protocol Bluetooth Frequency Band 2.4 - 2.4835 GHz ISM Band GFSK for 1Mbps, ╥ /4-DQPSK for 2Mpbs, 8-DPSK (EDR Mode) Modulation Method Channel Access Protocol FHSS (Frequency Hopping Spread Spectrum) RF Output Power Class 1 (+8 dBm typical) up to +20dBm Configuration RS-232 Module... -
Page 46: Appendix A
Appendix A Instrument Cables WARNING: ANY NON-MEDICAL ELECTRICAL EQUIPMENT USED WITH THE CLEARCHART 4 MUST BE COMPLI- ANT WITH AN APPLICABLE IEC OR ISO SAFETY STANDARD. Cable Reference Length Description 16200-440 11m / 35ft DB9 M/F Null Modem Cable (shielded) <15m / 49 ft... -
Page 47: Warranty
(at Reichert’s expense) for such defense, and of all negotiation for the settlement and compromise thereof. Product Changes Reichert reserves the right to make changes in design or to make additions to or improvements in its products without obligation to add such to products previously manufactured. Claims for Shortages We use extreme care in selection, checking, rechecking and packing to eliminate the possibility of error. - Page 48 Toll Free 888-849-8955 Phone: 716-686-4500 Fax: 716-686-4555 Email: reichert.information@ametek.com www.reichert.com Authorized European Representative AMETEK GmbH Business Unit Reichert Carl-von-Linde-Strasse 42 85716 Unterschleissheim/Munich Germany Email: info.reichert-de@ametek.com Tel: +49 (89) 315 8911 0 Fax: +49 (89) 315 891 99 ISO 13485 Certified 13795-101 Rev.
Need help?
Do you have a question about the ClearChart 4 and is the answer not in the manual?
Questions and answers
How to change the size for a different room distance?
To change the size settings for the Reichert ClearChart 4 for different room distances:
1. Use the MAX and MIN buttons to adjust the testing distance from the patient’s eye to the screen.
2. The units (inches or centimeters) depend on whether ENGLISH or METRIC was selected earlier in setup.
3. If MIRRORED was selected in the ROOM setup, enter two distances:
- First, the distance from the patient to the mirror.
- Then, the distance from the mirror to the screen.
4. Press the DOWN arrow when finished.
These settings help ensure the correct optotype size is displayed based on the room setup.
This answer is automatically generated