Table of Contents
Advertisement
1.
INSTRUCTIONS FOR USE .................................................................. 35
2.
OUR ENVIRONMENTAL CARE ........................................................... 36
3.
SAFETY INSTRUCTIONS .................................................................... 37
4.
GET TO KNOW YOUR OVEN .............................................................. 38
5.
BEFORE INSTALLATION..................................................................... 38
6.
DESCRIPTION OF THE CONTROLS ON THE FRONT PANEL.......... 39
7.
USE OF THE OVEN ............................................................................. 42
8.
AVAILABLE ACCESSORIES................................................................ 46
9.
COOKING HINTS WITHOUT MICROWAVE ........................................ 47
10. COOKING HINTS FOR THE MICROWAVE ......................................... 52
11. CLEANING AND MAINTENANCE ........................................................ 59
12. EXTRAORDINARY MAINTENANCE .................................................... 61
13. SOMETHING NOT WORKING? ........................................................... 62
14. INSTALLING THE APPLIANCE............................................................ 63
INSTRUCTIONS FOR THE USER: these contain user advice, description
of the commands and the correct procedures for cleaning and maintenance
of the appliance
qualified technician who must install the appliance, set it functioning and
carry out an inspection test
34
Contents
Advertisement
Table of Contents

Related Manuals for Smeg S200/1


Summary of Contents for Smeg S200/1
-
Page 1: Table Of Contents
INSTRUCTIONS FOR USE ... 35 INSTRUCTIONS FOR DISPOSAL – OUR ENVIRONMENTAL CARE ... 36 SAFETY INSTRUCTIONS ... 37 GET TO KNOW YOUR OVEN ... 38 BEFORE INSTALLATION... 38 DESCRIPTION OF THE CONTROLS ON THE FRONT PANEL... 39 USE OF THE OVEN ... 42 AVAILABLE ACCESSORIES... -
Page 2: Instructions For Use
Instructions for use 1. INSTRUCTIONS FOR USE THIS MANUAL IS AN INTEGRAL PART OF THE APPLIANCE. IT MUST BE KEPT IN ITS ENTIRETY AND IN AN ACCESSIBLE PLACE FOR THE WHOLE WORKING LIFE OF THE OVEN. WE ADVISE CAREFUL READING OF THIS MANUAL AND ALL THE INSTRUCTIONS THEREIN BEFORE USING THE APPLIANCE. -
Page 3: Instructions For Disposal - Our Environmental Care
Instructions for disposal 2. INSTRUCTIONS FOR DISPOSAL – OUR ENVIRONMENTAL CARE Our product's packing is made of non-polluting materials, therefore compatible with the environment and recycable. Please help by disposing of the packing correctly. Find the addresses of collection, recycling and disposal centres from your retailer or from the competent local organisations. -
Page 4: Safety Instructions
Safety instructions 3. SAFETY INSTRUCTIONS CONSULT INSTALLATION INSTRUCTIONS SAFETY STANDARDS FOR ELECTRICAL OR GAS APPLIANCES AND FOR THE VENTILATION FUNCTIONS. IN YOUR INTERESTS AND FOR YOUR SAFETY IT HAS BEEN ESTABLISHED BY LAW THAT THE INSTALLATION AND SERVICING OF ALL ELECTRICAL APPLIANCES IS TO BE CARRIED OUT BY QUALIFIED PERSONNEL IN ACCORDANCE WITH THE REGULATIONS IN FORCE. -
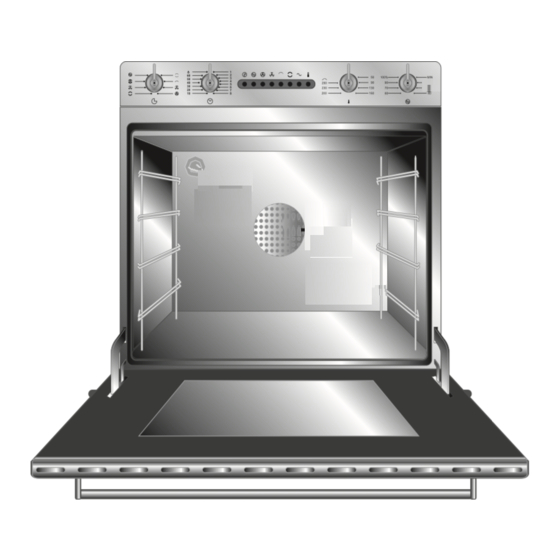
Page 5: Get To Know Your Oven
Instructions for the user 4. GET TO KNOW YOUR OVEN 5. BEFORE INSTALLATION Do not discard packing in the home environment. Separate the various waste materials and take them to the nearest special garbage collection centre. In order to remove all manufacturing residues, is recommended to clean the inside of the appliance. -
Page 6: Description Of The Controls On The Front Panel
Instructions for the user 6. DESCRIPTION OF THE CONTROLS ON THE FRONT PANEL All the oven controls are grouped together on the front panel. The symbols used are described in the table below. THERMOSTAT SWITCH Cooking temperature is selected by turning the switch clockwise to the desired setting, between 50°... -
Page 7: Microwave Power Regulation Knob
FULL GRILL ELEMENT + VENTILATION VENTILATED HEATING ELEMENT This knob selects the power settings, in %, for the microwave oven according to the product in the oven. For proper use of the power settings, please refer to the heading "7.3 Microwave cooking". -
Page 8: Instructions For The User
Instructions for the user LUMINOUS FUNCTIONS PANEL This panel shows the functions selected with the function switch knob. THERMOSTAT INDICATOR LIGHT (YELLOW) light comes on when the oven is heating up. OVEN INDICATOR (RED): light comes on when a function is selected UPPER AND LOWER HEATING ELEMENT INDICATOR... -
Page 9: Use Of The Oven
Instructions for the user 7. USE OF THE OVEN Before using the oven, make sure you have selected either a cooking time or manual functioning Warnings and general advice Before using the oven for the first time, pre-heat it to maximum temperature long enough to burn any manufacturing oily residues which could give the food a bad taste. -
Page 10: Cooling System
Instructions for the user Cooling system The oven is equipped with a cooling system which automatically comes on when the oven is being turned on. Fans cause a steady outflow of air from above the door which may continue for a brief period of time even after the oven has been turned off. - Page 11 Instructions for the user 7.3.1 Safety warnings concerning the use of the microwave 1 Do not activate the microwave if: • there is no food inside the oven; • the oven door is buckled, its hinges are loose or its seal is defective. In each of these cases, a specialised technician must intervene.
- Page 12 Instructions for the user 7.3.2 Kitchenware Not all kitchenware is suitable for use with microwave cooking. Do not use the following, for example: 1 closed containers, closed bottles, tins: high pressure can build up inside them which could cause them to explode; 2 closed metal containers;...
-
Page 13: Available Accessories
Instructions for the user 8. AVAILABLE ACCESSORIES The oven features 4 support positions for plates and racks of different height. Grill: useful for holding cooking containers. Pastry plate: for baking cakes, pizza and oven desserts. Accessories available on request Original accessories may be ordered from any Authorised Service Centre. -
Page 14: Cooking Hints Without Microwave
Instructions for the user 9. COOKING HINTS WITHOUT MICROWAVE In fan-assisted mode preheating should be carried out at 30/40°C above the cooking temperature. This considerably shortens cooking times and reduces power consumption, as well as giving better cooking results. Keep the oven door closed during cooking. Traditional cooking FUNCTION SWITCH THERMOSTAT... -
Page 15: Function Switch
Instructions for the user Grill cooking FUNCTION SWITCH THERMOSTAT Permits rapid browning of foods. For short-term cooking of small quantities, place the grid in the fourth guide from the bottom. For long-term cooking and grills, put the grid in the lowest guide in accordance with the size of the pieces. - Page 16 Instructions for the user Thawing FUNCTION SWITCH THERMOSTAT The movement of air ensured by the fan causes faster thawing of foods. The air circulating inside the oven is at room temperature. Thawing at room temperature has the advantage of not altering the taste and appearance of the food.
-
Page 17: Traditional Cooking
Instructions for the user Recommended cooking table Cooking times, especially meat, vary according to the thickness and quality of the food and to consumer taste. Cooking times are given for a pre-heated oven. FIRST COURSES LASAGNE OVEN-BAKED PASTA MEAT ROAST VEAL ROAST BEEF ROAST PORK CHICKEN... -
Page 18: Hot-Air Cooking
Instructions for the user FIRST COURSES LASAGNE OVEN-BAKED PASTA CREOLE RICE MEAT ROAST VEAL ROAST PORK ROAST BEEF FILLET OF BEEF ROAST LAMB ROAST-BEEF ROAST CHICKEN ROAST DUCK ROAST TURKEY ROAST RABBIT ROAST HARE ROAST PIGEON FISH PIZZA BREAD TOAST DESSERTS (PASTRY) CIAMBELLA FRUIT CAKE... -
Page 19: Cooking Hints For The Microwave
This cooking system gives a saving in time and electricity, since the heat is produced inside the food achieving the desired result more rapidly. Not all types of kitchenware are suitable for use in a microwave oven. Please refer to the heading "7.3.2 Kitchenware" to verify whether you have the right material. - Page 20 Instructions for the user 10.2 Microwaves FUNCTION SWITCH THERMOSTAT BETWEEN 20 AND 100% MICROWAVE POWER BETWEEN 30" AND 60' TIMER Before starting microwave cooking you have to provide yourself with special utensils and kitchenware. On this regard, please refer to the headings "7.3.2 Kitchenware"...
-
Page 21: Microwave Cooking
Instructions for the user MEAT CHICKEN VEAL LAMB CHOPS FISH 4 FISH BASS FISH SLICES FRESH VEGETABLES PEPPERS POTATOES CAULIFLOWER FROZEN VEGETABLES BROCCOLI SPINACH PEAS FRUIT PEARS PEACHES APPLES For more even cooking, the food should be turned when half cooked. During cooking, condensation may form inside the oven. - Page 22 Instructions for the user 10.3 Combined microwave FUNCTION SWITCH 50 ÷ 250 °C THERMOSTAT BETWEEN 20 AND 100% MICROWAVE POWER BETWEEN 30' AND 100' TIMER Before starting microwave cooking you have to provide yourself with special utensils and kitchenware. On this regard, please refer to the headings "7.3.2 Kitchenware"...
-
Page 23: Combined Microwave Cooking
Instructions for the user COMBINED MICROWAVE COOKING WEIGHT SCALLOPS MUSSELS AU GRATIN QUICHE LORRAINE GNOCCHI ALLA ROMANA LASAGNE GRILLED POLENTA WITH CHEESE, BUTTER AND RAGOUT SALMON DENTEX STUFFED SARDINES CHICKEN FILLET GUINEA-FOWL ONIONS ZUCCHINI CAULIFLOWER GRATIN For more even cooking, the food should be turned when half cooked. During cooking, condensation may form inside the oven. - Page 24 Instructions for the user 10.4 Thawing and reheating with the microwave FUNCTION SWITCH THERMOSTAT MICROWAVE POWER TIMER With your appliance it is possible to reheat food or drinks prepared in advance and conserved, tinned and pre-cooked foods as well as to thaw foods kept in the freezer.
- Page 25 Instructions for the user 10.4.2 Microwave thawing table WEIGHT (in grams) MEAT MINCED BEEF STEAKS ROASTS SAUSAGES WHOLE CHICKEN DUCK TURKEY FISH FILLETS OF SOLE SLICES OF SALMON 3 slices WHOLE FISH TROUT FRUIT STRAWBERRIES SLICED APPLES PEARS DESSERTS AND BREAD 2 ROLLS FRENCH BREAD JAM TART ø...
-
Page 26: Cleaning And Maintenance
Instructions for the user 11. CLEANING AND MAINTENANCE The oven must be periodically cleaned to maintain its working characteristics unaltered. Inadequate cleaning could jeopardise its appearance and above all its functioning. Before performing any operations requiring access to powered parts, switch off the power supply to the appliance. -
Page 27: Cleaning The Oven
Instructions for the user 11.4 Cleaning the oven For best oven upkeep clean regularly after having allowed to cool. Take out all removable parts. • Clean the oven grill and side guides with hot water and non-abrasive detergent. Rinse and dry. •... -
Page 28: Extraordinary Maintenance
Instructions for the user 12. EXTRAORDINARY MAINTENANCE The oven may require extraordinary maintenance or replacement of parts subject to wear such as seals, bulbs, and so on. The following instructions describe how to carry out these minor maintenance operations. Before any intervention disconnect the power supply of the device. 12.1 Replacement of light bulb Remove the bulb protector A by turning anticlockwise and change bulb B with a similar one (25 W). -
Page 29: Something Not Working
Instructions for the user 13. SOMETHING NOT WORKING? PROBLEM The oven does not heat up The oven is not connected The oven lamp no longer works The cooling fan continues to turn for a long time after oven been switched off There are sparks in the oven The food has not heated up... -
Page 30: Instructions For The Installer
Instructions for the installer 14. INSTALLING THE APPLIANCE 14.1 Electrical connection The I.D. plate with technical data, registration number and brand name is positioned visibly on the oven door frame. The plate must not be removed. It is obligatory for all electrical system to be grounded according to the methods required by safety rules. - Page 31 Instructions for the installer Never use the oven door to lever the oven into place when fitting. Avoid exerting too much pressure on the oven door when open.
Need help?
Do you have a question about the S200/1 and is the answer not in the manual?
Questions and answers