Table of Contents
Advertisement
Available languages
Available languages
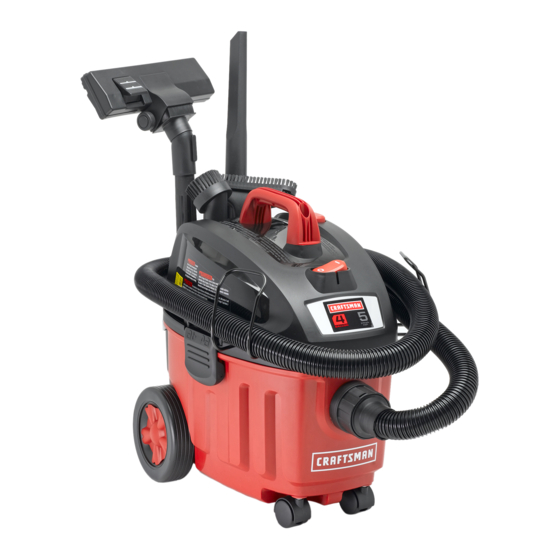
Operator's Manual
4 Gallon Wet/Dry Vacuum
Model No. 125.12002
CAUTION: Before using this
product, read this manual
and follow all its Safety Rules
and Operating Instructions.
Sears Brands Management Corporation, Hoffman Estates, IL 60179 U.S.A
www.craftsman.com
Safety
Assembly
Operation
Maintenance
Parts
Español - página 16
Advertisement
Chapters
Table of Contents

Related Manuals for Craftsman 125.12002


Summary of Contents for Craftsman 125.12002
- Page 1 Operator’s Manual 4 Gallon Wet/Dry Vacuum Model No. 125.12002 Safety Assembly CAUTION: Before using this Operation product, read this manual Maintenance and follow all its Safety Rules Parts and Operating Instructions. Español - página 16 Sears Brands Management Corporation, Hoffman Estates, IL 60179 U.S.A...
-
Page 2: Warranty
This ONE YEAR warranty is void if this product is ever used while providing commercial services or if rented to another person. For 90 DAY commercial and rental use terms, see the Craftsman warranty web page. This warranty gives you specific legal rights, and you may also have other rights which vary from state to state. -
Page 3: Polarized Plug
starting, unplug power cord before Observe the following warnings that changing or cleaning fi lter. appear on the motor housing of your Vac: • Do not leave Wet/Dry Vac unattended DOUBLE INSULATED when plugged in. Unplug from outlet GROUNDING NOT REQUIRED. when not in use and before servicing. -
Page 4: Table Of Contents
Introduction This Wet/Dry Vac is intended for Read this operator's manual to household use. It may be used for familiarize yourself with the product vacuuming of use. It may be used for features and to understand the specifi c vacuuming of blower. usage of your new Wet/Dry Vac. -
Page 5: Assembly
Assembly Remove entire contents of carton and check for parts inside the collection tank. Check each item against the Carton Contents List. If any parts are missing or damaged please call 1-800-469-4663 for replacement. Carton Content List Key Description ......Qty. Vac Assembly ......1 Hose ........1 2-in-1 Utility Nozzle .....1... -
Page 6: Unpacking Your Wet/Dry Vacuum & General Assembly
Assembly (continued) Before beginning assembly of product, make sure all parts are present. Compare parts with package contents list and diagram. If any part is missing or damaged, do not attempt to assemble the product. Contact customer service for replacement parts. A Philips head screw driver is required. - Page 7 10. Insert the handle into the slots located on the top of the power head and secure it with the screws provided. Do not over tighten the screw. (Fig. 12) 11. Position the hose storage rack as illustrated. insert one side of the rack into the channel making sure it is secured in place.
-
Page 8: Operation
Operation Vacuuming Dry Materials WARNING: Be sure to read, understand and apply all the information in the Important Safety Instructions section at the beginning of this operator's manual. Do not vacuum in areas with fl ammable gases, vapors, or explosive dusts in the air. -
Page 9: Vacuuming Liquids
Operation (continued) Vacuuming Liquids WARNING: Be sure to read, understand and apply all the information in the Important Safety Instructions section at the beginning of this operator's manual. Do not vacuum in areas with fl ammable gases, vapors, or explosive dusts in the air. -
Page 10: Maintenance
Maintenance Emptying the Collection Tank 1. Verify that the power cord is ALWAYS USE DUST FILTER FOR DRY VACUUMING. If the machine is used disconnected from the outlet. (Fig. 1) 2. Disconnect the hose from the vacuum. without the cartridge fi lter, the motor will burn out and the warranty will be voided. -
Page 11: Installing & Cleaning Foam Sleeve Filter
Maintenance (continued) Installing & Cleaning Foam Sleeve Filter Installing Foam Sleeve Filter Cleaning Foam Sleeve Filter 1. Verify that the power cord is 1. With the removed power head in the disconnected from the outlet. (Fig.1) upside down position, carefully remove 2. -
Page 12: Cleaning & Disinfecting The Wet/Dry Vac
Maintenance (continued) Cleaning and Disinfecting the Wet/Dry Vac To keep your Wet/Dry Vac looking its best, To disinfect the collection tank: clean the outside with a cloth dampened 1. Pour 1 gallon of water and 1 teaspoon with warm water and mild soap. chlorine bleach into the collection tank. -
Page 13: Troubleshooting
Troubleshooting WARNING: TO REDUCE THE RISK OF ELECTRIC SHOCK UNPLUG BEFORE TROUBLESHOOTING. Problem Possible Causes Corrective Action Vacuum will not operate 1) No power supply. 1) Check power supply – cord, breakers, fuses. 2) Unplug and check the power 2) Faulty power cord. cord. -
Page 14: Repair Parts
Repair Parts 125.12002 4 Gallon Wet/Dry Vac Always order by part number, not by key number. Always mention the model number when ordering parts. The model number is found on the serial plate located on the vacuum. To order parts, call 1-800-469-4663. - Page 15 Repair Parts (Continued) 4 Gallon Wet/Dry Vac...
- Page 16 Manual Del Operador Aspiradora Para Materiales Húmedos/Secos De 4 Galones Núm. de Modelo 125.12002 Seguridad Ensamble PRECAUCIÓN: Antes de Operación usar este producto, lea Mantenimiento este manual y siga todas Partes las reglas de seguridad e instrucciones de operación. English- Page 1 Sears Brands Management Corporation, Hoffman Estates, IL 60179 EE.UU.
- Page 17 Para detalles sobre la cobertura de la garantía para obtener un reemplazo gratuito, visite la página web: www.craftsman.com/warranty. Esta garantía no cubre bolsas de cubierta, fi ltros, mangueras o accesorios, que son partes consumibles que pueden desgastarse por el uso normal dentro del periodo de la garantía.
- Page 18 • No deje la aspiradora de material húmedo/seco Obedezca las siguientes advertencias desatendida cuando la conecte. Desconéctela que aparecen en la caja del motor de su del tomacorriente cuando no está en uso y antes aspiradora: de realizar el servicio. NO REQUIERE DE CONEXIÓN A •...
-
Page 19: Introducción
Introducción Esta aspiradora de material húmedo/seco Lea este manual del operador para está diseñada para aspirar materiales familiarizarse con las características húmedos y secos, además puede usarse del producto y para entender el uso como un soplador. específi co de su nueva aspiradora de material húmedo/seco. -
Page 20: Ensamble
Ensamble Retire todo el contenido de la caja y verifi que si hay partes dentro del tanque de recolección. Verifi que cada parte contra la lista de contenido de la caja. Si hay alguna parte faltante o dañada, llame al 1-800-469-4663 para recibir un reemplazo. -
Page 21: Desempaque De La Aspiradora De Material Húmedo/Seco Yensamble General
Ensamble (continuación) Antes de comenzar a ensamblar el producto, asegúrese de que todas las partes estén presentes. Compare las partes con la lista de contenido del paquete y el diagrama. Si hay alguna parte faltante o dañada, no intente ensamblar el producto. Comuníquese con servicio al cliente para ordenar partes de repuesto. - Page 22 8. Para limpiar materiales húmedos con la aspiradora, instale el fi ltro de espuma que se proporciona. (Fig. 10) Consulte la página 26 para ver cómo instalar el fi ltro. 9. Coloque la cabeza motriz de nuevo sobre el tanque de recolección alineando la sección superior con los pasadores y cerrándolos hasta trabarlos.
-
Page 23: Operación
Operación Aspiración de Materiales Secos ADVERTENCIA: Asegúrese de leer, entender y aplicar toda la información de la sección de instrucciones de seguridad importantes que está al inicio de este manual de operaciones. No aspire en áreas con gases infl amables, vapores o polvos explosivos en el aire. -
Page 24: Aspiración De Líquidos
Operación (continuación) Aspiración de Líquidos ADVERTENCIA: Asegúrese de leer, entender y aplicar toda la información de la sección de instrucciones de seguridad importantes que está al inicio de este manual de operaciones. No aspire en áreas con gases infl amables, vapores o polvos explosivos en el aire. -
Page 25: Mantenimiento
Mantenimiento Cómo Vaciar el Tanque de Recolección 1. Verifi que que el cable de corriente esté SIEMPRE USE EL FILTRO DE desconectado del tomacorriente. CARTUCHO PARA ASPIRAR MATERIAL (Fig. 1) SECO. Si la máquina se usa sin el fi ltro de 2. -
Page 26: Instalación Y Limpieza Del Fi Ltro De Manga De Espuma
Mantenimiento (continuación) Instalación y Limpieza del Filtro de Manga de Espuma Instalación del filtro de manga de Limpieza del filtro de manga de espuma espuma 1. Después de retirar la cabeza motriz en 1. Verifi que que el cable de corriente esté posición invertida, retire con cuidado desconectado del tomacorriente. -
Page 27: Limpieza Y Desinfección De La Aspiradora De Material Húmedo/Seco
Mantenimiento (continuación) Limpieza y Desinfección de la Aspiradora de Material Húmedo/Seco Para mantener su aspiradora de material Para desinfectar el tanque de recolección: húmedo/seco en las mejores condiciones, 1. Vierta 1 galón de agua y 1 cucharadita de limpie el exterior con un paño húmedo con blanqueador en el tanque de recolección. -
Page 28: Resolución De Problemas
Resolución de Problemas ADVERTENCIA: PARA REDUCIR EL RIESGO DE DESCARGAS ELÉCTRICAS, DESCONECTE LA ASPIRADORA ANTES DE RESOLVER UN PROBLEMA. Problema Causas posibles Acción correctiva 1) Revise el suministro de energía - 1) No hay suministro de energía. cable, disyuntores, fusibles. 2) Desconecte y revise el cable de 2) Cable de corriente defectuoso. -
Page 29: Partes De Repuesto
Partes de Repuesto 125.12002 Aspiradora De Material Húmedo/Seco De 4 Galones Siempre ordene por número de parte y no por número de clave. Siempre mencione el número del modelo cuando ordene partes. El número de modelo se encuentra en la placa de serie que se encuentra en la aspiradora. - Page 30 Partes de Repuesto (Continuación) Aspiradora De Materiales Húmedos/Secos De 4 Galones...