Table of Contents
Advertisement
Quick Links
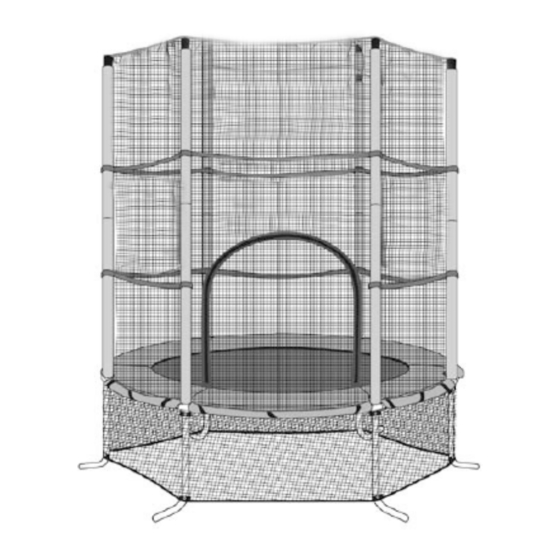
138cm (4.5ft) Trampoline
S001961
Instruction Manual
WARNING: To ensure your safety, please do not attempt to assemble this product without reading this instruction
manual carefully. Failure to comply with this warning may result in injury or property damage.
• Prior to assembly, this product includes small parts/accessories that are not suitable for children under 3 years
of age as they may cause a choking hazard.
• This product should be assembled by 2 adults.
• Only use this product on a soft, flat level surface.
• This trampoline has a maximum user weight of 34kg.
• Do now allow more than one person on the trampoline at any time.
• This product is designed for domestic use only, it is not intended for gymnastics or high level acrobatic stunts.
For parts and service enquiries, please contact Action Spares on 1800 465 070 or e-mail service@actionspares.com.au
Advertisement
Table of Contents

Related Manuals for Action Sports Stats


Summary of Contents for Action Sports Stats
- Page 1 138cm (4.5ft) Trampoline S001961 Instruction Manual WARNING: To ensure your safety, please do not attempt to assemble this product without reading this instruction manual carefully. Failure to comply with this warning may result in injury or property damage. • Prior to assembly, this product includes small parts/accessories that are not suitable for children under 3 years of age as they may cause a choking hazard.
- Page 2 Contents Important Safety Information Parts List Assembly Instructions Warranty S001961 4.5ft Trampoline...
-
Page 3: Important Safety Information
Important Safety Information To reduce the risk of serious injury, read the entire manual before you assemble or use this product. In particular, please note the following safety precautions. Please keep this manual in a safe place for future reference. 1. P rior to assembly, this product includes small parts/accessories that are not suitable for children under 3 years of age as they may cause a choking hazard. - Page 4 Important Safety Information (cont) 17. I nspect the trampoline before each use, replace any worn or defective parts. If you require replacement parts to be sent out, please contact our National Service Centre (details can be found in the warranty pages at the back of this manual. 18. Ensure that the frame padding is correctly and securely positioned prior to use. 19. C limb on and off the trampoline, do not jump on or off. It is dangerous to jump from the trampoline to the ground when dismounting, or onto the trampoline when mounting. Always use two hands to hold onto the frame when getting on or off the trampoline. Never use the elastic toggles or enclosure poles as hand grips. Small children may need assistance getting on or off of the trampoline. 20. W hen bouncing on the trampoline, always aim for the centre of the jumping mat. Bouncing near the edge of the trampoline mat can lead to injury. The frame pad is not designed to support the weight of the trampoline user.
-
Page 5: Parts List
Parts List Part No. Description Top Rail T-Joint Leg Tube Frame Pad Skirting Upper Enclosure Pole Lower Enclosure Pole Elastic Toggle Loop Screw (Ø4*16mm) Screwdriver S001961 4.5ft Trampoline... -
Page 6: Assembly Instructions
Assembly Instructions Frame Assembly Lay out the parts on a clear dry level surface as shown in Figure 1. The T-Joints (B) should be placed between each Top Rail. Connect the Top Rail (A) by sliding it into the T-Joints (B) to form the top rail loop as shown in Figure 2.1. Attention: make sure the two ends with a groove on the Top Rail Tube (A) are facing down to the ground. See Fig. 2.2 To complete assembly of the Legs. Join the Leg Tube (C) to the Top Rail and leave the hole without screw at this stage. The screw will be used in later step when the skirting is connected as well. - Page 7 Assembly Instructions (cont) Mat Assembly 1. Spread out the Mat (D) and the Elastic Toggle (J) ready for assembly as shown in Figure 5. Thread the Elastic Toggle (J) through the Mat (D) one by one, when it is finished, it should look like Figures 6 & 7. Secure the Elastic Toggle (H) to the Top Rails as shown in Figures 8 – 12. S001961 4.5ft Trampoline...
- Page 8 Assembly Instructions (cont) When the Elastic Toggles have been properly connected, the trampoline should look like Figure 13. Frame Pad and Skirting Assembly Place the Frame Pad (E) on the top of the trampoline as shown in Figure 14. Straighten and adjust the hangover of the pad. Bring the bungee strap with clip around the outside of the frame and under the pad. Pull the bungee strap and clip to the pre-sewn loop. See Figures 15 & 16. Attach the skirting (G) to the bottom of the trampoline and secure with Screw (K). See Figures 17 & 18. When the screws have been properly screwed in the trampoline should look like Figure 19. S001961 4.5ft Trampoline...
-
Page 9: Figures
Assembly Instructions (cont) Pole Assembly Attach the Upper Enclosure Poles (H) and the Lower Enclosure Poles (I) which have both been pre-assembled with foam; and secure with Screw (K). See Figure 20 . Insert each assembled Enclosure Pole to every T-Joint (B) of the trampoline in an upright position; and fasten with Screw (K). See Figures 21 & 22. Net Assembly Raise the net and attach the Net to the top of each Enclosure Pole, align the hole and fasten with the Screw (K). See Figures 23 & 24. S001961 4.5ft Trampoline... -
Page 10: Figures
Assembly Instructions (cont) There is a row of sewn-in hook and loop tapes, two hook and loop tapes in line. Attach these hook and loop tapes securely to each of the poles. Adjust the net to make sure the hook and loop tapes are securely fastened. The panel with a zipper doorway should be located in the place where it is easiest to get in and out of the trampoline. See Figures 25 & 26. Inspect the whole trampoline to make sure all the loops, hooks and loop tapes and elastic straps are securely attached. Check that the enclosure is positioned evenly around the trampoline and that it is not under strain on any particular one point. - Page 11 Warranty Information Congratulations on your purchase! This 138cm (4.5ft) Trampoline is warranted to be free from defects in material and workmanship under normal use and service conditions for a period of 2 years on the frame and mat, 12 months on all other parts, from the date of purchase of this article. Evidence of unfair usage or incorrect adjustment by the owner will void this promise. Our goods come with guarantees that cannot be excluded under the Australian Consumer Law. You are entitled to a replacement or refund for a major failure and for compensation for any other reasonably foreseeable loss or damage. You are also entitled to have the goods repaired or replaced if the goods fail to be of acceptable quality and the failure does not amount to a major failure.
- Page 12 SERVICE CENTRE Contact details and hours of operation. Freecall 1800 465 070 9:00am – 4:30pm Monday to Friday (excluding Public Holidays) 9:00am – 3:00pm Saturday This product is warranted and distributed by: Action Sports of 48B Egerton St, Silverwater NSW, 2128 Phone: (02) 8799 3500 © 2017 Action Sports Equipment Pty Ltd. S001961 4.5ft Trampoline...
Need help?
Do you have a question about the Stats and is the answer not in the manual?
Questions and answers