Table of Contents
Advertisement
Advertisement
Table of Contents

Related Manuals for kruss P3000


Summary of Contents for kruss P3000
- Page 1 Polarimeter P3000 User Manual www.kruess.com...
-
Page 3: Table Of Contents
Calibration .................. 9 Accuracy Check ................9 Sample Dilution ................9 3.4 Instrument Images ................ 10 Instrument Front View of P3000 ..........10 Instrument Back View of P3000 ........... 10 Polarimeter Tubes ..............10 3.5 Screen Descriptions ..............11 Main Menu ................11 Explanation of Buttons .............. - Page 4 Connecting the Polarimeter to the Power Supply ......19 5.2 Preparing the Instrument after Installation ........20 Switching on the Instrument ............20 Switching on the Printer .............. 20 Connecting the Temperature Sensor ..........21 Calibrating the Temperature Sensor ..........21 Checking (Validating) the Instrument ..........
- Page 5 7.3 Calibrating the Measurement Range ..........44 Opening the Menu ..............44 Canceling the Calibration ............45 Resetting the Calibration ............. 46 Performing the Calibration ............46 Blank Measurement ..............46 Input of the Quartz Standard ............46 Input of the Quartz Temperature ..........48 Measuring the Quartz Standard ..........
- Page 6 11.1 Technical Specifications ............... 63 11.2 Ordering Information ..............65 11.3 Consumables ................66...
-
Page 7: Chapter - 1 Introduction
Chapter - 1 Introduction / 1.1 Application Examples Chapter - 1 Introduction The Polarimeter P3000 is very easy to operate and is designed for the fully automated measurement of optical rotation. The measurement sample is filled into the polarimeter tube, inserted into the sample chamber and measured. -
Page 8: Reading Information
Chapter - 1 Introduction / 1.2 Reading Information Reading Information Although instrument operation of the P3000 is easy, we recommend attentive reading of this manual to ensure correct and optimal use of all functions. Symbols This manual uses the following symbols: Listings •... -
Page 9: Chapter - 2 General Safety Instructions
Chapter - 2 General Safety Instructions Chapter - 2 General Safety Instructions Hazards during normal specified operation: Danger! Electric shock by damaged instrument or power cable. Before switching on the instrument, make sure that the instrument and the power cable are undamaged. - Page 10 Chapter - 2 General Safety Instructions Careful! Damage to electrical components by condensate formation. Wait at least one hour after transporting the instrument in a cooler environment (e.g. cold room or outdoors) before connecting to the power supply. Careful! Overheating damage.
-
Page 11: Chapter - 3 Instrument Description
Instrument images • Required reagents • Screen description • Measurement principle • Scope of Delivery The following items are included in the delivery of the polarimeters P3000: Polarimeter P3000 • Power cable • Touchscreen pen • Polarimeter tubes: • 1 x 100 mm glass tube with middle funnel 1 x 200 mm glass tube with middle funnel ... -
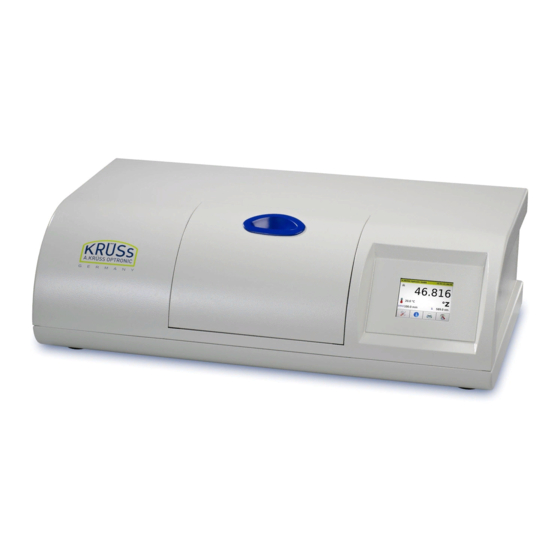
Page 12: 3.4 Instrument Images
3.4 Instrument Images Instrument Front View of P3000 Sample chamber port Touchscreen user interface Instrument Back View of The P3000 provides the following connections: P3000 Printer connection (for direct result output) • Power supply connection with power switch and •... -
Page 13: Screen Descriptions
Chapter - 3 Instrument Description / 3.5 Screen Descriptions Screen Descriptions This chapter briefly describes the following screens of the polarimeter P3000: Main Menu In the main menu the measurements are started and the results are displayed. The buttons lead to further submenus. -
Page 14: Explanation Of Display Window
Chapter - 3 Instrument Description / 3.5 Screen Descriptions Prints the result shown on the display. Starts the measurement. Explanation of Display Window 11.000 °Z Measurement result of the sample with unit. Blank Blank used for calculation of the sample result. -
Page 15: 3.6 Measurement Principle
Chapter - 3 Instrument Description / 3.6 Measurement Principle 3.6 Measurement Principle The polarimeter measures the optical rotation of the orientation of plane-polarized light caused by optically active substances. In principle, it consists of two polarization filters, the polarizer and the analyzer, each of which allows only a certain orientation of plane- polarized light to pass through. -
Page 16: Chapter - 4 Basic Operation
Chapter - 4 Basic Operation / 4.1 Buttons Chapter - 4 Basic Operation The instrument is operated by a touchscreen display using four touchscreen buttons. Buttons Operation of the polarimeter is performed using these four buttons: Opens the submenus for : System settings (printer, language, date/time) •... - Page 17 Chapter - 4 Basic Operation / 4.1 Buttons Opens the wiindow with the following information about the P3000: Instrument and firmware settings. • Date of last calibration. • Version of the user interface and data base. • Returns to the main menu.
-
Page 18: 4.2 Defining The System Settings
Chapter - 4 Basic Operation / 4.2 Defining the System Settings 4.2 Defining the System Settings Switching between the parameters: Printer, • Language, • Day, Month, Year, Hour, Min, Sec. • Selection of the desired setting: on/off (printer) • German/English (language) •... -
Page 19: 4.3 Defining The Instrument Settings
Chapter - 4 Basic Operation / 4.3 Defining the Instrument Settings 4.3 Defining the Instrument Settings Selection of parameters (scale, polarimeter tube, temperature). Selection of parameter setting. Accepts the set values and returns to the main menu. -
Page 20: 4.4 Performing The Calibrations
Chapter - 4 Basic Operation / 4.4 Performing the Calibrations 4.4 Performing the Calibrations The functions for performing the calibrations of the measurement range and the temperatue sensor are accessed using the button Calibration. Performing the calibrations see Chapter 7.4 Calibrating the Temperature Sensor. Selection of calibration functions (measurement range and temperature sensor). -
Page 21: Chapter - 5 Initial Startup
Chapter - 5 Initial Startup / 5.1 Installation Chapter - 5 Initial Startup This chapter covers the following topics: Installation • Preparing the instrument after installation • Installation Choosing a Suitable Place the instrument on a level and stable surface. ... -
Page 22: Preparing The Instrument After Installation
After installation the instrument is basically ready for operation. Only if a temperature sensor is used, the sensor must first be calibrated before performing the first measurement A.Krüss recommends validation of the P3000 after transport and installation. Warning! Damage to the retina by the LED light source. -
Page 23: Connecting The Temperature Sensor
Temperature measurement with a specified • thermometer. The P3000 determines the temperature difference between the sensor and the specified thermometer and corrects the deviation of the sensor for all following measurements. Performing the calibration: see Chapter 7.4 Calibrating the... -
Page 24: Checking (Validating) The Instrument
Chapter - 5 Initial Startup / 5.2 Preparing the Instrument after Installation Checking (Validating) the Although the P3000 is calibrated ex works, the Instrument instrument's accuracy should always be checked after transport. The instrument check is carried out as follows: Set the instrument parameters •... - Page 25 Chapter - 5 Initial Startup / 5.2 Preparing the Instrument after Installation Use the buttons and to select the desired instrument settings (scale, polarimeter tube or temperature). Set the desired parameter with the button . Exit the selected instrument setting with the buttons ...
- Page 26 Chapter - 5 Initial Startup / 5.2 Preparing the Instrument after Installation Leave the sample chamber empty or insert an empty polarimeter tube into the sample chamber. Close the lid. Start the blank measurement with Start. To save the blank value press ...
- Page 27 Chapter - 5 Initial Startup / 5.2 Preparing the Instrument after Installation Measuring the Standard Insert the quartz standard into the sample chamber. Fill the standard into the polarimeter tube. Close the sample chamber Start the measurement with ...
-
Page 28: Chapter - 6 Routine Operation
Chapter - 6 Routine Operation / 6.1 Preparing the Instrument Chapter - 6 Routine Operation This chapter supplies information on the following topics: What to do after switching on the instrument. • How to prepare measurements. • How to start the measurement. •... -
Page 29: Changing The Instrument Parameters
Chapter - 6 Routine Operation / 6.1 Preparing the Instrument Starting from the main menu, all necessary settings for a measurement are defined. Changing the Instrument Before starting a measurement, the following Parameters instrument parameters can be changed: Scale (unit) •... - Page 30 Chapter - 6 Routine Operation / 6.1 Preparing the Instrument Open the menu with the instrument settings with Select the desired instrument settings (scale, polarimeter tube or temperature) using the buttons and . Set the desired parameter with . ...
-
Page 31: 6.2 Executing A Measurement
Chapter - 6 Routine Operation / 6.2 Executing a Measurement 6.2 Executing a Measurement After changing the polarimeter tube, changing of the dilution medium or after opening the polarimeter tube, a blank measurement of the polarimeter tube must be performed first. -
Page 32: Resetting The Blank
Chapter - 6 Routine Operation / 6.2 Executing a Measurement Resetting the Blank If the saved blank should not be considered in the following sample measurements, the blank must be reset to zero. Open the system setting with Select with the buttons ... -
Page 33: Starting The Measurement
Chapter - 6 Routine Operation / 6.2 Executing a Measurement Starting the Measurement After inserting the polarimeter tube filled with the sample, the measurement can be started. Temperature control! If there is a greater temperature difference between the sample and the ambient temperature, you should wait a while before starting the measurement. -
Page 34: 6.3 Measurement Results
Chapter - 6 Routine Operation / 6.3 Measurement Results After cleaning, the sample tube is again available for the next sample measurement. The motor of the polarimeter is automatically switched off after a few seconds. 6.3 Measurement Results Measurement Result The measurement result is displayed together with the Display unit. -
Page 35: Chapter - 7 Settings
Chapter - 7 Settings / 7.1 System Settings Chapter - 7 Settings This chapter covers the following topics: How to switch the printer on and off. • How to select the language. • How to set date, time and language. •... -
Page 36: Explanations
Chapter - 7 Settings / 7.1 System Settings Select System settings with and . Open the system settings menu with Explanations Settings/Buttons Explanations Printer The connected printer can be switched on and off. Language The languages German and English are available. Date/Time Date and time are set. -
Page 37: Switching The Printer On And Off
Chapter - 7 Settings / 7.1 System Settings Switching the Printer on If a printer is connected, it can be switched on and off and off with the P3000. Open the system settings with Printer Select using the buttons and . -
Page 38: Selecting The Language
Chapter - 7 Settings / 7.1 System Settings Selecting the Language The languages German and English are available. Open the system settings with Language Select using the buttons and . Select the language German or English with the ... -
Page 39: Input Of Date And Time
Chapter - 7 Settings / 7.1 System Settings Input of Date and Time Open the system settings with Date/Time Select using the buttons and . Month Year Hour Further select well as with the buttons and . Set the desired number with the button . -
Page 40: Instrument Settings
Chapter - 7 Settings / 7.2 Instrument Settings Instrument Settings In the instrument settings the parameters for the measurement are set. Parameters for the measurement are: Scale (unit) • Length of the polarimeter tube [mm] • Wavelength [nm] • Currently only the wavelength 589 nm is available. Actual temperature at the polarimeter tube [°C / °F •... -
Page 41: Explanations
Chapter - 7 Settings / 7.2 Instrument Settings Explanations Settings/Buttons Explanations Scale Selection of the unit: ° Opt. Rotation. Actual measured value. °Z International sugar scale. For this unit the weighted sugar sample in g/cm³ is selected: 6.5 g/cm³ • 13.0 g/cm³... -
Page 42: Selecting The Scale
Chapter - 7 Settings / 7.2 Instrument Settings Switching between the parameters: Scale, Polarimeter tube, Temperature. Selection of the desired parameter settings: °/°Z, 100.0 mm/200.0 mm, °C/°F/off. The settings are accepted, the dialog window is closed and the main menu opens. Selecting the Scale Selection of the scale. - Page 43 Chapter - 7 Settings / 7.2 Instrument Settings Select the desired weighted sugar sample with the buttons and . Accept the selection with Instrument The dialog window closes and the menu settings opens again. Exit the menu Instrument settings with ...
-
Page 44: Selecting The Polarimeter Tube
Chapter - 7 Settings / 7.2 Instrument Settings Selecting the Polarimeter There are two pre-defined polarimeter tube lengths Tube (100.0 mm und 200.0 mm) available. Open the instrument settings with Polarimeter tube Select using the buttons and . Select the desired polarimeter tube with the button ... -
Page 45: Selecting The Temperature
Chapter - 7 Settings / 7.2 Instrument Settings Selecting the Temperature If a temperature sensor is connected, the temperature at the polarimeter tube is measured. The temperature unit is selectable. Unit selection automatically activates 20.0 °C. the display, e.g.: Open the instrument settings with ... -
Page 46: Calibrating The Measurement Range
Chapter - 7 Settings / 7.3 Calibrating the Measurement Range Calibrating the Measurement Range The calibration consists of two measurements: Blank measurement of the empty sample chamber. • Quartz standard measurement. • For the quartz standard measurement the optical rotation of the quartz standard at 20 °C and the actual temperature of the quartz are entered. -
Page 47: Canceling The Calibration
Chapter - 7 Settings / 7.3 Calibrating the Measurement Range Measurement range Select with the buttons and . Start the calibration with The first calibration dialog window opens. Canceling the Calibration Press Cancel The calibration is canceled and the previous calibration is maintained. -
Page 48: Resetting The Calibration
Chapter - 7 Settings / 7.3 Calibrating the Measurement Range Resetting the Calibration Press Reset. The calibration is reset to the ex works setting. Performing the Calibration For calibration the polarimeter blank is measured with the empty sample chamber first. Remove the polarimeter tube from the sample ... - Page 49 Chapter - 7 Settings / 7.3 Calibrating the Measurement Range Exits the calibration menu and returns to the main menu. The previous calibration is maintained. Selection of the desired value, decimal point, sign • functions: • CLR = Deletion of the complete value. DEL = Deletion of the last input character.
-
Page 50: Input Of The Quartz Temperature
Chapter - 7 Settings / 7.3 Calibrating the Measurement Range Input of the Quartz Temperature Enter the actual temperature of the quartz. Input as described above. Finish the entry with The input values (standard and temperature) including the compensated quartz value are shown in the following window. -
Page 51: Measuring The Quartz Standard
Chapter - 7 Settings / 7.3 Calibrating the Measurement Range Quartz temp.comp . Opt. rotation of the quartz standard at the actual temperature. Quartz Temperature Input actual temperature of the quartz standard. Measuring the Quartz Insert the quartz standard into the sample ... -
Page 52: Rejecting The Calibration
Chapter - 7 Settings / 7.3 Calibrating the Measurement Range Please note! The date of the last calibration can be called up any time with the button in the main menu. Rejecting the Calibration Press to reject the calculated calibration ... -
Page 53: Calibrating The Temperature Sensor
Chapter - 7 Settings / 7.4 Calibrating the Temperature Sensor Calibrating the Temperature Sensor The calibration consists of two temperature measurements: Temperature measurement with the temperature • sensor Temperature measurement with a specified • thermometer. The temperatue difference between the sensor and the specified thermometer is determined and compensated. -
Page 54: Measuring The Temperature
Chapter - 7 Settings / 7.4 Calibrating the Temperature Sensor Temperature sensor Select with the buttons and and press The dialog window Calibration temperature sensor opens. Nominal Display Explanation Input field for the temperature measured value: with the certified thermometer. Measured Display of the temperature measured by value:... -
Page 55: Input Of The Thermometer Temperature
Chapter - 7 Settings / 7.4 Calibrating the Temperature Sensor Wait for thermal equilibrium! If thermal equilibrium has not been reached when entering the nominal value, the calibration may lead to faulty results. Sensor, thermometer, water and room temperature must be the same. If the temperature display is stable over a longer period of time, thermal equilibrium is given. - Page 56 Chapter - 7 Settings / 7.4 Calibrating the Temperature Sensor Accept the nominal temperature with Nominal Input of the value measured with the temperature specified thermomter. Actual Value measured with the temperature temperature sensor. Press The temperature difference is calculated and all following temperatures measured with the sensor are corrected with this value.
- Page 57 Chapter - 7 Settings / 7.4 Calibrating the Temperature Sensor The currently measured corrected temperature is displayed.
-
Page 58: Blank
Chapter - 7 Settings / 7.5 Blank Blank Blank The function allows you to perform a new blank measurement and to reset a saved blank value to zero. A blank measurement must be performed: after each change of the polarimeter tube •... -
Page 59: Resetting The Blank
Chapter - 7 Settings / 7.5 Blank Resetting the Blank If the saved blank should not be considered in the following sample measurements, the blank must be reset to zero. Press Reset Measuring the Blank Insert the empty / with dilution medium filled ... -
Page 60: Saving The New Blank
Chapter - 7 Settings / 7.5 Blank Saving the New Blank If you would like to accept the new blank shown on the display: Press Save. The new blank is saved and the main menu showing the new blank value opens. Rejecting the New Blank If you do not want to accept the blank value shown on the display:... -
Page 61: Chapter - 8 Maintenance, Care & Inspection
Chapter - 8 Maintenance, Care & Inspection / 8.1 Regular Maintenance and Care Chapter - 8 Maintenance, Care & Inspection This chapter covers the following topics: What to do daily / weekly / yearly / when necessary • Changing the fuse •... -
Page 62: 8.2 Changing The Fuse
Chapter - 8 Maintenance, Care & Inspection / 8.2 Changing the Fuse 8.2 Changing the Fuse Please note! Disconnect the power plug before changing the fuse. Disconnect the power plug. Change the fuse above the power switch. Re-connect the power plug. ... -
Page 63: Chapter - 9 Troubleshooting Table
Chapter - 9 Troubleshooting Table Chapter - 9 Troubleshooting Table This chapter offers help to eliminate possibly occuring errors quickly. Error Possible causes Remedy Faulty Glass plates at the ends of the Clean the glass plates. • • measurement polarimeter tube are dirty or results stained. -
Page 64: Chapter - 10 Transport, Storage And Disposal
Chapter - 10 Transport, Storage and Disposal Chapter - 10 Transport, Storage and Disposal Transport For transport purposes use the original packaging only. Transport must be carried out at ambient temperatures between -20°C and +60°C and at max. 95% relative humidity. Storage Storage for longer periods of time must be carried out at ambient temperatures between +5°C and +45°C... -
Page 65: Chapter - 11 Appendix
Chapter - 11 Appendix / 11.1 Technical Specifications Chapter - 11 Appendix 11.1 Technical Specifications P3000 ± 90° Measurement range ± 259°Z Opt. rotation [°] Measurement unit Int. sugar scale [°Z] 0.01° Resolution 0.01 °Z ± 0.01° Accuracy ± 0.01 °Z Reproducibility 0.01°... - Page 66 Chapter - 11 Appendix / 11.1 Technical Specifications Sample transmissibility min 0.1% (OD3) Calibration automatically (menu guided) Display LCD TFT 5.7“ 320x240 Pixel User interface Touchscreen Interfaces RS232 (Printer) Power supply 100 - 240 V −, 50/60 Hz Printer connection RS-232 serial interface Dimensions 65 x 20 x 36 cm...
- Page 67 Chapter - 11 Appendix / 11.2 Ordering Information 11.2 Ordering Information Name of Item Description Order no. Polarimeter P3000 P3000 Glass tube (length 100mm) P1000-100 Glass tube (length 200mm) P1000-200 Glass tube (length 100mm with P1000-110 funnel) Glass tube (length 200mm with...
- Page 68 Chapter - 11 Appendix / 11.3 Consumables Economy quartz control plate for +17° in °Z: +49 °Z not certifiable P1000+517 polarimeter calibration in °: Economy quartz control plate for -17° in °Z: -49 °Z not certifiable P1000-517 polarimeter calibration in °: Economy quartz control plate for -34°...
- Page 69 Warranty Conditions A. KRUESS Optronic warrants that the instruments of the digital polarimeter family will be free from defects in materials and workmanship after the date of delivery for a time period of 24 months. During this warranty period A. KRUESS Optronic will repair or replace products which fall under the warranty conditions.
- Page 70 A.KRÜSS Optronic GmbH Alsterdorfer Straße 276-278 22297 Hamburg | Germany +49-(0)40-51 43 17- 0 +49-(0)40-51 43 17- 60 eMail info@kruess.com www.kruess.com...
Need help?
Do you have a question about the P3000 and is the answer not in the manual?
Questions and answers