Table of Contents
Advertisement
Belkin Ltd.
Express Business Park, Shipton Way
Rushden, NN10 6GL, United Kingdom
+44 (0) 1933 35 2000
+44 (0) 1933 31 2000 fax
Belkin B.V.
Boeing Avenue 333
1119 PH Schiphol-Rijk, The Netherlands
+31 (0) 20 654 7300
+31 (0) 20 654 7349 fax
Belkin Tech Support
Europe: 00 800 223 55 460
© 2005 Belkin Corporation. All rights reserved. All trade names are registered trademarks of
respective manufacturers listed. Mac, Apple, and AirPort are trademarks of Apple Computer,
Inc., registered in the U.S. and other countries. The mark Wi-Fi is a registered mark of the
Wi-Fi Alliance.
Wireless G Universal
Range Extender/
Access Point
Belkin GmbH
Hanebergstrasse 2
80637 Munich, Germany
+49 (0) 89 143405 0
+49 (0) 89 143405 100 fax
Belkin SAS
130 rue de Silly
92100 Boulogne-Billancourt, France
+33 (0) 1 41 03 14 40
+33 (0) 1 41 31 01 72 fax
P74992uk
Advertisement
Table of Contents

Related Manuals for Belkin Range Extender/ Access Point


Summary of Contents for Belkin Range Extender/ Access Point
-
Page 1: Access Point
Belkin Tech Support Europe: 00 800 223 55 460 © 2005 Belkin Corporation. All rights reserved. All trade names are registered trademarks of respective manufacturers listed. Mac, Apple, and AirPort are trademarks of Apple Computer, Inc., registered in the U.S. and other countries. The mark Wi-Fi is a registered mark of the Wi-Fi Alliance. -
Page 2: User Manual
Wireless G Universal Range Extender/ Access Point Increase your wireless coverage User Manual ����� ������� F5D7132... -
Page 3: Table Of Contents
Table of Contents 1 Introduction..........1 Advantages of a Wireless Network. -
Page 4: Introduction
“Placement of your Wireless Networking Hardware for Optimal Performance” on the next page. By following our simple setup instructions, you will be able to use your Belkin Home Network to: • Share one high-speed Internet connection with all the computers in your home •... -
Page 5: Placement Of Your Wireless Networking Hardware For Optimal Performance
To achieve the best wireless network coverage for your “wireless clients” (i.e., computers enabled by Belkin Wireless Notebook Network Cards, Wireless Desktop Network Cards, and Wireless USB Adapters): •... - Page 6 Introduction Avoid Obstacles and Interference Avoid placing your wireless router (or access point) near devices that may emit radio “noise,” such as microwave ovens. Dense objects that can inhibit wireless communication include: • Refrigerators • Washers and/or dryers • Metal cabinets •...
- Page 7 Experiment with more than one of the available channels in order to find the clearest connection and avoid interference from neighboring cordless phones or other wireless devices. For Belkin wireless networking products, use the detailed Site Survey and wireless channel information included in your User Manual. These guidelines should allow you to cover the maximum possible area with your wireless router (or access point).
-
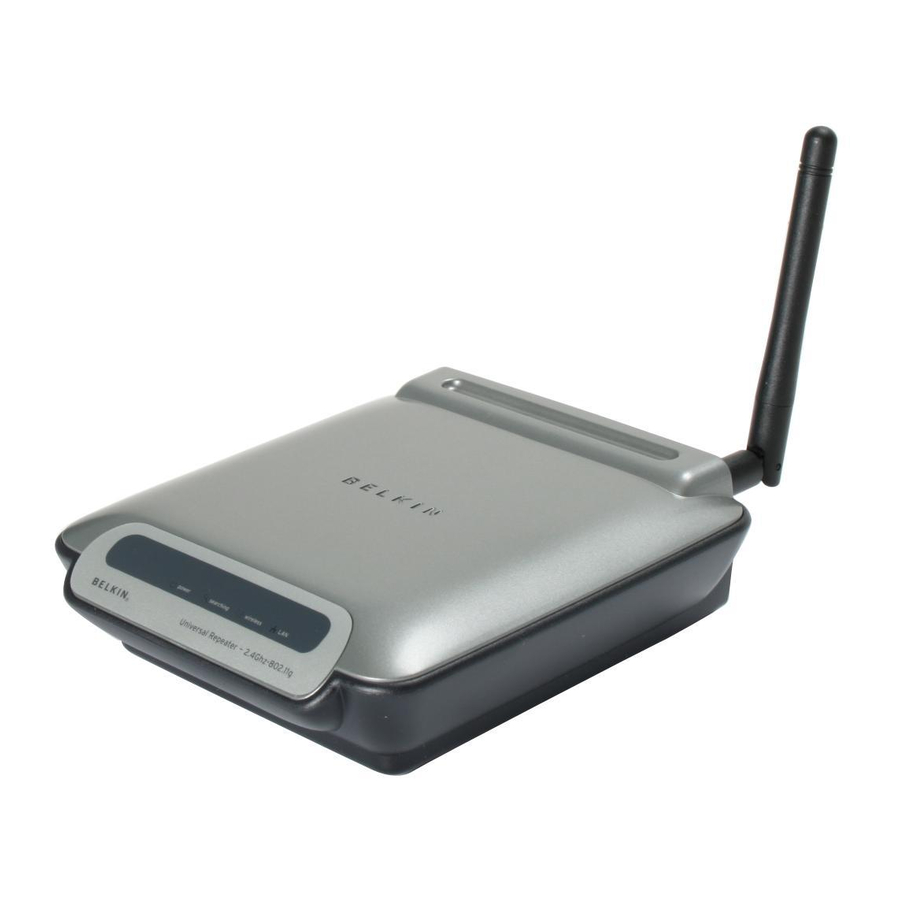
Page 8: Overview
Overview The WURE is designed to be positioned horizontally on a desktop, or wall-mounted. All of the cables exit from the rear of the WURE for better organization and utility. The LED indicators are easily visible on the front of the WURE to provide you with information about network activity and status. - Page 9 Overview ��� ����� ����� ����� ������� ������������ Power Jack Back Panel Power Jack Connect the included 4.5V DC power supply to this jack. RJ45 Ethernet Jack Connect an Ethernet cable to this socket, and connect to an open RJ45 10Base-T or 100Base-Tx port on a switch, hub, or router. Auto Connect Button The “Auto Connect”...
-
Page 10: Package Contents
Overview Package Contents • Belkin Wireless G Wireless Universal Range Extender • Detachable Antenna • Power Supply • User Manual • Quick Installation Guide • Ethernet Cable • Easy Installation Wizard Software CD-ROM System Requirements • At least one computer with an installed 802.11g or 802.11b- compliant wireless Ethernet adapter •... -
Page 11: Configuring The Wure
Configuring the WURE Configuring the WURE �������������������� � � ������� � � � ���� ���� � Wireless G Universal Range Extender Wireless G Notebook Card �������� ��������������� Wired Router Wireless G Desktop Card Configuring as a Wireless Access Point 1. Connect Connecting as a Wireless Access Point The WURE can add wireless-enabled computers to an existing wired network. - Page 12 Both your PC and WURE must be wired into your network for this Utility to work. 3. Configure Running the Wireless Range Extender Management Utility To start your Wireless Range Extender Management Utility, double-click the “Belkin Range Extender Utility” icon. You will see the following screen. Wireless Range Extender...
- Page 13 Configuring the WURE Configuring the WURE Click the “Refresh” button. The Utility will detect the WURE(s) connected to your network. Select the WURE you wish to configure. If your WURE’s IP address is not in the same subnet as your network, the “Set IP Address”...
-
Page 14: Advanced Configuration
Configuring the WURE The “UR/AP mode switch” window will appear. Select the AP radio button. Congratulations. Your WURE is now set up for access point mode. 4. Advanced Configuration Configuring your WURE through the Web-Based Advanced User Interface If you wish to use the Web-Based Advanced User Interface, click the “Web Management”... -
Page 15: Configuring As A Wireless G Universal Range Extender
Configuring the WURE Configuring the WURE Configuring as a Wireless G Universal Range Extender Auto Connect Button Auto Connect is a quick and easy method to automatically set up your WURE to your wireless network. It is designed to remove the need for users to set the correct SSID and channel. - Page 16 Configuring the WURE Release the “Auto Connect” button; the WURE will automatically associate to the wireless router (or access point) with the strongest signal. In most cases, this will be the router to which you positioned the WURE closest. Once the WURE has associated to your router (or access point), the “Searching”...
-
Page 17: Using The Web-Based Advanced User Interface
Using the Web-Based Advanced User Interface Using the Web-Based Advanced User Interface The most convenient way to access the WURE’s Web-Based Advanced User Interface is to connect the unit to the wireless router through the included cable. Once you finish configuring the device, you can disconnect the cable. - Page 18 Using the Web-Based Advanced User Interface Note: Once you have completed configuring your WURE, repeat steps 1 through 3. Then select “Obtain an IP automatically” or set a valid IP for your computer on the same subnet as the network to which you are connecting.
-
Page 19: Understanding The Web-Based Advanced User Interface
Using the Web-Based Advanced User Interface Using the Web-Based Advanced User Interface Logging out of the WURE One computer at a time can log into the WURE in order to make changes to its settings. There are two ways to log out: 1, by clicking the “Logout”... - Page 20 Using the Web-Based Advanced User Interface (2) Home Button The home button is available in every page of the UI. Pressing this button will take you back to the home page. (3) Help Button The “Help” button gives you access to the WURE’s help pages. Help is also available on many pages by clicking “more info”...
-
Page 21: Wireless > Basic
Using the Web-Based Advanced User Interface Using the Web-Based Advanced User Interface Wireless > Basic The “Wireless > Basic” page lets you make changes to the wireless network settings. From this page you can make changes to the wireless settings. Changing the Wireless Network Name (SSID) To identify your wireless network, a name called the SSID (Service Set Identifier) is used. -
Page 22: Using The Wireless Mode Switch
Using the Web-Based Advanced User Interface Using the Wireless Mode Switch Your WURE can operate in three different wireless modes: “54g- Auto”, “54g-Only”, and “54g-LRS”. The different modes are explained next. 54g-Auto Mode In this mode, the WURE is compatible with 802.11b and 802.11g wireless clients simultaneously. -
Page 23: Using The Broadcast Ssid Feature
Using the Web-Based Advanced User Interface Using the Web-Based Advanced User Interface reside in. The default channel is 11 (unless you are in a country that does not allow channel 11). The channel can be changed if needed. If there are other wireless networks operating in your area, your network should be set to operate on a channel that is different than the other wireless networks. -
Page 24: Protected Mode
Using the Web-Based Advanced User Interface to “Broadcast SSID”, and then click “Apply Changes”. The change is immediate. Each computer now must be set to connect to your specific SSID; an SSID of “ANY” will no longer be accepted. Refer to the documentation of your wireless network adapter for information on making this change. -
Page 25: Repeater Mode
Using the Web-Based Advanced User Interface Using the Web-Based Advanced User Interface Repeater Mode Repeater mode allows your WURE to directly connect to a wireless router (or access point). You can use this mode to extend the range of your wireless network, or to add an extension of your network, without running cables. - Page 26 Using the Web-Based Advanced User Interface The status of your connection will show in the “Status” box.
-
Page 27: Securing Your Wi-Fi ® Network
Using the Web-Based Advanced User Interface Using the Web-Based Advanced User Interface The example below illustrates using Repeater mode to extend the range of your wireless network. In this example, the WURE is set up to connect to the wireless router located in another area. Wireless G Universal Range Extender... - Page 28 Most of the new wireless equipment in the market today supports both 64-bit and 128-bit WEP encryption, but you might have older equipment that only supports 64-bit WEP. All Belkin wireless products will support both 64-bit and 128-bit WEP. Encryption Keys After selecting either the 64-bit or 128-bit WEP encryption mode, it is critical that you generate an encryption key.
- Page 29 WPA (with radius server) is a system where a radius server distributes the network key to the clients automatically. This is typically found in a business environment. (For a list of Belkin wireless products that support WPA, please visit our website at www.belkin.
- Page 30 Using the Web-Based Advanced User Interface Using a Hexadecimal Key A hexadecimal key is a combination of numbers and letters from A–F and 0–9. 64-bit keys are five two-digit numbers. 128-bit keys are 13 two-digit numbers. For instance: AF 0F 4B C3 D4 = 64-bit key; C3 03 0F AF 0F 4B B2 C3 D4 4B C3 D4 E7 = 128-bit key In the boxes below, create your key by writing in two characters between A–F and 0–9 in each box.
-
Page 31: Wep Setup
Using the Web-Based Advanced User Interface Using the Web-Based Advanced User Interface Note to Mac users: Original Apple AirPort products support 64- ® ® ® bit encryption only. Apple AirPort 2 products can support 64-bit or 128-bit encryption. Please verify which version you are using. If you cannot configure your network with 128-bit encryption, try 64-bit encryption. - Page 32 Using the Web-Based Advanced User Interface Click “Apply Changes” to finish. Encryption in the WURE is now set. Each of your computers on your wireless network will now need to be configured with the same security settings. WARNING: If you are configuring the wireless WURE (or access point) from a computer with a wireless client, you will need to ensure that security is turned ON for this wireless client.
-
Page 33: Wpa Setup
Microsoft. This patch works only with the Windows XP operating system. You also need to download the latest driver for your Belkin Wireless G Desktop or Notebook Network Card from the Belkin support site. - Page 34 Using the Web-Based Advanced User Interface Enter your pre-shared key. This can be from eight to 63 characters and can be letters, numbers, or symbols. This same key must be used on all of the clients that you set up. For example, your PSK might be something like: “Smith family network key”.
- Page 35 Using the Web-Based Advanced User Interface Using the Web-Based Advanced User Interface Setting WPA2-Personal (AES) From the “Security Mode” drop-down menu, select “WPA2-Personal (AES)”. For “Encryption Technique”, select “AES”. This setting will have to be identical on the clients that you set up. Enter your pre-shared key.
-
Page 36: Mac Address Control
Using the Web-Based Advanced User Interface MAC Address Control Setting MAC Address Filtering The MAC address filter is a powerful security feature that allows you to specify which computers are allowed or denied access to the network. When setting an “Allow” list, any computer NOT included in the list will be denied access to the network. -
Page 37: Changing System Settings
Changing System Settings Changing System Settings The “System Settings” page is where you can enter a new administra- tor password. Setting or Changing the Administrator Password The WURE ships with NO password entered. If you wish to add a password for greater security, you can set a password here. Write down your password and keep it in a safe place, as you will need it in order to log into the WURE in the future. -
Page 38: Saving A Current Configuration
Changing System Settings The following message will appear. Restoring the defaults includes restarting the WURE. It can take up to 60 seconds. It is important not to turn the power off on the WURE during the restart. A 60-second countdown will appear on the screen. When the countdown reaches zero, the WURE’s defaults will be restored. - Page 39 Changing System Settings Changing System Settings A window will open in which you can select the location where you want to save the configuration file. Select a location. You can name the file anything you want, or use the default name “Config”.
-
Page 40: Restoring A Previous Configuration
Changing System Settings Restoring a Previous Configuration This option will allow you to restore a previously saved configuration. Click “Browse”. A window will open that allows you to select the location of the configuration file. All configuration files end with a “.cfg”. -
Page 41: Updating Firmware
Updating Firmware From time to time, Belkin may release new versions of the WURE’s firmware. Firmware updates contain feature improvements and fixes, if any. When Belkin releases new firmware, you can download it from the Belkin update website and update your WURE’s firmware to the... - Page 42 Changing System Settings Downloading a New Version of Firmware If you click the “Check Firmware” button and a new version of firmware is available, you will see a screen such as the following. To download the new version of firmware, click “Download”. A window will open that allows you to select the location...
- Page 43 Changing System Settings Changing System Settings Updating the WURE’s Firmware In the “Firmware Update” page, click “Browse”. A window will open that allows you to select the location of the firmware update file. All firmware files end with a “.bin”. Browse to the firmware file you downloaded.
- Page 44 Changing System Settings You will be asked if you are sure you want to continue. Click “OK”. You will see one more message. This message tells you that the WURE may not respond for as long as one minute as the firmware is loaded and the WURE is rebooted.
-
Page 45: Troubleshooting
If you are unable to connect to the Internet from a wireless computer, please check the following items: Look at the lights on your router. If you’re using a Belkin Router, the lights should be as follows: • The “Power” light should be on. - Page 46 (as opposed to wirelessly), ensure that “Broadcast SSID” is enabled. This setting is found on the router’s wireless “Channel and SSID” configuration page. If you are still unable to access the Internet after completing these steps, please contact Belkin Technical Support.
- Page 47 Troubleshooting Troubleshooting Troubleshooting Problem: My wireless network performance is inconsistent. Data transfer is sometimes slow. Signal strength is poor. Difficulty establishing and/or maintaining a Virtual Private Network (VPN) connection. Solution: Wireless technology is radio-based, which means connectivity and the throughput performance between devices decreases when the distance between devices increases.
- Page 48 How do I extend the range of my wireless network? Solution: Belkin recommends using one of the following products to extend wireless network coverage throughout large homes or offices: • The WURE can double the coverage area of your wireless network.
- Page 49 The “Advanced” button will allow you to view and configure more options of the card. Once the “Advanced” button is clicked, the Belkin Wireless LAN Utility will appear. This Utility will allow you to manage all the advanced features of the Belkin wireless card.
- Page 50 You also need to download the latest driver for your Belkin Wireless G Desktop or Notebook Network Card from the Belkin support site. Other operating systems are not supported at this time. The Microsoft patch only supports devices with WPA-enabled drivers such as Belkin 802.11g products.
- Page 51 Problem: I am having difficulty setting up Wi-Fi Protected Access (WPA) security on a Belkin Wireless Router or Belkin Access Point for a business. Solution: If your network uses a radius server to distribute keys to the clients, use this setting.
- Page 52 Click “OK, then “Apply” to save the settings. Problem: I am NOT using a Belkin client card and I am having difficulty setting up Wi-Fi Protected Access (WPA) security for a home network. Solution: If you are...
- Page 53 Troubleshooting Troubleshooting Note: Select “WPA (with radius server)” if you are using this computer to connect to a corporate network that supports an authentication server such as a radius server. Please consult your network administrator for further information. Select “TKIP” or “AES” under “Date Encryption”. This setting will have to be identical to the wireless router (or access point) that you set up.
-
Page 54: New Zealand
*Distance and connection speeds will vary depending on your networking environment. Technical Support http://www.belkin. You can find technical support information at: com/networking www.belkin.com through the tech support area. If you want to contact technical support by phone, please call: 877-736-5771 or 310-898-1100 ext. -
Page 55: Information
Information Information FCC Statement DECLARATION OF CONFORMITY WITH FCC RULES FOR ELECTROMAGNETIC COMPATIBILITY We, Belkin Corporation, of 501 West Walnut Street, Compton, CA 90220, declare under our sole responsibility that the product, F5D7132 to which this declaration relates, complies with Part 15 of the FCC Rules. Operation is... - Page 56 Modifications The FCC requires the user to be notified that any changes or modifications to this device that are not expressly approved by Belkin Corporation may void the user’s authority to operate the equipment. Canada-Industry Canada (IC) The wireless radio of this device complies with RSS 139 &...
- Page 57 Belkin Corporation Limited Lifetime Product Warranty Belkin Corporation warrants this product against defects in materials and workmanship for its lifetime. If a defect is discovered, Belkin will, at its option, repair or replace the product at no charge provided it is returned during the warranty period, with transportation charges prepaid, to the authorized Belkin dealer from whom you purchased the product.
Need help?
Do you have a question about the Range Extender/ Access Point and is the answer not in the manual?
Questions and answers