
Related Manuals for Singer Inspiration 4220


Summary of Contents for Singer Inspiration 4220
- Page 1 Inspiration 20/28 Stitches / Points / Puntos Sewing Machine Machine à coudre Máquina de Coser 4220 / 4228 AU TO Instruction Book Instruction Book Instruction Book Manuel d'Instructions Manual de Instrucciones...
- Page 2 ® A registered trademark of The Singer Company Ltd. or its affiliates. Copyright © 2007. ® Une marque déposée de The Singer Company Ltd. ou ses affilies. Copyright ©2007. ® Una marca registrada de The Singer Company Ltd. o sus afiliados.
-
Page 3: Table Of Contents
Table of Contents 1. Important Safety Instructions ... 2. Getting to Know Your Machine ... 3. Learning How to Set the Machine for the Different Stitches ... 4. Lifting the Carrying Handle ... 5. Connecting the Machine ... 6. Machine Basics ... Changing Needles Removing Snap-on Presser Feet Attaching Snap-on Presser Feet... -
Page 4: Important Safety Instructions
Pag. 41 Para los Territorios Europeos: Pag. 43 Esta máquina de coser Singer fue evaluada de acuerdo con las normas Europeas y aporta los requerimientos relativos a seguridad eléctrica, interferencias de radio e inmunidad Pag. 45 electromagnética. La conformidad está documentada con la marca (*) Probada en 220-240V condición. -
Page 5: Consignes De Sécurité Importantes
Always use the proper needle plate. Do not attempt to adjust the motor belt. The wrong plate, can cause the Contact your nearest authorized SINGER needle breaks. Service Center should any adjustment be required. -
Page 6: Instrucciones Importantes De Seguridad
Siempre que sea necesario algún ajuste, No use la máquina con la aguja doblada. solicite apoyo de algún técnico de la Red de Servicio Autorizado de Singer. Utilice siempre la placa aguja adecuada, una placa aguja errónea puede romper la No descontecte jalando el cable, aguja. -
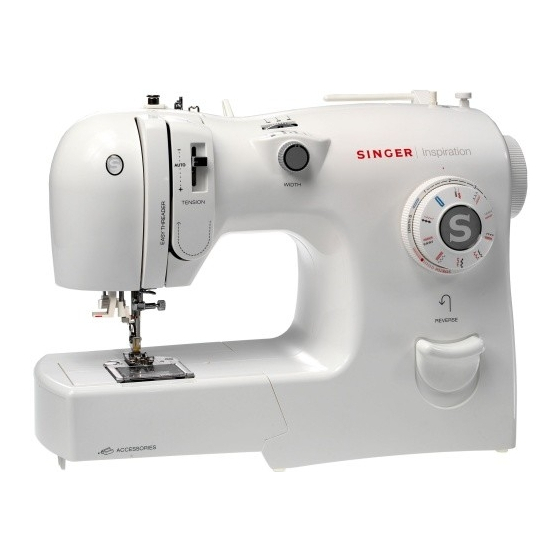
Page 7: Faites Connaissance Avec Votre Machine
Needle position selector dial Needle thread tension A U T Pattern selector Dial Drop Feed Lever Needle position selector: The needle can be moved from the center position to either the right or left position. This is helpful when inserting zippers or cording, and when topstitching. Needle thread tension knob: This control determines the amount of pressure on the needle thread as it passes through the machine. -
Page 8: Conociendo Su Máquina
353364 359838900 IMPORTANT: This machine uses only the special bobbin (359838900) by Singer. These bobbins are Sure Fit IMPORTANT : Seules les canettes spéciales (359838900) de Singer sont à utiliser sur cette machine. L'insertion de ces canettes Sure Fit™ s'effectue dans un seul sens. -
Page 9: Learning How To Set The Machine For The Different Stitches
IMPORTANT: Always set the Stitch Length to STRETCH stitches to ensure the stitch forms properly. Stitch Selectors for the model 4220. Stitch Selectors for the model 4228. IMPORTANT: It is easier to turn the pattern selector dial, if the Stitch width dial is in the Straight Stitch position and the needle is in the highest position. - Page 10 EXTENSIBLE, afin de vous assurer que les points seront formés correctement. Sélecteur de point du modèle 4228 Sélecteur de point du modèle 4220 IMPORTANT : il est plus facile de tourner le sélecteur de point si le cadran de largeur du point est réglé...
- Page 11 Siempre ajuste el Largo de Puntada a para todas las puntadas en ROJO/FLEXIBLES para asegurar que la puntada se forme correctamente. Selector de puntadas del modelo 4220 Selector de puntadas modelo 4228 IMPORTANTE: Es más fácil girar el selector de puntada, si la perilla de ancho de puntada está...
-
Page 12: Lifting The Carrying Handle
Lifting the Carrying Handle Relever la poignée pour transporter la machine Relever la poignée pour transporter la machine Levantando la asa Connecting the machine Branchement de la machine Conectando la máquina Velocidad For North America “This appliance has a polarized (one blade wider than the other) plug. To reduce the risk of electric shock, this plug is intended to fit in a polarized outlet only one way. -
Page 13: Machine Basics
Aspectos básicos de la máquina Changing needles / Changement d'aiguille / Cambiando agujas Use only SINGER needles Utilisez des aiguilles SINGER uniquement Utilice solamente agujas Singer Turn handwheel counter clockwise until the needle is in the highest position. Tournez le volant vers vous jusqu'à ce que l'aiguille soit dans la position la plus haute. -
Page 14: Mettre En Place Le Pied Presseur À Enclenche
Machine basics Généralités Aspectos básicos de la máquina Attaching snap-on presser feet Mettre en place le pied presseur à enclenche Colocando el prensatelas de colocación instantánea Turn handwheel counter clockwise until the needle is in the highest position. Tournez le volant vers vous jusqu'à ce que l'aiguille soit dans la position la plus haute. -
Page 15: Retirer Et Remettre En Place Le Bras Libre
Machine basics Généralités Aspectos básicos de la máquina Removing and replacing the extension table Retirer et remettre en place le bras libre Colocación y extracción de la cubierta removible Applications Applications Aplicaciones To attach, slide extension table to the right. Pour le mettre en place, faites glisser le bras libre vers la droite. -
Page 16: Tension Du Fil
* Not recommended on stretch fabrics. * Déconseillé sur les tissus extensibles * No se recomienda para telas elásticas. Always use SINGER needles for best results. Pour de meilleurs résultats, utilisez toujours des aiguilles SINGER. Siempre utilice agujas SINGER para mejores resultados. Aiguille Agujas... -
Page 17: Threading The Machine
Threading the machine Enfilage de la machine Ensartando la Máquina Winding the bobbin Remplissage de la canette Devanando la bobina Turn handwheel counter clockwise until the needle is in the highest position. Tournez le volant vers vous jusqu'à ce que l'aiguille soit dans la position la plus haute. -
Page 18: Mettre En Place Et Retirer La Canette
Inserting the bobbin and removing the bobbin Use only SINGER #359838900 bobbins Mettre en place et retirer la canette (Utilisez des canettes SINGER #359838900 uniquement) Colocando y quitando la bobina (utilice sólo bobinas SINGER #359838900) Turn handwheel counter clockwise until the needle is in the highest position. - Page 19 Threading the machine Enfilage de la machine Ensartando la Máquina Close bobbin visor slide plate, leaving a 6” thread tail. Fermez la plaque transparente du compartiment à canette en laissant dépasser un bout de fil de 15 cm. Cierre la placa transparente, dejando una hebra de 6 centimetros.
- Page 20 Threading the machine Enfilage de la machine Ensartando la Máquina Pull thread out from the spool through the second thread guide. Tirez le fil de la bobine et faites-le passer dans le deuxième guide-fil. Jale el hilo de la carrete por el segundo guía hilos. Firmly hold the thread close to the spool with your right hand, then holding the thread-end in your left hand, follow the thread guides.
-
Page 21: Enfile-Aiguille Automatique
Threading the machine Enfilage de la machine Ensartando la Máquina Automatic needle threader Enfile-aiguille automatique Ensartando la máquina To use the Automatic needle threader; thread the machine, stopping at the needle, and set the machine as follows: Pour utiliser l'enfile-aiguille automatique, enfilez la machine en vous arrêtant à l'aiguille, puis réglez la machine de la façon suivante: Para usar el ensartador automático de aguja, ensarte la máquina, y deténgase en la aguja, luego ajuste la máquina como sigue:... -
Page 22: Remonter Le Fil De Canette
Threading the machine Enfilage de la machine Ensartando la Máquina Raising the bobbin thread Remonter le fil de canette Sacando el hilo de la bobina Raise presser foot lifter. Relevez le releveur de pied presseur. Levante la palanca del prensatelas. Hold needle thread loosely with your left hand. -
Page 23: Bâtir
Straight Stitching Points droits Puntada Recta Begin sewing. Sew 5-6 stitches, then stop. Commencer la couture. Cousez cinq ou six points, puis arrêtez. Comience a coser. Cosa 5-6 puntadas, luego deténgase. Hold the reverse button down, and sew. The machine will sew in reverse, reinforcing the stitching. -
Page 24: Zigzag Stitching
Basting Bâtir Hilvanado Cousez Comience a coser. Continue sewing until finished. Continuez la couture jusqu'à la fin. Continúe cosiendo hasta terminar la costura. Turn handwheel counter clockwise until the needle is in the highest position. Tournez le volant vers vous jusqu'à ce que l'aiguille soit dans la position la plus haute. -
Page 25: Ojales En Un Paso
Zig-zag Stitching Points zigzags Puntada Zigzag Sew. Cousez. Comience a coser. When finished, t urn handwheel counter clockwise until the needle is in the highest position. Une fois la couture terminée, tournez le volant vers vous jusqu'à ce que l'aiguille soit dans la position la plus haute. Cuando termine, gire el volante hacia usted hasta que la aguja esté... -
Page 26: Boutonnière 1 Étape
Buttonholes one-step Boutonnière 1 étape Ojales en un paso Gently pull the buttonhole engaging lever down and push it to the back. Abaissez délicatement la manette de boutonnière, puis poussez le vers l'arrière. Jale con cuidado la palanca del ojal y empuje hacia atrás. -
Page 27: Surjeter Une Couture Ou Un Bord
Overedging a seam or edge Surjeter une couture ou un bord Puntada tipo Overlock Largeur du point Selector de ancho de puntada Needle position: Center Position de l'aiguille: centrale Selector de posición de la aguja: Centro Start with the Needle thread tension in Auto position. -
Page 28: Stretch Stitches
Stretch Stitches Points extensibles Puntadas Flexibles Largeur du point Selector de ancho de puntada Needle position: Center Position de l'aiguille: centrale Selector de posición de la aguja: Centro Start with the Needle thread tension in Auto position. Tension du fil d'aiguille Selector de tensión del hilo A U T Pattern selector dial... -
Page 29: Blind Hem Stitch
Adjusting Stretch Stitches Réglage pour les points extensibles Ajustando las puntadas flexibles Stretch stitches are stitches with a forward and reverse motion. For best results place a stabilizer under the fabric to assist in proper stitch formation. Always sew a test on a scrap of the fabric that you are using. -
Page 30: Couture À L'aiguille Jumellée Optionelle
A U T Pattern selector Sélecteur de point Selector de puntadas Optional twin needle Use Singer twin needles Style #2025. See your Singer retailer Aiguille double en option N'utilisez que des aiguilles Singer Type d'aiguille: #2025, Disponible dans votre magasin Singer Aguja doble opcional. - Page 31 Twin Needle Sewing with Optional Twin Needle Couture à l'aiguille jumellée optionnelle Coser con Aguja Doble (opcional) Change to the twin needle. Mettre en place l'aiguille jumellée Cambie a la aguja doble. Turn handwheel counter clockwise until the needle is in the highest position..
- Page 32 Twin Needle Sewing with Optional Twin Needle Couture à l'aiguille jumellée optionnelle Coser con Aguja Doble (opcional) Place one spool of thread on the vertical spool pin and the other on the horizontal spool pin. Placez une bobine de fil sur le porte- bobine vertical et une sur le porte- bobine horizontal.
- Page 33 Twin Needle Sewing with Optional Twin Needle Couture à l'aiguille jumellée optionnelle Coser con Aguja Doble (opcional) Pass one thread through the eye of the right needle, and then pass the second thread through the eye of the left needle. Pull 6” of both threads under the presser foot, and to the back of the machine.
-
Page 34: Maintenance
Maintenance Entretien Mantenimiento Cleaning the machine Nettoyage de la machine Limpieza de la máquina DO NOT remove the positioning plate (A). Ne retirez PAS la plaquette de positionnement (A). NUNCA remueva la placa de posición (A). Maintenance Entretien Mantenimiento Removing bobbin case Retirer le boîtier de canette Retirar la caja bobina Replacing bobbin... -
Page 35: Liste De Performances
Maintenance Maintenance Mantenimiento Performance checklist Thread balls up on Lift presser foot and re-thread the machine, holding thread firmly. the underside of the fabric Lower presser foot prior to sewing Needle does Is machine connected to electrical supply? not move Is the power and light switched on? Is speed control pedal connected? Is the bobbin winder spindle pushed to the right? -
Page 36: Guía De Solución De Problemas
Maintenance Entretien Mantenimiento Guía de solución de problemas La aguja no se mueve ¿Está el cable conectado a la clavija? ¿Está el interruptor encendido? ¿Está el controlador conectado? ¿Está el eje devanador a la derecha? La aguja se mueve pero ¿Tiene algún defecto la aguja? la puntada no se forma ¿Está... - Page 40 Printed in Brazil Printed in Brazil Imprimé au Brésil Impreso en Brasil Eng./ Fren./ Spa. Part Number / Pièce Nº. / Pieza Nº. 360102-023...
Need help?
Do you have a question about the Inspiration 4220 and is the answer not in the manual?
Questions and answers