Table of Contents
Advertisement
Advertisement
Table of Contents

Related Manuals for Doxie DX250

Summary of Contents for Doxie DX250
- Page 1 Model : DX250 User Manual ...
-
Page 2: Table Of Contents
Table of Contents Table of Contents Read This First ...........1 Important safety instructions ........1 Disclaimer ............2 Copyright ............2 Notes about copyrighted materials ......3 Disposal of this product..........3 Package Contents ..........3 Introduction ............5 Scanner Diagram ............5 Front View..............5 Rear View..............6 Indicator Lights ............7 Suitable and Unsuitable Original Types.....8 Orientation of the Original and Scanned Image..9... - Page 3 Table of Contents Care and Maintenance ........19 Cleaning the Scanner..........19 Cleaning the Outer Casing ..........19 Cleaning the Image Sensor ........... 19 Calibrating the Scanner ..........20 Storing the Scanner ............21 Battery maintenance ...........21 Frequently Asked Questions/Troubleshooting 22 Specifications............24...
-
Page 4: Read This First
Read This First Read This First Please read the following important safety instructions carefully before using this scanner. Failure to observe these instructions may result in personal injuries or damages to the scanner. Important safety instructions Always follow these basic safety precautions when using the scanner. -
Page 5: Disclaimer
Disclaimer Do not insert objects other than compatible memory cards into the memory card slot of this device. The metal contacts inside the slot can easily become damaged by foreign objects. This scanner contains a rechargeable built-in Li-Polymer battery. The battery should only be charged via the USB connection to a PC. -
Page 6: Notes About Copyrighted Materials
Package Contents Notes about copyrighted materials Avoid scanning and re-distributing copyrighted originals and images or those of unknown sources. Doing so may violate your local copyright laws and related regulations. This company cannot be made liable for the losses that may result from breaching the laws described above. - Page 7 Package Contents <Memo>...
-
Page 8: Introduction
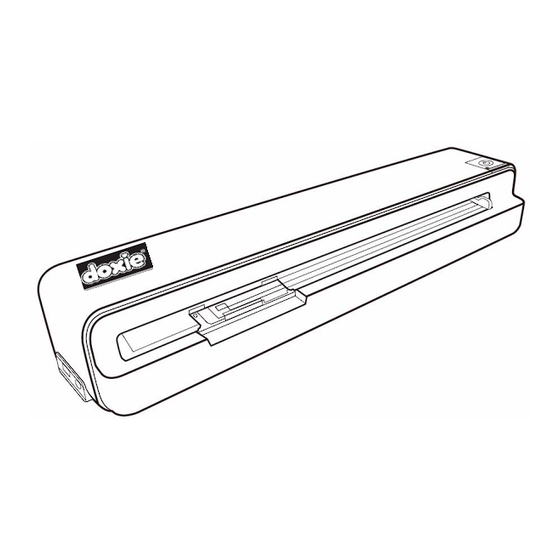
Introduction Introduction Scanner Diagram Front View No. Name Function/description • Press to power on the scanner. • When scanner power is on, press and release to change scanning resolution. • Press and hold for one second to power off the Power button scanner. -
Page 9: Rear View
Introduction Rear View No. Name Function/description USB socket For connecting a USB flash drive. Output slot The scanned original comes out from this slot. Accepts the following types of memory cards: SD/xD/MMC/ SD, xD, MMC and MS. Refer to "Supported MS card slot Memory Card Types"... -
Page 10: Indicator Lights
Introduction Indicator Lights Please see below for the indicator lighting patterns and the functions they represent. : Blinking slowly : Blinking rapidly : Steadily on : Off Power Status/card The battery is fully charged (when scanner power is on and connected to a computer) and is ready for use;... -
Page 11: Suitable And Unsuitable Original Types
Introduction • Paper jam. Press the Power button. The scanner will back out the original so you can remove the jammed original from the Feeding slot. (green) (color) • Calibration error. Please contact your nearest service center for help. No memory card, card full (free space below 10MB), card error, card locked or the file system is not supported. -
Page 12: Orientation Of The Original And Scanned Image
Introduction Orientation of the Original and Scanned Image Refer to the illustrations below for the relationship between the orientation of the original when scanning and that of the scanned image when displayed on the computer screen. Scanner Original Scanned image when displayed on-screen Scanner... -
Page 13: Using The Scanner
Using the Scanner Using the Scanner Preparation and Initial Setup 1. Connect the mini end of the USB cable (included with scanner) to the Mini USB socket on the scanner. 2. Power on your computer, and then connect the large end of the USB cable to a USB port on your computer to start charging the built-in battery of the scanner. -
Page 14: Power On The Scanner
Using the Scanner 11 Power on the Scanner 1. Press the Power button. The Power and Status/Card indicators blink. NOTE : For more information on the indicator lights, refer to "Indicator Lights" on page 7. 2. Wait until the Power indicator stops blinking and then goes off. -
Page 15: Using The Plastic Sheath
Using the Scanner Using the Plastic Sheath Always use the clear plastic sheath (included) when scanning photos to ensure the best scanning results. The sheath helps eliminate the possibility of de-focusing due to the uneven surface of curled photos. Curled photo Fuzzy areas that result from the uneven surface of the curled photo... -
Page 16: Scan An Original
Using the Scanner 13 Scan an Original 1. With the side to be scanned facing upward and in correct orientation (refer to "Orientation of the Original and Scanned Image" on page 9), place one edge of the original on the scanner and adjust the paper guide slide so that the original aligns against the left side of the feeding slot. - Page 17 Using the Scanner NOTE: • Always place the scanner on a flat surface for scanning. Do not hold the scanner while scanning. • Do not remove the memory card or USB flash drive (if connected) while the indicators are blinking. •...
-
Page 18: Automatic Image Cropping
Using the Scanner 15 Automatic Image Cropping This scanner has a built-in cropping function that detects and crops dark edges of an original during the scan process. See the illustration below. Scanning direction Scanned image Original Cropping size (as measured on the original) Scanning resolution 300dpi/600dpi (when the original’s size is larger... -
Page 19: Connecting The Scanner To A Computer
Using the Scanner Connecting the Scanner to a Computer By connecting the scanner to a computer, you can access the scanned images on the memory card, USB flash drive and scanner’s internal memory directly, or use the scanner as a memory card reader, so that you can freely copy, paste or delete files using the computer. - Page 20 Using the Scanner 17 4. The scanner will be recognized by the computer as removable disks. When the Status/Card indicator stops blinking, you are ready to view or edit the files. NOTE: Do not remove the memory card or USB flash drive while the computer is accessing the files on them.
-
Page 21: More Information
Using the Scanner For Macintosh Users: a. Click and drag the volume icon to Trash. b. Disconnect the scanner from your computer. More Information File naming and storage rules • If the memory card is used with the Memory card scanner for the first time, the scanner creates a folder named “FotoIMG”... -
Page 22: Care And Maintenance
Care and Maintenance 19 Care and Maintenance Cleaning the Scanner In order to maintain the scanned image quality and prevent dust accumulation, it is recommended that you clean the scanner (outer casing and image sensor inside the scanner) approximately every 50-100 scans, or if vertical lines or stripes appear on the scanned image. -
Page 23: Calibrating The Scanner
Care and Maintenance 3. Gently slide the sensor cleaning swab back and forth from one end of the output slot to the other five or six times consecutively. NOTE : Do not apply too much force on the swab. 4. Remove the sensor cleaning swab from the slot, and store it in a safe place and protect it from dust. -
Page 24: Storing The Scanner
Care and Maintenance 21 Storing the Scanner If the scanner will not be used for a prolonged period of time, follow the instructions below to store the scanner for future use. 1. Disconnect the scanner from power supply. 2. Place the scanner and power adapter in a box or bag to keep them from accumulation of dust. -
Page 25: Frequently Asked Questions/Troubleshooting
Frequently Asked Questions/Troubleshooting Frequently Asked Questions/Troubleshooting Problem: There are strange lines on the scanned image, or the image is not clear. Solution: Please ensure the following: • Are there scratches on the original, or is the original clean? Remove any stains or dust from the original before scanning. - Page 26 Frequently Asked Questions/Troubleshooting 23 Problem: The scanner feels warm to the touch. Solution: It is normal for the scanner to emit a small amount of heat (around 30-45 C) after prolonged use. However, if there are strange odors coming from the scanner or the scanner feels hot to the touch, disconnect the scanner immediately from the computer.
-
Page 27: Specifications
Specifications Specifications Document feeding Sheet-fed type (single-pass) • 300 dpi (default setting) Resolution • 600 dpi 59 (L) x 269 (W) x 44 (H) mm (scanner Dimensions (approx. value) only) Weight (approx. value) 396g (scanner only) Refer to "Suitable and Unsuitable Original Supported original types Types"... - Page 28 Mini photo scanner is to make print photos/negative/slide easy to digitize and share and furthermore the elderly or children with mirror instruction are easy to operate it simply and easily and also extend to A4/Letter size to cover most of print photos and the support of negative/slide scanning.
- Page 29 —Reorient or relocate the receiving antenna. —Increase the separation between the equipment and receiver. —Connect the equipment into an outlet on a circuit different from that to which the receiver is connected. —Consult the dealer or an experienced radio/TV technician for help. FCC RF Radiation Exposure Statement: 1.
Need help?
Do you have a question about the DX250 and is the answer not in the manual?
Questions and answers