Fantech DBF110 Installation Instructions Manual
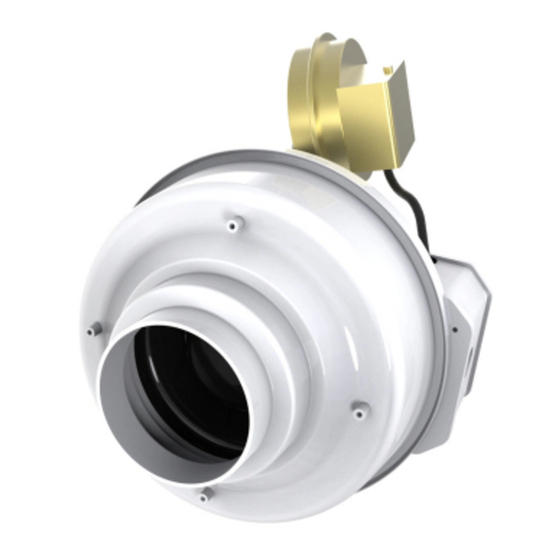
Dryer exhaust booster system
Hide thumbs
Also See for DBF110:
- Installation instructions manual (13 pages) ,
- Installation and operation manual (17 pages) ,
- Installation instructions (4 pages)
Table of Contents
Advertisement
Available languages
Available languages
Quick Links
Advertisement
Table of Contents

Subscribe to Our Youtube Channel
Related Manuals for Fantech DBF110


Summary of Contents for Fantech DBF110
- Page 1 Your Ventilation Solutions Company DBF110 DRYER EXHAUST BOOSTER SYSTEM INSTALLATION INSTRUCTIONS DISPOSITIF DBF110 D’AMPLIFICATION DU SYSTÈME DE VENTILATION DES SÉCHOIRS À LINGE INSTRUCTIONS D’INSTALLATION SISTEMA DE REFUERZO DE ESCAPE DE LA SECADORA DBF110 INSTRUCCIONES DE INSTALACION...
-
Page 2: Dimensional Data
Pressure Sensor Switch Operation Fantech’s DBF110 is equipped with Fantech's Patented DB10 pressure switch. The DB10 is a positive pressure sensing switch which recognizes dryer operation and activates the booster fan from an independent electrical circuit. -
Page 3: Electrical Connection
Illustration 2 Step 2. Mount Bracket Correct Mounting of Diaphragm Switch Using the wood screws provided, attach the mounting bracket to a Horizontal Vertical Angled support beam at the selected location. Bracket is provided with grom- mets in order to isolate any vibration and prevent the transmission of Switch mounted sound through the structure. -
Page 4: Wiring Procedure
5. Verify that the pressure switch diaphragm is vertical as shown in d. Turn on power to fan. Illustration 2 of these instructions. If the diaphragm is not vertical, 9. If fan fails to start, please consult Fantech for additional technical support. -
Page 5: Installation Du Ventilateur
Le DBF110 est equipepé avec le mano-contact DB10 breveté de Fantech. Le DB10 de Fantech est un rupteur de détection de pression positive qui identifie le fonctionnement du séchoir et active le ventilateur d’amplification à partir d’un circuit électrique indépendant. Cela élimine non seulement les connexions tran- DBF110 sitant par les circuits du séchoir, ce qui peut en annuler la garantie, mais aussi... -
Page 6: Branchements Électriques
Illustration 2 2ème Étape. Le support de montage À l’aide des vis à bois fournies, montez le support de montage sur une des Bon positionnement diaphragme du rupteur poutres maîtresses présentes à l’emplacement choisi. Le support est fourni équipé de joints d’étanchéité servant à isoler toutes les éventuelles vibrations et Horizontal Vertical Incliné... -
Page 7: Garantie Et Entretien
5. Vérifiez que le diaphragme du rupteur de pression est bien positionné verti- ci-dessous. calement comme illustré à Illustration 2 de ces instructions. Si le d. Appliquez le courant au ventilateur. 9. Si le ventilateur ne démarre toujours pas, veuillez consulter Fantech pour l’obtention d’une assistance technique plus poussée... - Page 8 Operación del Interruptor Sensor de Presión El DBF110 de Fantech está equipado con un interruptor de presión DB10 paten- tado por FanTech. El DB10 de Fantech es un interruptor sensor de presión pos- itiva que capta la operación de la secadora y activa el ventilador de refuerzo mediante un circuito eléctrico independiente.
-
Page 9: Conexiones Eléctricas
Paso 2. Soporte para Montaje Ilustración 2 Utilice los tornillos tirafondo para fijar el soporte de montaje a una viga en el sitio Posición Correcta del Diafragma Interruptor seleccionado. El soporte está provisto de anillos protectores para aislar cualquier vibración y evitar la transmisión de ruidos a través de la estructura. Tenga cuida- do de no apretar los tornillos en exceso. -
Page 10: Análisis De Fallas
Ilustración 2 de estas instrucciones. Si no se encuentra en posición 9. Si el ventilador aún no arranca, diríjase de nuevo a Fantech para la consulta vertical, reoriente el interruptor de presión y vuelva a ensayar la operación... - Page 11 Tales productos se deben devolver al punto de com- TECH, accompagné de sa facture et identifié par un numéro RMA. pra o a la fábrica de FANTECH, junto con la Factura de Venta y su debida identi- ficación con el número RMA.
- Page 12 Product may need to be returned quential or incidental damages, loss of property, revenues, or profit, to the FANTECH factory, together with a copy of the bill of sale and or costs of removal, installation or reinstallation, for any breach of identified with RMA number.
Need help?
Do you have a question about the DBF110 and is the answer not in the manual?
Questions and answers