Table of Contents
Advertisement
Advertisement
Table of Contents

Related Manuals for Arcserve 7000 Series


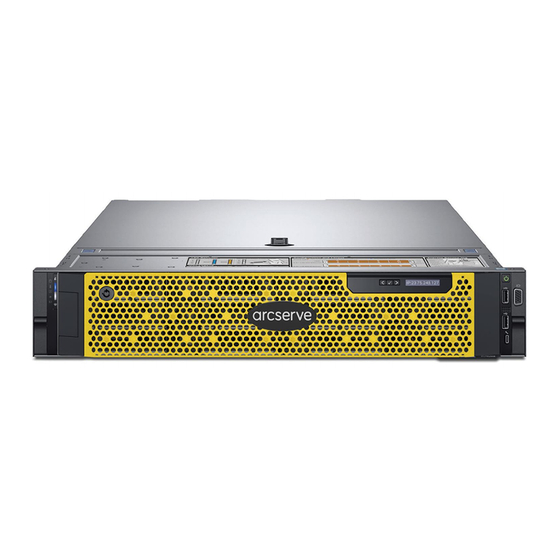
Summary of Contents for Arcserve 7000 Series
- Page 1 Arcserve® Appliance User Guide Version 6.5...
- Page 2 Should the license terminate for any reason, it is your responsibility to certify in writing to Arcserve that all copies and partial copies of the Documentation have been returned to Arcserve or destroyed.
- Page 3 Contact Arcserve Support The Arcserve Support team offers a rich set of resources for resolving your tech- nical issues and provides easy access to important product information. Contact Support With Arcserve Support: You can get in direct touch with the same library of information that is shared internally by our Arcserve Support experts.
- Page 4 Returns are subject to a re-stocking fee of 10%. Exceptions are: 1) If an order was fulfilled incorrectly, Arcserve will accept RMA and provide full credit; 2) If a defect- ive item is returned within 30 days, Arcserve will accept RMA and provide full credit;...
-
Page 5: Table Of Contents
Chapter 2: Introducing the Arcserve Appliance Introduction Arcserve Unified Data Protection Arcserve UDP Agent (Linux) Arcserve Replication and High Availability (Arcserve RHA) Arcserve Backup Safety Precautions What is Included in the Box What is Included in the Box of Appliance 8000 Series... - Page 6 Upgrade the Arcserve Appliance Used as Arcserve UDP Console and RPS Upgrade the Arcserve Appliance Used as Arcserve UDP RPS Upgrade Steps When Two or More Arcserve Appliance Are Used in the Environment Upgrade the Arcserve UDP Linux Agent on the Arcserve Appliance...
- Page 7 Chapter 8: Restoring or Repairing the Arcserve Appliance Apply Arcserve UDP Factory Reset Using Boot Option in 7000-8000 Series Appliance139 Apply Arcserve UDP Factory Reset Using Boot Option in 9012-9504DR Series Appli- ance Clear Configuration and Apply Appliance Factory Reset...
- Page 8 Default Time Zone on the Appliance Licenses Error even when the licenses are available Arcserve UDP Console Shows Error while adding Remote Console in Replicate to a Remotely Managed RPS Task Unable to Perform VSB Task Using Another Appliance as Monitor...
-
Page 9: Chapter 1: About Arcserve Appliance Documentation
Chapter 1: About Arcserve Appliance Documentation Arcserve Appliance User Guide helps you understand how to use Arcserve Appli- ance. To understand about Arcserve Appliance, view Introduction. Rest of the sec- tions help you install and use Arcserve Appliance. This section contains the following topics:... -
Page 10: Language Support
This release is available in the following languages: English Chinese (Simplified) Chinese (Traditional) French German Italian Japanese Portuguese (Brazil) Spanish 2 Arcserve Appliance User Guide... -
Page 11: Product Documentation
The Arcserve UDP Knowledge Center consists of the following documentation: Arcserve UDP Solutions Guide Provides detailed information on how to use the Arcserve UDP solution in a centrally-managed Console environment. This guide includes such information as how to install and configure the solution, how to protect and restore your data, how to get reports, and how to manage Arcserve High Availability. -
Page 13: Chapter 2: Introducing The Arcserve Appliance
Chapter 2: Introducing the Arcserve Appliance This section contains the following topics: Introduction Safety Precautions What is Included in the Box What is Not Included in the Box Available Models Controls and Indicators Ports Used by the Appliance Chapter 2: Introducing the Arcserve Appliance 5... -
Page 14: Introduction
Introduction Introduction Arcserve Appliance is the first complete and most cost-effective data protection appliance, featuring Assured Recovery™. Each Arcserve Appliance is a self-con- tained, "set and forget" backup and recovery solution. Architected with cloud-native capabilities, its unmatched ease of deployment and usability combine with a broad set of features such as global source-based deduplication, multi-site replication, tape support, and automated data recovery capabilities. The Arcserve Appliance... -
Page 15: Arcserve Unified Data Protection
Introduction Arcserve Unified Data Protection The Arcserve UDP software is a comprehensive solution to protect complex IT envir- onments. The solution protects your data residing in various types of nodes such as Windows, Linux, and virtual machines on VMware ESX Servers or Microsoft Hyper- V Servers. -
Page 16: Arcserve Udp Agent (Linux)
Common Internet File System (CIFS) share, in the backup source node. The latest version of Arcserve UDP Agent (Linux) is preinstalled in a virtual machine within the appliance. This virtual machine becomes the Linux Backup Server. Arc- serve UDP Agent (Linux) is installed at the default installation path in the Arcserve Appliance. -
Page 17: Arcserve Replication And High Availability (Arcserve Rha)
Compatibility Matrix. Arcserve RHA lets you replicate data to a local or remote Server, helping you to recover that data if you face a Server crash or site disaster. You may switch your users to the replica Server manually or automatically if you have licensed High Availability. -
Page 18: Arcserve Backup
Arcserve Backup is installed at "C:\Program Files (x86)\Arcserve" on your computer after you run InstallASBU.bat. The components installed in the Arcserve Appliance lets you back up the destination of Arcserve UDP to a tape. For more information about supported operating systems, see Compatibility Matrix. -
Page 19: Safety Precautions
Safety Precautions For your safety, please read and follow all instructions before attempting to unpack, connect, install, power on, or operate an Arcserve Appliance. Failure to adhere to the safety precautions can result in personal injury, equipment damage, or malfunction. -
Page 20: What Is Included In The Box
What is Included in the Box What is Included in the Box The section describes what is included in the box of following Appliance series: 8000 Series 9000 Series 12 Arcserve Appliance User Guide... -
Page 21: What Is Included In The Box Of Appliance 8000 Series
What is Included in the Box of Appliance 8000 Series The following items are included in the box: Arcserve Appliance (serial number label is located on rear side of appliance) Power cable: 1 Network Cables: 1 red, 1 blue (3-feet long each) -
Page 22: What Is Included In The Box Of Appliance 9000 Series
What is Included in the Box What is Included in the Box of Appliance 9000 Series Arcserve Appliance 9000 series contains two boxes: R440 and R740. Below list provides included items in both the boxes. The following items are included in the in R440 Accessory box:... -
Page 23: What Is Not Included In The Box
What is Not Included in the Box The following items are not included in the box and may be needed for installation and configuration of the appliance: Monitor Keyboard External Storage Device (if needed) Chapter 2: Introducing the Arcserve Appliance 15... -
Page 24: Available Models
Available Models Available Models The Arcserve Appliance 7000 series, 8000 series and 9000 series are available in a variety of different models designed to meet your specific needs: Models 7100 - 7300v Models 7400 - 7600v Models 8100 - 8400... -
Page 25: Models 7100-7300V
4 x 3 TB SAS 4 x 3 TB SAS and RAID con- (RAID 5) (RAID 5) (RAID 5) (RAID 5) (RAID 5) figuration External Tape Backup Con- 1 x PASS nectivity (SAS, SATA, FC) Chapter 2: Introducing the Arcserve Appliance 17... - Page 26 ** On "V" models, space available for backup is reduced by the size of virtual standby VMs. ***Estimated capacity assuming a typical 3:1 deduplication and compression ratio. Actual backup capacity may vary significantly, based upon data type, backup type, schedule, and more. 18 Arcserve Appliance User Guide...
-
Page 27: Models 7400-7600V
(SAS, SATA, FC) Total system RAM 64 GB 96 GB 64 GB 96 GB 128 GB 192 GB SSD drive 240 GB 240 GB SSD 480 GB 480 GB 480 GB 480 GB Chapter 2: Introducing the Arcserve Appliance 19... - Page 28 ** On "V" models, space available for backup is reduced by the size of virtual standby VMs. ***Estimated capacity assuming a typical 3:1 deduplication and compression ratio. Actual backup capacity may vary significantly, based upon data type, backup type, schedule, and more. 20 Arcserve Appliance User Guide...
-
Page 29: Models 8100-8400
Actual backup capacity may vary significantly, based upon data type, backup type, backup schedule, etc. **Arcserve Appliance has additional RAM in order to host Virtual Standby / Instant VM recovery on the appliances. VM memory allocation should be sized based on... - Page 30 Available Models guest OS workload. Arcserve also provides the option to add additional RAM to the standard appliance configuration based on customer needs. 22 Arcserve Appliance User Guide...
-
Page 31: Models 9012 - 9504Dr
12 x 8 10 x 12 x 16 x 12 Drives 12 TB 12 TB Broad- On-Board Base PCIe Broadcom 5720 QP 1Gb Network Daughter Card Broadcom Cards SAS 12Gbps HBA External Controller Chapter 2: Introducing the Arcserve Appliance 23... - Page 32 Port FC Dual-Port 10G SFP+ Dual-Port FC 16G HBA Dual, Hot- Plug , Powe Sup- Redundant Dual, Hot-Plug , Redundant Power Supply (1+1) , 750 W plies Power Sup- ply (1+1) , 550 W iDRAC Enterprise 24 Arcserve Appliance User Guide...
-
Page 33: Controls And Indicators
Controls and Indicators Controls and Indicators The Arcserve Appliance contains several controls and indicators (LEDs) on the front and rear panels and on each drive carrier. These controls and indicators provide the capability to control various functions and a quick-view reference of the status... -
Page 34: Front Panel 7100-7300V
Controls and Indicators Front Panel 7100-7300v The front panel of the Arcserve Appliance contains control panel buttons, control panel LEDs, and drive carrier LEDs. The following table describes these items. Number Control / Indicator Description Used to turn on and off power from the power supply to the appliance components. - Page 35 *Solid Red : Indicates failure of the corresponding hard drive. With the Arcserve Appliance, if one hard drive fails, the rest of the drives will kick in immediately to ensure no Hard Drive (HDD) LED data is lost and the appliance continues to work nor- mally.
-
Page 36: Front Panel 7400-7600V
Controls and Indicators Front Panel 7400-7600v The front panel of the Arcserve Appliance contains control panel buttons, control panel LEDs, and drive carrier LEDs. The following table describes these items. Number Control/Indicator Description Used to turn on and off power from the power supply to the appliance components. - Page 37 *Solid Red : Indicates failure of the corresponding hard drive. With the Arcserve Appliance, if one hard drive fails, the rest Hard Drive (HDD) of the drives will kick in immediately to ensure no data is lost and the appliance continues to work normally. There-...
-
Page 38: Front Panel 8100-8200
Controls and Indicators Front Panel 8100-8200 The front panel of the Arcserve Appliance 8100-8200 contains control panel but- tons, control panel LEDs, and drive carrier LEDs. The following table describes these items: Control/Indicator Description Used to turn on and off power from the power supply to the appli- ance components. - Page 39 Blinking Green : Indicates activity on the corresponding drive. *Solid Red : Indicates failure of the corresponding hard drive. With the Arcserve Appliance, if one hard drive fails, the rest of the drives will kick in immediately to ensure no data is lost and the appli- Hard Drive (HDD) ance continues to work normally.
-
Page 40: Front Panel 8300-8400
Controls and Indicators Front Panel 8300-8400 The front panel of the Arcserve Appliance 8300-8400 contains control panel but- tons, control panel LEDs, and drive carrier LEDs. The following table describes these items: Control/Indicator Description Used to turn on and off power from the power supply to the appli- ance components. - Page 41 Blinking Green : Indicates activity on the corresponding drive. *Solid Red : Indicates failure of the corresponding hard drive. With the Arcserve Appliance, if one hard drive fails, the rest of the drives will kick in immediately to ensure no data is lost and the appli- Hard Drive (HDD) ance continues to work normally.
-
Page 42: Front Panel 9012-9048
Controls and Indicators Front Panel 9012-9048 The front panel of the Arcserve Appliance contains control panel buttons, control panel LEDs, and drive carrier LEDs. The following table describes these items: Num- Control / Indicator Icon Description Contains the system health and system ID, status LED, and the iDRAC Quick Sync 2 (wireless) indicator. - Page 43 Service Tag, NIC, MAC address, Information Tag and so on. If you have opted for the secure default access to iDRAC, the Inform- ation tag also contains the iDRAC secure default password. Chapter 2: Introducing the Arcserve Appliance 35...
-
Page 44: Front Panel 9072 Dr - 9504 Dr
Controls and Indicators Front Panel 9072 DR - 9504 DR The front panel of the Arcserve Appliance contains control panel buttons, control panel LEDs, and drive carrier LEDs. The following table describes these items: Number Control / Indicator Icon Description... -
Page 45: Rear Panel 7100-7300V
Used to connect USB 2.0 type devices to the appliance. USB 3.0 (blue) Used to connect USB 3.0 type devices to the appliance. Network Data I/O Used to transfer network data to and from the appliance. Chapter 2: Introducing the Arcserve Appliance 37... - Page 46 ((ETH0 for Network 1) Network Data I/O Used to transfer network data to and from the appliance. Port 2 (ETH1 for Network 2) VGA Connector Used to connect a monitor to the appliance (if needed). 38 Arcserve Appliance User Guide...
-
Page 47: Rear Panel 7400-7600V
(SAS port for tape easy transporting from one location to another. drive) Serial Number Label A unique serial number that is assigned to the appliance. Chapter 2: Introducing the Arcserve Appliance 39... - Page 48 (Tap Auto- easy transporting from one location to another. loader/Library) Note : This port is present in the operating system as LSI LSI SAS 9212 - 4i4e Adapter SAS2 2008 Falcon. 40 Arcserve Appliance User Guide...
-
Page 49: Rear Panel 8100-8200
USB 2.0 Port 2 (Black) USB 3.0 Port 3 (Blue) USB 3.0 Port 4 (Blue) Network Data I/O Port 1 (ETH0 for Network 1) Network Data I/O Port 2 (ETH1 for Network 2) Chapter 2: Introducing the Arcserve Appliance 41... - Page 50 Controls and Indicators VGA Port External Storage Device Port (SAS port for tape drive option) 42 Arcserve Appliance User Guide...
-
Page 51: Rear Panel 8300-8400
Power Supply Module #2 Power Good LED Power Supply Module #2 AC Receptacle Power Supply Module #2 Fan COM Port USB Port 1 (generation 2) USB Port 2 (generation 2) USB Port 3 (generation 3) Chapter 2: Introducing the Arcserve Appliance 43... - Page 52 Controls and Indicators USB Port 4 (generation 3) ETH0 (Network 1) ETH1 (Network 2) VGA Port (Monitor) UID LED 44 Arcserve Appliance User Guide...
-
Page 53: Rear Panel 9012-9048
Controls and Indicators Rear Panel 9012-9048 The rear panel of the Arcserve Appliance contains the power supplies, cable con- nections, and ports for the appliance. The following table describes these items: Number Control / Indicator Icon Description Use the serial port to connect a serial device to Serial port the system. - Page 54 ID button is enabled in the iDRAC setup. If the system stops responding during POST, press and hold the system ID but- ton (for more than five seconds) to enter the BIOS progress mode. 46 Arcserve Appliance User Guide...
-
Page 55: Rear Panel 9072Dr-9504Dr
Controls and Indicators Rear Panel 9072DR-9504DR The rear panel of the Arcserve Appliance contains the power supplies, cable con- nections, and ports for the appliance. The following table describes these items: Number Control / Indicator Icon Description The PCIe expansion card slot (riser 1) con-... - Page 56 Press the button to identify a system in a System identification rack by turning on the system ID button. button You can also use the system ID button to reset iDRAC and to access BIOS using the step through mode. 48 Arcserve Appliance User Guide...
-
Page 57: Ports Used By The Appliance
Ports Used by the Appliance Ports Used by the Appliance The following topics provide information about ports that are used by Arcserve UDP, Arcserve Backup, and the Appliance for Linux Support: Arcserve UDP Arcserve Backup Appliance for Linux Support Chapter 2: Introducing the Arcserve Appliance 49... -
Page 58: Arcserve Udp
Ports Used by the Appliance Arcserve UDP This section contains the following topics: Components installed on Microsoft Windows Components installed on Linux Production node protected by UDP Linux remotely 50 Arcserve Appliance User Guide... -
Page 59: Components Installed On Microsoft Windows
HATransServer.exe Standby tasks Agent in the proxy mode. Reserved for Arcserve UDP RPS Global Deduplication 500- Arcserve Data Store Ser- GDDServer.exe vice (GDD). 5060 Server One Arcserve UDP GDD data store will use Chapter 2: Introducing the Arcserve Appliance 51... - Page 60 Arcserve Backup Primary Server syn- chronize data. To shut down Tomcat that is 8006 used by the Arcserve UDP console. Specifies the default HTTP/HTTPS Arcserve com- 8014 TCP Tomcat7.exe munication Console port between remote man- 52 Arcserve Appliance User Guide...
- Page 61 UDP Server and Arcserve Arcserve UDP consoles. 8014 TCP httpd.exe *Specifies the Server default shared port and the only port you must open when you use the Arcserve UDP Server as the replication destination. Chapter 2: Introducing the Arcserve Appliance 53...
- Page 62 Arcserve UDP Server. Specifies the Arcserve default 8015 TCP Tomcat7.exe HTTP/HTTPS Console com- munication port between remote man- agement con- soles and the Arcserve UDP Agent. Note : You can modify the default com- munication 54 Arcserve Appliance User Guide...
- Page 63 Server Note : The port cannot be cus- tomized and can be ignored for the firewall setting. To shutdown Tomcat that is CA.ARCserve.CommunicationFoundation. 1800- used by the Arcserve UDP WindowsService.exe Server or Agent. Chapter 2: Introducing the Arcserve Appliance 55...
-
Page 64: Components Installed On Linux
Arcserve UDP Linux UDP agent for Linux. This port is required for both incoming and outgoing communications. Used by Tomcat, can be Arcserve 18005 TCP Java ignored for firewall set- UDP Linux tings. 56 Arcserve Appliance User Guide... -
Page 65: Node Protected By Udp Linux Remotely
*Port sharing is supported for replication jobs. All data on different ports can be forwarded to port 8014 (default port for the Arcserve UDP Server, which can be modified during install- ation). When a replication job runs between two recovery point Servers across WAN, only port 8014 needs to be opened. -
Page 66: Arcserve Backup
DBEng.exe base Engine Arcserve 7854 TCP CASportmapper Catirpc.exe PortMapper 4152- Arcserve Dis- CASDiscovery casdscsvc.exe covery Service 4152- Arcserve Dis- CASDiscovery casdscsvc.exe covery Service 9000- For other Arcserve MS RPC services that 9500 use dynamic ports 58 Arcserve Appliance User Guide... -
Page 67: Appliance For Linux Support
Linux backup server in order to backup other Linux node to cloud using 50003 port. NAT port redirection, redirects 50004 on appliance 50004 TCP to Linux backup server in order to backup other Linux node to cloud using 50004 port. Chapter 2: Introducing the Arcserve Appliance 59... -
Page 68: How To Add Ports To Centos 6.6 X64 Firewall
Ports Used by the Appliance How to Add Ports to CentOS 6.6 x64 Firewall If you upgrade the Arcserve Appliance pre-installed Linux Backup Server to v6.5 Update 2, then after the upgrade you need to manually add some ports to Linux that has CentOS 6.6 x64 firewall. - Page 69 -A FORWARD -j REJECT --reject-with icmp-host-prohibited COMMIT 3. Save the iptables file. 4. Restart the iptables service using the following command: /etc/init.d/iptables restart You have added the ports to CentOS 6.6 x64 firewall successfully. Chapter 2: Introducing the Arcserve Appliance 61...
-
Page 70: Chapter 3: Installing The Arcserve Appliance
Chapter 3: Installing the Arcserve Appliance This section contains the following topics: How to Install Arcserve Backup r17.5 SP1 How to Install 8100-8200 Series Appliance How to Install 8300-8400 Series Appliance How to Install 9012-9048 Series Appliance How to Install 9072-9504DR Series Appliance... -
Page 71: How To Install Arcserve Backup R17.5 Sp1
How to Install Arcserve Backup r17.5 SP1 How to Install Arcserve Backup r17.5 SP1 Arcserve Backup r17.5 SP1 is not pre-installed on the appliance. You can install Arc- serve Backup r17.5 SP1 using a script called “InstallASBU.bat” located on your desktop. -
Page 72: How To Install 8100-8200 Series Appliance
How to Install 8100-8200 Series Appliance The appliance is intended for installation in restricted areas only. Only qualified per- sonnel should perform Initial setup and maintenance. For the complete installation process, see Appliance Installation of 8100-8200. 64 Arcserve Appliance User Guide... -
Page 73: How To Install 8300-8400 Series Appliance
How to Install 9072-9504DR Series Appliance The appliance is intended for installation in restricted areas only. Only qualified per- sonnel should perform Initial setup and maintenance. For the complete installation process, see Appliance Installation of 9072-9504DR. Chapter 3: Installing the Arcserve Appliance 65... -
Page 74: Chapter 4: Upgrading Arcserve Udp On The Appliance
Chapter 4: Upgrading Arcserve UDP on the Appliance This section contains the following topics: How to Apply a License After Upgrading Arcserve Software Upgrade Sequence on Arcserve Appliance Upgrade Sequence for UDP Console, RPS, and Agent Chapter 4: Upgrading Arcserve UDP on the Appliance 66... -
Page 75: How To Apply A License After Upgrading Arcserve Software
After upgrading Arcserve UDP to v6.5 or upgrading Arcserve Backup to r17.5, the original license key on the Arcserve Appliance will not work. To obtain the new license keys for Arcserve Unified Data Protection v6.5 and Arcserve Backup r17.5, contact your account representative. -
Page 76: Upgrade Sequence On Arcserve Appliance
Upgrade Sequence on Arcserve Appliance Upgrade Sequence on Arcserve Appliance The upgrade from Arcserve Appliance v5.0 to Arcserve UDP v6.5 could involve one of the following sequences: Upgrade Arcserve UDP Upgrade the Arcserve Appliance Used as Arcserve Console and RPS... -
Page 77: Upgrade The Arcserve Appliance Used As Arcserve Udp Console And Rps
Upgrade Sequence on Arcserve Appliance Upgrade the Arcserve Appliance Used as Arcserve UDP Console and RPS Upgrade this Arcserve Appliance, then follow up the upgrade sequence described to upgrade the environment. 69 Arcserve Appliance User Guide... -
Page 78: Upgrade The Arcserve Appliance Used As Arcserve Udp Rps
Upgrade Sequence on Arcserve Appliance Upgrade the Arcserve Appliance Used as Arcserve UDP RPS Upgrade the complete productive environment. For details, refer to the upgrade sequence. Chapter 4: Upgrading Arcserve UDP on the Appliance 70... -
Page 79: Upgrade Steps When Two Or More Arcserve Appliance Are Used In The Environment
Upgrade Sequence on Arcserve Appliance Upgrade Steps When Two or More Arcserve Appli- ance Are Used in the Environment Upgrade the whole product environment. For details, refer to upgrade sequence. If you see warning as displayed below when you add an Appliance as RPS from... -
Page 80: Upgrade The Arcserve Udp Linux Agent On The Arcserve Appliance
Upgrade the Arcserve UDP Linux Agent on the Arc- serve Appliance Follow these steps: 1. Upgrade the Arcserve UDP Console that manages the Linux Backup Server envir- onment. 2. Upgrade the Linux Backup Server on the Arcserve Appliance. For more information, see Arcserve Unified Data Protection Agent for Linux Online Help. -
Page 81: Upgrade The Arcserve Backup On The Arcserve Appliance
Upgrade Sequence on Arcserve Appliance Upgrade the Arcserve Backup on the Arcserve Appli- ance Refer to the Arcserve Backup Implementation Guide to complete upgrade on the Arcserve Appliance. 73 Arcserve Appliance User Guide... -
Page 82: Upgrade Sequence For Udp Console, Rps, And Agent
4. Upgrade Arcserve UDP Agentless Proxy, some Agents in Data Center. 5. Upgrade Arcserve UDP RPS (Remote site). 6. Upgrade Arcserve UDP Agentless Proxy and some Agents at the remote site. Note: Repeat Step 5 and 6 for each remote location. -
Page 83: Chapter 5: Configuring The Arcserve Appliance
Chapter 5: Configuring the Arcserve Appliance This section contains the following topics: How to Configure Network Settings for Arcserve Appliance How to Set Up the Arcserve Appliance Configure Arcserve Appliance as Gateway Chapter 5: Configuring the Arcserve Appliance 75... -
Page 84: How To Configure Network Settings For Arcserve Appliance
How to Configure Network Settings for Arcserve Appli- ance To manage the Arcserve Appliance, the first step is to have the appliance in your network. For that, you need to assign a hostname to the appliance and then con- figure network ports. - Page 85 After you reboot the appliance, you can access the appliance from any other machine using the URL - https://<hostname>:8015. 4. Click Save. The following dialog opens. By default, Arcserve UDP discovers all network con- nections in a network. If some connections are not assigned, then manually edit and specify the connection details.
- Page 86 How to Configure Network Settings for Arcserve Appliance 6. To edit a network connection, click Edit from the Network Connections box. 78 Arcserve Appliance User Guide...
- Page 87 How to Configure Network Settings for Arcserve Appliance The Network Connection dialog opens. 7. Modify the IP address, subnet mask, and default gateway values as required and click Save. Note: Optionally, you can also modify the hostname, domain, date, and time.
- Page 88 How to Configure Network Settings for Arcserve Appliance 10. When the appliance configuration screen reopens, click Launch Wizard. 80 Arcserve Appliance User Guide...
-
Page 89: How To Set Up The Arcserve Appliance
The backup destination is the appliance Server. Note: All the steps on the Arcserve Appliance Configuartion wizard are optional, you can skip and directly open the UDP console and create plans. - Page 90 How to Set Up the Arcserve Appliance Note: As the data store is encrypted, you must specify an encryption password. 4. Enter and confirm the encryption password for this data store. 5. Click Next. The Email and Alert dialog opens. You can define the email Server that is used to send alerts and the recipients who would get the alerts.
- Page 91 How to Set Up the Arcserve Appliance 6. Specify the following email and alert details: Service Specifies the email services such as Google Mail, Yahoo Mail, Live Mail, or Other. Email Server Chapter 5: Configuring the Arcserve Appliance 83...
- Page 92 How to Set Up the Arcserve Appliance Specifies the email Server address. For example, for Google Server email, specify smtp.gmail.com. Port Species the email Server port number. Requires Authentication Specifies whether the email Server requires authentication. If yes, spe- cify the account name and password for authentication.
- Page 93 Server (RPS). For more information on a remotely-managed RPS, see Arcserve UDP Solutions Guide. Arcserve UDP Console URL Specifies the URL of the remote Arcserve UDP console. Username and Password Specifies the username and password to connect to the remote console.
- Page 94 How to Set Up the Arcserve Appliance Note: If you do not want to create basic plans using the wizard, perform the fol- lowing steps: a. Click Skip Plan Creation. The Next Steps dialog opens. b. Click Finish to open the UDP console and create plans.
- Page 95 14. Enter the following schedule: Arcserve UDP agent install or upgrade schedule: The latest version of the Arcserve UDP agent is installed on source nodes that do not have the agent installed. Any previous agent installations is upgraded to the latest version.
- Page 96 The Next Steps dialog opens. You have successfully completed the configuration and you are now ready to work in the Arcserve UDP Console. You can add more nodes to protect, cus- tomize plans with features such as virtual standby, and add more destinations by including Recovery Point Servers and Data Stores.
- Page 97 How to Set Up the Arcserve Appliance 18. Click Finish to exit the wizard and open the Arcserve UDP Console. Chapter 5: Configuring the Arcserve Appliance 89...
-
Page 98: Configure Arcserve Appliance As Gateway
Sites. 4. Click Add a Site. 5. Follow the instructions provided in the Add a Site wizard to install Arcserve UDP Remote Management Gateway on the Arcserve Appliance. Note: After installing Arcserve UDP Remote Management Gateway on the Arcserve Appliance, clicking Launch Wizard on the Arcserve Appliance wizard does not launch the Arcserve UDP Console. -
Page 99: Chapter 6: Working With Arcserve Appliance
Chapter 6: Working with Arcserve Appliance Using Arcserve Appliance, you can create backup plans for Windows, Linux, and vir- tual machines. You can also write data to a tape device and create a virtual standby machine. This section contains the following topics:... -
Page 100: Activate Arcserve Product On The Appliance
Activate Arcserve Product on the Appliance Activate Arcserve Product on the Appliance For activating Arcserve product on the Appliance, see Arcserve Product Licensing Online Help. 92 Arcserve Appliance User Guide... -
Page 101: Create A Plan Using Arcserve Appliance Wizard
2. Define the backup schedule. 3. Review and confirm the plan. In addition to a basic plan, Arcserve UDP lets you create complex plans and control many parameters from the UDP Console. To create complex plans from the UDP Console, see the Arcserve UDP Solutions Guide. -
Page 102: Add Nodes To A Plan
Add Nodes to a Plan You can create a plan to protect various nodes. To protect nodes, you need to add nodes to a plan. You can add nodes from the Arcserve Appliance wizard. The wizard lets you add nodes using the following methods:... -
Page 103: Add Nodes By Hostname/Ip Address
You can manually enter the IP address or the hostname of the address to add a node to a plan. Use this method when you have a few nodes to add, however, you can add multiple nodes one at a time. Arcserve UDP Agent (Windows) is installed on these nodes. - Page 104 3. (Optional) To remove the added nodes from the list on the right pane, select the nodes and click Remove. 4. Click Next. The nodes are added to the plan. 96 Arcserve Appliance User Guide...
-
Page 105: Add Nodes By Active Directory
Password Specifies the user password. Computer Name Filter Specifies the filter to discover node names. Cancel Plan Creation Cancels the plan that you just created. 2. Click Browse. The discovered nodes are displayed. Chapter 6: Working with Arcserve Appliance 97... - Page 106 The selected node is added to the right pane. 5. (Optional) To remove the nodes from the right pane, select the nodes and click Remove. 6. Click Next. The nodes are added to the plan. 98 Arcserve Appliance User Guide...
-
Page 107: Add Vcenter/Esx Nodes
Specifies the port number to be used. Protocol Specifies the protocol to be used. Username Specifies a user name of the Server. Password Specifies the user password. Cancel Plan Creation Cancels the plan that you just created. Chapter 6: Working with Arcserve Appliance 99... - Page 108 Add Nodes to a Plan 2. Click Connect. The discovered hostnames are displayed. 100 Arcserve Appliance User Guide...
- Page 109 The selected nodes are added to the right pane. 5. (Optional) To remove the nodes from the right pane, select the nodes and click Remove. 6. Click Next. The nodes are added to the plan. Chapter 6: Working with Arcserve Appliance 101...
-
Page 110: Add Hyper-V Nodes
Specifies Hyper-V user name having the administrator rights. Note: For Hyper-V clusters, use a domain account with administrative privilege of the cluster. For standalone Hyper-V hosts, we recommend using a domain account. Password Specifies the password of user name. Cancel Plan Creation 102 Arcserve Appliance User Guide... - Page 111 The selected nodes are added to the right pane. 5. (Optional) To remove the nodes from the right pane, select the nodes and click Remove. 6. Click Next. The nodes are added to the plan. Chapter 6: Working with Arcserve Appliance 103...
-
Page 112: Create A Backup Plan For Linux Nodes
Create a Backup Plan for Linux Nodes Create a Backup Plan for Linux Nodes You can back up Linux nodes from the Arcserve Appliance Console. The Linux Backup Server is already added to the Console. Follow these steps: 1. Open the Arcserve Appliance Console. -
Page 113: Create A Backup Plan To A Tape Device
UDP backup plan, and the destination is a tape device. You need to use Arcserve Backup Manager to manage your backup jobs to a tape. -
Page 114: Create An On-Appliance Virtual Standby Plan
Create an On-Appliance Virtual Standby Plan Create an On-Appliance Virtual Standby Plan Arcserve Appliance has the capability to serve as a virtual standby machine. Follow these steps: 1. Verify and ensure that you have a successful backup plan. 2. Open the Arcserve Appliance Console. -
Page 115: Create Plan To Backup The Linux Backup Server
Create Plan to Backup the Linux Backup Server Create Plan to Backup the Linux Backup Server In the Arcserve Appliance, you can configure the Linux Backup Server to backup. Follow these steps: 1. From Arcserve UDP Console, click the resources tab. - Page 116 Create Plan to Backup the Linux Backup Server 7. Navigate to All Plans and create an Agent-based Linux plan. The Source tab appears. 108 Arcserve Appliance User Guide...
- Page 117 Create Plan to Backup the Linux Backup Server 8. From the Add drop-down list, select Select Nodes to Protect in Arcserve UDP. Chapter 6: Working with Arcserve Appliance 109...
- Page 118 9. Protect the added Linux node and click OK. The Destination tab appears. 10. The default destination displayed is the data store created using Appliance wizard. Select Local disk or shared folder to backup the node if required. 110 Arcserve Appliance User Guide...
- Page 119 Create Plan to Backup the Linux Backup Server 11. After providing the settings related to plan, click Save. You can perform backup for the added Linux Backup Server successfully. Chapter 6: Working with Arcserve Appliance 111...
-
Page 120: Setting-Up To Perform Linux Instant Vm Job To Local Appliance Hyper-V
Setting-up to Perform Linux Instant VM Job to Local Appliance Hyper-V Setting-up to Perform Linux Instant VM Job to Local Appliance Hyper-V Using Arcserve Appliance, you can set the network to perform Linux instant VM job on local Appliance Hyper-V. Follow these steps: 1. -
Page 121: Migrate Arcserve Udp Console Using Consolemigration.exe
1. On old Arcserve UDP Console, perform backup for the Arcserve UDP data- base. The DB_Migration folder is created successfully. 2. On the new Arcserve UDP Console, copy the DB_Migration folder to the fol- lowing path: <UDP_Home> \Management\BIN\Appliance\ 3. If the new Arcserve UDP Console is Arcserve UDP Appliance then change hostname and reboot the system and finish the Appliance configuration using Appliance wizard. - Page 122 You can manually update the disconnected nodes from the new Arcserve UDP Console. Note: In Arcserve UDP Console, if any site other than Local Site exists, follow the steps mentioned in NewRegistrationText.txt file to register the site again. You have completed migration of Arcserve Appliance Console to the new Arcserve UDP Console successfully.
-
Page 123: Migrate Pre-Installed Linux Backup Server To Centos
Migrate Pre-installed Linux Backup Server to CentOS 7.4 Migrate Pre-installed Linux Backup Server to CentOS Important! The Linux Migration Tool is available only in Arcserve UDP v6.5 Update Linux Migration tool (Linux_migration.ps1) is a new feature introduced from Arc- serve UDP v6.5 Update 4 that lets you migrate the pre-installed Linux Backup Server of the Arcserve UDP Appliance from previous version of CentOS such as CentOS 6.6 to CentOS 7.4. - Page 124 Backup Server (CentOS 7.4) is completed and the name is modified as Linux- BackupSvr in the Hyper-V manager successfully. 6. Update the Linux backup server from the Arcserve UDP Console. After the migration of Linux Backup Server to CentOS 7.4, all the Linux...
-
Page 125: Perform Migration Between Arcserve Appliances
This topic provides two solutions for user to perform migration from existing Arc- serve Appliance to another fresh Arcserve Appliance. For example, let us migrate the Arcserve Appliance 8200 to Arcserve Appliance 8400. The prerequisites are listed as follows: Ensure that you can connect to both Appliance 8200 and Appliance 8400. -
Page 126: Solution 1
To perform BMR from existing Arcserve Appliance to another fresh Arcserve Appli- ance, follow these steps: 1. Create a data store on the fresh Arcserve Appliance 8400 and backup Arc- serve Appliance 8200 to this data store. Note: You can just ignore the following warning: The Arcserve UDP Recovery Point Server data store is configured on volume X:,Y:. - Page 127 Perform Migration between Arcserve Appliances 4. Now, rebuild the network switch on 8400 Appliance. Follow these steps: a. Open Routing and Remote Access and click Disable Routing and Remote Access. Chapter 6: Working with Arcserve Appliance 119...
- Page 128 Stop all the UDP services on Arcserve Appliance 8200 using the fol- lowing command in the command line: C:\Program Files\Arcserve\Unified Data Protection\Management\BIN> cmdutil.exe /stopall b. Copy all the data on disk X and Y from Arcserve Appliance 8200 to 8400 manually. 120 Arcserve Appliance User Guide...
- Page 129 Perform Migration between Arcserve Appliances c. On 8400 Appliance, start all UDP services and then import the data copied from 8200 Appliance. Chapter 6: Working with Arcserve Appliance 121...
- Page 130 Perform Migration between Arcserve Appliances 122 Arcserve Appliance User Guide...
-
Page 131: Solution 2
How to Migrate Arcserve UDP Console Using ConsoleMigration.exe. Follow these steps: 1. Stop all the Arcserve UDP services on Arcserve Appliance 8200 using the fol- lowing command in the command line: C:\Program Files\Arcserve\Unified Data Protection\Management\BIN> cmdutil.exe /stopall Chapter 6: Working with Arcserve Appliance 123... - Page 132 Perform Migration between Arcserve Appliances 2. Copy all the data on disk X and Y from Arcserve Appliance 8200 to 8400 manually. 124 Arcserve Appliance User Guide...
- Page 133 3. On 8400 Appliance, start all Arcserve UDP services and then import the data stores copied from 8200 Appliance. Note: The Arcserve UDP log files are not migrated to the new fresh Appli- ance. You have migrated the existing Arcserve Appliance to another fresh Arcserve Appli- ance successfully.
-
Page 134: Modify The Input Source Of Pre-Installed Linux Backup Server
Modify the Input Source of Pre-installed Linux Backup Server You can change the Keyboard of pre-installed Linux Backup Server. Follow these steps: 1. Log into Arcserve Appliance as administrator. 2. Click Settings. 3. Click Region & Language. 126 Arcserve Appliance User Guide... - Page 135 Modify the Input Source of Pre-installed Linux Backup Server 4. Click + to select a new input source. Chapter 6: Working with Arcserve Appliance 127...
- Page 136 Modify the Input Source of Pre-installed Linux Backup Server 5. Select the language and keyboard layout. 128 Arcserve Appliance User Guide...
- Page 137 Modify the Input Source of Pre-installed Linux Backup Server 6. Click Add. Input source is successfully added. Chapter 6: Working with Arcserve Appliance 129...
-
Page 138: Chapter 7: Monitoring The Appliance Server Remotely
Chapter 7: Monitoring the Appliance Server Remotely You can monitor Arcserve Appliance remotely. This section contains the following topics: Working with IPMI Working with Integrated Dell Remote Access Controller (iDRAC) Chapter 7: Monitoring the Appliance Server Remotely 130... -
Page 139: Working With Ipmi
Working with IPMI Working with IPMI This section contains the following topics: 131 Arcserve Appliance User Guide... -
Page 140: How To Change Ipmi Password
Working with IPMI How to Change IPMI Password Before changing the IPMI password, you need to access the BIOS setup screen to obtain the IP address. Follow these steps: 1. Boot up your system. The Bootup screen appears. 2. Press the Delete key. The BIOS setup screen is displayed. - Page 141 7. Enter your user name in the Username field. Default: ADMIN 8. Enter your password in the Password field. Default: ARCADMIN The home page (IPMI main screen) is displayed. 9. Click the Configuration option from the top bar. The Configuration screen is displayed. 133 Arcserve Appliance User Guide...
- Page 142 Working with IPMI 10. Click the Users option in the Configuration sidebar. 11. Select the User: (ADMN) from the Users List. 12. Click Modify User. The Modify User screen is displayed. 13. Enter your user name (ADMIN). 14. Select the Change Password option. The password field is enabled.
-
Page 143: How To Upgrade Ipmi Firmware
6. Click Browse on the Firmware Upload screen and select the .bin file from the extracted files. 7. Click Upload Firmware. Firmware Image uploads. 8. Click Start Upgrade. Firmware upgrade completes and reboots IPMI. You can view the upgraded Firmware version on the Summary screen. 135 Arcserve Appliance User Guide... -
Page 144: Working With Integrated Dell Remote Access Controller (Idrac)
Arcserve Appliance 9012-9504DR series models are installed with Integrated Dell Remote Access Controller 9 (iDRAC9). iDRAC9 lets the server administrators improve the overall availability of Arcserve Appliance. iDRAC provides the alerts to administrators about server issues, allows to perform remote server management, and reduces the need for physical access to the server. - Page 145 Working with Integrated Dell Remote Access Controller (iDRAC) The Virtual Console page displays. The Virtual Console Viewer displays the remote system desktop. You can take the control of remote system and run the operations using keyboard and mouse. 137 Arcserve Appliance User Guide...
-
Page 146: Chapter 8: Restoring Or Repairing The Arcserve Appliance
Chapter 8: Restoring or Repairing the Arcserve Appli- ance This section contains the following topics: Apply Arcserve UDP Factory Reset Using Boot Option in 7000-8000 Series Appliance 139 Apply Arcserve UDP Factory Reset Using Boot Option in 9012-9504DR Series Appli- ance... -
Page 147: Apply Arcserve Udp Factory Reset Using Boot Option In 7000-8000 Series Appliance
Apply Arcserve UDP Factory Reset Using Boot Option in 7000-8000 Series Appliance You can apply UDP factory reset from the Boot Menu of the Arcserve Appliance. Using UDP factory reset, you can return your Arcserve Appliance to clean and non- configured status. - Page 148 Apply Arcserve UDP Factory Reset Using Boot Option in 7000-8000 Series Appliance Notes: The Preserve existing backup data option is selected by default. Only C:\ volume in the original operating system is rebuilt. Data at X:\ volume and Y:\ volume remains unchanged.
- Page 149 Apply Arcserve UDP Factory Reset Using Boot Option in 7000-8000 Series Appliance 141 Arcserve Appliance User Guide...
-
Page 150: Apply Arcserve Udp Factory Reset Using Boot Option In 9012-9504Dr Series Appliance
Apply Arcserve UDP Factory Reset Using Boot Option in 9012-9504DR Series Appliance You can apply UDP factory reset from the Boot Menu of the Arcserve Appliance 9012-9504DR series. Using UDP factory reset, you can return your Arcserve Appli- ance 9012-9504DR series to clean and non-configured status. - Page 151 Apply Arcserve UDP Factory Reset Using Boot Option in 9012-9504DR Series Appliance Notes: The Preserve existing backup data option is selected by default. Only C:\ volume in the original operating system is rebuilt. Data at X:\ volume and Y:\ volume remain unchanged.
- Page 152 Apply Arcserve UDP Factory Reset Using Boot Option in 9012-9504DR Series Appliance Chapter 8: Restoring or Repairing the Arcserve Appliance 144...
-
Page 153: Clear Configuration And Apply Appliance Factory Reset
Clear Configuration and Apply Appliance Factory Reset Clear Configuration and Apply Appliance Factory Reset Using Factory Reset, you can return your Arcserve Appliance back to clean and non- configured status. You can apply factory reset from the Arcserve UDP Console. Follow these steps: 1. - Page 154 3. From the confirmation dialog, click Reset to launch the factory reset. The Appliance machine is rebooted, and the factory reset runs as displayed below: Completion of factory reset displays a confirmation dialog. Chapter 8: Restoring or Repairing the Arcserve Appliance 146...
- Page 155 Clear Configuration and Apply Appliance Factory Reset 4. From the confirmation dialog, perform one of the following options: Click Restart to reboot the appliance. Click Shut Down to close the appliance. 147 Arcserve Appliance User Guide...
-
Page 156: How To Replace Factory Reset Image Using Set Appliance Image Utility
For example, if you are using Arcserve Appliance v6.5 Update 1 that is running on Windows 2012 R2 and want to replace Arcserve Appliance v6.5 Update 1 with Arcserve v6.5 Update 2, you can apply Arcserve Appli- ance v6.5 Update2 image that is running on Windows 2012 R2 only. - Page 157 Update 1 to Arcserve Appliance v6.5 Update 1 If the installed Arcserve UDP release version on Appliance is Arcserve UDP v6 Update 1, then you can upgrade the Appliance to Arcserve UDP v6.5 Update 1. Follow these steps:: 1. Download the Appliance image of Arcserve Appliance v6.5 Update 1, and execute the Set Appliance Image Utility.
- Page 158 2. Perform the following steps to revert to Update 1 version of Appliance: Note: After replacing Appliance image in Arcserve UDP Console, the Ori- ginal Arcserve UDP version is changed to the desired Appliance release ver- sion. a. From Arcserve UDP Console, navigate to Settings and select Factory Reset.
- Page 159 How to Replace Factory Reset Image Using Set Appliance Image Utility Note: Reload the page if desired Appliance release version is not dis- played in Original Arcserve UDP version after replacing the Appliance image. b. Click Perform Factory Reset to revert from current version of Appli- ance to the new Arcserve Appliance v6.5 Update 1 version.
-
Page 160: Remove And Replace A Hard Drive
Remove and Replace a Hard Drive Remove and Replace a Hard Drive With the Arcserve Appliance, if one hard drive fails, the rest of the drives will kick in immediately to ensure no data is lost and the appliance continues to work nor- mally. - Page 161 5. Slide the drive tray into the appliance until it is fully installed and secure by closing the drive carrier handle. 153 Arcserve Appliance User Guide...
-
Page 162: How To Perform Bare Metal Recovery (Bmr) Without Preserving Data
UDP Boot Kit. Follow these steps: 1. Run the Create Arcserve UDP Boot Kit application in the Appliance and gen- erate the bootable BMR ISO image or USB stick for x64 platform. Note: You need to include the local drivers for the ISO image. To include the local drivers, select the Include Local Drivers option in the Create Boot Kit for Bare Metal Recovery window. - Page 163 How to Perform Bare Metal Recovery (BMR) without Preserving Data 2. Boot the Arcserve Appliance using BMR ISO image or USB Stick. The Arcserve bare metal recovery setup appears. 3. Select the required language and click Next. 155 Arcserve Appliance User Guide...
- Page 164 How to Perform Bare Metal Recovery (BMR) without Preserving Data 4. Select the Restore from a Arcserve Unified Data Protection backup option and click Next. The Select a Recovery Point wizard window appears. 5. Click Browse and select Browse from Recovery Point Server.
- Page 165 How to Perform Bare Metal Recovery (BMR) without Preserving Data The Select Node window appears. 6. Enter the Recovery Point Server Host Name, User Name, Password, Port, and Protocol. 7. Click Connect. 8. Once the connection is established, click OK. 157 Arcserve Appliance User Guide...
- Page 166 How to Perform Bare Metal Recovery (BMR) without Preserving Data The Bare Metal Recovery(BMR)- Select a Recovery Point dialog appears. 9. Select the recovery point to restore and click Next. Chapter 8: Restoring or Repairing the Arcserve Appliance 158...
- Page 167 How to Perform Bare Metal Recovery (BMR) without Preserving Data 10. (Optional) Enter the session password if prompted, and click OK. The Bare Metal Recovery(BMR)- Choose a Recovery Mode dialog appears. 11. Select Advanced Mode and click Next. 159 Arcserve Appliance User Guide...
- Page 168 The Bare Metal Recovery(BMR)- Adjust Disk Partitions dialog appears. 12. Right click on the largest GUID Partition Table(GPT) disk available and click Clean Disk. 13. After cleaning the disk, right click on the same disk and click Commit. Chapter 8: Restoring or Repairing the Arcserve Appliance 160...
- Page 169 How to Perform Bare Metal Recovery (BMR) without Preserving Data The Submit Disk Changes window appears. 14. Click Submit. 15. After the cleaning of disk is completed, click OK. 161 Arcserve Appliance User Guide...
- Page 170 How to Perform Bare Metal Recovery (BMR) without Preserving Data 16. From the Bare Metal Recovery(BMR)- Adjust Disk Partitions dialog, click Back. Chapter 8: Restoring or Repairing the Arcserve Appliance 162...
- Page 171 How to Perform Bare Metal Recovery (BMR) without Preserving Data The Bare Metal Recovery(BMR)- Choose a Recovery Mode dialog appears. 17. Select Express Mode and click Next. The BMR dialog appears. 163 Arcserve Appliance User Guide...
- Page 172 How to Perform Bare Metal Recovery (BMR) without Preserving Data 18. Click Yes. The Summary of Restore Settings dialog appears. 19. Click Cancel. The Bare Metal Recovery(BMR)- Adjust Disk Partitions dialog appears. Chapter 8: Restoring or Repairing the Arcserve Appliance 164...
- Page 173 GPT disk available in the Original Source Disk/Volume Layouts tab and click Next. Note: To view the size of partition, hover the mouse to the disk to display the disk properties. The Summary of Restore Settings dialog appears. 21. Click OK. 165 Arcserve Appliance User Guide...
- Page 174 How to Perform Bare Metal Recovery (BMR) without Preserving Data The Bare Metal Recovery(BMR)- Start Recovery Process dialog appears. 22. Clear selection of the Do not start Agent service automatically after reboot option and wait for restore to complete. Chapter 8: Restoring or Repairing the Arcserve Appliance 166...
- Page 175 How to Perform Bare Metal Recovery (BMR) without Preserving Data The Bare Metal Recovery(BMR)- Insert Device Driver dialog appears. 23. Select the required driver for raid controller and click Next. 167 Arcserve Appliance User Guide...
- Page 176 How to Perform Bare Metal Recovery (BMR) without Preserving Data The Reboot pop up appears and the Arcserve Appliance is rebooted auto- matically. The BMR process is completed successfully. Chapter 8: Restoring or Repairing the Arcserve Appliance 168...
-
Page 177: How To Perform Bare Metal Recovery (Bmr) And Preserving Data
UDP Boot Kit. Follow these steps: 1. Run the Create Arcserve UDP Boot Kit application in the Appliance and gen- erate the bootable BMR ISO image or USB stick for x64 platform. Note: You need to include the local drivers for the ISO image. To include the local drivers, select the Include Local Drivers option in the Create Boot Kit for Bare Metal Recovery window. - Page 178 How to Perform Bare Metal Recovery (BMR) and Preserving Data The Arcserve bare metal recovery setup appears. 3. Select the required language and click Next. 4. Select the Restore from a Arcserve Unified Data Protection backup option and click Next. Chapter 8: Restoring or Repairing the Arcserve Appliance 170...
- Page 179 5. Click Browse and select Browse from Recovery Point Server. The Select Node window appears. 6. Enter the Recovery Point Server Host Name, User Name, Password, Port, and Protocol. 7. Click Connect. 8. Once the connection is established, click OK. 171 Arcserve Appliance User Guide...
- Page 180 How to Perform Bare Metal Recovery (BMR) and Preserving Data The Bare Metal Recovery(BMR)- Select a Recovery Point dialog appears. 9. Select the recovery point to restore and click Next. Chapter 8: Restoring or Repairing the Arcserve Appliance 172...
- Page 181 How to Perform Bare Metal Recovery (BMR) and Preserving Data 10. (Optional) Enter the session password if prompted, and click OK. The Bare Metal Recovery(BMR)- Choose a Recovery Mode dialog appears. 11. Select Advanced Mode and click Next. 173 Arcserve Appliance User Guide...
- Page 182 How to Perform Bare Metal Recovery (BMR) and Preserving Data 12. On the Bare Metal Recovery(BMR)- Adjust Disk Partitions dialog, click Next. 13. On the Summary of Disk Restore Settings screen, click OK. Chapter 8: Restoring or Repairing the Arcserve Appliance 174...
- Page 183 How to Perform Bare Metal Recovery (BMR) and Preserving Data 14. On the Bare Metal Recovery(BMR)- Start Recovery Process dialog, clear selection of the Do not start Agent service automatically after reboot option and wait for restore to complete and machine reboot. 175 Arcserve Appliance User Guide...
- Page 184 How to Perform Bare Metal Recovery (BMR) and Preserving Data The BMR process is completed successfully. Chapter 8: Restoring or Repairing the Arcserve Appliance 176...
-
Page 185: Chapter 9: Performing Appliance Capacity Expansion
Chapter 9: Performing Appliance Capacity Expansion This section contains the following topics: Working with Expansion Kit in Arcserve Appliance 9012-9504 DR Models Connecting Appliance Expansion Shelf to the Appliance Server Chapter 9: Performing Appliance Capacity Expansion 177... -
Page 186: Working With Expansion Kit In Arcserve Appliance 9012-9504 Dr Models
Follow these steps: 1. Perform the following steps to insert HDDs in the empty disk slots: a. From the Arcserve UDP Console verify and ensure that no jobs are running on the Appliance Server. If any jobs are running, Pause the corresponding plans. - Page 187 Working with Expansion Kit in Arcserve Appliance 9012-9504 DR Models d. Click one of the following options to complete the pending actions: Apply Now Starts the convert to Raid action immediately. At Next Reboot Starts the convert to Raid action at the time of next reboot.
- Page 188 Working with Expansion Kit in Arcserve Appliance 9012-9504 DR Models f. Navigate to Configuration and Storage Configuration. g. Click one of the following options to complete the pending oper- ations: Apply Now Starts the create virtual disk operation immediately. At Next Reboot Starts the create virtual disk operation at the time of next reboot.
- Page 189 Working with Expansion Kit in Arcserve Appliance 9012-9504 DR Models l. From the Disk Management window, select the virtual disk and apply the following properties: Assign a Drive Letter Specify NTFS as File System Format the disk 4. Perform the following steps to expand the data store: a.
- Page 190 Working with Expansion Kit in Arcserve Appliance 9012-9504 DR Models g. From the command line, navigate to C:\Program Files\Arc- serve\Unified Data Protection\Engine\BIN and run the following com- mand: as_gddmgr.exe –DataPath Add <data store name> -NewDataPath <new data folder> The following example screen shows the details such as Volume capa- city, Used space, Free space for Primary data path, Expanded data path and the total values.
- Page 191 Working with Expansion Kit in Arcserve Appliance 9012-9504 DR Models h. In UDP Console, navigate to resources, Destinations, and Recovery Point Servers. i. Right click the Data Store and click Start. j. Resume the plans that you paused before from UDP Console.
-
Page 192: Connecting Appliance Expansion Shelf To The Appliance Server
Connecting Appliance Expansion Shelf to the Appliance Server Connecting Appliance Expansion Shelf to the Appli- ance Server This section contains the following topics: 184 Arcserve Appliance User Guide... -
Page 193: Appliance Infield Expansion For All The Available Models
Connecting Appliance Expansion Shelf to the Appliance Server Appliance Infield Expansion for all the Available Models Expan- Cur- Free Mod- Current Capa- sion rent Add-on Slot- DESCRIPTION cities \TB Shelf SSD - Cards Capacity 1. 8100 model sup- ports only 8 TB Infield Expansion. - Page 194 6. 8100 - Expansion shelf comes with RAID-6. 7. Expansion Shelf comes with Dual PSU. 8. Follow Add data path instructions given in Expansion guide after connecting the expan- sion shelf. 9. Wherever a new SSD 186 Arcserve Appliance User Guide...
- Page 195 Connecting Appliance Expansion Shelf to the Appliance Server is required follow the Migrate HASH des- tination to new SSD instructions given in the Expansion Guide. 1. 8200 model sup- ports either 8 TB or 16 TB Infield LSI SAS Expansion. 9200 -8E Client can connect...
- Page 196 5. SAS con- nection is used between the Appli- ance and Expansion shelf. 6. Expansion shelf comes with RAID-6. 7. Expansion Shelf comes with Dual PSU. 8. Follow Add data path instructions given in Expansion 188 Arcserve Appliance User Guide...
- Page 197 Connecting Appliance Expansion Shelf to the Appliance Server guide after connecting the expan- sion shelf. 9. Wherever a new SSD is required follow the Migrate HASH des- tination to new SSD instructions given in the Expansion Guide. 1. 8300 model sup- ports either LSI SAS 8 TB or 16...
- Page 198 2 in order to use Infield Expansion. 5. SAS con- nection is used between the Appli- ance and Expansion shelf. 6. Expansion shelf comes with RAID-6 (6x4 TB 190 Arcserve Appliance User Guide...
- Page 199 Connecting Appliance Expansion Shelf to the Appliance Server Disks). 7. Expansion Shelf comes with Dual PSU. 8. Follow Add data path instructions given in Expansion guide after connecting the expan- sion shelf. 9. Wherever a new SSD is required follow the Migrate HASH des- tination to...
- Page 200 TB - 3. 8400 has 2, 40 ( 12x4 5, and 6 as TB Disks) Infield optional Expansion slots. One (MegaRAI- free slot is D SAS mandatory 9380-8e) for Appli- ance Infield Expansion / MegaRAID SAS 9380- 192 Arcserve Appliance User Guide...
- Page 201 Connecting Appliance Expansion Shelf to the Appliance Server 4. If both the optional slots are filled with add-on Cards, then you need to free at least one slot, prefer- ably slot 2 in order to use Infield Expansion. 5. SAS con- nection is used between...
- Page 202 Connecting Appliance Expansion Shelf to the Appliance Server sion shelf. 194 Arcserve Appliance User Guide...
-
Page 203: What Is Included In The Box
What is included in the box The following items are included in the box: Note: If you notice that any items in the box are damaged, contact Arcserve Sup- port. Appliance Expansion Shelf Note: The number of available disks in the expansion shelf depends on the capacity of the Appliance Expansion shelf. - Page 204 Connecting Appliance Expansion Shelf to the Appliance Server SAS Cables Two SAS Cables which are used to connect the MegaRaid Controller in the Appliance Expansion Shelf and Appliance Server. 196 Arcserve Appliance User Guide...
- Page 205 Connecting Appliance Expansion Shelf to the Appliance Server SSD (optional) Note: For Appliance 8300 only, you need to connect with 40TB Appliance expansion and you have one unattached 2TB SSD. Chapter 9: Performing Appliance Capacity Expansion 197...
-
Page 206: How To Connect The Appliance Expansion Shelf To The Appliance Server
2. Connect the CacheVault Power Module02 (CVPM02) to MegaRAID Con- troller 9380-8e. 3. Pause all the Arcserve UDP plans and ensure that there are no running jobs on the Appliance Server. 4. Power off the Appliance Server and disconnect the power cord from the power supply. - Page 207 Connecting Appliance Expansion Shelf to the Appliance Server 6. Perform the following steps to insert the MegaRAID Controller 9380-8e into an available PCI-e slot of the Appliance Server: a. Locate an empty PCI-e slot. b. Remove the blank bracket panel on the backside of the computer that aligns with the empty PCIe slot.
- Page 208 Note: If a 40 TB Appliance Expansion Shelf connected to an Appliance 8300, plug the 2 TB SSD (shipped with the Appliance Expansion Shelf) into the empty SATA slot at the rear panel of the Appliance 8300. 200 Arcserve Appliance User Guide...
- Page 209 Connecting Appliance Expansion Shelf to the Appliance Server 11. Connect the power cords of Appliance Expansion Shelf and power on the Appliance Expansion Shelf. 12. Reconnect the power cords of the Appliance Server and power on the Appli- ance Server. 13.
- Page 210 9380-8e are online and available. Note: If there are any disks that are not online, right click and select Scan Foreign Configuration. c. Select the Import: Import logical configuration from all foreign drives option and click OK. 202 Arcserve Appliance User Guide...
- Page 211 Connecting Appliance Expansion Shelf to the Appliance Server d. Click Yes to initiate the import process. e. Click OK. All the disk drives on the expansion shelf are online now. 15. Navigate to the Logical tab where you can see the following disks are con- figured with RAID-6.
- Page 212 Connecting Appliance Expansion Shelf to the Appliance Server 16. Open Computer Management and navigate to Disk Management and per- form the following steps: a. Format the Appliance Expansion Shelf assembled disk as NTFS and assign a drive letter. For example, “V:”. 204 Arcserve Appliance User Guide...
- Page 213 Connecting Appliance Expansion Shelf to the Appliance Server b. Format the SSD as NTFS and assign a drive letter. For example, “W:”. You have connected the Appliance Expansion Shelf to the Appliance Server successfully. Chapter 9: Performing Appliance Capacity Expansion 205...
-
Page 214: How To Modify Arcserve Udp Data Store
How to Modify Arcserve UDP Data store This section contains the following topics: Adding a data path on the expansion shelf to the Arcserve UDP data store Migrating Hash Destination to the new SSD Checking the Overall Capacity of Data Store from Arcserve UDP Console... -
Page 215: Adding A Data Path On Expansion Shelf To Arcserve Udp Data Store
Connecting Appliance Expansion Shelf to the Appliance Server Adding a Data Path on Expansion Shelf to Arcserve UDP Data Store Follow these steps: 1. Create a folder in the volume on the Appliance expansion shelf, such as “V:\data”. 2. Stop the data store and use the following command to expand the data store to the Appliance expansion shelf: as_gddmgr.exe –DataPath Add <data store name>... -
Page 216: Migrating Hash Destination To The New Ssd
2. Ensure the data store is stopped. If not, stop the data store from the Arc- serve UDP Console. 3. Modify the data store from the Arcserve UDP Console and set the Hash Destination to W:\Arcserve\data_store\hash. 4. Save the modification of the data store. -
Page 217: Checking The Overall Capacity Of Data Store From Arcserve Udp Console
Connecting Appliance Expansion Shelf to the Appliance Server Checking the Overall Capacity of Data Store from Arc- serve UDP Console The overall capacity is the capacity of the Appliance server plus the capacity of the Appliance expansion shelf. Chapter 9: Performing Appliance Capacity Expansion 209... -
Page 218: Resuming All The Plans From Arcserve Udp Console
Connecting Appliance Expansion Shelf to the Appliance Server Resuming all the plans from Arcserve UDP Console Resume all the paused plans from the Arcserve UDP Console. 210 Arcserve Appliance User Guide... -
Page 219: Chapter 10: Working With Network Configuration
Chapter 10: Working with Network Configuration This section contains the following topics: Understanding the Network Configuration Details How to Configure the NIC Teaming Process How to Disable DHCP Server How to Configure IP Address for the Preinstalled Linux Backup Server How to Enable Round Robin on the DNS Server to Balance Load Chapter 10: Working with Network Configuration 211... -
Page 220: Understanding The Network Configuration Details
Any machine on the public network can connect to the Linux Backup Server through the special port of Appliance Server only. Network Configuration Details: On the Hyper-V Manager, an internal only virtual switch – Linux-BkpSvr-Switch is available that is used only by Linux-BackupSvr. 212 Arcserve Appliance User Guide... - Page 221 Understanding the Network Configuration Details In the Control Panel\Network and Internet\Network Connections, you can see “Hyper-V Virtual Ethernet Adapter” named as “LinuxBkpSvr”. You have con- figured the IPv4 for this switch as “192.168.10.1” by default as below. You have configured DHCP Server on the appliance machine by default. The DHCP Server works only on the Hyper-V virtual adapter.
- Page 222 By default, only one 192.168.10.2 in the Address Pool to ensure the built-in Linux Backup Server can get the IP 192.168.10.2. We have configured NAT on the Appliance machine. We have configured port redirection on the appliance for the Linux Backup Server. 214 Arcserve Appliance User Guide...
- Page 223 Understanding the Network Configuration Details Linux Backup Server gets the IP address 192.168.10.2 from the DHCP Server. After getting the IP, the backend script (C:\Program Files\Arcserve\Unified Data Protection\Engine\BIN\Appliance\resetdhcp.ps1) communicates with Linux to change the system locale of the Linux to make it consistent with the system loc- ale of the Appliance Windows OS.
- Page 224 Understanding the Network Configuration Details 216 Arcserve Appliance User Guide...
-
Page 225: How To Configure The Nic Teaming Process
How to Configure the NIC Teaming Process How to Configure the NIC Teaming Process The Arcserve Appliance contains built-in Ethernet ports. To use these ports, an Eth- ernet NIC teaming needs to be configured. NIC Teaming allows multiple network adapters placed into a team for bandwidth aggregation and traffic failover to main- tain connectivity in the event of a network component failure. - Page 226 To verify that the configuration is working, log into the Linux Backup Server in the Hyper-V Manager and ping the IP address for the specific computers on your intranet. If this fails, review and repeat this procedure. 218 Arcserve Appliance User Guide...
-
Page 227: How To Disable Dhcp Server
DHCP_ENABLE=false AdapterName=LinuxBkpSvr Appliance_IPAddress=192.168.10.1 Linux_IPAddress=192.168.10.2 3. Save the file. 4. Delete the file C:\Program Files\Arcserve\Unified Data Pro- tection\Engine\BIN\Appliance\dhcpdone.flag. 5. Run C:\Program Files\Arcserve\Unified Data Pro- tection\Engine\BIN\Appliance\resetdhcp.ps1 to disable the DHCP Server ser- vice as below from dos command line: C:\Program Files\Arcserve\Unified Data Pro- tection\Engine\BIN\Appliance>powershell .\resetdhcp.ps1... -
Page 228: How To Configure Ip Address For The Preinstalled Linux Backup Server
DHCP_ENABLE=true AdapterName=LinuxBkpSvr Appliance_IPAddress=192.168.100.1 Linux_IPAddress=192.168.100.2 3. Save the file. 4. Delete the file C:\Program Files\Arcserve\Unified Data Pro- tection\Engine\BIN\Appliance\dhcpdone.flag. 5. Run C:\Program Files\Arcserve\Unified Data Pro- tection\Engine\BIN\Appliance\resetdhcp.ps1 to reset the IP address for net- work interface LinuxBkpSvr and the preinstalled Linux Backup Server. - Page 229 The preinstalled Linux Backup Server will shut down and restart during the process if you change the Linux_IPAddress. 6. Run the following command from the command prompt: C:\Program Files\Arcserve\Unified Data Pro- tection\Engine\BIN\Appliance>powershell .\resetdhcp.ps1 Chapter 10: Working with Network Configuration 221...
-
Page 230: How To Enable Round Robin On The Dns Server To Balance Load
Myserver A <IPAddress1> Myserver A <IPAddress2> For the Resolver to get the same IP address every time, create two more "A" records assigning a unique name to each address as below: Altname1 A <IPAddress1> Altname2 A <IPAddress2> 222 Arcserve Appliance User Guide... - Page 231 How to Enable Round Robin on the DNS Server to Balance Load Using this method, a Resolver always obtains IPAddress1 when sending a query for Altname1 and always obtains IPAddress2 when sending a query for Altname2. Chapter 10: Working with Network Configuration 223...
-
Page 232: Chapter 11: Understanding Safety Precautions
Chapter 11: Understanding Safety Precautions This section contains the following topics: General Safety Precautions Electrical Safety Precautions FCC Compliance Electrostatic Discharge (ESD) Precautions Chapter 11: Understanding Safety Precautions 224... -
Page 233: General Safety Precautions
Inspect the box in which the appliance was shipped and ensure that there are no visible signs of damage. If there is evidence of damage, please retain all packaging materials and contact Arcserve Support immediately at: https://www.arcserve.com/support. Decide on a suitable location for the rack unit that will hold the appliance. It should be situated in a clean, dust-free area that is well ventilated and free of clutter. - Page 234 General Safety Precautions While working on the appliance, do not wear loose clothing such as neckties and unbuttoned shirt sleeves, which can come into contact with electrical cir- cuits or be pulled into a cooling fan. Remove any jewelry or metal objects from your body, which are excellent metal conductors that can create short circuits and harm you if they come into contact with printed circuit boards (PCBs) or areas where power is present.
-
Page 235: Electrical Safety Precautions
DVD-ROM laser: CAUTION - this Server may have come equipped with a DVD- ROM drive. To prevent direct exposure to the laser beam and hazardous radi- ation exposure, do not open the enclosure or use the unit in any unconventional way. 227 Arcserve Appliance User Guide... -
Page 236: Fcc Compliance
FCC Compliance FCC Compliance This appliance complies with part 15 of the FCC Rules. Operation is subject to the following conditions: This appliance may not cause harmful interference, and This appliance must accept any interference received, including interference that may cause undesired operation Note: This equipment has been tested and found to comply with the limits for a Class A digital device, pursuant to part 15 of the FCC Rules. -
Page 237: Electrostatic Discharge (Esd) Precautions
Put the Serverboard and peripherals back into their antistatic bags when not in use. For grounding purposes, verify your appliance provides excellent conductivity between the power supply, the case, the mounting fasteners, and the Ser- verboard. 229 Arcserve Appliance User Guide... -
Page 238: Chapter 12: Troubleshooting
Default Time Zone on the Appliance Licenses Error even when the licenses are available Arcserve UDP Console Shows Error while adding Remote Console in Replicate to a Remotely Managed RPS Task Unable to Perform VSB Task Using Another Appliance as Monitor... -
Page 239: Linux Backup Server Fails To Connect From The Console
Linux Backup Server Fails to Connect from the Con- sole Symptom When I try to connect my Linux Backup Server from the Arcserve UDP Console, con- nection is unsuccessful and I see a red mark. Solution When a Linux Backup Server fails to connect from the console, you can troubleshoot the connection to determine the problem. - Page 240 Linux Backup Server Fails to Connect from the Console The Linux Backup Server now connects from the Console. Chapter 12: Troubleshooting 232...
-
Page 241: Backing Up Arcserve Appliance From Another Appliance Reports Duplicated Nodes
Case 1: Appliance B is added as an RPS to the Appliance A UDP Console. For example: From Appliance B, you can configure the appliance using the UDP wiz- ard and select "This appliance will function as an instance of Arcserve UDP Recov- ery Point Server managed by another Arcserve UDP console."... -
Page 242: Linux Backup Server Cannot Communicate With Any Node In The Network
1. Log into Appliance B and delete the registry key of the Node ID that is located under [HKEY_LOCAL_MACHINE\SOFTWARE\Arcserve Unified Data Pro- tection\Engine]. 2. Restart the Arcserve UDP Agent service from Appliance B. 3. From the UDP console, go to the Nodes, All Nodes pane and update the node from Appliance B. - Page 243 Access management console. 8. Delete the file dhcpdone.flag from the following location: C:\Program Files\Arcserve\Unified Data Pro- tection\Engine\BIN\Appliance 9. Using Command Line, enter folder C:\Program Files\Arcserve\Unified Data Pro- tection\Engine\BIN\Appliance and run resetdhcp.ps1 as shown below. C:\Program Files\Arcserve\Unified Data Pro- tection\Engine\BIN\Appliance>powershell .\resetdhcp.ps1 When the script runs successfully, the communication issue for the Linux Backup Server is resolved.
-
Page 244: Linux Backup Server Cannot Get The Network Dns Suffix
Linux Backup Server Cannot Get the Network DNS Suffix Linux Backup Server Cannot Get the Network DNS Suffix When you set the static IP address to the appliance Server, the Linux Backup Server cannot get the network DNS suffix properly after restarting the network service. This issue leads to communication problems between the Linux backup Server and the UDP console. -
Page 245: Default Time Zone On The Appliance
The default time zone is (UTC-08:00) Pacific Time (US & Canada) no matter what region you select when you first power on the appliance. Solution Navigate to Arcserve Backup Appliance Wizard, click Edit and set Date and Time to change the time zone. 237 Arcserve Appliance User Guide... -
Page 246: Licenses Error Even When The Licenses Are Available
Licenses Error even when the licenses are available Licenses Error even when the licenses are available For more information on license related errors in the Appliance even when the licenses are available, refer the link. Chapter 12: Troubleshooting 238... -
Page 247: Arcserve Udp Console Shows Error While Adding Remote Console In Replicate To A Remotely Managed Rps Task
Remote Console in Replicate to a Remotely Managed RPS Task In Arcserve UDP Appliance v6.5 Update1 if you add a Replicate to a remotely man- aged RPS task and enter the hostname/IP of a different appliance machine as Recovery Point Server (RPS) in the Remote Console field, then the below error mes- sage is displayed in the Arcserve UDP Console. - Page 248 Arcserve UDP Console Shows Error while adding Remote Console in Replicate to a Remotely 1. Delete the GUID in local Appliance from the following registry path: HKEY_LOCAL_MACHINE\SOFTWARE\Arcserve\Unified Data Pro- tection\Management\Console\GUID 2. Delete the GUID from the database using the following commands in...
-
Page 249: Unable To Perform Vsb Task Using Another Appliance As Monitor
Unable to Perform VSB Task Using Another Appliance as Monitor On the Arcserve Appliance v6.5 Update1 if you perform VSB task and use another Appliance as monitor, the VSB task fails and the below error message is displayed in the activity log. - Page 250 Unable to Perform VSB Task Using Another Appliance as Monitor HKEY_LOCAL_MACHINE\SOFTWARE\Arcserve\Unified Data Pro- tection\Engine\GUID 3. Start all the UDP services on Arcserve UDP RPS Appliance using the fol- lowing command in the command line: C:\Program Files\Arcserve\Unified Data Protection\Management\BIN> cmdutil.exe /startall 4.
-
Page 251: Ivm Job Fails To Create Linux Ivm To Esxi Server With Hbbu Session On Appliance Data Store
3. Create a file with the name server.env. 4. Add the following text in the server.env file: export HBBU_VM_RESTORE_DISABLE=1 5. Save and close the server.env file. 6. Run the following command to restart the service: #/opt/Arcserve/d2dserver/bin/d2dserver start 243 Arcserve Appliance User Guide... -
Page 252: Chapter 13: Applying Best Practices
Chapter 13: Applying Best Practices The section contains the following topics: Best Practices for Network Configuration Best Practices for Windows Defender with PowerShell cmdlets Chapter 13: Applying Best Practices 244... -
Page 253: Best Practices For Network Configuration
If both the Appliance and Agent nodes are online on the same sub network, the following symptoms may occur: On the Arcserve UDP Console, when you deploy the plan to Agent node, the following error message is displayed: Backup job of the Agent node fails as below:... - Page 254 Best Practices for Network Configuration Ping Appliance host name from the Agent node and the Appliance is NOT connected as follows: Solution To resolve the connection problem between the Appliance and Agent node, perform one of the following steps: If Linux node is not available in the production environment, stop the DHCP Server service and RRAS service on the Appliance and verify whether the problem is resolved or not.
- Page 255 IPv4 address of Appliance one by one according to the order above to get the first IPv4 of the Appliance connected on the Agent node as follows: 2. Modify the file C:\Windows\System32\drivers\etc\hosts to add a record for the pair the_IPv4_got_above Appliance_hostname and save the file. 247 Arcserve Appliance User Guide...
-
Page 256: Best Practices For Windows Defender With Powershell Cmdlets
Best Practices for Windows Defender with PowerShell cmdlets Best Practices for Windows Defender with Power- Shell cmdlets You can get the Defender cmdlets by using the following commands: PS C:\> (Get-MpPreference).ExclusionPath Gets exclusion path of Defender. PS C:\> (Get-MpPreference).ExclusionProcess Gets exclusion processes of Defender. PS C:\>... -
Page 258: Chapter 14: Acknowledgements
Chapter 14: Acknowledgements Portions of this product include software developed by third-party software pro- viders. The following section provides information regarding this third-party soft- ware. This section contains the following topic: PuTTY Chapter 14: Acknowledgements 250... -
Page 259: Putty
The above copyright notice and this permission notice shall be included in all copies or substantial portions of the Software. THE SOFTWARE IS PROVIDED "AS IS", WITHOUT WARRANTY OF ANY KIND, EXPRESS OR IMPLIED, INCLUDING BUT NOT LIMITED TO THE WARRANTIES 251 Arcserve Appliance User Guide... - Page 260 PuTTY OF MERCHANTABILITY, FITNESS FOR A PARTICULAR PURPOSE AND NONINFRINGEMENT. IN NO EVENT SHALL SIMON TATHAM BE LIABLE FOR ANY CLAIM, DAMAGES OR OTHER LIABILITY, WHETHER IN AN ACTION OF CONTRACT, TORT OR OTHERWISE, ARISING FROM, OUT OF OR IN CONNECTION WITH THE SOFTWARE OR THE USE OR OTHER DEALINGS IN THE SOFTWARE.
Need help?
Do you have a question about the 7000 Series and is the answer not in the manual?
Questions and answers