Table of Contents
Advertisement
Advertisement
Table of Contents

Related Manuals for Vision Lynx Stereo


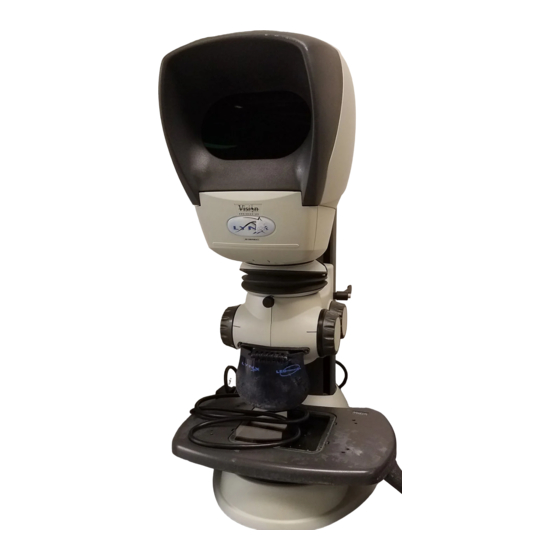
Summary of Contents for Vision Lynx Stereo
- Page 1 E N G I N E E R I N G Stereo...
- Page 3 The instrument that you have just received is manufactured by Vision Engineering. Vision Engineering is the world leader in the manufacture of Microscopes without eyepieces (known as DYNASCOPES or LYNX), Microscopes with Expanded Pupils (known as COBRA) and stereo magnifiers (known as MANTIS).
- Page 4 GERMANY: SWITZERLAND: AUSTRIA: CZECH REPUBLIC: SLOVAKIA: Vision Engineering Limited Tel: +49 (0) 8141 40 1670 Anton Pendele Strasse 3 Fax: +49 (0) 8141 40 16755 D-82275 Emmering e-mail: sales@vision-eng.de Germany NORTH GERMANY: BENELUX: DENMARK: NETHERLANDS: Vision Engineering Limited Tel: +49 (0) 2129 91 5900...
-
Page 5: Table Of Contents
CONTENTS Introduction Packing Contents Head Pack Stand Pack or Platform Pack Zoom Assembly Pack & Accessories Assembly Platform/Bench Assembly Head to Tubular Support Assembly Column to Stand Assembly Column Attachment Assembly Attaching Head Objective Lens Attaching 6 Point Ringlight Attaching Spot Illuminator Photographic Attachments Zoom Multiplier Mains Connection... - Page 6 Magnification & Optical Information Lynx Magnification Table Product Family Family Tree Warranty...
-
Page 7: Packing Contents
PACKING CONTENTS Please look for the following parts in each pack. Each pack has a check list on the outside of its contents PACKING CONTENTS HEAD PACK Adjustable Subject Platform Condenser Assembly with Diffuser Substage Illuminator STAND PACK PLATFORM PACK Column &... -
Page 8: Zoom Assembly Pack & Accessories
PACKING CONTENTS Zoom/Focus ZOOM PACK Assembly Boom Mount Bracket Objective Lenses x 1.5 x 0.3 Spare Lamp x 0.5 x 0.7 Spot Lamp Anti-glare x 2.0 Assembly Shield x 1.0 Photographic Adaptors & Photo Arm Zoom Multiplier ACCESSORIES PACKS 6 Point Ringlight, Illuminator &... -
Page 9: Assembly
ASSEMBLY PLATFORM/BENCH ASSEMBLY If bench mounting, drill holes in the bench using the template shown 1 left. Allow room for the horizontal support bar to protrude behind the Lynx. ASSEMBLY ASSEMBLY Securing Bolts Feed the stand & Pressure Cups 105mm Dia. securing bolts up 9mm Dia. -
Page 10: Column To Stand Assembly
ASSEMBLY COLUMN TO STAND ASSEMBLY Insert the Fan, connect it and lock it in position with its securing screw (see inset 1). Raise the column into the upright position and secure it with the four column securing screws. Remove the Blanking Plate. -
Page 11: Column Attachment Assembly
ASSEMBLY Sub-stage illuminator - Remove the protective film from Mirror the mirror (see right). Fit the bulb (see 1 and 2 right). Remove the Blanking Plate. Slide the sub-stage illuminator into position and secure it with the two bolts supplied. Connect the assembly. -
Page 12: Attaching Head
ASSEMBLY ATTACHING HEAD Head Connector Insert the Head Connector in the Head Socket. Place the Head on to the Zoom/Focus Assembly, ensuring the alignment pin in the Zoom/Focus Assembly Alignment Pin lines up with the relevant Head slot in the Head. Tighten the securing screw. -
Page 13: Attaching Spot Illuminator
ASSEMBLY ATTACHING SPOT ILLUMINATOR Place the Spot Illuminator into position and tighten the securing screws. Insert the illuminator’s connector into the socket Objective Lens underneath the Zoom/Focus Assembly. Spot Illuminator Connector Securing Screws Spot Illuminator PHOTOGRAPHIC ATTACHMENTS Remove the Head. Place the Photographic Head... -
Page 14: Zoom Multiplier
ASSEMBLY Remove the Head. Place the Zoom ZOOM MULTIPLIER Multiplier Assembly into position and tighten the securing screw. Head Replace the Head on to the assembly Connector and tighten the Head Securing Zoom Multiplier MAINS Head Head Socket CONNECTION Securing Screw Securing Screw Attach the anti-glare shield as shown left. -
Page 15: Operator Controls
OPERATOR CONTROLS ASSEMBLY MAIN SYSTEM CONTROLS ORDER OF SETTINGS 1. Turn the Zoom control to maximum. Head Height Adjuster 2. Set the Focus control to obtain the (1x) best clarity. The focus will now be Focus High Magnification maintained throughout Control (1.5x or 2x) Control... -
Page 16: Routine Maintenance
ROUTINE MAINTENANCE ROUTINE MAINTENANCE GENERAL Clean the viewing screen periodically with optical cloth. MAINTENANCE POINTS If, after cleaning the viewing screen, the picture quality is Retaining Knobs below standard, remove and clean the graticule if fitted. If the graticule requires adjustment after it has been Graticule cleaned, see page 9. -
Page 17: Sub-Stage Lamp Changing
ROUTINE MAINTENANCE SUB-STAGE LAMP CHANGING Condenser & 20W/12V Diffuser ROUTINE Dichroic Lamp MAINTENANCE Plate (2000 hour) ILLUMINATOR LAMP CHANGING Sub-Stage Illuminator Bulb NOTE: ENSURE THE ILLUMINATOR IS NOT HOT. 150W/21V Press down the bulb/fan Halogen Lamp assembly release button (see 1 above). - Page 18 MAGNIFICATION & OPTICAL INFORMATION LYNX MAGNIFICATION TABLE WITH 1.5x WITH 2x PART WORKING FIELD OF VIEW FIELD OF VIEW MAGNIFICATION RANGE MULTIPLIER MULTIPLIER NOTES NUMBER DISTANCE AT MAX. ZOOM AT MIN. ZOOM (C-040) (C-041) C-050 x0.3 x2.1 - x12 x3.2 - x18 x4.2 - x24 312mm 12mm...
- Page 19 PRODUCT FAMILY FAMILY TREE PRODUCT FAMILY Page 13...
- Page 21 If, during the warranty period the product is found to be defective, it will be repaired or replaced at facilities of Vision Engineering or elsewhere, all at the option of Vision Engineering. However, Vision Engineering reserves the right to refund the purchase price if it is unable to provide replacement, and repair is not commercially practicable or cannot be timely made.
Need help?
Do you have a question about the Lynx Stereo and is the answer not in the manual?
Questions and answers
My lynx stereo dynascope isn't maintaining focus as I change the magnification. Do you have any recommendations for trouble shooting this issue? When I change the dial on the magnification slowly, there is little clarity. If I change the dial on the magnification normally, it completely lose focus
To troubleshoot focus issues with the Vision Lynx Stereo when changing magnification, follow these steps:
1. Check Focus High Maintenance – Ensure that the Focus High is maintained throughout the magnification control (1.5x or 2x) across the zoom range.
2. Adjust the Subject Platform Height – Use the Subject Platform Height Adjuster to bring the subject into focus.
3. Graticule Adjustment – If the graticule is present, loosen the retaining knobs and move the graticule up or down for focus. Re-tighten the knobs after adjustment.
4. Clean the Viewing Screen – Periodically clean the viewing screen with an optical cloth to maintain picture quality.
5. Clean the Graticule – If focus issues persist after cleaning the viewing screen, remove and clean the graticule if fitted.
6. Re-adjust the Graticule – If the graticule was removed and cleaned, refocus and centralize it by loosening the retaining knobs, adjusting, and then re-tightening.
By following these steps, you can troubleshoot and resolve focus issues when changing magnification.
This answer is automatically generated