Table of Contents
Advertisement
Quick Links
Advertisement
Table of Contents

Subscribe to Our Youtube Channel
Related Manuals for Sherlo Tronics COMPLEX_RX_V3

Summary of Contents for Sherlo Tronics COMPLEX_RX_V3
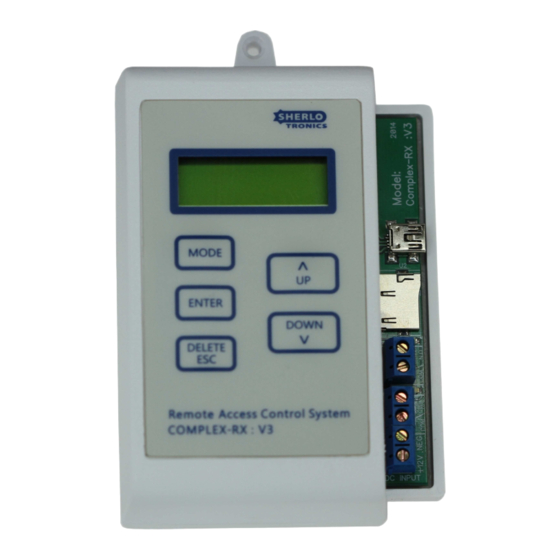
- Page 1 Installation manual Complex Gate Receiver Model: COMPLEX_RX_V3 2 Channel receiver, 8000 remotes total capacity, real time clock, 2000 Events internal, microSD card, USB 2.0, New Feature:- Baring & Un-barring of remotes. USB 2.0 microSD Card...
-
Page 2: Table Of Contents
Contents Description of functions and features......pg 2 Specifications............pg 2 Wiring diagram............pg 3 Learning in Remotes..........pg 4 Deleting remotes from the unit........pg 5 Setting the time & date..........pg 6 Setting the Relay contact closure time......pg 7 Changing the Password.......... -
Page 3: Description Of Functions And Features
Description of Functions and Features 1. The Complex-Rx_VER3 unit can Store up to 4000, Sherlotronics Code- hopping remotes per relay, that is a total of 8000 into its memory. The memory starts from UNIT 1 to 500. Each UNIT can be programmed with up to 8 users. -
Page 4: Wiring Diagram
Wiring Diagram N.O = Normally Open COM = Common MODE ENTER N.O RELAY 1 DOWN DELETE N.O RELAY 2 Remote Access Control System NEGATIVE COMPLEX-RX : V3 +12V DC This diagram serves as an example of a typical gate motor wiring MODE ENTER DOWN... -
Page 5: Learning In Remotes
Learning in Remotes 1. Press the MODE Button until the screen displays install mode INSTALL MODE 2. Press ENTER. The unit will prompt you for a MODE password. ENTER 3. Using the UP/DOWN keys enter the PASSWORD DOWN DELETE The default is 1;2;3;4. 4. -
Page 6: Deleting Remotes From The Unit
Deleting Remotes 1. Press the MODE Button until the screen displays INSTALL MODE install mode 2. Press ENTER. The unit will prompt you for a password. MODE 3. Using the UP/DOWN keys enter the PASSWORD ENTER The default is 1;2;3;4. DOWN DELETE 4. -
Page 7: Setting The Time & Date
Setting the Time & Date 1. Press the MODE Button until the screen displays install mode INSTALL MODE 2. Press ENTER. The unit will prompt you for a MODE password. ENTER 3. Using the UP/DOWN keys enter the PASSWORD DOWN DELETE The default is 1;2;3;4. -
Page 8: Setting The Relay Contact Closure Time
Setting the Relay time 1. Press the MODE Button until the screen displays install mode INSTALL MODE 2. Press ENTER. The unit will prompt you for a MODE password. ENTER 3. Using the UP/DOWN keys enter the PASSWORD DOWN DELETE The default is 1;2;3;4. -
Page 9: Changing The Password
Changing the password 1. Press the MODE Button until the screen displays install mode INSTALL MODE 2. Press ENTER. The unit will prompt you for a MODE password. ENTER 3. Using the UP/DOWN keys enter the PASSWORD DOWN DELETE The default is 1;2;3;4. 4. -
Page 10: Saving To The Microsd Card
Saving to the microSD card A microSD card must first be formatted to a FAT32 File system. Carefully plug the card into the card holder. The display will ready SD Card inserted. MODE To make a backup to the microSD card ENTER Recommend DOWN... -
Page 11: Installing A Saved Backup From A Microsd Card
Installing the Remotes backup file. If you need to install a new unit due to a product been struck by lightning or if an electrical malfunction occured, please follow this guide in successfully install all the remotes back into the replacement unit. Insert a microSD card into your pc, and make sure it is formatted as a FAT32 file system. -
Page 12: Baring Remotes From The Unit
Set Baring 1. Press the MODE Button until the screen displays INSTALL MODE install mode 2. Press ENTER. The unit will prompt you for a password. MODE 3. Using the UP/DOWN keys enter the PASSWORD ENTER The default is 1;2;3;4. DOWN DELETE 4. - Page 13 Un Barring 1. Press the MODE Button until the screen displays INSTALL MODE install mode 2. Press ENTER. The unit will prompt you for a password. MODE 3. Using the UP/DOWN keys enter the PASSWORD ENTER The default is 1;2;3;4. DOWN DELETE 4.
- Page 14 Product Dimensions 82mm MODE ENTER DOWN DELETE Remote Access Control System COMPLEX-RX : V3 31mm 67mm Sherlotronics SA (Pty) Ltd, Aintree Street, Northriding, Johannesburg South Africa. Sherlotronics SA (Pty) Ltd, Aintree Street, Northriding, Johannesburg South Africa. pg 13 pg 2 Tel: +27(11) 462-5101 Tel: +27(11) 462-5101 Fax: +27(11) 462-8177...
-
Page 15: Software Revisions
Software revisions : COMPLEX-RX_V3 Revision V3 PCB V3.01 .....First Release V3.02....Relay Time values modified V3.03....SD Card Time / Date stamping added V3.04....Test Key code added V3.05....SD card detection V3.06....Implemented the BOOT loader V3.07....Change RX to simple Serial learn V3.08....Updated SPI write routine to 8 Byte V3.09....Revised sync counter saving routine V3.10....Updated Deleting / Learning time password reset V3.11....Revised year stamp on SD card... -
Page 16: Warranty Policy
Warranty Policy The goods supplied by Sherlotronics shall be subject to the provisions of sections 55 to 57 of the Consumer Protection Act (68/2008) except where the provisions of the warranty contained in the Sherlotronics documentation are more favourable to the purchaser. Subject to the warranty contained in the Sherlotronics product documentation, if applicable, Sherlotronics products are warranted for a period of (24 Months) after delivery.
Need help?
Do you have a question about the COMPLEX_RX_V3 and is the answer not in the manual?
Questions and answers